
- SAP Community
- Products and Technology
- Technology
- Technology Blogs by SAP
- Step 13 with SAP Cloud SDK: Automated Testing
Technology Blogs by SAP
Learn how to extend and personalize SAP applications. Follow the SAP technology blog for insights into SAP BTP, ABAP, SAP Analytics Cloud, SAP HANA, and more.
Turn on suggestions
Auto-suggest helps you quickly narrow down your search results by suggesting possible matches as you type.
Showing results for
daniel_kurzynsk
Explorer
Options
- Subscribe to RSS Feed
- Mark as New
- Mark as Read
- Bookmark
- Subscribe
- Printer Friendly Page
- Report Inappropriate Content
09-19-2017
3:53 PM
In this tutorial, we give an overview of how to test applications which are written using the SAP Cloud SDK.
Note: This post is part of a series. For a complete overview visit the SAP Cloud SDK Overview.
In general, there are multiple kinds of tests differentiating mainly in the granularity of testing. They all have their advantages and disadvantages. A common visualization is the testing pyramid. Based on the costs of the tests it visualizes that you should have much more unit tests than integration tests than E2E (End-To-End) tests. The costs for creating, running and maintaining increase while you move the pyramid up.

For example, End-To-End (E2E) tests are running on the user interface level. The test executor automatically clicks through the user interface asserting that applications behave in the desired way. Testing on this level shows that the features of the application are working. You could have, e.g., one E2E test per feature or user story. However, E2E tests are expensive to write and execute. E2E tests interact with the browser. This is expensive, because it takes time to start the browser and the browsers loads and renders a lot of resources. In addition, it is usually difficult to specify the interaction with the browser in a way that it can deal with smaller changes in the application user interface structure. Furthermore, E2E tests are sometimes flaky. Imitating the interaction with the browser is error-prone. The browser with changing loading times and asynchronous behaviour creates a quite unstable environment, which is a bad condition for tests. Thus, you should limit their number to a reasonable subset of functionality not tested otherwise. At least the majority of functionality should be already tested by unit and integration tests.
Integration tests have a reduced complexity. They skip the user interface and work directly on the defined backend APIs. They test the integration between software modules or systems. In our example, we mainly use them to test the integration between backend services and the integration to SAP S/4HANA systems.
Although they have a reduced complexity, they still have medium costs. They still have an overhead, e.g., for network communications or spawning a small server to make the backend APIs available. You should use them to verify that your backend services can communicate with your SAP S4HANA system and to test that the services behave as the user interface expects it.
Unit tests have the smallest granularity. They can be defined directly on the programming level, e.g., calling methods of your java classes. Dependencies to other modules or systems may be mocked to ensure that they run very quickly and only test the portion under consideration. These tests are usually very cheap. You should use them to verify that your software modules, such as classes, behave as expected.
In this tutorial, we show how to write tests for your application. We will write the tests in a way that an automated build pipeline can execute them. At the end you should be able the write the following kind of tests for your application:
For the modules of your backend services we suggest writing JUnit tests. The archetype already contains a submodule called
Unit tests should be very light weight. They should test the modules, e.g. a class, in a isolated manner. Other depended modules or even calls to external destinations, such as an ERP system, may be mocked. For mocking, the SAP Cloud SDK provides mocking facilities with the class
Take a look at Step 19: Mocking S/4HANA calls to learn more about how the SAP Cloud SDK makes it easy to mock even calls to SAP S/4HANA systems.
In the integration tests you can tests your backend services without the frontend application. In the steps 2,3 and 4, we already introduced the integration tests and showed how to set them up. In general, we recommend to use Arquillian to spawn a small server containing only the resources for the specific backend services you want to test. This is faster compared to deploying it to the SAP Cloud Platform first and then testing against the deployed version. Furthermore, you still have the possibility to influence the test execution, e.g. with mocking or to collect test coverage data. For spring, we recommend to use the SpringRunner. For both, there is an example test already included in the corresponding archetype.
In this tutorial, we want to focus on the mocking facilities provided by the SAP S4HANA Cloud SDK. When you execute the integration tests locally, they run in a different environment than later on in the SAP Cloud Platform. Therefore, many services, such as the destination service, are not available, as the SAP Cloud Platform provides a much richer environment in terms of services and runtime libraries than the local test environment. This target environment has to be, partially, replicated in the local environment where the mocking facilities allow to test your business application without relying on the provided services locally. Since the SAP Cloud SDK already comes with abstractions for these services, it also offers to mock them in a local environment.
As example, we take the BusinessPartnerServiceTest from Step 4 with SAP Cloud SDK: Calling an OData Service:
Everything around mocking is located in the class
In this example, we use the class
As result, you can get platform specific information such as tenant or user information although you are not in a SAP Cloud Platform environment. Furthermore, this is the basis to mock destination such as the connection to an ERP system or other external services.
The SAP Cloud Platform has a destination concept. A destination has a name and a configuration. It specifies an URI and authentication parameters, such as basic authentication with username and password.
To configure the credentials you can either create a local file or pass the credentials over command line. A valid file is named
To pass the credentials over the command line you can use the command line parameter
In the third case, we mock the destination only by referencing an alias. In this case, you also have to configure the system in the file
Mocking an ERP system uses the same mechanism. However, in addition you also have to provide a system id and a client id in addition to providing the systems as above. You can use either SapClient.EMPTY if the default client of a host is fine, or you use the convenience method ErpSystem.builder() that does not require a client id.
In accordance to this, the
There is even a short form of the code, because the destination name and the alias are optional. If you don't provide a destination name, the destination name will be taken from
In this tutorial, we will use Jasmine and Karma to implement the unit tests of the Javascript frontend code written in SAP UI5. As an example we take the application developed in the previous steps. Jasmine is a framework to write unit tests for JavaScript code. Karma is a tool to run the tests from console or in a build pipeline.
In order to make it testable, we refactor our application from step 9. We extract loading the business partners from the SAP UI5 controller into a service class. We assume that your front end code is located in
The code uses jQuery to send a GET request to a backend service of your application. It returns a promise for the list of business partners.
After the refactoring the imports in the controller in
Replace the
A test for this service class looks as follows:
In Jasmine each test is wrapped into an
In order to execute this test you can either create a new html page which executes the tests or you can use karma. We will use karma to be able to run the test from the command line. To run karma you have to install nodejs and create a
The package.json could look like:
In the scripts section you define the command
The only piece missing is the configuration of karma. To configure karma you create a file called
First, we define the base path, which is in our case the project root folder. In the
In the reporters section, we specify that we also want the results to be stored in the junit format and that we also want the code coverage data to be stored. These reporters are defined in the remaining sections. In preprocessors we define that all js files should be preprocessed to allow computing the code coverage. The format and the location of the junit and the code coverage reporters are specified in the sections coverageReporter and junitReporter.
The final folder structure should look as follows:

Now you can run the following commands in the root folder of the project to execute your tests. It will start a chrome instance and execute the tests.
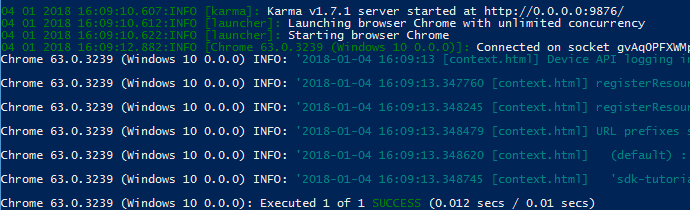
It should run the tests and shows the results in the terminal:
In an delivery pipeline everything is usually executed without a user interface. Thus, opening a normal browser would not work. However, most browsers also offer a headless mode. The browser is started without a user interface. Note that you can run the script also with a headless browser:
For the E2E tests we use cucumber and nightwatch-api. It runs your tests using the chrome driver in the browser against a running version of your application. The version can run locally or in the SAP Cloud Platform.
From the previous steps we have an application which can list and create business partners. Our first test is to load the page and check that it was loaded successfully. Tests can be defined in the cucumber format:
We place that file in
Steps are placed into the folder
If we check multiple times for the same element, we can use page objects to have the retrieving strategy for this element in a central place.
To configure nightwach we create the following file in
This configuration file defines some constants and places where the reports are located. Please note, that we use the folder
Furthermore, we also have to configure cucumber to start and configure chromedriver as well as nightwatch. Therefore, we create the file
We also have to update the package.json to add an additional start script and additional dependencies:
The final folder structure looks as follows:

Now you can run the following commands to execute your tests. Note that the launch URL must be unprotected as we have not yet implemented a login step – Step 21: End-To-End Tests Against Secured Applications explains how you can also target apps that require authentication.
You should see the following result:

To our your tests in firefox, we can append a configuration flag for the environment:
Now you know how to write various kind of tests for your application. In the next tutorial Step 14 about the SDK we show you how to execute these tests in a build pipeline before you deploy your application to the SAP Cloud Platform. Thus, writing tests is very important to ensure a high quality of your application. Please already note that the pipeline will enforce that most of your productive code is covered by unit or integration tests. It will check the amount of productive code tested with unit or integration tests.
Are you facing a development question? Then check out Stack Overflow for SAP Cloud SDK related questions. If you do not find an answer, feel free to post your question and make sure to attach the tag ‘s4sdk’. Our team, as well as the whole Stack Overflow community, are at your service and will quickly react to your question.
For an overview of SAP Cloud SDK related questions, go to https://stackoverflow.com/questions/tagged/s4sdk.
You think that you found a bug in one of our Continuous Delivery artifacts? Feel free to open an issue in our Pipeline GitHub repository on https://github.com/SAP/cloud-s4-sdk-pipeline/issues.
Note: This post is part of a series. For a complete overview visit the SAP Cloud SDK Overview.
Testing Pyramid
In general, there are multiple kinds of tests differentiating mainly in the granularity of testing. They all have their advantages and disadvantages. A common visualization is the testing pyramid. Based on the costs of the tests it visualizes that you should have much more unit tests than integration tests than E2E (End-To-End) tests. The costs for creating, running and maintaining increase while you move the pyramid up.
For example, End-To-End (E2E) tests are running on the user interface level. The test executor automatically clicks through the user interface asserting that applications behave in the desired way. Testing on this level shows that the features of the application are working. You could have, e.g., one E2E test per feature or user story. However, E2E tests are expensive to write and execute. E2E tests interact with the browser. This is expensive, because it takes time to start the browser and the browsers loads and renders a lot of resources. In addition, it is usually difficult to specify the interaction with the browser in a way that it can deal with smaller changes in the application user interface structure. Furthermore, E2E tests are sometimes flaky. Imitating the interaction with the browser is error-prone. The browser with changing loading times and asynchronous behaviour creates a quite unstable environment, which is a bad condition for tests. Thus, you should limit their number to a reasonable subset of functionality not tested otherwise. At least the majority of functionality should be already tested by unit and integration tests.
Integration tests have a reduced complexity. They skip the user interface and work directly on the defined backend APIs. They test the integration between software modules or systems. In our example, we mainly use them to test the integration between backend services and the integration to SAP S/4HANA systems.
Although they have a reduced complexity, they still have medium costs. They still have an overhead, e.g., for network communications or spawning a small server to make the backend APIs available. You should use them to verify that your backend services can communicate with your SAP S4HANA system and to test that the services behave as the user interface expects it.
Unit tests have the smallest granularity. They can be defined directly on the programming level, e.g., calling methods of your java classes. Dependencies to other modules or systems may be mocked to ensure that they run very quickly and only test the portion under consideration. These tests are usually very cheap. You should use them to verify that your software modules, such as classes, behave as expected.
Goal of this Blog Post
In this tutorial, we show how to write tests for your application. We will write the tests in a way that an automated build pipeline can execute them. At the end you should be able the write the following kind of tests for your application:
- Backend Unit Tests
- Integration Tests
- Frontend Unit Tests with Jasmine and Karma.
- End-To-End Tests with Nightwatch-Cucumber.
Unit-Tests Backend
For the modules of your backend services we suggest writing JUnit tests. The archetype already contains a submodule called
unit-tests. Please place your unit tests there. They are in a separate module to make it easier for the pipeline to execute them separately. Furthermore, it avoids that test dependencies become part of the application by accident. This module already contains the JUnit dependency.Unit tests should be very light weight. They should test the modules, e.g. a class, in a isolated manner. Other depended modules or even calls to external destinations, such as an ERP system, may be mocked. For mocking, the SAP Cloud SDK provides mocking facilities with the class
MockUtil. Furthermore, we recommend using mocking frameworks, such as mockito or powermock.Take a look at Step 19: Mocking S/4HANA calls to learn more about how the SAP Cloud SDK makes it easy to mock even calls to SAP S/4HANA systems.
Integration Tests Backend
In the integration tests you can tests your backend services without the frontend application. In the steps 2,3 and 4, we already introduced the integration tests and showed how to set them up. In general, we recommend to use Arquillian to spawn a small server containing only the resources for the specific backend services you want to test. This is faster compared to deploying it to the SAP Cloud Platform first and then testing against the deployed version. Furthermore, you still have the possibility to influence the test execution, e.g. with mocking or to collect test coverage data. For spring, we recommend to use the SpringRunner. For both, there is an example test already included in the corresponding archetype.
Mocking Basics
In this tutorial, we want to focus on the mocking facilities provided by the SAP S4HANA Cloud SDK. When you execute the integration tests locally, they run in a different environment than later on in the SAP Cloud Platform. Therefore, many services, such as the destination service, are not available, as the SAP Cloud Platform provides a much richer environment in terms of services and runtime libraries than the local test environment. This target environment has to be, partially, replicated in the local environment where the mocking facilities allow to test your business application without relying on the provided services locally. Since the SAP Cloud SDK already comes with abstractions for these services, it also offers to mock them in a local environment.
As example, we take the BusinessPartnerServiceTest from Step 4 with SAP Cloud SDK: Calling an OData Service:
package com.sap.cloud.sdk.tutorial;


import io.restassured.RestAssured;

import io.restassured.http.ContentType;

import io.restassured.module.jsv.JsonSchemaValidator;

import org.jboss.arquillian.container.test.api.Deployment;

import org.jboss.arquillian.junit.Arquillian;

import org.jboss.arquillian.test.api.ArquillianResource;

import org.jboss.shrinkwrap.api.spec.WebArchive;

import org.junit.Before;

import org.junit.BeforeClass;

import org.junit.Test;

import org.junit.runner.RunWith;

import org.slf4j.Logger;


import java.net.URL;


import com.sap.cloud.sdk.cloudplatform.logging.CloudLoggerFactory;

import com.sap.cloud.sdk.testutil.MockUtil;


import static io.restassured.RestAssured.when;


@RunWith(Arquillian.class)

public class BusinessPartnerServletTest {

    private static final MockUtil mockUtil = new MockUtil();

    private static final Logger logger = CloudLoggerFactory.getLogger(BusinessPartnerServiceTest.class);


    @ArquillianResource

    private URL baseUrl;


    @Deployment

    public static WebArchive createDeployment() {

        return TestUtil.createDeployment(BusinessPartnerServlet.class);

    }


    @BeforeClass

    public static void beforeClass() {

        mockUtil.mockDefaults();

        mockUtil.mockErpDestination();

    }


    @Before

    public void before() {

        RestAssured.baseURI = baseUrl.toExternalForm();

    }


    @Test

    public void testService() {

        // JSON schema validation from resource definition

        final JsonSchemaValidator jsonValidator = JsonSchemaValidator

                .matchesJsonSchemaInClasspath("businesspartners-schema.json");


        // HTTP GET response OK, JSON header and valid schema

        when()

                .get("/businesspartners")

        .then()

                .statusCode(200)

                .contentType(ContentType.JSON)

                .body(jsonValidator);

    }

}
Everything around mocking is located in the class
MockUtil in the SAP Cloud SDK. Information about the interface and the available methods can be found in the JavaDoc.In this example, we use the class
MockUtil in the beforeClass method to mock common resources using mockUtil.mockDefaults() and to mock the connection to the S/4HANA system. The mockDefaults method calls several methods from the MockUtil to mock:| mockCurrentCloudPlatform() | Mocks the SAP Cloud Platform environment, i.e. the application name. The Default application name is testapp. |
| mockCurrentLocales() | Mocks the current locale to en-US |
| mockCurrentTenant() | Mocks the tenant id to 00000000-0000-0000-0000-000000000000 |
| mockCurrentUser() | Mocks the user name to MockedUser |
| mockAuditLog() | Makes the audit logger locally available not to cause run-time problems. The default behavior is to forward the logs to the standard logger. |
As result, you can get platform specific information such as tenant or user information although you are not in a SAP Cloud Platform environment. Furthermore, this is the basis to mock destination such as the connection to an ERP system or other external services.
The SAP Cloud Platform has a destination concept. A destination has a name and a configuration. It specifies an URI and authentication parameters, such as basic authentication with username and password.
MockUtil provides a way to mock a destination configuration together with a name. Thus, your application code can be the same in the tests and in the productive environment. Destinations can be mocked using the following ways://Mock system without authentication
String name = "myDestinationName";
URI uri = new URI("http://path/to/destination/");
mockUtil.mockDestination(name, uri);
//Authentication with be taken from credentials configuration for this alias
String alias = "myAlias";
TestSystem<GenericSystem> testSystem = new GenericSystem(alias, uri);
mockUtil.mockDestination(name, testSystem);
//System configuration and authentication configuration for this alias
//from command line or file.
mockUtil.mockDestination(name, alias);To configure the credentials you can either create a local file or pass the credentials over command line. A valid file is named
credentials.yml and is located in integration-tests/src/test/resources. The file contains a list of credentials referencing an alias. Possible formats are json and yaml format:credentials:
- alias: 'myAlias'
username: 'username'
password: 'password'To pass the credentials over the command line you can use the command line parameter
-Dtest.credentials. The value of should be a json string in the same format as in the file. Please be aware that, if you pass the credentials over the command line, the credentials might be persisted in the history and others might see it. If you decide for a file, you don't have to enter it again for every test. However, be aware, that you should restrict the access and add the file to your gitignore.In the third case, we mock the destination only by referencing an alias. In this case, you also have to configure the system in the file
integration-tests/src/test/resources/systems.yml:systems:
- alias: "myAlias"
uri: "http://path/to/destination/"Mock ERP Destination
Mocking an ERP system uses the same mechanism. However, in addition you also have to provide a system id and a client id in addition to providing the systems as above. You can use either SapClient.EMPTY if the default client of a host is fine, or you use the convenience method ErpSystem.builder() that does not require a client id.
//Authentication with be taken from credentials configuration for this alias

String alias = "myAlias";

String systemId = "AAB";

SapClient sapClient = new SapClient("SAPCLIENT-NUMBER");

ErpSystem erpSystem = new ErpSystem(alias, uri, systemId, sapClient);

mockUtil.mockErpDestination(name, erpSystem);


//System configuration and authentication configuration

//for alias from command line or file.

mockUtil.mockErpDestination(name, alias);
In accordance to this, the
system.yml with ERP systems looks as follows. In cloud system do not need to specify systemId and sapClient.erp:
default: "myAlias"
systems:
- alias: "myAlias"
systemId: "AAB"
uri: "http://path/to/destination/"
sapClient: "SAPCLINET-NUMBER"There is even a short form of the code, because the destination name and the alias are optional. If you don't provide a destination name, the destination name will be taken from
ErpDestination.getDefaultName(). The default destination name is ErpQueryEndpoint. The alias will be taken from the default system in your systems.yml.//Uses ErpDestination.getDefaultName() as destination name and
// the default system defined in the systems.yml
mockUtil.mockErpDestination();Unit-Tests Frontend
In this tutorial, we will use Jasmine and Karma to implement the unit tests of the Javascript frontend code written in SAP UI5. As an example we take the application developed in the previous steps. Jasmine is a framework to write unit tests for JavaScript code. Karma is a tool to run the tests from console or in a build pipeline.
In order to make it testable, we refactor our application from step 9. We extract loading the business partners from the SAP UI5 controller into a service class. We assume that your front end code is located in
webapp. Place your service class in webapp/service/businesspartners.js:sap.ui.define([], function () {
"use strict";
return {
getBusinessPartners: function () {
return jQuery.get("/businesspartners")
}
}
});The code uses jQuery to send a GET request to a backend service of your application. It returns a promise for the list of business partners.
After the refactoring the imports in the controller in
webapp/controller/View1.controller.js would look as follows:sap.ui.define([
"sap/ui/core/mvc/Controller",
"sap/ui/model/json/JSONModel",
"sdk-tutorial-frontend/service/businesspartners"
], function(Controller, JSONModel, BusinessPartnerService) {Replace the
jQuery.get(...) with: BusinessPartnerService.getBusinessPartners().A test for this service class looks as follows:
"use strict";

sap.ui.define([

        "sdk-tutorial-frontend/service/businesspartners"

    ],

    function (BusinessPartnersService) {

        //Create test data used for mocking and in the assertion

        var testBusinessPartners = [{

            "BusinessPartner": "1",

            "LastName": "Doe"

        }]


        function getBusinessPartnersPromise() {

            var jQueryPromise = new $.Deferred();

            return jQueryPromise.resolve(testBusinessPartners);

        }


        describe("Business Partner Service", function () {


            it("gets business partners", function (done) {

                spyOn(jQuery, "ajax").and.returnValue(getBusinessPartnersPromise());

                BusinessPartnersService.getBusinessPartners().then(function (businessPartners) {

                    expect(businessPartners).toEqual(testBusinessPartners);

                    expect(jQuery.ajax).toHaveBeenCalled();

                    done();

                });


            });


        });

    });
In Jasmine each test is wrapped into an
it block. In this case it is an asynchronous test. First we mock the call to the backend in the spyOn method by overwriting the method jQuery.ajax. Then we call the BusinessPartnerService implemented in the file before. In the callback we evaluate the assertions and mark the asynchronous test execution is completed. We place the test in frontend-unit-tests/tests/service/businesspartners.jasmine.js.In order to execute this test you can either create a new html page which executes the tests or you can use karma. We will use karma to be able to run the test from the command line. To run karma you have to install nodejs and create a
package.json in the root of your project.The package.json could look like:
{

    "name": "businesspartner-manager-cf",

    "version": "1.0.0",

    "description": "Frontend Tests",

    "scripts": {

        "ci-test": "karma start frontend-unit-tests/karma.conf.js --watch=false --single-run=true"

    },

    "author": "SAP",

    "private": true,

    "devDependencies": {

        "yargs": "^6.6.0",

        "jasmine": "^2.99.0",

        "karma": "^3.1.4",

        "karma-chrome-launcher": "^2.1.1",

        "karma-coverage": "^1.1.1",

        "karma-jasmine": "^1.1.2",

        "karma-junit-reporter": "^1.2.0",

        "karma-openui5": "^0.2.3"

    }

}
In the scripts section you define the command
ci-test which is used to run the unit tests with karma. In the section devDependencies you specify the dependencies needed to execute the tests. You install them with running npm install in a terminal window.The only piece missing is the configuration of karma. To configure karma you create a file called
karma.conf.js in the folder frontend-unit-tests. This file looks as follows:const argv = require("yargs").argv;
module.exports = function (config) {
config.set({
basePath: '../',
frameworks: ['openui5', 'jasmine'],
openui5: {
path: 'https://sapui5.hana.ondemand.com/1.42.9/resources/sap-ui-cachebuster/sap-ui-core.js',
useMockServer: false
},
client: {
openui5: {
config: {
theme: 'sap_bluecrystal',
resourceroots: {
'sdk-tutorial-frontend': './base/webapp/',
}
}
}
},
files: [{
pattern: 'webapp/**',
served: true,
included: false
},
'./frontend-unit-tests/tests/**/*.jasmine.js'
],
browsers: [argv.headless?"ChromeHeadless" :"Chrome"],
reporters: ['junit', 'progress', 'coverage'],
preprocessors: {
'webapp/**/*.js': ['coverage'],
},
junitReporter: {
outputDir: 's4hana_pipeline/reports/frontend-unit', // results will be saved as $outputDir/$browserName.xml
outputFile: 'Test.frontend.unit.xml', // if included, results will be saved as $outputDir/$browserName/$outputFile
suite: '', // suite will become the package name attribute in xml testsuite element
useBrowserName: true, // add browser name to report and classes names
nameFormatter: undefined, // function (browser, result) to customize the name attribute in xml testcase element
classNameFormatter: undefined // function (browser, result) to customize the classname attribute in xml testcase element
},
coverageReporter: {
// specify a common output directory
dir: 's4hana_pipeline/reports/frontend-unit/coverage',
includeAllSources: true,
reporters: [
{
type: 'html',
subdir: 'report-html/ut'
}, {
type: 'lcov',
subdir: 'report-lcov/ut'
}, {
type: 'cobertura',
subdir: '.',
file: 'cobertura.frontend.unit.xml'
}
],
instrumenterOptions: {
istanbul: {
noCompact: true
}
}
},
});
};First, we define the base path, which is in our case the project root folder. In the
openUi5 block, we can define where the resources for SAP UI5 are located and can be downloaded from. In the client block you can define the resource roots for your application components, as you also do it in your index.html of your SAP UI5 application. Please note that the path has to have ./base/ in front and then points to the folder where your frontend code is located. It is not in the actual path on the file system. In the files section you specify the location of the files that you need for testing. By default all files are loaded to execute the tests. Thus, we specify for the application code that it is not included but served when required in a test.In the reporters section, we specify that we also want the results to be stored in the junit format and that we also want the code coverage data to be stored. These reporters are defined in the remaining sections. In preprocessors we define that all js files should be preprocessed to allow computing the code coverage. The format and the location of the junit and the code coverage reporters are specified in the sections coverageReporter and junitReporter.
The final folder structure should look as follows:
Now you can run the following commands in the root folder of the project to execute your tests. It will start a chrome instance and execute the tests.
npm install

npm run ci-test
It should run the tests and shows the results in the terminal:
In an delivery pipeline everything is usually executed without a user interface. Thus, opening a normal browser would not work. However, most browsers also offer a headless mode. The browser is started without a user interface. Note that you can run the script also with a headless browser:
npm run ci-test -- --headless.End-To-End Tests
For the E2E tests we use cucumber and nightwatch-api. It runs your tests using the chrome driver in the browser against a running version of your application. The version can run locally or in the SAP Cloud Platform.
From the previous steps we have an application which can list and create business partners. Our first test is to load the page and check that it was loaded successfully. Tests can be defined in the cucumber format:
Feature: Address Manager App

Scenario: Address Manager App opens

	Given I open the Address Manager home page

	Then a list of business partners is shown

	And the business partner name John Doe exists
We place that file in
e2e-tests/features/address-manager-app.feature.Steps are placed into the folder
e2e-tests/steps. They define what exactly happens in each line of the feature file. A step basically implements the single lines in the feature file above. The file e2e-tests/steps/steps.js looks like as follows:
const { client } = require("nightwatch-api");

const { Given, Then } = require("cucumber");


Given(/^I open the Address Manager home page$/, async () => {

  const businesspartner = client.page.businesspartner()

  console.info (businesspartner.url())

  await businesspartner.navigate().waitForElementVisible('@body')

})


Then(/^a list of business partners is shown$/, async () => {

  const businesspartner = client.page.businesspartner()

  await businesspartner.waitForElementVisible('@businessPartnerList')

  await businesspartner.assert.visible('@businessPartnerList')

})


Then(/^the business partner name John Doe exists$/, async () => {

  const businesspartner = client.page.businesspartner()

  await businesspartner.navigate().waitForElementVisible('@businessPartnerDoe')

})
If we check multiple times for the same element, we can use page objects to have the retrieving strategy for this element in a central place.
@businessPartnerList is defined in the page object e2e-tests/page_objects/businesspartner.js and should make navigation easier:
module.exports = {

    url: function () {

        return this.api.launchUrl

    },

    elements: {

        body: 'body',

        businessPartnerDoe:

        {

           selector : "//li[contains(@class, 'sapMObjLItem')]//*[contains(text(), 'John Doe')]",

           locateStrategy: "xpath"

        },

        businessPartnerList:{

            selector :"(//div[contains(@class, 'sapMList') and contains(@class, 'sapMListBGSolid')])",

            locateStrategy: "xpath"

        }

    }

};
To configure nightwach we create the following file in
e2e-tests/nightwatch.conf.js:const chromedriver = require('chromedriver');
const geckodriver = require('geckodriver');
const argv = require("yargs").argv;
module.exports = {
output_folder: 's4hana_pipeline/reports/e2e',
page_objects_path: __dirname + '/page_objects',
silent: !process.env.NIGHTWATCH_VERBOSE,
test_settings: {
default: {
launch_url : argv.launchUrl,
webdriver: {
start_process: true,
port: 4444
},
globals: {
abortOnAssertionFailure : true,
retryAssertionTimeout: 10000,
waitForConditionTimeout: 10000,
asyncHookTimeout : 10000
},
screenshots: {
enabled: true,
path: 's4hana_pipeline/reports/e2e/screenshots'
}
},
chromeHeadless: {
webdriver: {
server_path: chromedriver.path,
cli_args: ['--port=4444']
},
desiredCapabilities: {
browserName: 'chrome',
javascriptEnabled: true,
acceptSslCerts: true,
chromeOptions: {
args: ['headless', 'window-size=1280,800', 'disable-gpu', 'no-sandbox']
}
}
},
chrome: {
webdriver: {
server_path: chromedriver.path,
cli_args: ['--port=4444']
},
desiredCapabilities: {
browserName: 'chrome',
javascriptEnabled: true,
acceptSslCerts: true,
chromeOptions: {
args: ['window-size=1280,900', 'disable-gpu', 'no-sandbox']
}
}
},
firefox: {
webdriver: {
server_path: geckodriver.path,
cli_args: ['--port', '4444', '--log', 'debug']
},
desiredCapabilities: {
browserName: 'firefox',
javascriptEnabled: true,
acceptSslCerts: true,
marionette: true
}
}
}
};
This configuration file defines some constants and places where the reports are located. Please note, that we use the folder
s4hana_pipeline/reports to store all reports. This path is later required by our pipeline. In launch_url you can see that that the URL tested against can be defined as command line argument.Furthermore, we also have to configure cucumber to start and configure chromedriver as well as nightwatch. Therefore, we create the file
e2e-tests/cucumber.conf.js with the following content:
const fs = require('fs');

const path = require('path');

const { setDefaultTimeout,  AfterAll, BeforeAll } = require('cucumber');

const { createSession, closeSession, startWebDriver, stopWebDriver, client } = require('nightwatch-api');

const reporter = require('cucumber-html-reporter');

const argv = require("yargs").argv;


setDefaultTimeout(60000);


const reportsDirectory = path.resolve(__dirname, '../s4hana_pipeline/reports/e2e')

if (!fs.existsSync(reportsDirectory)){

  fs.mkdirSync(reportsDirectory, { recursive: true });

}


BeforeAll(async () => {

  const options = {

    configFile: __dirname + "/nightwatch.conf.js",

    env: argv.NIGHTWATCH_ENV || 'firefox'

  }

  await startWebDriver(options);

  await createSession(options);

});


AfterAll(async () => {

  await closeSession();

  await stopWebDriver();


  setTimeout(() => {

    reporter.generate({

      theme: 'bootstrap',

      jsonFile: reportsDirectory + "/cucumber_report.json",

      output: reportsDirectory + "/cucumber_report.html",

      reportSuiteAsScenarios: true,

      launchReport: false

    });

  }, 0);

});
We also have to update the package.json to add an additional start script and additional dependencies:
{

  "name": "businesspartner-manager-cf",

  "version": "1.0.0",

  "description": "Frontend Tests",

    "scripts": {

        "ci-e2e": "cucumber-js e2e-tests/features --require e2e-tests/cucumber.conf.js --require e2e-tests/steps --format json:s4hana_pipeline/reports/e2e/cucumber_report.json",

        "ci-test": "karma start frontend-unit-tests/karma.conf.js --watch=false --single-run=true"

    },

    "author": "SAP",

    "private": true,

    "devDependencies": {

        "chromedriver": "^75.1.0",

        "cucumber": "^4.2.1",

        "cucumber-html-reporter": "^4.0.5",

        "cucumber-junit": "^1.7.1",

        "geckodriver": "^1.16.2",

        "jasmine": "^2.99.0",

        "karma": "^3.1.4",

        "karma-chrome-launcher": "^2.1.1",

        "karma-coverage": "^1.1.1",

        "karma-jasmine": "^1.1.2",

        "karma-junit-reporter": "^1.2.0",

        "karma-openui5": "^0.2.3",

        "nightwatch": "^1.0.19",

        "nightwatch-api": "^2.1.3",

        "yargs": "^6.6.0"

    }

}
The final folder structure looks as follows:
Now you can run the following commands to execute your tests. Note that the launch URL must be unprotected as we have not yet implemented a login step – Step 21: End-To-End Tests Against Secured Applications explains how you can also target apps that require authentication.
npm install

npm run ci-e2e -- --launchUrl=https://path/to/your/running/application
You should see the following result:
To our your tests in firefox, we can append a configuration flag for the environment:
npm run ci-e2e -- --launchUrl=https://path/to/your/running/application --NIGHTWATCH_ENV=firefox
Continuous Integration and Delivery
Now you know how to write various kind of tests for your application. In the next tutorial Step 14 about the SDK we show you how to execute these tests in a build pipeline before you deploy your application to the SAP Cloud Platform. Thus, writing tests is very important to ensure a high quality of your application. Please already note that the pipeline will enforce that most of your productive code is covered by unit or integration tests. It will check the amount of productive code tested with unit or integration tests.
Questions and Troubleshooting
Are you facing a development question? Then check out Stack Overflow for SAP Cloud SDK related questions. If you do not find an answer, feel free to post your question and make sure to attach the tag ‘s4sdk’. Our team, as well as the whole Stack Overflow community, are at your service and will quickly react to your question.
For an overview of SAP Cloud SDK related questions, go to https://stackoverflow.com/questions/tagged/s4sdk.
You think that you found a bug in one of our Continuous Delivery artifacts? Feel free to open an issue in our Pipeline GitHub repository on https://github.com/SAP/cloud-s4-sdk-pipeline/issues.
- SAP Managed Tags:
- SAP Cloud SDK,
- SAP S/4HANA,
- SAP S/4HANA Cloud Public Edition,
- SAP Business Technology Platform
Labels:
4 Comments
You must be a registered user to add a comment. If you've already registered, sign in. Otherwise, register and sign in.
Labels in this area
-
ABAP CDS Views - CDC (Change Data Capture)
2 -
AI
1 -
Analyze Workload Data
1 -
BTP
1 -
Business and IT Integration
2 -
Business application stu
1 -
Business Technology Platform
1 -
Business Trends
1,658 -
Business Trends
114 -
CAP
1 -
cf
1 -
Cloud Foundry
1 -
Confluent
1 -
Customer COE Basics and Fundamentals
1 -
Customer COE Latest and Greatest
3 -
Customer Data Browser app
1 -
Data Analysis Tool
1 -
data migration
1 -
data transfer
1 -
Datasphere
2 -
Event Information
1,400 -
Event Information
76 -
Expert
1 -
Expert Insights
177 -
Expert Insights
349 -
General
1 -
Google cloud
1 -
Google Next'24
1 -
GraphQL
1 -
Kafka
1 -
Life at SAP
780 -
Life at SAP
14 -
Migrate your Data App
1 -
MTA
1 -
Network Performance Analysis
1 -
NodeJS
1 -
PDF
1 -
POC
1 -
Product Updates
4,575 -
Product Updates
392 -
Replication Flow
1 -
REST API
1 -
RisewithSAP
1 -
SAP BTP
1 -
SAP BTP Cloud Foundry
1 -
SAP Cloud ALM
1 -
SAP Cloud Application Programming Model
1 -
SAP Datasphere
2 -
SAP S4HANA Cloud
1 -
SAP S4HANA Migration Cockpit
1 -
Technology Updates
6,871 -
Technology Updates
486 -
Workload Fluctuations
1
Related Content
- Business AI for Aerospace, Defense and Complex Manufacturing in Technology Blogs by SAP
- Unlocking the Potential of Business AI: Engineering Best Practices in Technology Blogs by SAP
- Integrating SAP S/4HANA with Kafka via SAP Advanced Event Mesh: Part1 – Outbound connection in Technology Blogs by Members
- Unleashing the Power of Custom Widgets in SAP Analytics Cloud in Technology Blogs by Members
- IoT: RFID integration with SAP HANA Cloud via SAP BTP in Technology Blogs by Members
Top kudoed authors
| User | Count |
|---|---|
| 14 | |
| 11 | |
| 11 | |
| 10 | |
| 10 | |
| 9 | |
| 8 | |
| 7 | |
| 7 | |
| 6 |