
- SAP Community
- Products and Technology
- Technology
- Technology Blogs by SAP
- SAP BTP: How to call protected app across regions ...
Technology Blogs by SAP
Learn how to extend and personalize SAP applications. Follow the SAP technology blog for insights into SAP BTP, ABAP, SAP Analytics Cloud, SAP HANA, and more.
Turn on suggestions
Auto-suggest helps you quickly narrow down your search results by suggesting possible matches as you type.
Showing results for
Product and Topic Expert
Options
- Subscribe to RSS Feed
- Mark as New
- Mark as Read
- Bookmark
- Subscribe
- Printer Friendly Page
- Report Inappropriate Content
06-28-2022
2:54 PM
This blog post describes how to set up a central custom Identity Provider and connect it to 2 subaccounts in different regions. The goal is to enable an application to call a protected endpoint on a subaccount in a different region.
Authorization is handled as well.
Used technologies:
SAP BTP, Cloud Foundry, XSUAA, SAML2, OAuth2, Destination, OAuth2SAMLBearerAsertion, Node.js.
This blog post builds completely on top of the scenario described in detail in the previous postings: intro and tutorial.
Authorization is handled a bit different than in the previous blog post.
So I’d like to encourage you to go through today’s blog post as well.
0. Introduction
1. Backend Application
2. Frontend Application
3. Custom Identity Provider
4. Trust Configuration
5. Role Collection Mapping
6. Destination
7. Run
8. Cleanup
Appendix 1: Sample Code for Backend Application
Appendix 2: Sample Code for Frontend Application
Appendix 3: Sample Code for Destination Configuration
The detailed description of our setup is described in the intro blog.
In our example scenario, we have a kind of service-providing application, which we call “Backend App” and which is deployed in a Trial account in region Singapore (ap21).
We want to call it from a “Frontend Application” which is deployed in a different Trial account in a different region (us10).
The challenge of our scenario was to get a JWT token, across boundaries of different subaccounts and regions.
The solution was to define Trust (based on SAML) and to use a destination of type "OAuth2SAMLBearerAssertion".
As an additional challenge, in addition to protecting our backend app with OAuth, we require a scope. And we expect that the frontend app sends a JWT token which contains that scope.
Today we describe a setup with a standalone Identity Provider (IdP) which is used to store and authenticate users.
As IdP, we’re using SAP Cloud Identity Services - Identity Authentication (IAS).
The idea is to connect one external IdP to both subaccounts:
This means that for both subaccounts, we need to establish trust to the Custom IdP.
Afterwards, the same users will be available on both subaccounts.
From my perspective, this is a natural setup, as long as the development and application infrastructure spans across both subaccounts.
Looking a bit more in detail, the following diagram focuses on the user login in the frontend subaccount:
In above diagram we can see that the business user (JoeCool) logs into the protected Frontend Application.
The approuter handles the OAuth flow together with XSUAA.
XSUAA itself doesn’t know about users so it turns to the connected IdP for user authentication.
This is possible due to the trust relationship between the subaccount-XSUAA and the IdP.
In our example, the IdP is an IAS tenant and we will describe how to establish the trust configuration.
Now let's see how authorization is handled.
Both applications define and require a scope.
Question:
How to achieve that the JWT which is sent to backend app contains the required backend scope ?
Solution:
Role collection mapping.
For user centric scenario, a scope is wrapped into a role-template at designtime.
After deploy, a role is generated based on that template.
An admin adds that role to a role collection and assigns it to a user.
This is the normal demo flow.
In case of custom IdP, we have the following chance:
Within the identity provider, we create a user group.
Whenever a new user is created in the IdP, he is added to this group (if suitable).
In the BTP cockpit, we assign the user group to a role collection. Not single users.
Above diagram shows a user, JoeCool, who wants to access the frontend app.
JoeCool has been created as user in the Custom Identity Provider, which we call “Cross_IdP”.
JoeCool has also been added to the user group “BackendUsers”.
The BTP admin has configured (mapped) the user group “BackendUsers” to the role collections in both subaccounts.
As a consequence, JoeCool is assigned to the role collection and when a JWT token is issued for him, it will contain the scope that is configured in the role collection.
This is the goal of todays tutorial and at the end we will see if it works.
One last point we need to add to the diagram: The destination.
We’ve covered the configuration and usage of the OAuth2SAMLBearerAssertion destination in the previous blog posts.
Today it is only necessary to mention:
Even though we already have trust established between both subaccounts and the cross-scenario-IdP, this is not enough for the destination to work.
The destination service will act as IdP itself and if we want to use the OAuth-SAML destination, then we need to establish trust from backend subaccount to frontend (destination-IdP) as well.
So this step, which was described in previous posts, cannot be omitted.
So let’s paint it in the diagram:
What does it mean?
Our scenario is based on SAML. When an end user does login, a SAML Bearer Assertion is generated. This is a small xml document which is kept in a browser session. The document is signed and contains information about the user. It also contains a session ID.
This assertion is meant to identify the user when he logs in to a different application of his company (e.g.).
But from our application code, we cannot access that assertion. And even if we could, it would be useless due to invalidated session ID.
As such, the destination service generates an own SAML assertion and signs it with its certificate.
And this is the reason, why we say that the destination service acts as IDP.
And this is why we need to define trust to this IDP.
At runtime, the destination service will contact the Backend-XSUAA and send the assertion and receive a JWT token. This is possible due to the trust only.
The JWT token will contain the required scope, because the user is contained in the user group, which in turn is mapped to the role collection.
Important to note:
When mapping the user group we need to specify:
The user group is provided by the Destination-IDP, not by the IAS.
The reason is explained above: the SAML assertion containing the info about the user and the user group (which is a special user-attribute), is generated by Destination service, not IAS.
This previous tutorial and this prerequisites section are prerequisites.
We use the project as created here.
We’re using the same backend application as in the previous tutorial.
We login to the Trial account which represents the backend.
In my example:
cf login -a https://api.cf.ap21.hana.ondemand.com -o backendorg
We’re using the same xsuaa configuration as in the previous tutorial.
The command to create the instance from scratch:
cf cs xsuaa application backendXsuaa -c backend-security.json
We’re using the same xsuaa configuration as in the previous tutorial.
The complete sample code can be found in the appendix 1.
After deploy, cf push , we can take a note of the service-endpoint URL.
In my example:
https://backend.cfapps.ap21.hana.ondemand.com/endpoint
The frontend app is explained in previous post and contains no difference.
So we go through the creation process without further comments
We log on to the Trial account used for the frontend.
In my example:
cf login -a https://api.cf.us10.hana.ondemand.com -o frontendorg
The creation command:
cf cs xsuaa application frontendXsuaa -c frontend-security.json
The creation command:
cf cs destination lite frontendDestination
The complete sample code can be found in the appendix 2.
The complete sample code can be found in the appendix 2.
After deploy, we get the application entry URL, but we don’t use it until all configuration has been finished.
What we want to achieve:
We use one central Identity Provider which maintains business users.
This Identity Provider is connected to both our subaccounts.
Like that, the end users are known to both Backend_Subaccount and Frontend_Subaccount.
In my example, I’m using SAP Cloud Identity Services - Identity Authentication (IAS) as Identity Provider.
According to our diagram, we have the following tasks to do:
Above steps are enough for authentication to the backend service. However, to get the scope into the JWT token, we need the following configuration as well:
These configuration tasks are really simple, but it takes some time and few screenshots and lot of words to go through it.
I only ask you to not lose patience...
A few steps are required beforehand in the IAS.
We login with admin user to the IAS at
https://abc.accounts400.ondemand.com/admin/
3.0.1 Create User
For our testing, we create a new business user (end user).
Users & Authorizations -> User Management
We press “Add User” button in the right bottom corner and enter some data of our choice:
Note that the user will need to confirm the E-Mail address and change password upon first login.
3.0.2. Create User Group
We need to create a user group, this is key for our tutorial.
As of our spec, the users who belong to this group, will have permissions to access our application landscape across borders.
With other words, they should have permission to access our Frontend Application and Backend Application.
To create a user group, we navigate to
Users & Authorizations -> User Groups -> Create
We name the new group as “CrossScenarioGroup”.
Note that it is important to be clear about the naming.
The "Name" is the technical name, it is the name which we need to remember and type correctly later in this tutorial.
The "Display Name" is just a label and only relevant for UI and screenshots.
3.0.3. Add User to Group
Finally, we add our new user to the new group.
We select the group in the list, then press "Add".
From the list, we select our new user and press "Save".
We can verify the assignment in the user details of the new user (see "Groups").
Assignment can also be configured here.
3.0.4. Download SAML metadata of IAS
We will need the SAML metadata of the Identity Provider for configuring trust in the subaccounts.
To download the metadata as a file, we navigate to
Applications & resources -> Tenant Settings -> SAML 2.0 Configuration
At the bottom, there’s the "Download" link.
Note:
Alternatively, this direct link can be used:
https://abc.accounts400.ondemand.com/saml2/metadata
After download, we copy the file to our project folder.
Note:
We’re downloading the metadata to configure the trust manually. In the subaccount, there's a “Establish Trust” button, to support automated configuration, but that would be based on OIDC.
To configure trust between the central IdP and the Subaccount, we need just a few configuration tasks on both sides, IdP and Subaccount.
3.1.1. Configuration in Backend Subaccount
We need to upload the SAML metadata of IAS in Backend Subaccount.
We open the SAP BTP Cockpit and login to the Backend_Subaccount.
In my example it is the Trial account in region ap21.
We navigate to Security ->Trust Configuration and press “New Trust Configuration”
We upload the SAML metadata of IAS (which we downloaded in step 3.0.4).
Name:
We enter any name of our choice, e.g. "Cross_Scenario_IdP".
It will be used for display.
Description:
Any description of our choice, to be able to remember what it is.
E.g. "Custom Identity Provider (IAS) for cross subaccount scenario"
Available for User Logon:
We enable this checkbox.
Link Text:
This link text will be displayed when user is asked to login. If there are multiple IdPs, then the user has to choose the right one.
Text can be anything, e.g. "Cross-Scenario Identity Provider"
Finally we press "Save".
The new trust configuration is added to the list of IdPs.
We don’t leave this page, as we need it for the next step.
3.1.2. Configuration in IdP
Next task is to configure the IdP, in our example the IAS.
We need to register the Subaccount in the Identity Provider (IAS)
To do so, we upload the SAML metadata of the subaccount into IAS.
But first, we need to fetch this metadata.
* Download SAML metadata of Backend Subaccount
As we’re still logged-in at Backend_Subaccount, Trust Configuration screen, we can download the metadata right away.
We copy the downloaded file to the c:\crossapp\backend folder in our project directory.
** Create Application in IAS
Now we change to our Identity Provider (IAS).
We navigate to Applications & Resources -> Applications
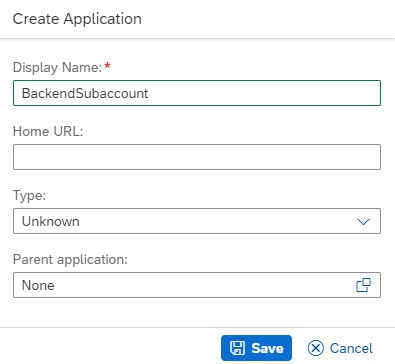
Press “Create”.
Enter Display name as e.g. "BackendSubaccount".
Press "Save".
Now that we've created an empty application, we need to configure it.
*** Upload SAML metadata
Make sure that BackendSubaccount is selected in the list of applications, such that the right pane shows the details.
We choose SAML 2.0 Configuration.
In the section Define from Metadata we upload the downloaded SAML metadata file from the “Backend_Subaccount” (stored the c:\crossapp\backend folder).
After upload, all the fields are populated.
Nice, nothing else to do here.
Press "Save".
So now we have an application in the IAS that knows how to talk to the Backend Subaccount.
However, there's still some fine-tuning required.
**** Configure Default Name ID Format
We make sure that BackendSubaccount is selected and the right pane shows the details.
We click on Default Name ID Format.
We choose "E-Mail".
"Save".
***** Configure Assertion Attributes
We make sure that BackendSubaccount is selected and the right pane shows the details.
We click on Assertion Attributes.
We press “+ Add” and in the popup, we scroll down to choose “Groups”.
A new entry is added to the list. It has a default value (Assertion Attribute).
We replace the default value with “Groups”.
Make sure to spell correctly: “Groups” starting with upper case
Press "Save".
Double check: Groups should be spelled Groups and not groups and not grUPs.
3.1.3. Little recap
We’ve downloaded SAML metadata and uploaded SAML metadata.
3.2. Establish Trust between IAS and Frontend Subaccount
Now we have to repeat all steps - this time for the Frontend_Subaccount.
3.2.1. Configuration in Frontend Subaccount
We open the SAP BTP Cockpit and login to the Frontend_Subaccount.
In my example it is the Trial account in region us10.
To create "New Trust Configuration", we upload the SAML metadata of IAS (which we downloaded in step 3.0.4, and copied to project folder).
Enter Name, e.g. "Cross_IdP".
Description, e.g. "Custom Identity Provider used for cross account scenario".
Enable “Available for User Logon”
Link Text, e.g. "Cross-Scenario Identity Provider".
Press "Save".
3.2.2. Configuration in IdP
First, we fetch SAML metadata of Frontend Subaccount.
* Download SAML metadata of Frontend Subaccount
We’re still logged-in at Frontend_Subaccount, so we download the SAML metadata, and copy the file to folder to c:\crossapp\frontend.
** Create Application in IAS
We change to Identity Provider (IAS).
Create new application and enter Display name as "FrontendSubaccount".
*** Upload SAML metadata
In IAS -> details of FrontendSubaccount -> SAML 2.0 Configuration, we upload the SAML metadata file of “Frontend_Subaccount” (stored at c:\crossapp\frontend).
Press "Save".
**** Configure Default Name ID Format
In IAS -> details of FrontendSubaccount -> Default Name ID Format,
we choose "E-Mail"
and press "Save".
***** Configure Assertion Attributes
We go to IAS -> details of FrontendSubaccount -> Assertion Attributes.
We press “+ Add”, choose “Groups” enter value as “Groups”.
Reminder: spell correctly.
Press "Save".
3.2.3. Little recap
We’ve downloaded SAML metadata and uploaded SAML metadata.
In addition to the already configured trust between the 2 subaccounts and the custom IdP, we need an additional trust configuration.
This one is what we were already using in the previous tutorials.
The reason why we need this additional trust config:
It is required by the destination service.
The Destination Service takes the role of a trusted IdP when executing on the Oauth2 SAML Bearer Assertion flow.
With other words:
The destination service helps us to execute the OAuth - SAML grant flow.
So it has to send a SAML assertion in order to exchange it for a JWT token.
It is impossible to get a hold of the SAML assertion which is issued when the end user logs in to our Frontend App.
As such, the destination service generates an own SAML assertion.
It is signed with an own certificate.
As a consequence, the Backend Subaccount needs to trust it.
The trust configuration does not differ from the description in previous tutorial.
Short description:
Download IdP Metadata from Frontend_Subaccount -> Connectivity -> Destinations
Configure Trust at Backend_Subaccount -> Security -> Trust Configuration -> New
Name: “Frontend Destination IdP”
Description: Destination Identity Provider from Frontend Subaccount for destination usage
Available for User Logon: disabled
Why do we need trust configuration for IAS?
- end users are known in both subaccounts.
- it allows to map user group to role collection.
Why do we need trust configuration for Destination?
- it allows to use the destination of type OAuth2SAMLBearerAssertion
How can we verify the Destination-Trust?
After establishing the trust in the backend subaccount, we can click on the “Frontend_Destination_IdP” to open the details screen.
Then we click on “Show Details”
It shows the header data of the certificate which was used to sign the SAML metadata document.
Looking at the certificate data:
The issuer of the certificate contains the "Organizational Unit" (OU) which is filled with "Cloud Platform Destination Configuration".
The ID of the frontend subaccount is concatenated to the name:
Phew - reached chapter 5 and still more configuration waiting ahead - and already tired of reading....
Again, I have to beg you to remain patient and keep reading..... it is the last configuration chapter - besides chapter 6.
At least, chapter 7 and 8 will come without any further configuration.
What else can I promise you as appetizer?
Chapter 8 will be short, but 5 long.
Hum....not appetizing.
Chapter 5 is not short, but it is easy.
Really easy.
Feel energized about that?
Cool, so let's go on.
The following section is key for achieving the goal of our tutorial.
Remember the goal?
After so much talking, everybody would forget the initial goal.
Our goal is to call a protected app in different subaccount.
And this protected backend app requires a scope.
How to get the scope into the JWT token, which we send to the backend app?
The goal is to answer this question.
Remember the diagram in the intro section?
After so many screenshots nobody remembers…
One point is the possibility to map user group to role collection.
Other point is that we’re connecting 2 different worlds:
IdP ----- Subaccount
With other words:
SAML ----- OAuth
With other words:
IAS ----- XSUAA
The first world:
It knows about the concept of User Group.
Permissions can be maintained by adding a user to a special group, e.g. "CrossScenarioGroup".
This group will be mentioned in the SAML assertion of the logged-in user.
The second world:
It knows about the concept of Role Collection.
Permission can be maintained by adding a role to the collection (e.g. "BackendRole" in "BackendRoleCollection") and assigning it to a user (e.g. JoeCool).
This Role Collection will be mentioned in the JWT token.
More specifically: the scope(s).
Now what we need to do, is to define:
The "CrossScenarioGroup" corresponds to the "BackendRoleCollection".
Which means:
The users of the group should get the roles of the collection.
How to define?
Explained below.
5.1. Define Mapping between user group and Role Collection in Backend
We logon to the Backend_Subaccount.
We navigate to Security -> Role Collections.
In our tutorial, we don’t need to manually create a new role collection, because we defined it in our xs-security.json file
So it is already there and we can go ahead and “Edit” it.
We can see that it already contains the desired role “BackendRole”.
The point in this tutorial is that we don’t add a user to this role collection.
What we want to do is to configure a “user group”.
The goal is that all users of this group will get all roles of this role collection.
Now...
In our case, we have little special setup...
Description:
The frontend application will use the destination service to fetch a JWT token from backend.
The destination service will generate a SAML assertion, in order to exchange it for JWT token.
As such, the "origin" claim in the JWT will be filled with the Dstination-IdP.
So, as a consequence, in the cockpit, in the role collection editor, when choosing the Idp as origin for the user group: here we have to select the Destination-IdP (not the IAS).
I found it surprising, hence all this text...
Back to the role collection editing.
In the role collection editor we need to select the destination-IDP as origin of the user group.
We had named it Frontend Destination IdP.
Afterwards we need to enter the name of our user group: “CrossScenarioGroup”.
This is the technical name, as specified in the IAS.
Make sure to spell correctly.
And never forget to press “Save”.
5.2. Define Mapping between user group and Role Collection in Frontend
Now we repeat the similar step in the frontend subaccount.
Here we find the Role Collection “Frontend_Roles”, as predefined by us.
In the “User Groups” section, we have only one Identity Provider to choose, it is the IAS, with the name “Cross_Scenario_IdP”, as given during trust configuration.
We enter the name of the user group "CrossScenarioGroup".
This name will be added to the SAML assertion (as user-attribute) when the user logs in to our frontend application.
3.4.1. Optional check
We can now go to the Trust Configuration screen and click on the entry “Cross_Scenario_IdP”.
In the left menu, there’s an entry “Role Collection Mappings”.
When opening it, we can see the mapping which we’ve just defined, is already there.
It says:
The Role Collection corresponds to an attribute of the SAML assertion.
The attribute with name “Groups” has to be present in the assertion and the value must be equal to “CrossScenarioGroup”.
If this is the case, then the user will enjoy getting the roles of this collection.
Creating the destination is described in detail in previous blog post.
So today we can just import the destination configuration at
frontend_subaccount -> Connectivity -> Destinations -> Import Destination
The destination configuration can be copied (and adapted) from the appendix 3.
After import, anyways, we need to manually enter the sensitive info: clientid/secret.
To get the required info, we need to view the environment variables of our deployed backend app.
E.g. via these commands:
cf login -a https://api.cf.ap21.hana.ondemand.com -o backendorg
cf env backend
Then find the section of XSUAA binding and copy the properties into the destination configuration.
In my example:
"clientid": "sb-backendxsuaa!t7722"
"clientsecret": "abCD123SHWi4HJ7pTPhHNwaiM="
Remember:
"Client Key" <- clientid
"Token Service User" <- clientid
"Token Service Password" <- clientsecret
At this point we've finished with configuration efforts - no need to assign roles to our user anymore.
So we can call our application at:
https://frontendrouter.cfapps.<region>.hana.ondemand.com/tofrontend/homepage
In my example:
https://frontendrouter.cfapps.us10.hana.ondemand.com/tofrontend/homepage
Before entering credentials, we need to select the newly configured cross-identity-provider.
In my example, the IDP-selection screen of the frontend subaccount looks as follows:
After clicking on "Cross-Scenario Identity Provider", we can enter the credentials of the user which we created in chapter 3.0.1.
Note that new users have to change initial password on first login.
Afterwards we can finally see the result of our application:
The JWT information was explained in detail in previous blog post.
For today, we have one additional happiness factor: the groups information.
We can see that the CrossScenarioGroup, which was defined in the external Identity Provider, has been translated from a SAML user-attribute to a custom claim in the JWT token, called xs.saml.groups.
For us as application developers, this is not that relevant, because we check for the scope and don't care how it was made available.
In todays tutorial, it is all about configuration.
All boring.
Believe me: writing this blog post has been at least as exhausting as reading it...
Frontend Subaccount:
Manually delete destination configuration.
Delete artifacts:
cf login -a https://api.cf.us10.hana.ondemand.com -o frontendorg
cf d frontend -r -f
cf d frontendrouter -r -f
cf ds frontendXsuaa -f
cf ds frontendDestination -f
Backend Subaccount:
Manually delete trust configuration.
Delete artifacts:
cf login -a https://api.cf.ap21.hana.ondemand.com -o backendorg
cf d backend -r -f
cf ds backendXsuaa -f
Our requirement was to call a protected app from different subaccount and to get the required scope into the JWT token.
The end-user was stored in a custom Identity Provider (IAS).
The solution for authentication was to configure trust between the IAS and both subaccounts.
The solution for authorization was
1. configure trust between Destination-IdP (frontend subaccount) and backend subaccount
2. add the end-user to a User Group in the Identity Provider
3. configure Role Collection Mapping in both subaccounts
Note the specialty that in backend role collection the Destination-IdP has to be selected
See links section of previous blog post.
backend-security.json
manifest.yml
package.json
server.js
frontend-security.json
manifest.yml
app
package.json
server.js
package.json
xs-app.json
destination_to_backend
Authorization is handled as well.
Used technologies:
SAP BTP, Cloud Foundry, XSUAA, SAML2, OAuth2, Destination, OAuth2SAMLBearerAsertion, Node.js.
This blog post builds completely on top of the scenario described in detail in the previous postings: intro and tutorial.
Authorization is handled a bit different than in the previous blog post.
So I’d like to encourage you to go through today’s blog post as well.
Quicklinks:
Quick Guide
Sample Code
Content
0. Introduction
1. Backend Application
2. Frontend Application
3. Custom Identity Provider
4. Trust Configuration
5. Role Collection Mapping
6. Destination
7. Run
8. Cleanup
Appendix 1: Sample Code for Backend Application
Appendix 2: Sample Code for Frontend Application
Appendix 3: Sample Code for Destination Configuration
0. Introduction
The detailed description of our setup is described in the intro blog.
In our example scenario, we have a kind of service-providing application, which we call “Backend App” and which is deployed in a Trial account in region Singapore (ap21).
We want to call it from a “Frontend Application” which is deployed in a different Trial account in a different region (us10).
The challenge of our scenario was to get a JWT token, across boundaries of different subaccounts and regions.
The solution was to define Trust (based on SAML) and to use a destination of type "OAuth2SAMLBearerAssertion".
As an additional challenge, in addition to protecting our backend app with OAuth, we require a scope. And we expect that the frontend app sends a JWT token which contains that scope.
Today we describe a setup with a standalone Identity Provider (IdP) which is used to store and authenticate users.
As IdP, we’re using SAP Cloud Identity Services - Identity Authentication (IAS).
The idea is to connect one external IdP to both subaccounts:

This means that for both subaccounts, we need to establish trust to the Custom IdP.
Afterwards, the same users will be available on both subaccounts.
From my perspective, this is a natural setup, as long as the development and application infrastructure spans across both subaccounts.
Looking a bit more in detail, the following diagram focuses on the user login in the frontend subaccount:

In above diagram we can see that the business user (JoeCool) logs into the protected Frontend Application.
The approuter handles the OAuth flow together with XSUAA.
XSUAA itself doesn’t know about users so it turns to the connected IdP for user authentication.
This is possible due to the trust relationship between the subaccount-XSUAA and the IdP.
In our example, the IdP is an IAS tenant and we will describe how to establish the trust configuration.
Now let's see how authorization is handled.
Both applications define and require a scope.
Question:
How to achieve that the JWT which is sent to backend app contains the required backend scope ?
Solution:
Role collection mapping.
For user centric scenario, a scope is wrapped into a role-template at designtime.
After deploy, a role is generated based on that template.
An admin adds that role to a role collection and assigns it to a user.
This is the normal demo flow.
In case of custom IdP, we have the following chance:
Within the identity provider, we create a user group.
Whenever a new user is created in the IdP, he is added to this group (if suitable).
In the BTP cockpit, we assign the user group to a role collection. Not single users.

Above diagram shows a user, JoeCool, who wants to access the frontend app.
JoeCool has been created as user in the Custom Identity Provider, which we call “Cross_IdP”.
JoeCool has also been added to the user group “BackendUsers”.
The BTP admin has configured (mapped) the user group “BackendUsers” to the role collections in both subaccounts.
As a consequence, JoeCool is assigned to the role collection and when a JWT token is issued for him, it will contain the scope that is configured in the role collection.
This is the goal of todays tutorial and at the end we will see if it works.
One last point we need to add to the diagram: The destination.
We’ve covered the configuration and usage of the OAuth2SAMLBearerAssertion destination in the previous blog posts.
Today it is only necessary to mention:
Even though we already have trust established between both subaccounts and the cross-scenario-IdP, this is not enough for the destination to work.
The destination service will act as IdP itself and if we want to use the OAuth-SAML destination, then we need to establish trust from backend subaccount to frontend (destination-IdP) as well.
So this step, which was described in previous posts, cannot be omitted.
So let’s paint it in the diagram:

What does it mean?
Our scenario is based on SAML. When an end user does login, a SAML Bearer Assertion is generated. This is a small xml document which is kept in a browser session. The document is signed and contains information about the user. It also contains a session ID.
This assertion is meant to identify the user when he logs in to a different application of his company (e.g.).
But from our application code, we cannot access that assertion. And even if we could, it would be useless due to invalidated session ID.
As such, the destination service generates an own SAML assertion and signs it with its certificate.
And this is the reason, why we say that the destination service acts as IDP.
And this is why we need to define trust to this IDP.
At runtime, the destination service will contact the Backend-XSUAA and send the assertion and receive a JWT token. This is possible due to the trust only.
The JWT token will contain the required scope, because the user is contained in the user group, which in turn is mapped to the role collection.
Important to note:
When mapping the user group we need to specify:
The user group is provided by the Destination-IDP, not by the IAS.
The reason is explained above: the SAML assertion containing the info about the user and the user group (which is a special user-attribute), is generated by Destination service, not IAS.
Prerequisites
This previous tutorial and this prerequisites section are prerequisites.
Preparation
We use the project as created here.
1. Create Backend Application
We’re using the same backend application as in the previous tutorial.
1.0. Preparation
We login to the Trial account which represents the backend.
In my example:
cf login -a https://api.cf.ap21.hana.ondemand.com -o backendorg
1.1. Create XSUAA Service Instance
We’re using the same xsuaa configuration as in the previous tutorial.
The command to create the instance from scratch:
cf cs xsuaa application backendXsuaa -c backend-security.json
1.2. Create Backend Application
We’re using the same xsuaa configuration as in the previous tutorial.
The complete sample code can be found in the appendix 1.
1.3. Deploy
After deploy, cf push , we can take a note of the service-endpoint URL.
In my example:
https://backend.cfapps.ap21.hana.ondemand.com/endpoint
2. Create Frontend Application
The frontend app is explained in previous post and contains no difference.
So we go through the creation process without further comments
2.0. Preparation
We log on to the Trial account used for the frontend.
In my example:
cf login -a https://api.cf.us10.hana.ondemand.com -o frontendorg
2.1. Create XSUAA Service Instance
The creation command:
cf cs xsuaa application frontendXsuaa -c frontend-security.json
2.2. Create Destination Service Instance
The creation command:
cf cs destination lite frontendDestination
2.3. Create Core Application
The complete sample code can be found in the appendix 2.
2.4. Create Approuter
The complete sample code can be found in the appendix 2.
2.5. Deploy
After deploy, we get the application entry URL, but we don’t use it until all configuration has been finished.
3. Configure Custom Identity Provider
What we want to achieve:
We use one central Identity Provider which maintains business users.
This Identity Provider is connected to both our subaccounts.
Like that, the end users are known to both Backend_Subaccount and Frontend_Subaccount.
In my example, I’m using SAP Cloud Identity Services - Identity Authentication (IAS) as Identity Provider.
According to our diagram, we have the following tasks to do:
- Configure trust between IAS and Frontend Subaccount
- Configure trust between IAS and Backend Subaccount
Above steps are enough for authentication to the backend service. However, to get the scope into the JWT token, we need the following configuration as well:
- Configure Mapping between user group and Frontend Role Collection
- Configure Mapping between user group and Backend Role Collection
These configuration tasks are really simple, but it takes some time and few screenshots and lot of words to go through it.
I only ask you to not lose patience...
3.0. Preparation
A few steps are required beforehand in the IAS.
We login with admin user to the IAS at
https://abc.accounts400.ondemand.com/admin/
3.0.1 Create User
For our testing, we create a new business user (end user).
Users & Authorizations -> User Management
We press “Add User” button in the right bottom corner and enter some data of our choice:

Note that the user will need to confirm the E-Mail address and change password upon first login.
3.0.2. Create User Group
We need to create a user group, this is key for our tutorial.
As of our spec, the users who belong to this group, will have permissions to access our application landscape across borders.
With other words, they should have permission to access our Frontend Application and Backend Application.
To create a user group, we navigate to
Users & Authorizations -> User Groups -> Create
We name the new group as “CrossScenarioGroup”.

Note that it is important to be clear about the naming.
The "Name" is the technical name, it is the name which we need to remember and type correctly later in this tutorial.
The "Display Name" is just a label and only relevant for UI and screenshots.
3.0.3. Add User to Group
Finally, we add our new user to the new group.
We select the group in the list, then press "Add".
From the list, we select our new user and press "Save".

We can verify the assignment in the user details of the new user (see "Groups").
Assignment can also be configured here.
3.0.4. Download SAML metadata of IAS
We will need the SAML metadata of the Identity Provider for configuring trust in the subaccounts.
To download the metadata as a file, we navigate to
Applications & resources -> Tenant Settings -> SAML 2.0 Configuration
At the bottom, there’s the "Download" link.

Note:
Alternatively, this direct link can be used:
https://abc.accounts400.ondemand.com/saml2/metadata
After download, we copy the file to our project folder.
Note:
We’re downloading the metadata to configure the trust manually. In the subaccount, there's a “Establish Trust” button, to support automated configuration, but that would be based on OIDC.
3.1. Establish Trust between IAS and Backend Subaccount
To configure trust between the central IdP and the Subaccount, we need just a few configuration tasks on both sides, IdP and Subaccount.
3.1.1. Configuration in Backend Subaccount
We need to upload the SAML metadata of IAS in Backend Subaccount.
We open the SAP BTP Cockpit and login to the Backend_Subaccount.
In my example it is the Trial account in region ap21.
We navigate to Security ->Trust Configuration and press “New Trust Configuration”
We upload the SAML metadata of IAS (which we downloaded in step 3.0.4).
Name:
We enter any name of our choice, e.g. "Cross_Scenario_IdP".
It will be used for display.
Description:
Any description of our choice, to be able to remember what it is.
E.g. "Custom Identity Provider (IAS) for cross subaccount scenario"
Available for User Logon:
We enable this checkbox.
Link Text:
This link text will be displayed when user is asked to login. If there are multiple IdPs, then the user has to choose the right one.
Text can be anything, e.g. "Cross-Scenario Identity Provider"

Finally we press "Save".
The new trust configuration is added to the list of IdPs.
We don’t leave this page, as we need it for the next step.
3.1.2. Configuration in IdP
Next task is to configure the IdP, in our example the IAS.
We need to register the Subaccount in the Identity Provider (IAS)
To do so, we upload the SAML metadata of the subaccount into IAS.
But first, we need to fetch this metadata.
* Download SAML metadata of Backend Subaccount
As we’re still logged-in at Backend_Subaccount, Trust Configuration screen, we can download the metadata right away.

We copy the downloaded file to the c:\crossapp\backend folder in our project directory.
** Create Application in IAS
Now we change to our Identity Provider (IAS).
We navigate to Applications & Resources -> Applications
Press “Create”.
Enter Display name as e.g. "BackendSubaccount".
Press "Save".
Now that we've created an empty application, we need to configure it.
*** Upload SAML metadata
Make sure that BackendSubaccount is selected in the list of applications, such that the right pane shows the details.
We choose SAML 2.0 Configuration.
In the section Define from Metadata we upload the downloaded SAML metadata file from the “Backend_Subaccount” (stored the c:\crossapp\backend folder).
After upload, all the fields are populated.
Nice, nothing else to do here.
Press "Save".

So now we have an application in the IAS that knows how to talk to the Backend Subaccount.
However, there's still some fine-tuning required.
**** Configure Default Name ID Format
We make sure that BackendSubaccount is selected and the right pane shows the details.
We click on Default Name ID Format.
We choose "E-Mail".
"Save".
***** Configure Assertion Attributes
We make sure that BackendSubaccount is selected and the right pane shows the details.
We click on Assertion Attributes.
We press “+ Add” and in the popup, we scroll down to choose “Groups”.
A new entry is added to the list. It has a default value (Assertion Attribute).
We replace the default value with “Groups”.
Make sure to spell correctly: “Groups” starting with upper case
Press "Save".
Double check: Groups should be spelled Groups and not groups and not grUPs.
3.1.3. Little recap
We’ve downloaded SAML metadata and uploaded SAML metadata.
3.2. Establish Trust between IAS and Frontend Subaccount
Now we have to repeat all steps - this time for the Frontend_Subaccount.
3.2.1. Configuration in Frontend Subaccount
We open the SAP BTP Cockpit and login to the Frontend_Subaccount.
In my example it is the Trial account in region us10.
To create "New Trust Configuration", we upload the SAML metadata of IAS (which we downloaded in step 3.0.4, and copied to project folder).
Enter Name, e.g. "Cross_IdP".
Description, e.g. "Custom Identity Provider used for cross account scenario".
Enable “Available for User Logon”
Link Text, e.g. "Cross-Scenario Identity Provider".
Press "Save".
3.2.2. Configuration in IdP
First, we fetch SAML metadata of Frontend Subaccount.
* Download SAML metadata of Frontend Subaccount
We’re still logged-in at Frontend_Subaccount, so we download the SAML metadata, and copy the file to folder to c:\crossapp\frontend.
** Create Application in IAS
We change to Identity Provider (IAS).
Create new application and enter Display name as "FrontendSubaccount".
*** Upload SAML metadata
In IAS -> details of FrontendSubaccount -> SAML 2.0 Configuration, we upload the SAML metadata file of “Frontend_Subaccount” (stored at c:\crossapp\frontend).
Press "Save".
**** Configure Default Name ID Format
In IAS -> details of FrontendSubaccount -> Default Name ID Format,
we choose "E-Mail"
and press "Save".
***** Configure Assertion Attributes
We go to IAS -> details of FrontendSubaccount -> Assertion Attributes.
We press “+ Add”, choose “Groups” enter value as “Groups”.
Reminder: spell correctly.
Press "Save".
3.2.3. Little recap
We’ve downloaded SAML metadata and uploaded SAML metadata.
4. Configure Trust for Destination IdP
In addition to the already configured trust between the 2 subaccounts and the custom IdP, we need an additional trust configuration.
This one is what we were already using in the previous tutorials.
The reason why we need this additional trust config:
It is required by the destination service.
The Destination Service takes the role of a trusted IdP when executing on the Oauth2 SAML Bearer Assertion flow.
With other words:
The destination service helps us to execute the OAuth - SAML grant flow.
So it has to send a SAML assertion in order to exchange it for a JWT token.
It is impossible to get a hold of the SAML assertion which is issued when the end user logs in to our Frontend App.
As such, the destination service generates an own SAML assertion.
It is signed with an own certificate.
As a consequence, the Backend Subaccount needs to trust it.
The trust configuration does not differ from the description in previous tutorial.
Short description:
4.1. Frontend Subaccount
Download IdP Metadata from Frontend_Subaccount -> Connectivity -> Destinations
4.2. Backend Subaccount
Configure Trust at Backend_Subaccount -> Security -> Trust Configuration -> New
Name: “Frontend Destination IdP”
Description: Destination Identity Provider from Frontend Subaccount for destination usage
Available for User Logon: disabled
4.3. Short Recap
Why do we need trust configuration for IAS?
- end users are known in both subaccounts.
- it allows to map user group to role collection.
Why do we need trust configuration for Destination?
- it allows to use the destination of type OAuth2SAMLBearerAssertion
How can we verify the Destination-Trust?
After establishing the trust in the backend subaccount, we can click on the “Frontend_Destination_IdP” to open the details screen.
Then we click on “Show Details”
It shows the header data of the certificate which was used to sign the SAML metadata document.
Looking at the certificate data:
The issuer of the certificate contains the "Organizational Unit" (OU) which is filled with "Cloud Platform Destination Configuration".
The ID of the frontend subaccount is concatenated to the name:

5. Role Collection Mapping
Phew - reached chapter 5 and still more configuration waiting ahead - and already tired of reading....
Again, I have to beg you to remain patient and keep reading..... it is the last configuration chapter - besides chapter 6.
At least, chapter 7 and 8 will come without any further configuration.
What else can I promise you as appetizer?
Chapter 8 will be short, but 5 long.
Hum....not appetizing.
Chapter 5 is not short, but it is easy.
Really easy.
Feel energized about that?
Cool, so let's go on.
5.0 Intro
The following section is key for achieving the goal of our tutorial.
Remember the goal?
After so much talking, everybody would forget the initial goal.
Our goal is to call a protected app in different subaccount.
And this protected backend app requires a scope.
How to get the scope into the JWT token, which we send to the backend app?
The goal is to answer this question.
Remember the diagram in the intro section?
After so many screenshots nobody remembers…

One point is the possibility to map user group to role collection.
Other point is that we’re connecting 2 different worlds:
IdP ----- Subaccount
With other words:
SAML ----- OAuth
With other words:
IAS ----- XSUAA
The first world:
It knows about the concept of User Group.
Permissions can be maintained by adding a user to a special group, e.g. "CrossScenarioGroup".
This group will be mentioned in the SAML assertion of the logged-in user.
The second world:
It knows about the concept of Role Collection.
Permission can be maintained by adding a role to the collection (e.g. "BackendRole" in "BackendRoleCollection") and assigning it to a user (e.g. JoeCool).
This Role Collection will be mentioned in the JWT token.
More specifically: the scope(s).
Now what we need to do, is to define:
The "CrossScenarioGroup" corresponds to the "BackendRoleCollection".
Which means:
The users of the group should get the roles of the collection.
How to define?
Explained below.
5.1. Define Mapping between user group and Role Collection in Backend
We logon to the Backend_Subaccount.
We navigate to Security -> Role Collections.
In our tutorial, we don’t need to manually create a new role collection, because we defined it in our xs-security.json file
So it is already there and we can go ahead and “Edit” it.
We can see that it already contains the desired role “BackendRole”.
The point in this tutorial is that we don’t add a user to this role collection.
What we want to do is to configure a “user group”.
The goal is that all users of this group will get all roles of this role collection.
Now...
In our case, we have little special setup...
Description:
The frontend application will use the destination service to fetch a JWT token from backend.
The destination service will generate a SAML assertion, in order to exchange it for JWT token.
As such, the "origin" claim in the JWT will be filled with the Dstination-IdP.
So, as a consequence, in the cockpit, in the role collection editor, when choosing the Idp as origin for the user group: here we have to select the Destination-IdP (not the IAS).
I found it surprising, hence all this text...
Back to the role collection editing.
In the role collection editor we need to select the destination-IDP as origin of the user group.
We had named it Frontend Destination IdP.
Afterwards we need to enter the name of our user group: “CrossScenarioGroup”.
This is the technical name, as specified in the IAS.
Make sure to spell correctly.
And never forget to press “Save”.

5.2. Define Mapping between user group and Role Collection in Frontend
Now we repeat the similar step in the frontend subaccount.
Here we find the Role Collection “Frontend_Roles”, as predefined by us.
In the “User Groups” section, we have only one Identity Provider to choose, it is the IAS, with the name “Cross_Scenario_IdP”, as given during trust configuration.
We enter the name of the user group "CrossScenarioGroup".
This name will be added to the SAML assertion (as user-attribute) when the user logs in to our frontend application.
3.4.1. Optional check
We can now go to the Trust Configuration screen and click on the entry “Cross_Scenario_IdP”.
In the left menu, there’s an entry “Role Collection Mappings”.
When opening it, we can see the mapping which we’ve just defined, is already there.
It says:
The Role Collection corresponds to an attribute of the SAML assertion.
The attribute with name “Groups” has to be present in the assertion and the value must be equal to “CrossScenarioGroup”.
If this is the case, then the user will enjoy getting the roles of this collection.
6. Create Destination
Creating the destination is described in detail in previous blog post.
So today we can just import the destination configuration at
frontend_subaccount -> Connectivity -> Destinations -> Import Destination
The destination configuration can be copied (and adapted) from the appendix 3.
After import, anyways, we need to manually enter the sensitive info: clientid/secret.
To get the required info, we need to view the environment variables of our deployed backend app.
E.g. via these commands:
cf login -a https://api.cf.ap21.hana.ondemand.com -o backendorg
cf env backend
Then find the section of XSUAA binding and copy the properties into the destination configuration.
In my example:
"clientid": "sb-backendxsuaa!t7722"
"clientsecret": "abCD123SHWi4HJ7pTPhHNwaiM="
Remember:
"Client Key" <- clientid
"Token Service User" <- clientid
"Token Service Password" <- clientsecret
7. Run Scenario
At this point we've finished with configuration efforts - no need to assign roles to our user anymore.
So we can call our application at:
https://frontendrouter.cfapps.<region>.hana.ondemand.com/tofrontend/homepage
In my example:
https://frontendrouter.cfapps.us10.hana.ondemand.com/tofrontend/homepage
Before entering credentials, we need to select the newly configured cross-identity-provider.
In my example, the IDP-selection screen of the frontend subaccount looks as follows:

After clicking on "Cross-Scenario Identity Provider", we can enter the credentials of the user which we created in chapter 3.0.1.
Note that new users have to change initial password on first login.

Afterwards we can finally see the result of our application:

The JWT information was explained in detail in previous blog post.
For today, we have one additional happiness factor: the groups information.
We can see that the CrossScenarioGroup, which was defined in the external Identity Provider, has been translated from a SAML user-attribute to a custom claim in the JWT token, called xs.saml.groups.
For us as application developers, this is not that relevant, because we check for the scope and don't care how it was made available.
In todays tutorial, it is all about configuration.
All boring.
8. Cleanup
Believe me: writing this blog post has been at least as exhausting as reading it...
Frontend Subaccount:
Manually delete destination configuration.
Delete artifacts:
cf login -a https://api.cf.us10.hana.ondemand.com -o frontendorg
cf d frontend -r -f
cf d frontendrouter -r -f
cf ds frontendXsuaa -f
cf ds frontendDestination -f
Backend Subaccount:
Manually delete trust configuration.
Delete artifacts:
cf login -a https://api.cf.ap21.hana.ondemand.com -o backendorg
cf d backend -r -f
cf ds backendXsuaa -f
Summary
Our requirement was to call a protected app from different subaccount and to get the required scope into the JWT token.
The end-user was stored in a custom Identity Provider (IAS).
The solution for authentication was to configure trust between the IAS and both subaccounts.
The solution for authorization was
1. configure trust between Destination-IdP (frontend subaccount) and backend subaccount
2. add the end-user to a User Group in the Identity Provider
3. configure Role Collection Mapping in both subaccounts
Note the specialty that in backend role collection the Destination-IdP has to be selected
Quick Guide
| * IAS: Create user and add to group Download SAML metadata from Tenant Config* Frontend Subaccount: Download SAML metadata from Connectivity->Destination Download SAML metadata from SEcurity->Trust Configuration Configure Trust to IAS Frontend App protected with OAuth and XSUAA and uses Approuter and Token Exchange Frontend Role Collection: enter the UserGroup and choose IAS as IdP* Backend Subaccount: Backend App protected with OAuth and XSUAA Configure Trust to IAS Configure Trust to Destination-Service-IDP Download SAML metadata Backend Role Collection: enter the UserGroup and choose Destination-IdP* IAS: Create application for Backend Subaccount Upload SAML metadata, Configure Name Format (eMail) and Attribute (Groups:Groups) Create application for Frontend Subaccount Upload SAML metadata, Configure Name Format (eMail) and Attribute (Groups:Groups) |
Links
See links section of previous blog post.
Appendix 1: Sample Code for Backend Application
backend-security.json
{

    "xsappname": "backendxsuaa",

    "tenant-mode": "dedicated",

    "scopes": [{

        "name": "$XSAPPNAME.backendscope"

    }],

    "role-templates": [{

        "name": "BackendRole",

        "description": "Role required for Backend Application",

        "scope-references": ["$XSAPPNAME.backendscope"]

    }],

    "role-collections": [{

          "name": "Backend_Roles",

          "role-template-references": ["$XSAPPNAME.BackendRole"]

        }

    ]

}
manifest.yml
---

applications:

  - name: backend

    path: app

    memory: 64M

    routes:

    - route: backend.cfapps.ap21.hana.ondemand.com

    services:

      - backendXsuaa
app
package.json
{

  "dependencies": {

    "@sap/xsenv": "latest",

    "@sap/xssec": "latest",

    "express": "^4.17.1",

    "passport": "^0.4.0"

  }

}
server.js
const xsenv = require('@sap/xsenv')

const UAA_CREDENTIALS = xsenv.getServices({myXsuaa: {tag: 'xsuaa'}}).myXsuaa


const express = require('express')

const app = express();

const xssec = require('@sap/xssec')

const passport = require('passport')

const JWTStrategy = xssec.JWTStrategy

passport.use('JWT', new JWTStrategy(UAA_CREDENTIALS))

app.use(passport.initialize())

app.use(express.json())


// start server

app.listen(process.env.PORT)


app.get('/endpoint', passport.authenticate('JWT', {session: false}), (req, res) => {

    const authInfo = req.authInfo

    console.log(`===> [AUDIT] backendapp accessed by user '${authInfo.getGivenName()}' from subdomain '${authInfo.getSubdomain()}' with oauth client: '${authInfo.getClientId()}'`)

    const isScopeAvailable = authInfo.checkScope(UAA_CREDENTIALS.xsappname + '.backendscope')

    if (! isScopeAvailable) {

        //res.status(403).end('Forbidden. Missing authorization.') // Don't fail during prototyping

    }


    res.json({

        'message': `Backend app successfully called. Scope available: ${isScopeAvailable}`,

        'jwtToken': authInfo.getAppToken()})

})
Appendix 2: Sample Code for Frontend Application
frontend-security.json
{

    "xsappname": "frontendxsuaa",

    "tenant-mode": "dedicated",

    "role-templates": [{

        "name": "uaaUserDefaultRole",

        "description": "Default role uaa.user required for user centric scenarios",

        "scope-references": ["uaa.user"]

    }],

    "role-collections": [{

          "name": "Frontend_Roles",

          "role-template-references": [ "$XSAPPNAME.uaaUserDefaultRole" ]

        }

    ]

}
manifest.yml
---

applications:

  - name: frontend

    path: app

    memory: 64M

    routes:

    - route: frontend.cfapps.us10.hana.ondemand.com

    services:

      - frontendXsuaa

      - frontendDestination

  - name: frontendrouter

    routes:

    - route: frontendrouter.cfapps.us10.hana.ondemand.com

    path: approuter

    memory: 128M

    env:

      destinations: >

        [

          {

            "name":"destination_frontend",

            "url":"https://frontend.cfapps.us10.hana.ondemand.com",

            "forwardAuthToken": true

          }

        ]

    services:

      - frontendXsuaa
app
package.json
{

  "dependencies": {

    "@sap/destinations": "latest",

    "@sap/xsenv": "latest",

    "@sap/xssec": "^3.2.13",

    "express": "^4.17.1",

    "node-fetch": "2.6.2",

    "passport": "^0.4.0"

  }

}
server.js
const xsenv = require('@sap/xsenv')


const INSTANCES = xsenv.getServices({

    myXsuaa: {tag: 'xsuaa'},

    myDestination: {tag: 'destination'}

})

const XSUAA_CREDENTIALS = INSTANCES.myXsuaa

const DESTINATION_CREDENTIALS = INSTANCES.myDestination


const fetch = require('node-fetch')

const xssec = require('@sap/xssec')

const passport = require('passport')

const JWTStrategy = xssec.JWTStrategy

passport.use('JWT', new JWTStrategy(XSUAA_CREDENTIALS))

const express = require('express')

const app = express();

app.use(passport.initialize())

app.use(express.json())


// start server

app.listen(process.env.PORT)


// calling destination service with user token and token exchange

app.get('/homepage', passport.authenticate('JWT', {session: false}), async (req, res) => {


    const userJwtToken = req.authInfo.getAppToken()


    // instead of fetching token for destination service with client creds, we HAVE to use token exchange, must be user for princip propag

    const destJwtToken = await _doTokenExchange(userJwtToken)


    // read destination

    const destination = await _readDestination('destination_to_backend', destJwtToken)

    const samlbearerJwtToken = destination.authTokens[0].value


    // call backend app endpoint

    const response = await _callBackend(destination)

    const responseJson = JSON.parse(response)

    const responseJwtTokenDecoded = decodeJwt(responseJson.jwtToken)


    // print token info to browser

    const htmlUser = _formatClaims(userJwtToken)

    const htmlDest = _formatClaims(destJwtToken)

    const htmlBearer = _formatClaims(samlbearerJwtToken)


    res.send(`  <h4>JWT after user login</h4>${htmlUser}

                <h4>JWT after token exchange</h4>${htmlDest}

                <h4>JWT issued by OAuth2SAMLBearerAssertion destination</h4>${htmlBearer}

                <h4>Response from Backend</h4>${responseJson.message}. The token: <p>${JSON.stringify(responseJwtTokenDecoded)}</p>`)


})


/* HELPER */


async function _readDestination(destinationName, jwtToken, userToken){

    const destServiceUrl = `${DESTINATION_CREDENTIALS.uri}/destination-configuration/v1/destinations/${destinationName}`

    const options = {

       headers: { Authorization: 'Bearer ' + jwtToken}

    }

    const response = await fetch(destServiceUrl, options)

    const responseJson = await response.json()

    return responseJson

}


async function _doTokenExchange (bearerToken){

    return new Promise ((resolve, reject) => {

       xssec.requests.requestUserToken(bearerToken, DESTINATION_CREDENTIALS, null, null, null, null, (error, token)=>{

          resolve(token)

       })

    })

}


async function _callBackend (destination){

    const backendUrl = destination.destinationConfiguration.URL

    const options = {

       headers: {

          Authorization : destination.authTokens[0].http_header.value  // contains the "Bearer" plus space

       }

    }

    const response = await fetch(backendUrl, options)

    const responseText = await response.text()

    return responseText

}


function decodeJwt(jwtEncoded){

    return new xssec.TokenInfo(jwtEncoded).getPayload()

}


function _formatClaims(jwtEncoded){

    // const jwtDecodedJson = new xssec.TokenInfo(jwtEncoded).getPayload()

    const jwtDecodedJson = decodeJwt(jwtEncoded)

    console.log(`===> The full JWT: ${JSON.stringify(jwtDecodedJson)}`)


     const claims = new Array()

     claims.push(`issuer: ${jwtDecodedJson.iss}`)

     claims.push(`<br>client_id: ${jwtDecodedJson.client_id}</br>`)

     claims.push(`grant_type: ${jwtDecodedJson.grant_type}`)

     claims.push(`<br>scopes: ${jwtDecodedJson.scope}</br>`)

     claims.push(`ext_attr: ${JSON.stringify(jwtDecodedJson.ext_attr)}`)

     claims.push(`<br>aud: ${jwtDecodedJson.aud}</br>`)

     claims.push(`origin: ${jwtDecodedJson.origin}`)

     claims.push(`<br>name: ${jwtDecodedJson.given_name}</br>`)

     claims.push(`xs.system.attributes: ${JSON.stringify(jwtDecodedJson['xs.system.attributes'])}`)

     return claims.join('')

}
approuter
package.json
{

    "dependencies": {

        "@sap/approuter": "latest"

    },

    "scripts": {

        "start": "node node_modules/@sap/approuter/approuter.js"

    }

}
xs-app.json
{

  "authenticationMethod": "route",

  "routes": [

    {

      "source": "^/tofrontend/(.*)$",

      "target": "$1",

      "destination": "destination_frontend",

      "authenticationType": "xsuaa"

    }

  ]

}
Appendix 3: Sample Code for Destination Configuration
destination_to_backend
#clientKey=<< Existing password/certificate removed on export >>

#tokenServicePassword=<< Existing password/certificate removed on export >>

#

#Fri Jun 10 07:09:11 UTC 2022

Description=Destination pointing to backend app endpoint in backend account

Type=HTTP

authnContextClassRef=urn\:oasis\:names\:tc\:SAML\:2.0\:ac\:classes\:PreviousSession

audience=https\://backendsubdomain.authentication.ap21.hana.ondemand.com

Authentication=OAuth2SAMLBearerAssertion

Name=destination_to_backend

tokenServiceURL=https\://backendsubdomain.authentication.ap21.hana.ondemand.com/oauth/token/alias/backendsubdomain.azure-ap21

ProxyType=Internet

URL=https\://backend.cfapps.ap21.hana.ondemand.com/endpoint

nameIdFormat=urn\:oasis\:names\:tc\:SAML\:1.1\:nameid-format\:emailAddress

tokenServiceURLType=Dedicated

tokenServiceUser=sb-backendxsuaa\!t7722
Labels:
6 Comments
You must be a registered user to add a comment. If you've already registered, sign in. Otherwise, register and sign in.
Labels in this area
-
ABAP CDS Views - CDC (Change Data Capture)
2 -
AI
1 -
Analyze Workload Data
1 -
BTP
1 -
Business and IT Integration
2 -
Business application stu
1 -
Business Technology Platform
1 -
Business Trends
1,658 -
Business Trends
94 -
CAP
1 -
cf
1 -
Cloud Foundry
1 -
Confluent
1 -
Customer COE Basics and Fundamentals
1 -
Customer COE Latest and Greatest
3 -
Customer Data Browser app
1 -
Data Analysis Tool
1 -
data migration
1 -
data transfer
1 -
Datasphere
2 -
Event Information
1,400 -
Event Information
67 -
Expert
1 -
Expert Insights
177 -
Expert Insights
307 -
General
1 -
Google cloud
1 -
Google Next'24
1 -
GraphQL
1 -
Kafka
1 -
Life at SAP
780 -
Life at SAP
13 -
Migrate your Data App
1 -
MTA
1 -
Network Performance Analysis
1 -
NodeJS
1 -
PDF
1 -
POC
1 -
Product Updates
4,576 -
Product Updates
349 -
Replication Flow
1 -
REST API
1 -
RisewithSAP
1 -
SAP BTP
1 -
SAP BTP Cloud Foundry
1 -
SAP Cloud ALM
1 -
SAP Cloud Application Programming Model
1 -
SAP Datasphere
2 -
SAP S4HANA Cloud
1 -
SAP S4HANA Migration Cockpit
1 -
Technology Updates
6,873 -
Technology Updates
436 -
Workload Fluctuations
1
Related Content
- Supporting Multiple API Gateways with SAP API Management – using Azure API Management as example in Technology Blogs by SAP
- SAP BTP Cockpit - New User Menu, Settings Dialog and About Dialog Design in SAP BTP Cockpit in Technology Blogs by SAP
- plug and gain 101: #4 What is a Process Flow Variant? in Technology Blogs by SAP
- SAP Datasphere - Space, Data Integration, and Data Modeling Best Practices in Technology Blogs by SAP
- What’s New in SAP HANA Cloud – March 2024 in Technology Blogs by SAP
Top kudoed authors
| User | Count |
|---|---|
| 24 | |
| 16 | |
| 11 | |
| 10 | |
| 10 | |
| 9 | |
| 9 | |
| 8 | |
| 8 | |
| 7 |