
- SAP Community
- Products and Technology
- CRM and Customer Experience
- CRM and CX Blogs by SAP
- How to expand your customer journey with SAP Custo...
CRM and CX Blogs by SAP
Stay up-to-date on the latest developments and product news about intelligent customer experience and CRM technologies through blog posts from SAP experts.
Turn on suggestions
Auto-suggest helps you quickly narrow down your search results by suggesting possible matches as you type.
Showing results for
former_member62
Explorer
Options
- Subscribe to RSS Feed
- Mark as New
- Mark as Read
- Bookmark
- Subscribe
- Printer Friendly Page
- Report Inappropriate Content
09-05-2019
4:40 PM
On Thursday 29th of August, I had the pleasure to participate in the second in the series of “How to” Webinars for SAP Customer Data Cloud.
The Presenters for this session were:
Ratul Shah – Senior Product Marketing Managers, SAP Customer Data Cloud
Fred Gasse – Global Practice Lead, SAP Customer Data Cloud
Ian Hametz – Customer Identity Product Manager, SAP Customer Data Cloud
If you weren’t able to catch it live you can review the recording of this webinar here: https://enable.cx.sap.com/media/embed-varspeed/1_86o4oend
Ratul started by inviting the entire audience to our User Community meeting on September 19, 2019, in NYC. What a great way for customers to interact with each other and get hands-on with the product leadership team.
The conversation shifted back to the main topic– the importance of building trusted relationships across the journey. He highlighted the evolution of organizations, as they rapidly deploy websites and native applications to serve their customer base. He illuminated these key challenges facing organization today: 1) Inconsistent experiences 2) Multiple user accounts and 3) Security risks. He outlined today’s scenarios and then handed the webinar off to Ian and me to guide the audience on a hands-on learning journey.
This blog post covers the hands-on section of the Webinar and walks you through how to configure SAP Customer Data Cloud to set up multiple sites sharing a single database of user accounts. We will be looking at the following topics:
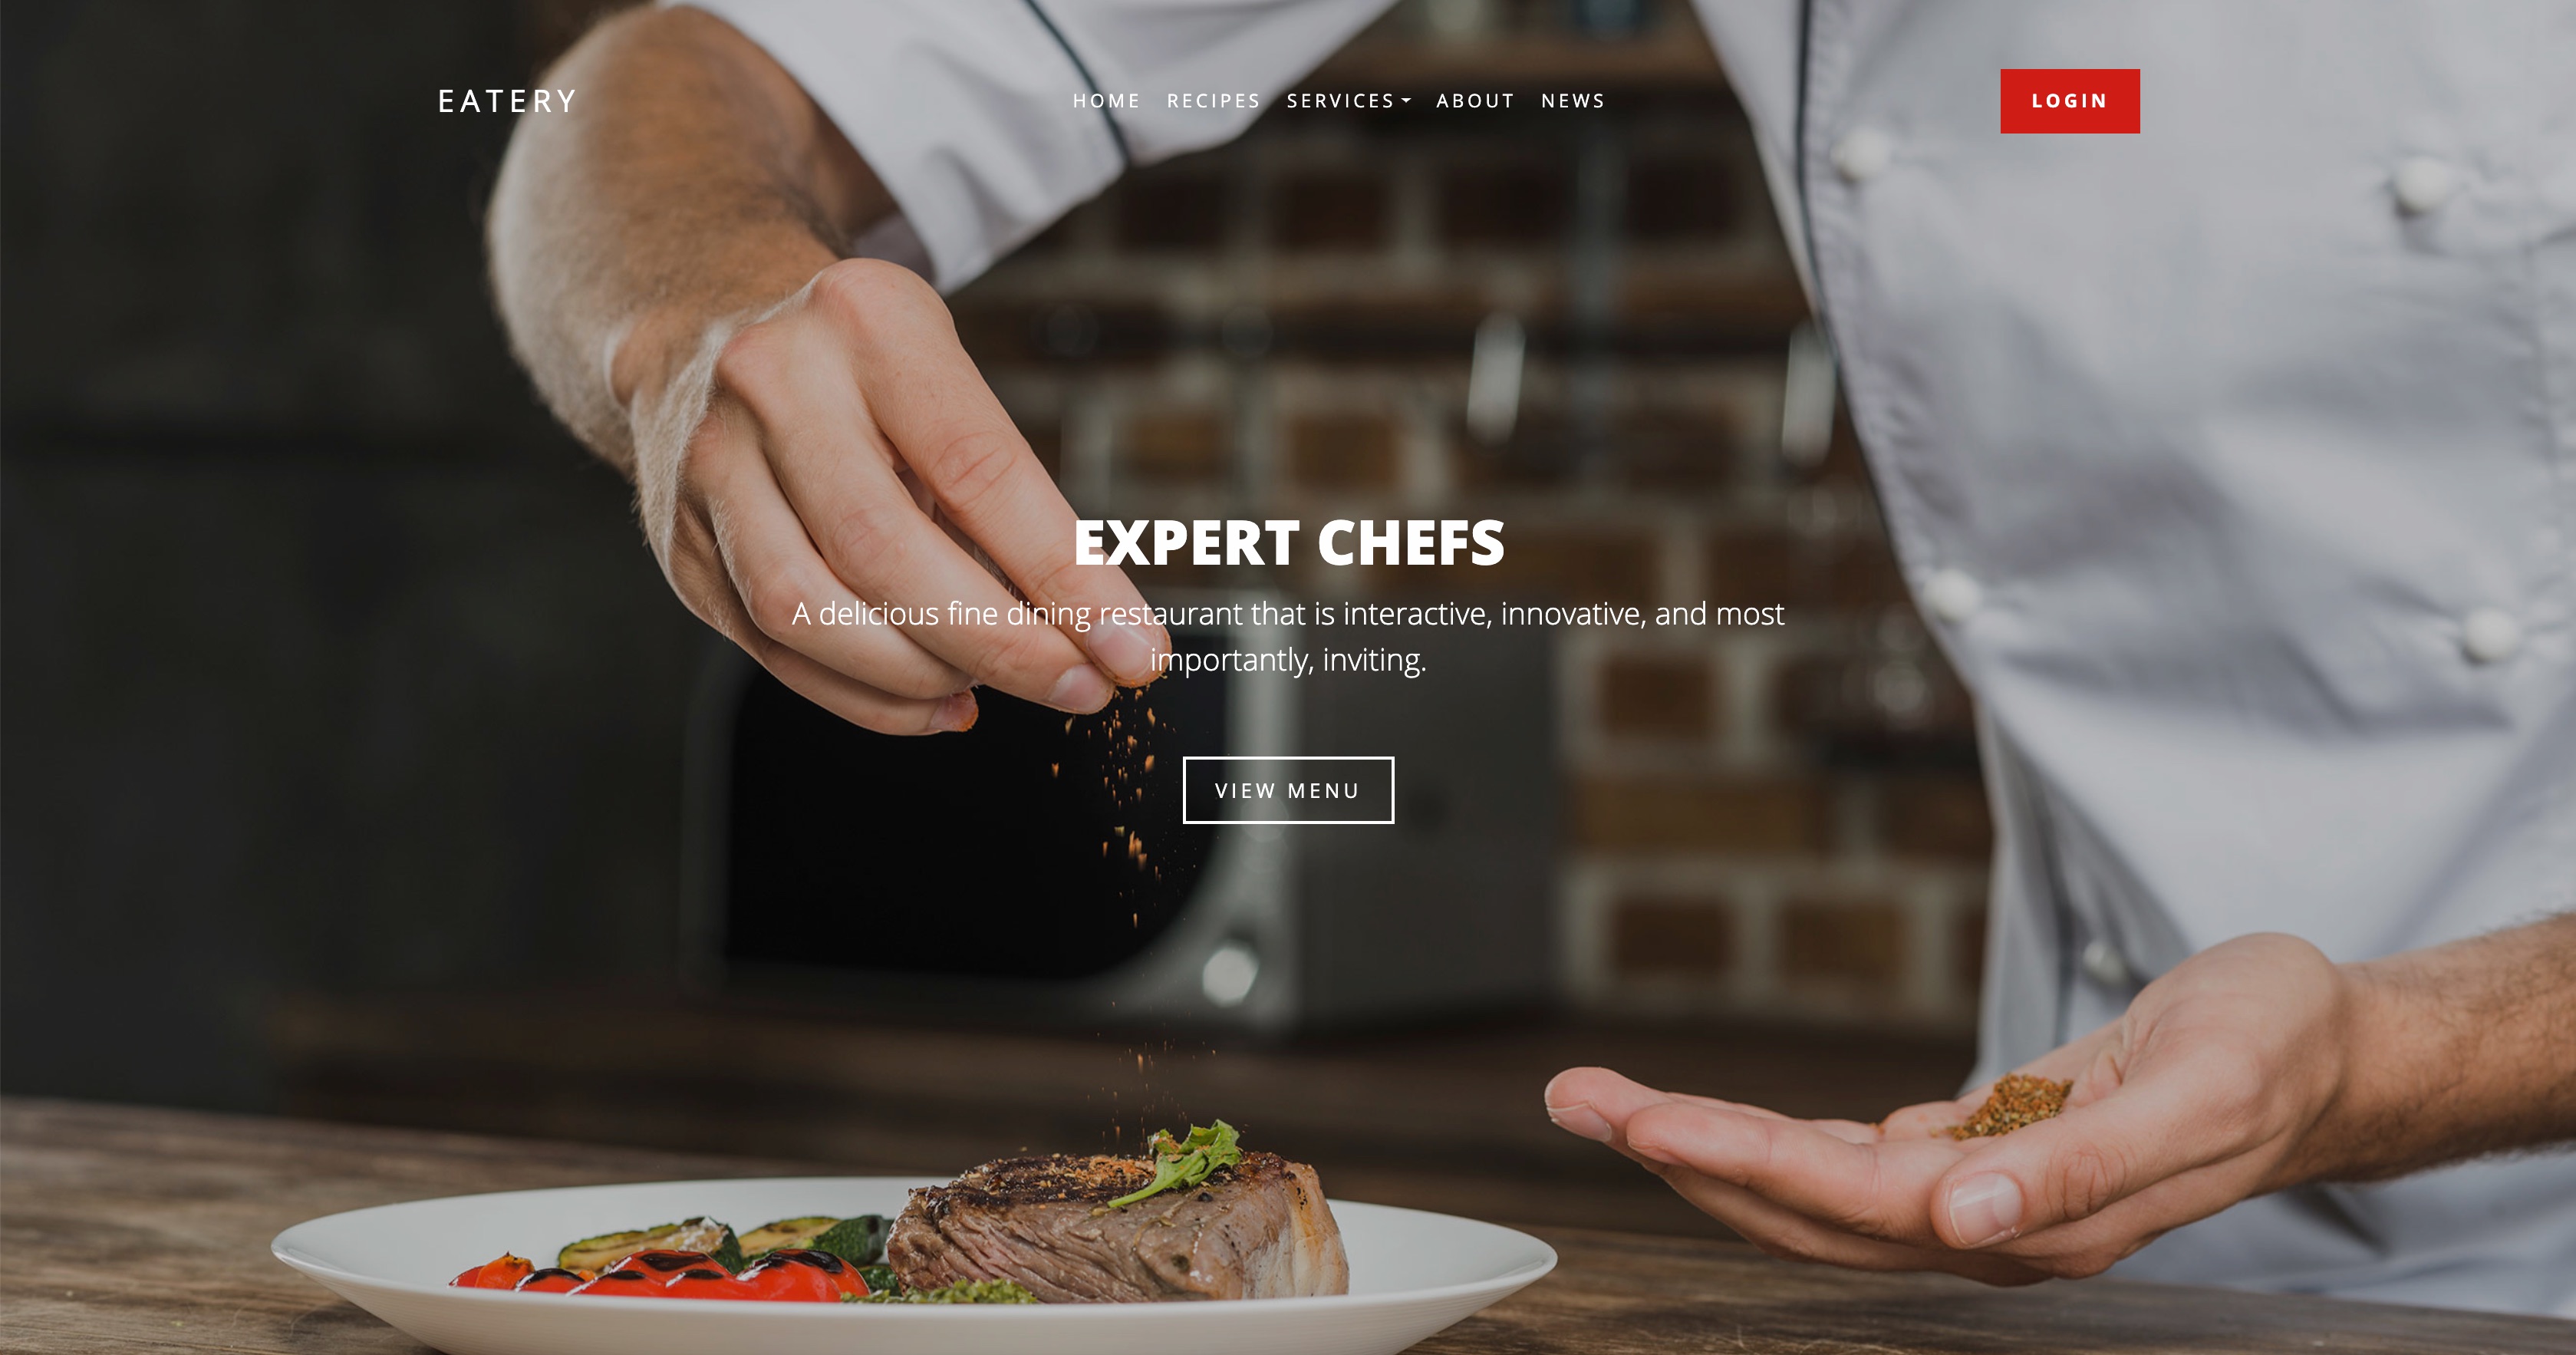
For the purpose of this demo, we'll consider that we are a company that owns a few restaurants around the world and we would like to allow our clients to login to all of our sites with a single account. Those sites were already pre-configured with some basic JavaScript to display our Screen Sets when the Login button is clicked ahead of the demo. Two API Keys were also created in the Admin Console.

If you would like to know how this setup can be achieved in just a few minutes, make sure you visit our previous blog on how to get started with SAP Customer Data Cloud.
The two API Keys that had been created on the Admin Console in preparation for the demo could be used independently and would each have their own siloed database of users. We use site grouping to join multiple siloed sites together and create a single repository of users that will also share the same data model.
The first step to create a site group to join multiple API Keys together is to create a new site on the Admin Console. This new site is like any other site u to that point but in the next step it will become the parent site and the sites that had already been configured earlier will become the child sites.
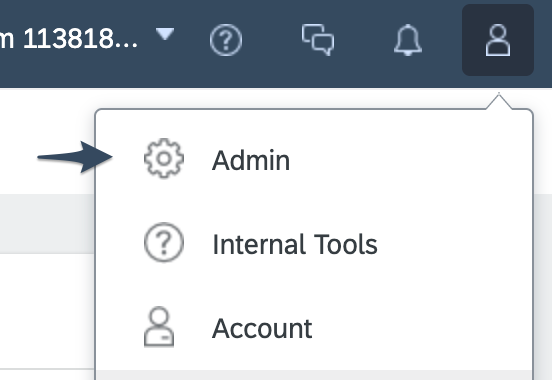
Creating the site group itself is done inside the “Admin” area of the Admin Console within the “Site Groups” section, you’ll have to click on the “Create Site Group” button:

Within the “Create Site Group” page, select the parent site and add the child sites to bundle the sites together and create the site hierarchy:

Once the site group has been created, going back to the homepage of the Admin Console should now show the child sites placed under the parent site as shown below:

Next, visit the Screen Sets section of the parent site to generate the Screen Set library for this site. The page will show a loading indicator while the Screen Sets are being generated which can take a minute to do.
With the Screen Sets generated you can now test the out-of-the-box login and registration features either on your sites if they have been configured or directly from the Preview mode of your Screen Sets within the Admin Console.

If a new user is registered on either of the child sites, this user will be able to log in on any of the other sites with the same credentials.
Another effect of sharing the same database is that a user can only register once, if that user tries to register again, he/she would be presented with an error message notifying them that the email address already exists.

For an optimized User Experience, the “Email already exists” message should be customized to something meaningful to the end-user so that they understand that multiple sites are sharing the same database and know they can use the credentials they already have on another site to log in. It is especially important for those brands which share the same user base but are not necessarily perceived as being related brands.
While multiple sites might want to share the same database of user accounts, it is also likely that they each have different terms of service, privacy or other consent that their users need to accept to opt-in to each site. Using SAP Customer Consent gives us the flexibility to create a consent statement that is only mandatory within the scope of one or more sites. We can, therefore, create multiple consents inside the parent site and only enforce those that should be mandatory within the site itself.
The consent statement is first created within the parent site. Using the example shown in the Webinar, we would need to click on the parent site and navigate to the “Consent“ section of that site:

For the purpose of this example, we are creating two separate terms of service so that we have one mandatory consent per site.

The terms of service that were created on the parent site will not be made active there as it would make them mandatory for all child sites within the site group. Instead, they should be marked as Active only within the child sites themselves as illustrated below:


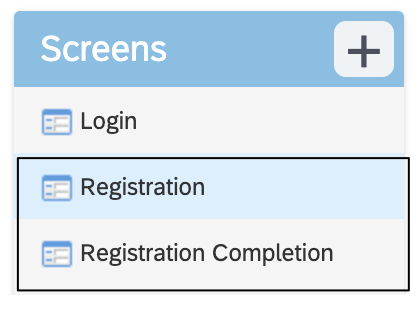
With the consent statements correctly created and the mandatory constraints set up on the child sites, we can start adding the terms of service checkboxes to our Screen Sets. We’ll be adding the consent checkboxes to both the Registration and Profile Completion Screen Sets. There are a couple of reasons why we need to add the fields for users to consent to our terms of service on the Profile Completion page too:
To use a consent statement on a Screen Set, the checkbox added to the Screen is mapped to the isConsentGranted Boolean field in the schema under Preferences > terms > name_of_your_consent

When setting up a site group, the child sites will automatically inherit the Screen Sets from their parent site. If we want to edit the default Screen Set for a specific child site when opening that Screen Set from within the child site for the first time we’ll see a “Clone” button instead of the standard “Save” button we usually see. Cloning a Screen Set will create a new version of the Screen Set specifically for the child site. Note that from that point on, any changes made to the parent Screen Set will not be reflected on the child site and vice versa.
Setting up SSO (Single Sign-On) is as easy as it is powerful. SSO allows us to share the logged-in state of a user for all the site within a site group. What that means is that if a user logs in to a site within a site group and that site group has SSO enabled, this user will automatically be logged in to all other sites of that site group. The same is true when logging out, once logged out into any of the sites, the user will be automatically logged out from all other sites in the site group.
The only configuration change required is to check the “SSO enabled” checkbox on the site group configuration page as illustrated below:

With that configuration set, all sites within a site group using our Web SDK (our standard client-side implementation) will automatically benefit from SSO with no other change needed.
There is another interesting functionality part of our SSO offering which lets us define SSO Segments within a site group so that the logged-in state of a user can be shared only for a subset of sites within a site group. More details on SSO Segments can be found in our developers' guide.
The final feature that was demonstrated during this Webinar was localization which is a feature of SAP Customer Data Cloud that allows us to define the default UI language of our Screen Sets.
The platform supports a variety of languages out-of-the-box and all the default labels and error messages are automatically translated. Any custom fields will need to be translated and added into our platform using the Localization of Screen Sets:

To add a new translation, we will first need to export the CSV file for the desired language, add the translation in the file and re-import the CSV file into the Screen Set section.
To define the default UI language on the site itself, we just need to define the name of the locale either in the Global Configuration of the site itself or directly on the configuration of the Web SDK as illustrated in the snippet below where we define the default language of our Screen Set to be Spanish:
For more details on the localization of our Screen Sets, please refer to our online documentation.
SAP Customer Data Cloud Webinar sessions are carried out by our product experts, covering a variety of topics spanning the full customer journey, from new capabilities, implementation best practices, release information, deep-dive sessions, to integration with other solutions.
Be sure to register for upcoming live webinars on the SAP CX Wiki, and subscribe to the Webinar Channel on enable.cx so you never miss out on new content.
The Presenters for this session were:
Ratul Shah – Senior Product Marketing Managers, SAP Customer Data Cloud
Fred Gasse – Global Practice Lead, SAP Customer Data Cloud
Ian Hametz – Customer Identity Product Manager, SAP Customer Data Cloud
If you weren’t able to catch it live you can review the recording of this webinar here: https://enable.cx.sap.com/media/embed-varspeed/1_86o4oend
Ratul started by inviting the entire audience to our User Community meeting on September 19, 2019, in NYC. What a great way for customers to interact with each other and get hands-on with the product leadership team.
The conversation shifted back to the main topic– the importance of building trusted relationships across the journey. He highlighted the evolution of organizations, as they rapidly deploy websites and native applications to serve their customer base. He illuminated these key challenges facing organization today: 1) Inconsistent experiences 2) Multiple user accounts and 3) Security risks. He outlined today’s scenarios and then handed the webinar off to Ian and me to guide the audience on a hands-on learning journey.
This blog post covers the hands-on section of the Webinar and walks you through how to configure SAP Customer Data Cloud to set up multiple sites sharing a single database of user accounts. We will be looking at the following topics:
- Creating a new site group.
- Setting up multiple terms of service using SAP Customer Consent.
- Adding consent to your Screen Sets.
- Enabling Single Sign-On on your sites.
- Setting up localization to display your Screen Sets in the language of your choice.
For the purpose of this demo, we'll consider that we are a company that owns a few restaurants around the world and we would like to allow our clients to login to all of our sites with a single account. Those sites were already pre-configured with some basic JavaScript to display our Screen Sets when the Login button is clicked ahead of the demo. Two API Keys were also created in the Admin Console.
If you would like to know how this setup can be achieved in just a few minutes, make sure you visit our previous blog on how to get started with SAP Customer Data Cloud.
Site groups:
The two API Keys that had been created on the Admin Console in preparation for the demo could be used independently and would each have their own siloed database of users. We use site grouping to join multiple siloed sites together and create a single repository of users that will also share the same data model.
The first step to create a site group to join multiple API Keys together is to create a new site on the Admin Console. This new site is like any other site u to that point but in the next step it will become the parent site and the sites that had already been configured earlier will become the child sites.
Creating the site group itself is done inside the “Admin” area of the Admin Console within the “Site Groups” section, you’ll have to click on the “Create Site Group” button:
Within the “Create Site Group” page, select the parent site and add the child sites to bundle the sites together and create the site hierarchy:
Once the site group has been created, going back to the homepage of the Admin Console should now show the child sites placed under the parent site as shown below:
Next, visit the Screen Sets section of the parent site to generate the Screen Set library for this site. The page will show a loading indicator while the Screen Sets are being generated which can take a minute to do.
With the Screen Sets generated you can now test the out-of-the-box login and registration features either on your sites if they have been configured or directly from the Preview mode of your Screen Sets within the Admin Console.
If a new user is registered on either of the child sites, this user will be able to log in on any of the other sites with the same credentials.
Another effect of sharing the same database is that a user can only register once, if that user tries to register again, he/she would be presented with an error message notifying them that the email address already exists.
For an optimized User Experience, the “Email already exists” message should be customized to something meaningful to the end-user so that they understand that multiple sites are sharing the same database and know they can use the credentials they already have on another site to log in. It is especially important for those brands which share the same user base but are not necessarily perceived as being related brands.
Asking for site-specific consent:
While multiple sites might want to share the same database of user accounts, it is also likely that they each have different terms of service, privacy or other consent that their users need to accept to opt-in to each site. Using SAP Customer Consent gives us the flexibility to create a consent statement that is only mandatory within the scope of one or more sites. We can, therefore, create multiple consents inside the parent site and only enforce those that should be mandatory within the site itself.
The consent statement is first created within the parent site. Using the example shown in the Webinar, we would need to click on the parent site and navigate to the “Consent“ section of that site:
For the purpose of this example, we are creating two separate terms of service so that we have one mandatory consent per site.
The terms of service that were created on the parent site will not be made active there as it would make them mandatory for all child sites within the site group. Instead, they should be marked as Active only within the child sites themselves as illustrated below:
With the consent statements correctly created and the mandatory constraints set up on the child sites, we can start adding the terms of service checkboxes to our Screen Sets. We’ll be adding the consent checkboxes to both the Registration and Profile Completion Screen Sets. There are a couple of reasons why we need to add the fields for users to consent to our terms of service on the Profile Completion page too:
- If a user was previously registered and had not already given their consent.
- If a user registers using a social provider since the standard site registration page is skipped. More on that one in one of our upcoming Webinars.
To use a consent statement on a Screen Set, the checkbox added to the Screen is mapped to the isConsentGranted Boolean field in the schema under Preferences > terms > name_of_your_consent
Child level Screen Sets:
When setting up a site group, the child sites will automatically inherit the Screen Sets from their parent site. If we want to edit the default Screen Set for a specific child site when opening that Screen Set from within the child site for the first time we’ll see a “Clone” button instead of the standard “Save” button we usually see. Cloning a Screen Set will create a new version of the Screen Set specifically for the child site. Note that from that point on, any changes made to the parent Screen Set will not be reflected on the child site and vice versa.
Enabling SSO (Single Sign-On) on a site group:
Setting up SSO (Single Sign-On) is as easy as it is powerful. SSO allows us to share the logged-in state of a user for all the site within a site group. What that means is that if a user logs in to a site within a site group and that site group has SSO enabled, this user will automatically be logged in to all other sites of that site group. The same is true when logging out, once logged out into any of the sites, the user will be automatically logged out from all other sites in the site group.
The only configuration change required is to check the “SSO enabled” checkbox on the site group configuration page as illustrated below:
With that configuration set, all sites within a site group using our Web SDK (our standard client-side implementation) will automatically benefit from SSO with no other change needed.
There is another interesting functionality part of our SSO offering which lets us define SSO Segments within a site group so that the logged-in state of a user can be shared only for a subset of sites within a site group. More details on SSO Segments can be found in our developers' guide.
Localization:
The final feature that was demonstrated during this Webinar was localization which is a feature of SAP Customer Data Cloud that allows us to define the default UI language of our Screen Sets.
The platform supports a variety of languages out-of-the-box and all the default labels and error messages are automatically translated. Any custom fields will need to be translated and added into our platform using the Localization of Screen Sets:
To add a new translation, we will first need to export the CSV file for the desired language, add the translation in the file and re-import the CSV file into the Screen Set section.
To define the default UI language on the site itself, we just need to define the name of the locale either in the Global Configuration of the site itself or directly on the configuration of the Web SDK as illustrated in the snippet below where we define the default language of our Screen Set to be Spanish:
<script src="https://cdns.gigya.com/JS/socialize.js?apikey=<your-api-key>">

{

    lang: "es"

}
For more details on the localization of our Screen Sets, please refer to our online documentation.
Webinar sign up:
SAP Customer Data Cloud Webinar sessions are carried out by our product experts, covering a variety of topics spanning the full customer journey, from new capabilities, implementation best practices, release information, deep-dive sessions, to integration with other solutions.
Be sure to register for upcoming live webinars on the SAP CX Wiki, and subscribe to the Webinar Channel on enable.cx so you never miss out on new content.
- SAP Managed Tags:
- SAP Customer Data Cloud
Labels:
You must be a registered user to add a comment. If you've already registered, sign in. Otherwise, register and sign in.
Labels in this area
-
Business Trends
270 -
Business Trends
13 -
chitchat
1 -
customerexperience
1 -
Event Information
256 -
Event Information
18 -
Expert Insights
30 -
Expert Insights
52 -
Life at SAP
133 -
Life at SAP
1 -
Product Updates
666 -
Product Updates
31 -
SAP HANA Service
1 -
SAPHANACloud
1 -
SAPHANAService
1 -
Technology Updates
453 -
Technology Updates
15
Related Content
- Don't miss the SAP Sales Cloud V2 Live session on June 10th '24 in CRM and CX Blogs by SAP
- Delete duplicate customers in SAP CDC in CRM and CX Questions
- SAP Sales and Service Cloud side-by-side extensions - Development Patterns in CRM and CX Blogs by Members
- Support Case vs Service Request – What's the difference? in CRM and CX Blogs by SAP
- SAP Emarsys Customer Engagement - Enhanced Lead Integration to SAP Sales Cloud Version 1 in CRM and CX Blogs by SAP
Top kudoed authors
| User | Count |
|---|---|
| 8 | |
| 3 | |
| 3 | |
| 2 | |
| 1 | |
| 1 | |
| 1 | |
| 1 | |
| 1 | |
| 1 |