
- SAP Community
- Products and Technology
- Enterprise Resource Planning
- ERP Blogs by SAP
- How Developer Extensibility lets you create your o...
Enterprise Resource Planning Blogs by SAP
Get insights and updates about cloud ERP and RISE with SAP, SAP S/4HANA and SAP S/4HANA Cloud, and more enterprise management capabilities with SAP blog posts.
Turn on suggestions
Auto-suggest helps you quickly narrow down your search results by suggesting possible matches as you type.
Showing results for
Advisor
Options
- Subscribe to RSS Feed
- Mark as New
- Mark as Read
- Bookmark
- Subscribe
- Printer Friendly Page
- Report Inappropriate Content
07-21-2023
12:47 PM

In this blog post series you will follow as I show you the steps for creating your own Situation Handling use case. You will experience the power and freedom you get when you combine developer extensibility with key user extensibility. The first blog post introduced the use case, the 3-system landscape and the part of developer extensibility. This second blog post follows up with the first part of key-user extensibility from the perspective of an extensibility specialist.
Ok, now that you have a custom CDS view let’s continue by using it in a situation object.
Create a situation object using key user extensibility
You will begin as an extensibility specialist with the role SAP_BR_EXTENSIBILITY_SPEC. This time you log in to client 100 in the development system. First, open the Manage Situation Objects app.
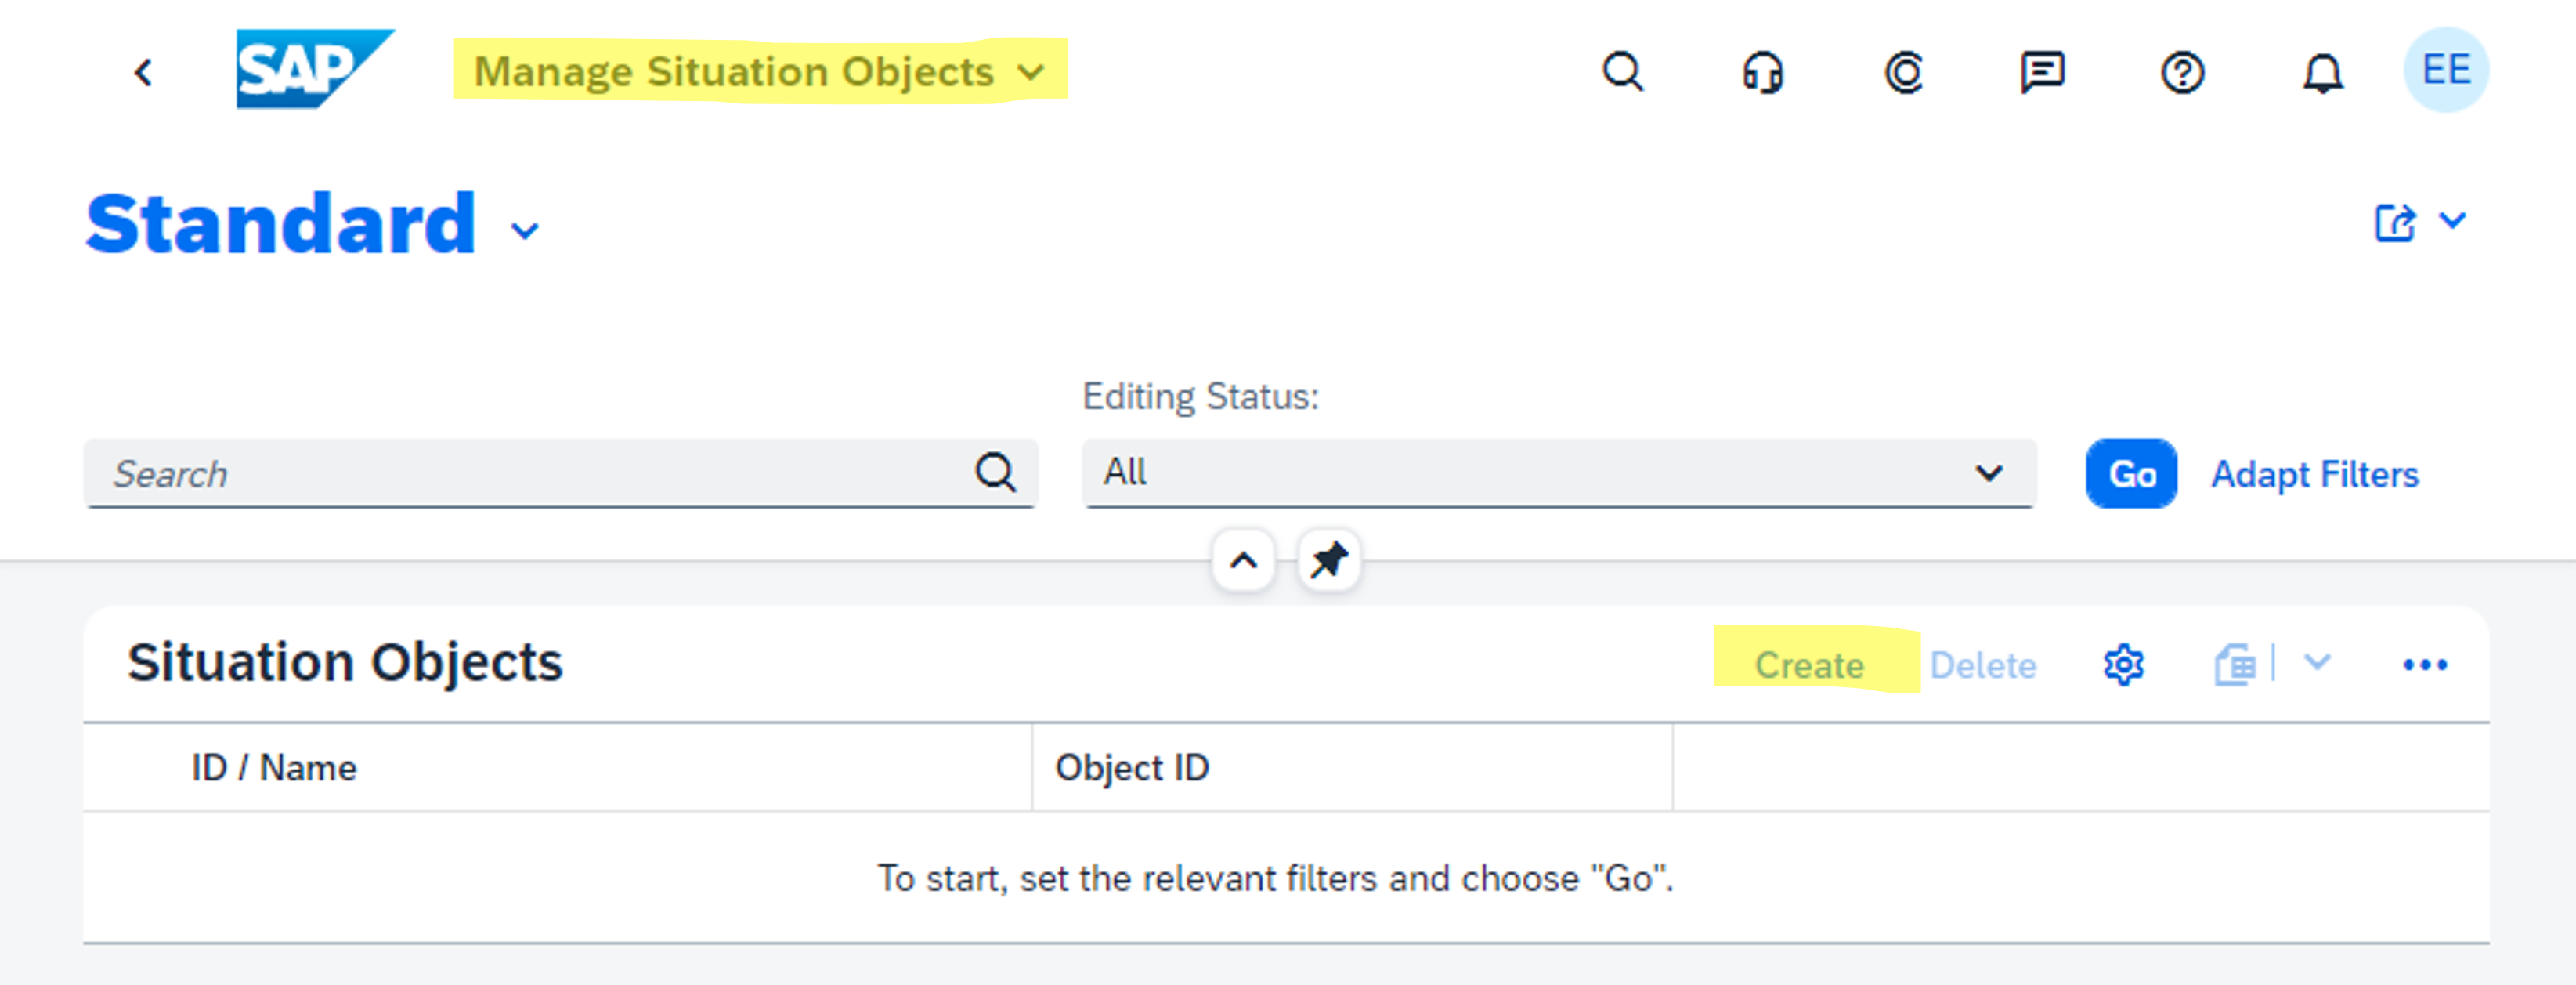
After choosing Create, you are prompted to enter an Object ID, for example, CC_BUDGET_2. On the next page you describe your object.

Next, reference the custom CDS view you created earlier. You do this in the Structures section when you choose Create there. First enter a Structure ID, for example, CDS_COSTCENTERBUDGET. The prefix CDS_ is recommended to indicate clearly that the structure is based on a CDS view. It also helps you in the later configuration steps to identify the structure. You might want to look at the complete guidelines regarding texts for IDs, names, and descriptions of the Situation Handling framework on the Fiori for Web Design Guidelines page.
On the next page you’ll describe your structure. After selecting CDS as the Structure Type, you enter your custom CDS view as Structure Name, such as ZI_COSTCENTERBUDGET and further describe it.

As the Sematic Key, you take the fields that make up the unique identifier of the anchor object and arrange them accordingly. Choose Apply to finish the Structures section.

Next, you specify to where our business user Sarah will be able to navigate to from the My Situations – Extended app. Under Navigation Targets, you assign navigation actions to business apps that help solve a situation. Use this option if no direct action is available to solve a situation or if situations are too complex to be handled with just one click. Enter the semantic object and the semantic object action for the app that you want to display. Choose Create, then enter an ID, for example, NAV_CCBUDGETREPORT which defines the navigation to the Cost Center Budget Report app.
You enter the Semantic Object and Action given by the app.

Once Sarah navigates to the app, you want her to focus on the data which caused the situation. You achieve this by setting the navigation parameters. As mentioned in the section about the custom CDS view, this is one of the design considerations you have think about beforehand. Choose Apply to finish the Navigation Targets section.

This navigation needs to be embedded in an action which you define in the End-User Actions section. There you specify button labels for the actions that are displayed to end users on the situation page in the My Situations – Extended app. Choose Create, then enter an ID, for example, ACT_CCBUDGETANALYSE. On the object page you choose Navigation Action as Action Type, define the name the button has in the My Situations – Extended app and reference the navigation you have just defined.

Choose Apply to finish the End-User Actions section. When you choose Create, your situation object is ready for use.
The next step on your journey is to use the situation object in a situation scenario.
Create a situation scenario using key user extensibility
Still logged-in as an extensibility specialist, you now open the Manage Situation Scenarios app.

After choosing Create, you are asked to provide a scenario ID, for example, CC_BUDGET_CONTROL_2. As scenario type you select object-based and as object structure type you choose CDS.
On the next page, describe your scenario and connect to a Responsibility Context ID, for example, YY1_CC_BUDGET_MANAGEMENT.

Next, reference the situation object you created earlier. This happens in the Anchor Object section by providing an anchor object ID, such as YY1_CC_BUDGET_2 and a structure ID, such as CDS_COSTCENTERBUDGET. You also need to set the Anchor Object Key field as the unique identifier in your custom CDS view, for example, COSTCENTERBUDGETKEY.

As the trigger, you want the Situation Handling framework to check the budget once a day. By choosing Add in the Situation Triggers section, you can define Batch as the Trigger Type and enter a description.

Under Trigger Object Information you will once again reference your previously created object and the unique ID. As Trigger Object Behavior you choose Add/Update.

As the Instance Key, you take the fields that make up the unique identifier of the anchor object and arrange them accordingly.

Under Actions, select the previously created action, for example, Analyze Cost Center Budget. On the object page for this action, you need to choose the parameters for your scenario. You choose all parameters, define them as Dynamic, from Anchor Object and select the respective Field Names. Choose Apply to finish the Action section.

Then, choose Apply to finish the Trigger section.
When you choose Create, your situation scenario is ready for use. Let’s have a look at a brief summary of the situation object’s and situation scenario’s main attributes.

What you learned and what will come next
Continuing as an extensibility specialist you used this CDS view to create a situation object which represents the budget consumption. Then based on this object you built a situation scenario which defined how a situation will be triggered and which actions are provided to the user.
Next as a business process configuration expert you will take this scenario to create a situation template which defines what are the general conditions for creating a situation, which messages should be shown and who should be informed.
Want to learn more or refresh your knowledge on Situation Handling?
More blog posts about Situation Handling are available:
- Custom Situation Cases: Configure your own use cases (1/6)
- The Power of Reuse – Custom Situation Configuration
- Fine-Tuning Custom Situations: Closing Behavior of Situation Instances
- Fine-Tuning of Custom Situations: Configure the Layout of My Situations – Extended
- Custom Situation Handling Use Case for Professional Services: Unstaffed Resource Requests
- Monitor Your Custom Situations
For more information, see SAP Help Portal for Situation Handling – Extended Framework for SAP S/4HANA and SAP Community for Intelligent Situation Handling. We welcome your valuable feedback.
Labels:
You must be a registered user to add a comment. If you've already registered, sign in. Otherwise, register and sign in.
Labels in this area
-
Artificial Intelligence (AI)
1 -
Business Trends
363 -
Business Trends
29 -
Customer COE Basics and Fundamentals
1 -
Digital Transformation with Cloud ERP (DT)
1 -
Event Information
461 -
Event Information
27 -
Expert Insights
114 -
Expert Insights
173 -
General
1 -
Governance and Organization
1 -
Introduction
1 -
Life at SAP
415 -
Life at SAP
2 -
Product Updates
4,682 -
Product Updates
252 -
Roadmap and Strategy
1 -
Technology Updates
1,500 -
Technology Updates
92
Related Content
- Shared Trouble is security doubled: the shared responsibility model for SAP S/4HANA Cloud in Enterprise Resource Planning Blogs by SAP
- SAP S/4HANA Cloud, public edition, ABAP Environment Case 8: Material Shelf Life Management in Enterprise Resource Planning Blogs by SAP
- Building Low Code Extensions with Key User Extensibility in SAP S/4HANA and SAP Build in Enterprise Resource Planning Blogs by SAP
- How to utilize key user custom field "via CODE LIST" and "Custom Business Object" in Enterprise Resource Planning Q&A
- FAQ on Upgrading SAP S/4HANA Cloud Public Edition in Enterprise Resource Planning Blogs by SAP
Top kudoed authors
| User | Count |
|---|---|
| 27 | |
| 6 | |
| 4 | |
| 4 | |
| 3 | |
| 3 | |
| 3 | |
| 3 | |
| 3 | |
| 3 |