
- SAP Community
- Products and Technology
- Technology
- Technology Blogs by SAP
- Cloud Integration - Send Mail via Microsoft Graph ...
Technology Blogs by SAP
Learn how to extend and personalize SAP applications. Follow the SAP technology blog for insights into SAP BTP, ABAP, SAP Analytics Cloud, SAP HANA, and more.
Turn on suggestions
Auto-suggest helps you quickly narrow down your search results by suggesting possible matches as you type.
Showing results for
Employee
Options
- Subscribe to RSS Feed
- Mark as New
- Mark as Read
- Bookmark
- Subscribe
- Printer Friendly Page
- Report Inappropriate Content
02-18-2023
10:29 AM
The blog "Cloud Integration – Connect to Microsoft 365 Mail with OAuth2" contains chapters how you can connect from SAP Cloud Integration to Microsoft 365 via OAuth2 to send mails using the protocol SMTP. In this blog we describe an alternative to the SMTP protocol: we use the Microsoft Graph REST API to send mails using the HTTP receiver adapter of SAP Cloud Integration.
We create an integration flow which connects to the Microsoft Graph REST API described in https://learn.microsoft.com/en-us/graph/api/user-sendmail?view=graph-rest-1.0&tabs=http.
When connecting to Outlook 365 with OAuth2, you need to have an organizational directory/tenant in Microsoft Azure Active Directory and a user in this directory which has a subscription to Outlook 365. The following screen shot shows an example of such a user in the Azure Active Directory with name “testusermail” which has the license “Exchange Online (Plan1)”.

You can check whether the user has a subscription to Outlook 365 by logging-in with the user to https://outlook.office365.com/mail/.
For the configuration tasks in the Azure Active Directory, you also need a user with the “Application administrator” and the “Application developer” role.
Furthermore, you need a SAP Cloud Integration or Integration Suite tenant on which you have a user with the “Integration Developer” role.
We build an integration flow which you can call via an HTTP client and which connects to Microsoft Graph via the HTTP receiver adapter of SAP Cloud Integration. To set up this scenario, execute the following steps:
When you log into the SAP Cloud Integration or Integration Suite WEB-UI, you see your host name in the browser address field:
Use the <host name> to construct the following redirect URI:
You need this redirect URI in the next step.
Log into your Cloud Integration tenant via the URL https://<host name>/itspaces (for Cloud Integration) or the URL https://<host name>/shell/home (for Integration Suite). Change to the “Operations View” (press the eye icon), and select the “Security Materials” tile. Select the “Create” button and choose “OAuth2 Authorization Code”.

Enter a name for the Credential and the “Authorization URL”, “Token Service URL”, “Client ID”, and “Client Secret” from your Microsoft App.
Enter also a “User Name”. This is the e-mail address of the user whose mail resources you want to access in an integration flow. This user must exist in the same Microsoft Azure directory/tenant as the App created and must have an Outlook 365 account.
Enter the scope "https://graph.microsoft.com/Mail.Send"
Additionally, you need the scope “offline_access” for creating refresh tokens (if this scope is not added, SAP Cloud Integration will add this scope automatically). The scopes must be separated by a space.
The default value for the Refresh Token Expiry is set to 90 days for “Microsoft 365” (see: https://docs.microsoft.com/en-us/azure/active-directory/develop/active-directory-configurable-token-...). However, if the expiry time was changed for your Microsoft tenant, then adjust this value.
 After clicking on the “Deploy” button, you see the newly created “OAuth2 Authorization Code” credential in the list of Security Materials in status “Unauthorized“.
Select the three dots in the entry with the created credential and choose the “Authorize” option.
A confirmation pop-up will come up. Select “Continue”:
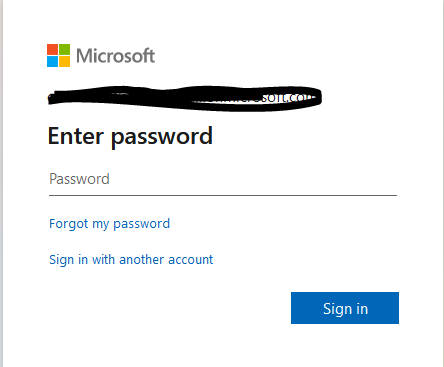
 A Microsoft login screen appears. Enter the password of the user you specified in the OAuth2 credential:
After you’ve selected “Sign in”, a further pop-up comes up, indicating the requested permissions required by the app:
Select “Accept”. You should get a success message:

Return to your previous browser page and refresh the Security Materials list (button “Reload content”). The state of the “OAuth2 Authorization Code” credential changed to “Deployed”:
The following Groovy script is the most important part of our scenario. The Groovy Script fetches the OAuth2 Access token from the Microsoft Identity server and creates the HTTP request body to be sent to Microsoft Graph.
We create a Script Collection so that the Groovy Script can be reused in several integration flows.
In the design view where you also create integration flows you can create a Script Collection:
Select the "Groovy Script" option:
Enter a name of the Groovy Script.
On the right side a pregenerated Groovy Script appears which we overwrite in the next step.
Enter in the Groovy Script Editor the following code:
The Groovy Script uses the following properties:
The Groovy Script uses the message body as input for the mail body and assumes that the message body has a char-set encoding of UTF-8.
The Groovy Script does only allow one recipient, one cc recipient and one attachment. If you want to use several recipients, several cc recipients, or several attachments, then you have to enhance the Script.
Deploy the Script Collection.
We create an integration flow with a script step which uses the created OAuth2 Authorization Code credential and a HTTP receiver adapter which calls the Microsoft Graph API. The following screenshot shows the integration flow we want to build:
The Content Modifier step "Configure Mail" contains the exchange properties for the Groovy Script step:
The properties MAIL_ATTACHMENT_..., MAIL_CC_RECIPIENT, and MAIL_SAVE_TO_SEND_ITEMS are optional. If MAIL_SAVE_TO_SEND_ITEMS is not set then the default setting "true" is used. See the Groovy Script above.
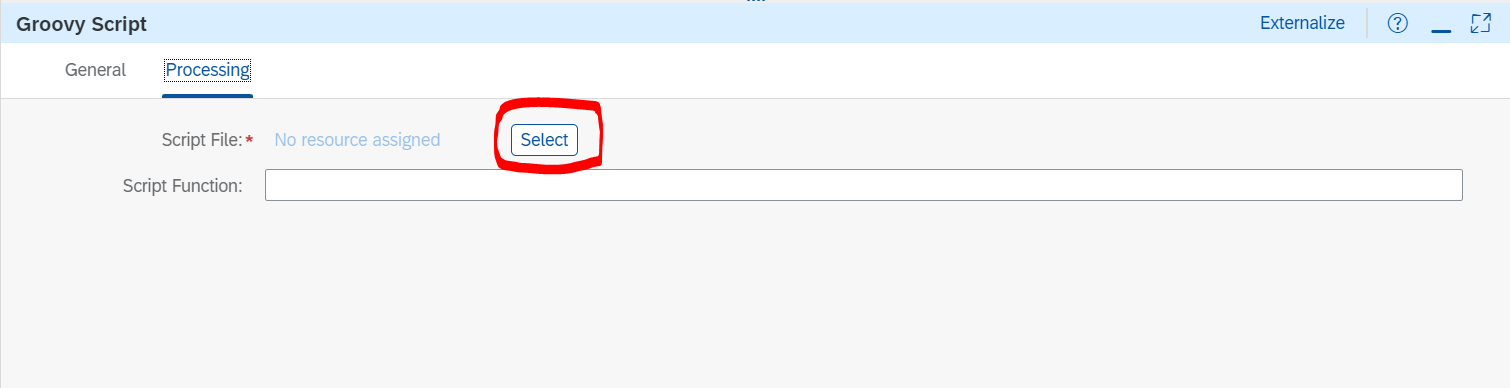
In the Groovy Script Step "Prepare Mail" we reference the Groovy Script from the Script Collection which we created before.
First you create a reference to the Script Collection:
Then you can reference the Script of the Collection in the Groovy Script step:
We create a "Request Reply" with name "Call Microsoft Graph" to which we connect a HTTP receiver adapter.
Enter in the "Address" field "https://graph.microsoft.com/v1.0/me/sendMail",
choose "Authentication" "None",
and enter in the Request Headers "Authorization|Content-Type" (these headers are set in the Groovy Script):
We call the HTTP receiver adapter in a request reply step because we want to clean-up headers after the call to Microsoft Graph. Therefore, we add the “Remove Headers” Content Modifier step after the “Request-Reply” step. Most importantly, we remove the “Authorization” header which is set by the script step and which contains the token. If we do not remove this header, the token will be part of the response to the sender and the sender could access this security relevant information.
To be able to call the integration flow endpoint, you need a user with the ESBMessaging.send role assigned. We assume here that you are familiar with setting up the basic authentication in your HTTP client (for example Postman); we do not explain the authentication part of the HTTP client.
After you’ve deployed the integration flow, you find the integration flow endpoint in the Operations View in the “Manage Integration Content” tile:
In the "Manage Integration Content" view you also see the deployed Script Collection "SendMail".
Now you can make a HTTP POST request from your HTTP client to this endpoint with a request body. The result will be that a mail is sent to the recipient you specified in the Content Modifier "Configure Mail". The mail body will be the body you used in the HTTP request. The subject of the mail will be the subject you specified in the property "MAIL_SUBJECT" of the Content Modifier "Configure Mail".
We create an integration flow which connects to the Microsoft Graph REST API described in https://learn.microsoft.com/en-us/graph/api/user-sendmail?view=graph-rest-1.0&tabs=http.
Prerequisites
When connecting to Outlook 365 with OAuth2, you need to have an organizational directory/tenant in Microsoft Azure Active Directory and a user in this directory which has a subscription to Outlook 365. The following screen shot shows an example of such a user in the Azure Active Directory with name “testusermail” which has the license “Exchange Online (Plan1)”.
You can check whether the user has a subscription to Outlook 365 by logging-in with the user to https://outlook.office365.com/mail/.
For the configuration tasks in the Azure Active Directory, you also need a user with the “Application administrator” and the “Application developer” role.
Furthermore, you need a SAP Cloud Integration or Integration Suite tenant on which you have a user with the “Integration Developer” role.
Setup
We build an integration flow which you can call via an HTTP client and which connects to Microsoft Graph via the HTTP receiver adapter of SAP Cloud Integration. To set up this scenario, execute the following steps:
- Step 1: Determine Redirect URI
- Step 2: Create OAuth Client/App in Microsoft Azure Active Directory
- Step 3: Create OAuth2 Authorization Code Credential in your SAP Cloud Integration Tenant
- Step 4: Create Script Collection with a Groovy Script
- Step 5: Create Integration Flow with Script Step and HTTP Receiver Adapter
- Step 6: Execute the Integration Flow
Step 1: Determine Redirect URI
When you log into the SAP Cloud Integration or Integration Suite WEB-UI, you see your host name in the browser address field:
https://<host name>/itspaces (for Cloud Integration)


https://<host name>/shell/home (for Integration Suite)
Use the <host name> to construct the following redirect URI:
https://<host name>/itspaces/odata/api/v1/OAuthTokenFromCode |
You need this redirect URI in the next step.
Step 2: Create OAuth Client/App in Microsoft Azure Active Directory
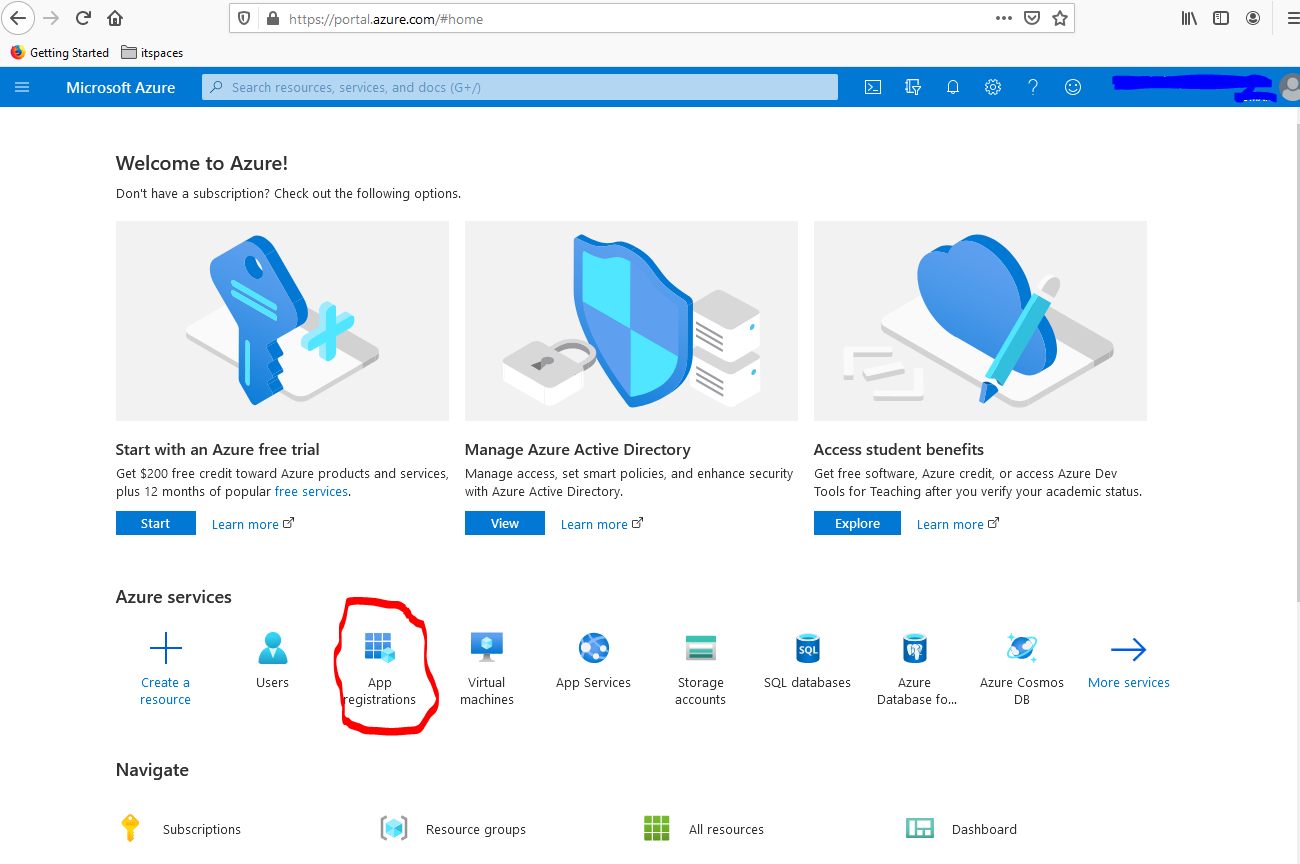
- Log into your Azure tenant by using https://portal.azure.com/
- Select “App registrations” under “Azure services”.
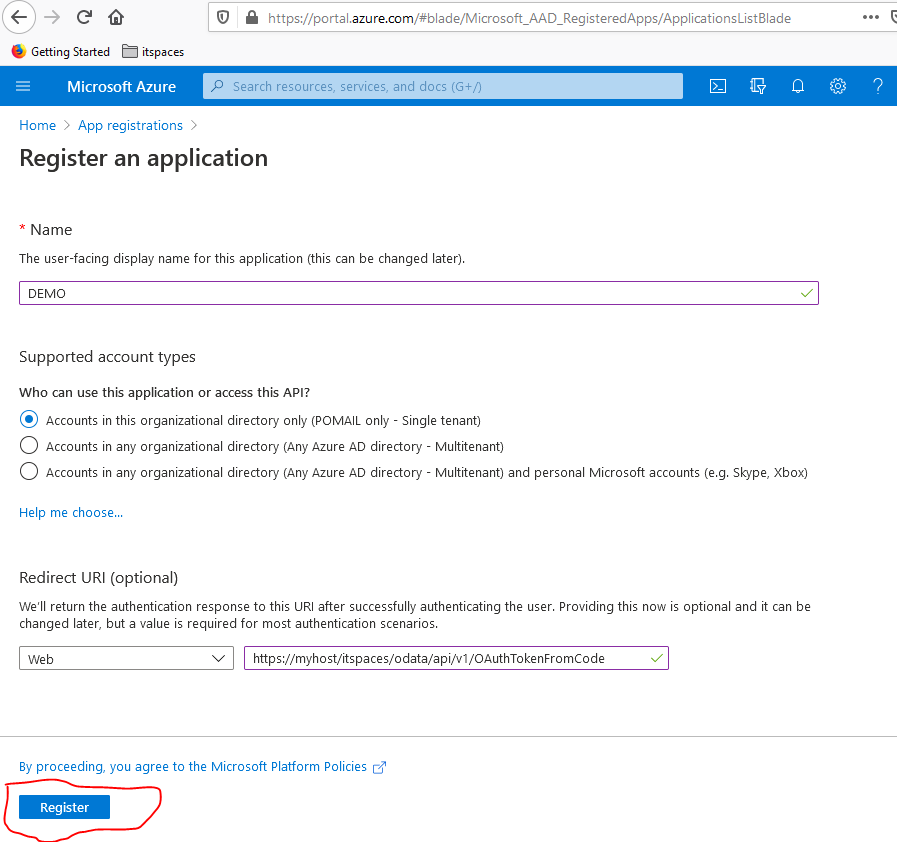
- Click on “New registration”, provide a name for your app, choose in the drop down “Select a platform” the value “Web“, and enter the redirect URI you determined at the beginning. Do not change the default setting for the “account types” (“Accounts in this organizational directory only”). After that, select “Register”.

 Save the Application (client) ID anywhere on your local desktop. You will need this ID later to configure the OAuth2 Credential in CPI.
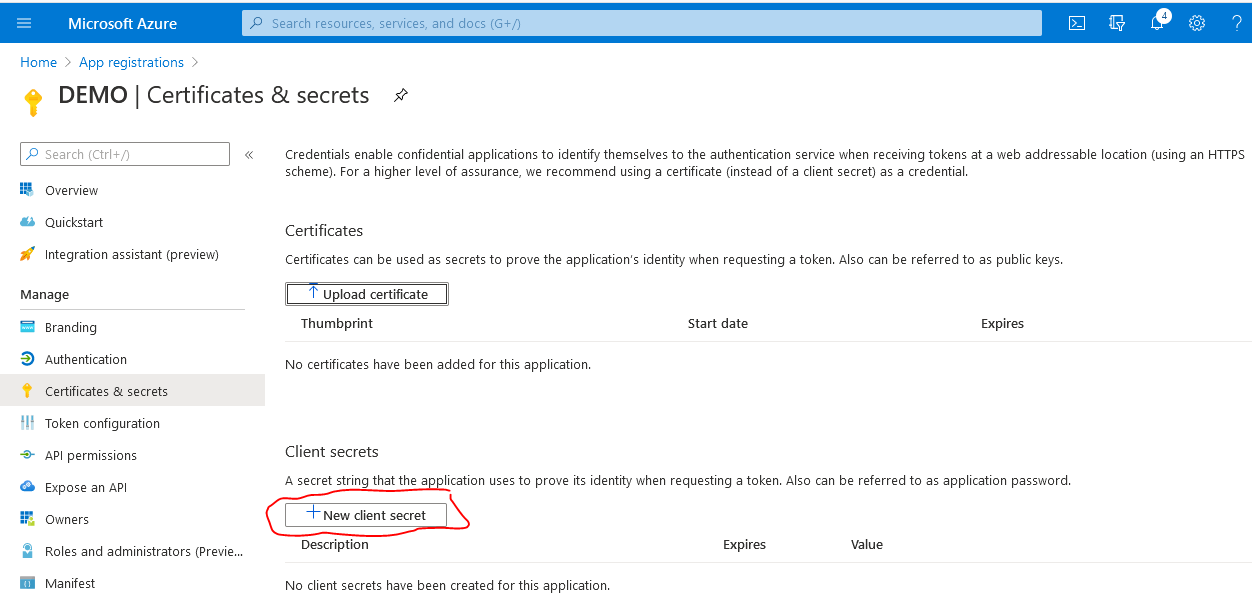
4. Choose “Certificates & secrets” in the menu on the left.
 5. Select “New client secret”, choose your preferred expiry period (“In 1 year”, “In 2 years” or “Never”). Optionally, you can also add a description. When you’re done, select “Add”.

Remark: Before the secret expires you have to create a new secret and transfer the new secret to the SAP CPI OAuth2 Authorization Code credential (see below).
6. Use the “Copy to clipboard” button to remember the created secret (you will need this later to configure the OAuth2 credential in CPI).

7. Go back to the “Overview” view of the app and select the “Endpoints” tab.

Copy the “OAuth 2.0 authorization endpoint (v2)” and the “OAuth 2.0 token endpoint (v2)” to your local desktop. You need these values later for the creation of the OAuth2 credential in Cloud Integration.
8. Choose “API permissions” in the menu on the left and check that the permission “Microsoft Graph User.Read” is configured. This permission should be there by default. If not then add it.
Step 3: Create OAuth2 Authorization Code Credential in your SAP Cloud Integration Tenant
Log into your Cloud Integration tenant via the URL https://<host name>/itspaces (for Cloud Integration) or the URL https://<host name>/shell/home (for Integration Suite). Change to the “Operations View” (press the eye icon), and select the “Security Materials” tile. Select the “Create” button and choose “OAuth2 Authorization Code”.
Enter a name for the Credential and the “Authorization URL”, “Token Service URL”, “Client ID”, and “Client Secret” from your Microsoft App.
Enter also a “User Name”. This is the e-mail address of the user whose mail resources you want to access in an integration flow. This user must exist in the same Microsoft Azure directory/tenant as the App created and must have an Outlook 365 account.
Enter the scope "https://graph.microsoft.com/Mail.Send"
Additionally, you need the scope “offline_access” for creating refresh tokens (if this scope is not added, SAP Cloud Integration will add this scope automatically). The scopes must be separated by a space.
The default value for the Refresh Token Expiry is set to 90 days for “Microsoft 365” (see: https://docs.microsoft.com/en-us/azure/active-directory/develop/active-directory-configurable-token-...). However, if the expiry time was changed for your Microsoft tenant, then adjust this value.
After clicking on the “Deploy” button, you see the newly created “OAuth2 Authorization Code” credential in the list of Security Materials in status “Unauthorized“.
Select the three dots in the entry with the created credential and choose the “Authorize” option.
A confirmation pop-up will come up. Select “Continue”:
A Microsoft login screen appears. Enter the password of the user you specified in the OAuth2 credential:After you’ve selected “Sign in”, a further pop-up comes up, indicating the requested permissions required by the app:

Select “Accept”. You should get a success message:
Return to your previous browser page and refresh the Security Materials list (button “Reload content”). The state of the “OAuth2 Authorization Code” credential changed to “Deployed”:

Step 4: Create Script Collection with a Groovy Script
The following Groovy script is the most important part of our scenario. The Groovy Script fetches the OAuth2 Access token from the Microsoft Identity server and creates the HTTP request body to be sent to Microsoft Graph.
We create a Script Collection so that the Groovy Script can be reused in several integration flows.
In the design view where you also create integration flows you can create a Script Collection:

Select the "Groovy Script" option:

Enter a name of the Groovy Script.
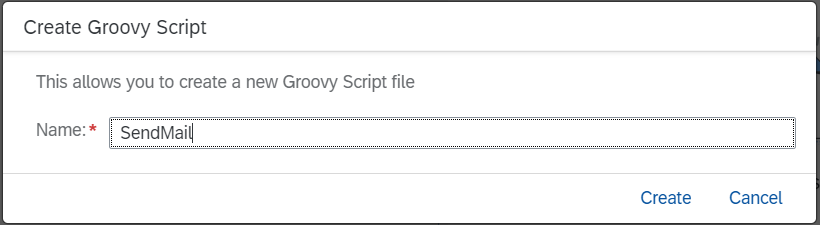
On the right side a pregenerated Groovy Script appears which we overwrite in the next step.
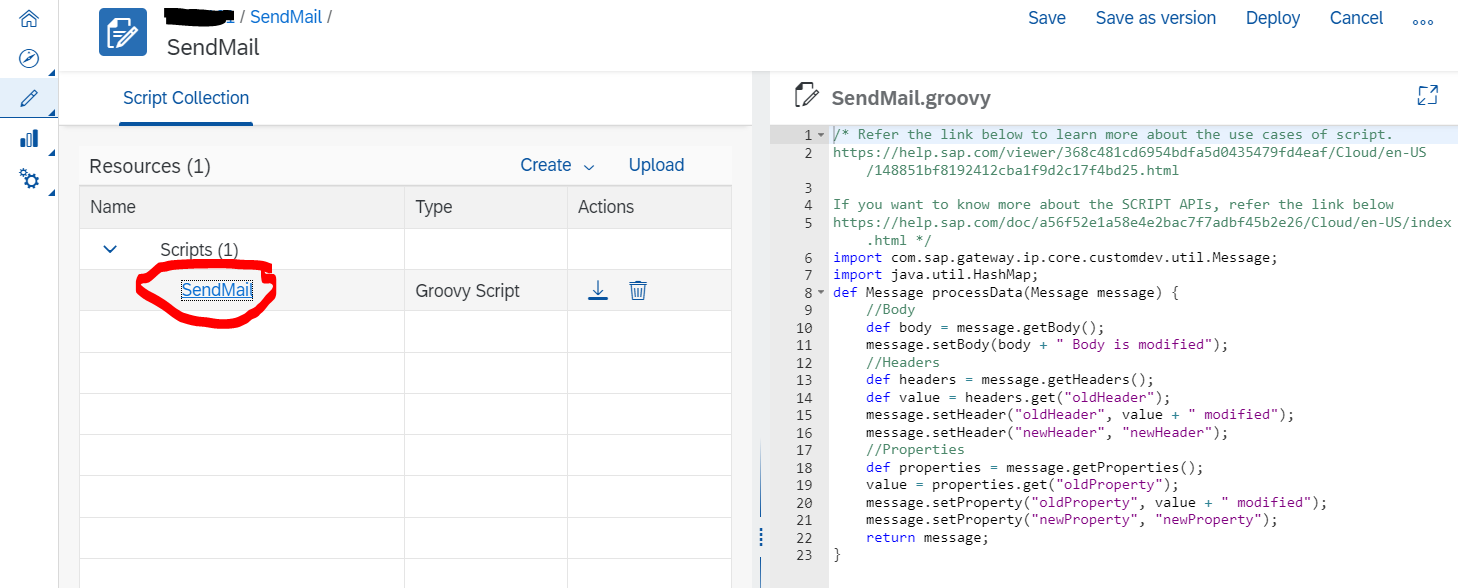
Enter in the Groovy Script Editor the following code:
/** This script fetches an access token from the OAuth2 Authorization Code credential whose name is provided

 * by the property "OAUTH2_AUTHORIZATION_CODE_CRED", sets the access token as Bearer token in the header "Authorization",

 * and creates a body in JSON format which can be sent to the Microsoft Graph API "https://graph.microsoft.com/v1.0/me/sendMail"

 * via the HTTP receiver adapter.

 *

 * The incoming message body is used as mail body and it is assumed the incoming message body has a charset encoding of UTF-8.

 *

 * The script is parametrized by the following properties:

 * - "OAUTH2_AUTHORIZATION_CODE_CRED": name of the OAuth2 Authorization Code credential created before (in our example: "SEND_MAIL_VIA_GRAPH_API")

 * - "MAIL_SAVE_TO_SENT_ITEMS": indicator whether to save the sent mail into the "Sent Items" folder of the mail account

 * - "MAIL_RECIPIENT": e-mail address of the mail recipient

 * - "MAIL_CC_RECIPIENT": optional e-mail address of the cc recipient

 * - "MAIL_SUBJECT": subject of the mail

 * - "MAIL_ATTACHMENT": optional property containing the base 64 encoded mail attachment

 * - "MAIL_ATTACHMENT_CONTENT_TYPE": content type of the mail attachment (example: "text/plain"), only necessary if MAIL_ATTACHMENT is provided

 * - "MAIL_ATTACHMENT_NAME": name of the mail attachment, only necessary if MAIL_ATTACHMENT is provided

 *

 * See also API description from Microsoft: https://learn.microsoft.com/en-us/graph/api/user-sendmail?view=graph-rest-1.0&tabs=http

 */


/* Refer the link below to learn more about the use cases of script.

https://help.sap.com/viewer/368c481cd6954bdfa5d0435479fd4eaf/Cloud/en-US/148851bf8192412cba1f9d2c17f...


If you want to know more about the SCRIPT APIs, refer the link below

https://help.sap.com/doc/a56f52e1a58e4e2bac7f7adbf45b2e26/Cloud/en-US/index.html */

import com.sap.gateway.ip.core.customdev.util.Message

import java.util.HashMap

import com.sap.gateway.ip.core.customdev.util.Message

import com.sap.it.api.securestore.SecureStoreService

import com.sap.it.api.securestore.AccessTokenAndUser

import com.sap.it.api.securestore.exception.SecureStoreException

import com.sap.it.api.ITApiFactory

import java.nio.charset.StandardCharsets

import groovy.json.JsonOutput

import java.util.Base64

import java.util.LinkedHashMap


def Message processData(Message message) {

     def properties = message.getProperties();


    SecureStoreService secureStoreService = ITApiFactory.getService(SecureStoreService.class, null);

    // fetch the name of the OAuth2 Authorization Code credential from the property "OAUTH2_AUTHORIZATION_CODE_CRED"

    String  oauth2AuthorizationCodeCred = properties.get("OAUTH2_AUTHORIZATION_CODE_CRED");

    if (oauth2AuthorizationCodeCred == null || oauth2AuthorizationCodeCred.isEmpty()){

        throw new IllegalStateException("Property OAUTH2_AUTHORIZATION_CODE_CRED is not specified")

    }

    // fetch access token

    AccessTokenAndUser accessTokenAndUser = secureStoreService.getAccesTokenForOauth2AuthorizationCodeCredential(oauth2AuthorizationCodeCred);

    String token = accessTokenAndUser.getAccessToken();


    // set the Authorization header with the access token

    message.setHeader("Authorization", "Bearer "+token);

    message.setHeader("Content-Type","application/json");


    MailMessage mailMessage = new MailMessage()

     String  mailSubject = properties.get("MAIL_SUBJECT");

    if (mailSubject == null || mailSubject.isEmpty()){

        throw new IllegalStateException("Property MAIL_SUBJECT is not specified")

    }

    mailMessage.subject = mailSubject


    // We assume here that the mail content is provided in the message body as byte array with UTF8 encoding

    // and that the content type is provided in the property MAIL_BODY_CONTENT_TYPE

    // 	Possible values vor the content type are  "text" and "html".

    String  contentType = properties.get("MAIL_CONTENT_TYPE");

    if (contentType == null || contentType.isEmpty()){

        throw new IllegalStateException("Property MAIL_CONTENT_TYPE is not specified")

    }

    byte[] messageBody =  message.getBody(byte[].class)

    if (messageBody == null){

         throw new IllegalStateException("Message body is null")

    }

    MailBody mailBody = new MailBody()

    mailBody.contentType = contentType

    mailBody.content = new String(messageBody,StandardCharsets.UTF_8) // we assume here that the message body is encoded in UTF8


    mailMessage.body = mailBody


    String  mailRecipient = properties.get("MAIL_RECIPIENT");

    if (mailRecipient == null || mailRecipient.isEmpty()){

        throw new IllegalStateException("Property MAIL_RECIPIENT is not specified")

    }

    EmailAddress emailAddress = new EmailAddress()

    emailAddress.address = mailRecipient


    MailRecipient recipient = new MailRecipient()

    recipient.emailAddress = emailAddress


    // you can also add more than one recipient

    mailMessage.toRecipients.add(recipient)


      //mailCcRecipient is optional

    String  mailCcRecipient = properties.get("MAIL_CC_RECIPIENT");

    if (mailCcRecipient != null && (! mailCcRecipient.isEmpty())){

        EmailAddress ccEmailAddress = new EmailAddress()

        ccEmailAddress.address = mailCcRecipient


        MailRecipient ccRecipient = new MailRecipient()

        ccRecipient.emailAddress = ccEmailAddress


        mailMessage.ccRecipients.add(ccRecipient)

    }


    // attachment is optional, attachment must be base 64 encoded

    String  attachment = properties.get("MAIL_ATTACHMENT");

    if (attachment != null && (! attachment.isEmpty())){

        String  attachmentContentType = properties.get("MAIL_ATTACHMENT_CONTENT_TYPE");

        if (attachmentContentType == null || attachmentContentType.isEmpty()){

            throw new IllegalStateException("Property MAIL_ATTACHMENT_CONTENT_TYPE is not specified")

        }

        String  attachmentName = properties.get("MAIL_ATTACHMENT_NAME");

        if (attachmentName == null || attachmentName.isEmpty()){

            throw new IllegalStateException("Property MAIL_ATTACHMENT_NAME is not specified")

        }

        Map<String,String> mailAttachment = new LinkedHashMap<>()

        mailAttachment.put("@odata.type","#microsoft.graph.fileAttachment")

        mailAttachment.put("name", attachmentName)

        mailAttachment.put("contentType", attachmentContentType)

        mailAttachment.put("contentBytes", attachment )

        // you can also add more than one attachment

        mailMessage.attachments.add(mailAttachment)

    }


    Mail mail = new Mail()

    mail.message = mailMessage;

    String  saveToSentItems = properties.get("MAIL_SAVE_TO_SENT_ITEMS");

    if (saveToSentItems == null || saveToSentItems.isEmpty()){

        // default value is true

        mail.saveToSentItems = true

    } else {

        boolean saveToSentItemsBoolean = Boolean.valueOf(saveToSentItems);

        mail.saveToSentItems = saveToSentItemsBoolean

    }


    String jsonBody = JsonOutput.toJson(mail)

    message.setBody(jsonBody.getBytes(StandardCharsets.UTF_8));


    return message;

}


class MailBody{


    String contentType = "Text"

    String content

}


class EmailAddress{

    String address

}


class MailRecipient{


    EmailAddress emailAddress


}


class MailMessage{


    String subject

    MailBody body

    List<MailRecipient> toRecipients = new LinkedList<MailRecipient>()

    List<MailRecipient> ccRecipients = new LinkedList<MailRecipient>()

    List<Map<String,String>> attachments = new LinkedList<Map<String,String>>()

    /* If you want to use "internetMessageHeaders" as described in https://learn.microsoft.com/en-us/graph/api/user-sendmail?view=graph-rest-1.0&tabs=http#example-2-cr..., then you enhance the MailMessage class. */

}


class Mail {


    MailMessage message

    boolean saveToSentItems }
The Groovy Script uses the following properties:
- OAUTH2_AUTHORIZATION_CODE_CRED: name of the OAuth2 Authorization Code credential created before (in our example: "SEND_MAIL_VIA_GRAPH_API")
- MAIL_SAVE_TO_SENT_ITEMS: indicator whether to save the sent mail into the "Sent Items" folder of the mail account
- MAIL_RECIPIENT: e-mail address of the mail recipient
- MAIL_CC_RECIPIENT: e-mail address of the cc recipient
- MAIL_SUBJECT: subject of the mail
- MAIL_ATTACHMENT: optional property containing the base 64 encoded mail attachment
- MAIL_ATTACHMENT_CONTENT_TYPE: content type of the mail attachment (example: "text/plain"), only necessary if MAIL_ATTACHMENT is provided
- MAIL_ATTACHMENT_NAME: name of the mail attachment, only necessary if MAIL_ATTACHMENT is provided
The Groovy Script uses the message body as input for the mail body and assumes that the message body has a char-set encoding of UTF-8.
The Groovy Script does only allow one recipient, one cc recipient and one attachment. If you want to use several recipients, several cc recipients, or several attachments, then you have to enhance the Script.
Deploy the Script Collection.
Step 5: Create Integration Flow with Script Step and HTTP Receiver Adapter
We create an integration flow with a script step which uses the created OAuth2 Authorization Code credential and a HTTP receiver adapter which calls the Microsoft Graph API. The following screenshot shows the integration flow we want to build:

Configuration of the HTTPS Sender Adapter

Configuration of the Content Modifier "Configure Mail"
The Content Modifier step "Configure Mail" contains the exchange properties for the Groovy Script step:

The properties MAIL_ATTACHMENT_..., MAIL_CC_RECIPIENT, and MAIL_SAVE_TO_SEND_ITEMS are optional. If MAIL_SAVE_TO_SEND_ITEMS is not set then the default setting "true" is used. See the Groovy Script above.
Groovy Script Step "Prepare Mail"
In the Groovy Script Step "Prepare Mail" we reference the Groovy Script from the Script Collection which we created before.
First you create a reference to the Script Collection:


Then you can reference the Script of the Collection in the Groovy Script step:


Request Reply Step "Call Microsoft Graph"
We create a "Request Reply" with name "Call Microsoft Graph" to which we connect a HTTP receiver adapter.

Configuration HTTP Receiver Adapter
Enter in the "Address" field "https://graph.microsoft.com/v1.0/me/sendMail",
choose "Authentication" "None",
and enter in the Request Headers "Authorization|Content-Type" (these headers are set in the Groovy Script):

Remove Headers Content Modifier
We call the HTTP receiver adapter in a request reply step because we want to clean-up headers after the call to Microsoft Graph. Therefore, we add the “Remove Headers” Content Modifier step after the “Request-Reply” step. Most importantly, we remove the “Authorization” header which is set by the script step and which contains the token. If we do not remove this header, the token will be part of the response to the sender and the sender could access this security relevant information.

Step 6: Execute the Integration Flow
To be able to call the integration flow endpoint, you need a user with the ESBMessaging.send role assigned. We assume here that you are familiar with setting up the basic authentication in your HTTP client (for example Postman); we do not explain the authentication part of the HTTP client.
After you’ve deployed the integration flow, you find the integration flow endpoint in the Operations View in the “Manage Integration Content” tile:

In the "Manage Integration Content" view you also see the deployed Script Collection "SendMail".
Now you can make a HTTP POST request from your HTTP client to this endpoint with a request body. The result will be that a mail is sent to the recipient you specified in the Content Modifier "Configure Mail". The mail body will be the body you used in the HTTP request. The subject of the mail will be the subject you specified in the property "MAIL_SUBJECT" of the Content Modifier "Configure Mail".
- SAP Managed Tags:
- SAP Integration Suite,
- Cloud Integration
Labels:
4 Comments
You must be a registered user to add a comment. If you've already registered, sign in. Otherwise, register and sign in.
Labels in this area
-
ABAP CDS Views - CDC (Change Data Capture)
2 -
AI
1 -
Analyze Workload Data
1 -
BTP
1 -
Business and IT Integration
2 -
Business application stu
1 -
Business Technology Platform
1 -
Business Trends
1,658 -
Business Trends
105 -
CAP
1 -
cf
1 -
Cloud Foundry
1 -
Confluent
1 -
Customer COE Basics and Fundamentals
1 -
Customer COE Latest and Greatest
3 -
Customer Data Browser app
1 -
Data Analysis Tool
1 -
data migration
1 -
data transfer
1 -
Datasphere
2 -
Event Information
1,400 -
Event Information
70 -
Expert
1 -
Expert Insights
177 -
Expert Insights
336 -
General
1 -
Google cloud
1 -
Google Next'24
1 -
GraphQL
1 -
Kafka
1 -
Life at SAP
780 -
Life at SAP
14 -
Migrate your Data App
1 -
MTA
1 -
Network Performance Analysis
1 -
NodeJS
1 -
PDF
1 -
POC
1 -
Product Updates
4,575 -
Product Updates
378 -
Replication Flow
1 -
REST API
1 -
RisewithSAP
1 -
SAP BTP
1 -
SAP BTP Cloud Foundry
1 -
SAP Cloud ALM
1 -
SAP Cloud Application Programming Model
1 -
SAP Datasphere
2 -
SAP S4HANA Cloud
1 -
SAP S4HANA Migration Cockpit
1 -
Technology Updates
6,872 -
Technology Updates
468 -
Workload Fluctuations
1
Related Content
- Tracking HANA Machine Learning experiments with MLflow: A technical Deep Dive in Technology Blogs by SAP
- SAP BTP FAQs - Part 1 (General Topics in SAP BTP) in Technology Blogs by SAP
- What’s New in SAP Analytics Cloud Q2 2024 in Technology Blogs by SAP
- How to create LLM based Chatbot for SAP HANA Cloud using RAG Application in Technology Blogs by SAP
- SAP Datasphere News in April in Technology Blogs by SAP
Top kudoed authors
| User | Count |
|---|---|
| 18 | |
| 12 | |
| 9 | |
| 8 | |
| 7 | |
| 7 | |
| 6 | |
| 6 | |
| 6 | |
| 6 |