
- SAP Community
- Products and Technology
- Technology
- Technology Blogs by SAP
- Building useful components with Lumira composites ...
Technology Blogs by SAP
Learn how to extend and personalize SAP applications. Follow the SAP technology blog for insights into SAP BTP, ABAP, SAP Analytics Cloud, SAP HANA, and more.
Turn on suggestions
Auto-suggest helps you quickly narrow down your search results by suggesting possible matches as you type.
Showing results for
former_member18
Contributor
Options
- Subscribe to RSS Feed
- Mark as New
- Mark as Read
- Bookmark
- Subscribe
- Printer Friendly Page
- Report Inappropriate Content
02-04-2020
6:11 PM
In this blog post series I want to show, how to add additional functionality to an SAP Lumira Application. I will show how a "Composite" component can be used to add additional functionality to Lumira applications, where in Design Studio only an SDK component could do the job.
Introduction
The basics and general scripting to do this, have already been explained in some other blog posts (thanks to reiner.hille-doering, michael.jung2 and others), but I thought it would be worth to show the way step-by-step to combine it in a real-life example I recently created for a Proof of Concept.
The goal was to have a visualization component, that is capable to show images in a dynamic way and ineract with them. That means the images are driven by a data source, they can be filtered and selected, and the visual appearance is dynamic and configurable.
In Part 1 I showed how to start developing the component from scratch and bring it into a first testable version. If you did not read Part 1 of this blog post series, please do so here:
Building useful components with Lumira composites – Dynamic Images Part 1
In this Part 2 I will lift some limitations of the current version, make the component more flexible and add functionality to it, so one can finally use it in various scenarios.
Limitations of the Part 1 version
The Part 1 version of the composite is good to demo the functionality, but it has the following limitations, which prevents it from beeing used in "real-life"-scenarios:
I will now remove each one of these limitations set-by-step.
Dynamic data source
The data source of the image data is already beeing passed in to the composite via the interface parameter "inDataSource". But so far we are doing the selection of the images with a fixed dimension value (e.g. "DS:2,DIM:id_11"), specific to our sample data source.
To change this behavior, I add another interface parameter called "inImageUrlDimension" with type "String":

Then I adjust the Global Script function "createImages()" to utilize this parameter as dimension to select the image urls from the data source. I change the selection criteria from former definition
to
This let's me pass in the dimension of the datasource, which holds the image URLs, dynamically from the application using our component.
Dynamic image resizing
So far the dimensions of the images are defined by the width and height properties of the IMAGE_TEMPLATE and the height property of the BLOCK_TEMPLATE we used so far to create the objects and set/copy their properties. This was hardcoded in the version 1 of the component.
To change this behavior, I add two new interface parameters called "inImageWidth" and "inImageHeight" with type "int":

Then I adjust the Global Script function "createImages()" to utilize these parameters to set the width and height of the images and blocks while creating them within the script:
Remark
A block object does only have a height property, hence only has a setHeight()-function.
Triggering actions on image selection
One of the most important things of this component is the interaction between the composite and the embedding application. Specifically this means if you click on an image, you want to recognize and get an information about the image clicked. With this you can e.g. filter a datasource/chart for a selected image-content.
To enable this feature I first need an interface event and I call it "imageClicked":

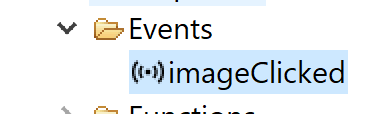
This event should be fired every time an image is clicked and this can later on be detected by the application using the composite.
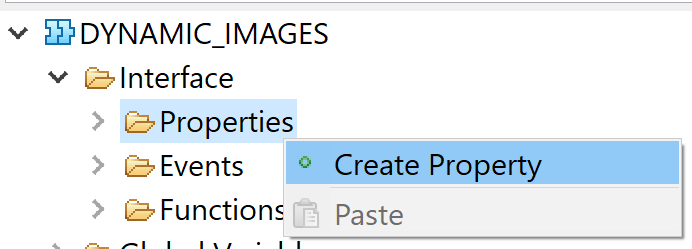
Since we cannot pass any value directly in the event itself, we need to create a global variable "gImageIDClicked" with type "String":


and an interface function through which the embedding application will be able to get the image id, that was clicked, from the composite:

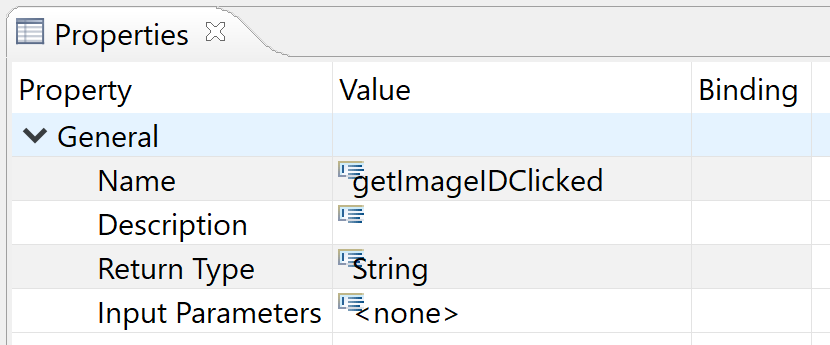
This function acts as the "getter" for the global variable "gImageIDClicked" and just returns it's value:

So far I only have one "dynamic" dimension of the datasource ("inImageUrlDimension", see above). In our case we don't want to return the Url of the image displayed, but an ID associated with the image. To make this in the same way dynamic as I did for the Url dimension, I need another interface property for passing in the images' ID dimension. I call it "inImageIDDimension" and it has the type "String":

Now that I have all things created I need, I will put it together in a new Global Script function called "imageClicked":


This function has a String input parameter "imageUrl" and no return type:

The script will create a selection object with the passed in imageUrl and the imageIDDimension and find the corresponding image ID for the given imageUrl in the datasource. It then stores the ID in the global variable "gImageIDClicked" and fires the event "imageClicked".
The code is:
The last step is to add this function to the onClick()-Event of the IMAGE_TEMPLATE object and pass in the actual images Url:

Since all image objects are copied from this template object, "this.getImage()" will do the trick:
That's it. Now I will show you, how to use the new features in the sample application.
Utilizing new functionality in the sample application
If you remember the sample application from the first part of this blog post series, you will recognize there are some new interfaces available in the image composite now:

We see here the ImageUrl- and ImageID-dimensions of our datasource ("DS:2,DIM:id_11" and "DS:2,DIM:id_5" in our case), the actual height and width of the images and the imageClicked-event.
Hint:
You may find the image dimensions of your datasource e.g. through the dimension selection of a dimension-filter object:

As you may see in the screenshot above, everytime you filter the datasource you need to call the update()-function of the dynamic images composite to reflect the changes here!
In the imageClicked()-event of the composite we just open an alert-windows to show the actual selected image's ID using the following code:
We can get the ID using the getImageIDClicked() function.
When running the sample application and clicking on one of the pictures, we see the result:

Of course we could also use the ID to filter or drill-down in some other datasources.
Outcome
Now our dynamic image composite is ready for using in real-life-scenarios and was already successfully presented in a customer proof-of-concept.
Thanks and have fun with this component!
Introduction
The basics and general scripting to do this, have already been explained in some other blog posts (thanks to reiner.hille-doering, michael.jung2 and others), but I thought it would be worth to show the way step-by-step to combine it in a real-life example I recently created for a Proof of Concept.
The goal was to have a visualization component, that is capable to show images in a dynamic way and ineract with them. That means the images are driven by a data source, they can be filtered and selected, and the visual appearance is dynamic and configurable.
In Part 1 I showed how to start developing the component from scratch and bring it into a first testable version. If you did not read Part 1 of this blog post series, please do so here:
Building useful components with Lumira composites – Dynamic Images Part 1
In this Part 2 I will lift some limitations of the current version, make the component more flexible and add functionality to it, so one can finally use it in various scenarios.
Limitations of the Part 1 version
The Part 1 version of the composite is good to demo the functionality, but it has the following limitations, which prevents it from beeing used in "real-life"-scenarios:
- It is "hardcoded" to the sample datasource used so far
- The images cannot be dynamically resized
- The images cannot be selected to trigger filter- or drill-events in the application
I will now remove each one of these limitations set-by-step.
Dynamic data source
The data source of the image data is already beeing passed in to the composite via the interface parameter "inDataSource". But so far we are doing the selection of the images with a fixed dimension value (e.g. "DS:2,DIM:id_11"), specific to our sample data source.
To change this behavior, I add another interface parameter called "inImageUrlDimension" with type "String":
Then I adjust the Global Script function "createImages()" to utilize this parameter as dimension to select the image urls from the data source. I change the selection criteria from former definition
var selections = inDataSource.getDataSelections({

  "DS:2,DIM:id_11": "?"

});

// Loop through the dataset and get the image URL:

selections.forEach(function(sel, index) {

  // Get the dimension member for each selection:

  var m = inDataSource.getMember("DS:2,DIM:id_11", sel);

...

}
to
var actDimension = inImageUrlDimension; // e.g. ("DS:2,DIM:id_11")

var dimValue ="?";


var sel=Convert.stringToDataSelection();

sel[actDimension] = [dimValue];


var selections = inDataSource.getDataSelections(sel);


// Loop through the dataset and get the image URL:

selections.forEach(function(sel, index) {

	// Here we would need to adjust the dimension name to a different datasource:

	var m = inDataSource.getMember(actDimension, sel);

...

}
This let's me pass in the dimension of the datasource, which holds the image URLs, dynamically from the application using our component.
Dynamic image resizing
So far the dimensions of the images are defined by the width and height properties of the IMAGE_TEMPLATE and the height property of the BLOCK_TEMPLATE we used so far to create the objects and set/copy their properties. This was hardcoded in the version 1 of the component.
To change this behavior, I add two new interface parameters called "inImageWidth" and "inImageHeight" with type "int":
Then I adjust the Global Script function "createImages()" to utilize these parameters to set the width and height of the images and blocks while creating them within the script:
...

	// Create a new image:

	image = COMPONENTS.createComponent(ComponentType.Image, block);

	// copy properties from an empty template image:

	COMPONENTS.copyProperties(IMAGE_TEMPLATE, image);

	// set some additional properties:

	image.setImage(imageUrl);

	image.setVisible(true);

	image.setHeight(inImageHeight);

	image.setWidth(inImageWidth);


	// add the block to the gBlocks global variable for later removal:

	gBlocks.push(block);

});


// Adjust block height:

var blocks = ADAPTIVE_LAYOUT_MAIN.getChildren();

blocks.forEach(function(element, index) {

  element.setHeight(inImageHeight);

});
Remark
A block object does only have a height property, hence only has a setHeight()-function.
Triggering actions on image selection
One of the most important things of this component is the interaction between the composite and the embedding application. Specifically this means if you click on an image, you want to recognize and get an information about the image clicked. With this you can e.g. filter a datasource/chart for a selected image-content.
To enable this feature I first need an interface event and I call it "imageClicked":
This event should be fired every time an image is clicked and this can later on be detected by the application using the composite.
Since we cannot pass any value directly in the event itself, we need to create a global variable "gImageIDClicked" with type "String":
and an interface function through which the embedding application will be able to get the image id, that was clicked, from the composite:
This function acts as the "getter" for the global variable "gImageIDClicked" and just returns it's value:
So far I only have one "dynamic" dimension of the datasource ("inImageUrlDimension", see above). In our case we don't want to return the Url of the image displayed, but an ID associated with the image. To make this in the same way dynamic as I did for the Url dimension, I need another interface property for passing in the images' ID dimension. I call it "inImageIDDimension" and it has the type "String":
Now that I have all things created I need, I will put it together in a new Global Script function called "imageClicked":
This function has a String input parameter "imageUrl" and no return type:
The script will create a selection object with the passed in imageUrl and the imageIDDimension and find the corresponding image ID for the given imageUrl in the datasource. It then stores the ID in the global variable "gImageIDClicked" and fires the event "imageClicked".
The code is:
// Now that we know the images Url, that was passed in, we need to get the ID matching the Url from the datasource:

var actImageUrlDimension = inImageUrlDimension; // e.g. ("DS:2,DIM:id_11")

var actImageIDimension = inImageIDDimension; // e.g. ("DS:2,DIM:id_5")


var dimUrlValue =imageUrl;

var dimIDValue ="?";


var sel=Convert.stringToDataSelection();

sel[actImageUrlDimension] = [dimUrlValue];

sel[actImageIDimension] = [dimIDValue];


var selections = inDataSource.getDataSelections(sel);


// Loop through the dataset and get the image URL:

selections.forEach(function(sel, index) {

	// Here we would need to adjust the dimension name to a different datasource:

	var m = inDataSource.getMember(actImageIDimension, sel);


	// Save the image ID found to the global var for later pick up (by getImageID):

	var imageID= m.text;

	gImageIDClicked=imageID;

});


// finall fire the event:

COMPOSITE.fireEvent("imageClicked");
The last step is to add this function to the onClick()-Event of the IMAGE_TEMPLATE object and pass in the actual images Url:
Since all image objects are copied from this template object, "this.getImage()" will do the trick:
GLOBAL_SCRIPTS_DYNAMIC_IMAGES.imageClicked(this.getImage());That's it. Now I will show you, how to use the new features in the sample application.
Utilizing new functionality in the sample application
If you remember the sample application from the first part of this blog post series, you will recognize there are some new interfaces available in the image composite now:
We see here the ImageUrl- and ImageID-dimensions of our datasource ("DS:2,DIM:id_11" and "DS:2,DIM:id_5" in our case), the actual height and width of the images and the imageClicked-event.
Hint:
You may find the image dimensions of your datasource e.g. through the dimension selection of a dimension-filter object:
As you may see in the screenshot above, everytime you filter the datasource you need to call the update()-function of the dynamic images composite to reflect the changes here!
In the imageClicked()-event of the composite we just open an alert-windows to show the actual selected image's ID using the following code:
APPLICATION.alert("ID "+DYNAMIC_IMAGES_1.getImageIDClicked()+" clicked!");We can get the ID using the getImageIDClicked() function.
When running the sample application and clicking on one of the pictures, we see the result:
Of course we could also use the ID to filter or drill-down in some other datasources.
Outcome
Now our dynamic image composite is ready for using in real-life-scenarios and was already successfully presented in a customer proof-of-concept.
Thanks and have fun with this component!
- SAP Managed Tags:
- SAP Lumira,
- User Interface
Labels:
4 Comments
You must be a registered user to add a comment. If you've already registered, sign in. Otherwise, register and sign in.
Labels in this area
-
ABAP CDS Views - CDC (Change Data Capture)
2 -
AI
1 -
Analyze Workload Data
1 -
BTP
1 -
Business and IT Integration
2 -
Business application stu
1 -
Business Technology Platform
1 -
Business Trends
1,658 -
Business Trends
95 -
CAP
1 -
cf
1 -
Cloud Foundry
1 -
Confluent
1 -
Customer COE Basics and Fundamentals
1 -
Customer COE Latest and Greatest
3 -
Customer Data Browser app
1 -
Data Analysis Tool
1 -
data migration
1 -
data transfer
1 -
Datasphere
2 -
Event Information
1,400 -
Event Information
68 -
Expert
1 -
Expert Insights
177 -
Expert Insights
311 -
General
1 -
Google cloud
1 -
Google Next'24
1 -
GraphQL
1 -
Kafka
1 -
Life at SAP
780 -
Life at SAP
13 -
Migrate your Data App
1 -
MTA
1 -
Network Performance Analysis
1 -
NodeJS
1 -
PDF
1 -
POC
1 -
Product Updates
4,576 -
Product Updates
355 -
Replication Flow
1 -
REST API
1 -
RisewithSAP
1 -
SAP BTP
1 -
SAP BTP Cloud Foundry
1 -
SAP Cloud ALM
1 -
SAP Cloud Application Programming Model
1 -
SAP Datasphere
2 -
SAP S4HANA Cloud
1 -
SAP S4HANA Migration Cockpit
1 -
Technology Updates
6,873 -
Technology Updates
444 -
Workload Fluctuations
1
Related Content
- SAP Datasphere + SAP S/4HANA: Your Guide to Seamless Data Integration in Technology Blogs by SAP
- Introducing the New E-learning ‘Clean Core with SAP Business Technology Platform’ in Technology Blogs by SAP
- SAP Fiori for SAP S/4HANA - Empowering Your Homepage: Enabling My Home for SAP S/4HANA 2023 FPS01 in Technology Blogs by SAP
- Supporting Multiple API Gateways with SAP API Management – using Azure API Management as example in Technology Blogs by SAP
- Consuming SAP with SAP Build Apps - Mobile Apps for iOS and Android in Technology Blogs by SAP
Top kudoed authors
| User | Count |
|---|---|
| 18 | |
| 16 | |
| 12 | |
| 11 | |
| 9 | |
| 8 | |
| 8 | |
| 8 | |
| 7 | |
| 7 |