=> THIS BLOG WAS CREATED FOR OLDER VERSIONS OF SAP BUSINESS ONE, AND B1i BUSINESS ONE INTEGRATION FRAMEWORK (this comment is done on 26.03.2018).!!!!
INTRODUCTION:
The functionality of Electronic Documents CFDI for Mexican Localization provided by SAP Business One can be affected by changes on the PACs companies that provide the service ‘sello’.
When the functionality was released, in SAP Note 1580236 there was an attachment containing a cacerts file with all the web certificates for Edicom, Levicom and Tralix.
This cacerts, might contain a certification that even if it was valid when the SAP Note 1580236 was released, can experience changes or expire for one of the PACS
Here I show a sample related to a recent case with Edicom, on how to add the new certification:
On December 2012 users of PAC Edicom have received an e-mail/letter telling the following:
The web certificate used by Edicom to secure the communication channel to web.sedeb2b.com will expire on Dec. 23th. This site contains our Digital Tax Stamps Generation Service for CFDI, that you have hired/accredited with us.
A new certificate has been created (download certificate) and it will be activated on Dec. 13th 09:00 (UTC-6)
This communication came together a link from where to download the new web certificate
How can I add this new web certificate to the existing certificates contained in the cacerts file of the SAP Note 1580236 ?
UPDATE: Later after this post was created, it was decided to include the updated cacerts in SAP Note 1580236, just for the use of customers that are in a transitory maintenance and use scenario versions that did not include the cacerts in the scenario package itself.
Never the less I kept this blog in case that it was required.
STEP 1: DOWNLOAD THE FILE PROVIDED BY PAC WITH NEW CERTIFICATE
Edicom has provided a link to download the new certificate by e-mail, contact with them if not:
the file that they provide is called ‘web.sedeb2b.com.p7b’ contained in zip file, or it can have a different name in a new change
You can download the zip file containing the file called in this example ‘web.sedeb2b.com.p7b’ in any place that you consider right.
 STEP 2: INSTALL THE CERTIFICATE
Double click in the file ‘web.sedeb2b.com.p7b’ and follow all steps as marked by the import wizard.
You can trigger this installation as well by right click on the file and select option ‘Install Certificate’
STEP 3: CONVERT THIS FILE IN .CER
The certificate file ‘web.sedeb2b.com.p7b’ as it is needs to be converted in .cer file in order to be added to the current ‘cacerts’ file that SAP Business One Support provided in the SAP Note 1580236
3.1 Open the direct command as an administrator and type the command ‘certmgr.msc’ and press ‘ENTER’

This will open the certificates browser window

3.2 Browse to the folder ‘Other People/Certificates’ where you can find the certificate file ‘web.sedeb2b.com.p7b’

Right click with the mouse on the file ‘web.sedebe2b.com’ and in ‘All Tasks’ select ‘Export’ to open the export wizard

3.3 After press ‘Next’, in following window select the option ‘Base-64 encoded X.509 (.CER)’

3.4 After pressing ‘Next’, a browser will open to give a name to the .cer file that will be created and as well the path to where you want to store the file.
In this example I will store it in the same place where I initially saved the ‘web.sedeb2b.com.p7b’ and I will call it ‘EdicomNew’ and press ‘Save’

3.4 press ‘Next’ until the message telling ‘Export was successful’ is displayed, ad press ‘Finish’.
As a results of this you have a new file called EdicomNew.cer in the selected folder
 STEP 4: ADD CERTIFICATE TO THE EXISTING CACERTS
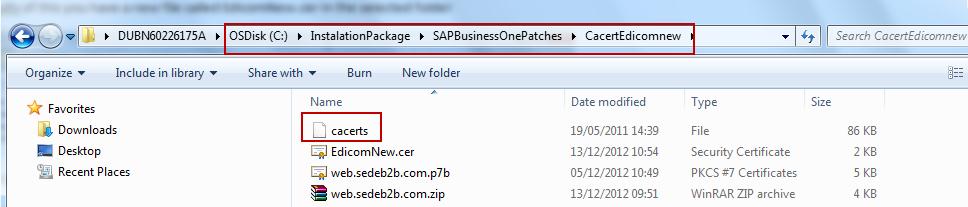
4.1 before going any further, do copy the current cacerts that you downloaded from the note in somewhere safe, in my example I will store it in the same place where I am storing everything
4.2 Copy the .cer file created in step 3.4, in my example ‘EdicomNew.cer’ into the folder ‘bin’ of your java application folder.
In my example, I will use the java that is provided with SAP Business One Integration, but you may use a different java that you have installed in your machine:
C:\Program Files (x86)\SAP\SAP Business One Integration\sapjre_6_64\jre\bin

4.3 Ensure that in that java bin folder a file called ‘keytool.exe’ exists

4.4 Open the direct command as an administrator and and change the directory to where the keytool.exe is located:
syntax: cd [the path]
my example:
cd
C:\Program Files (x86)\SAP\SAP Business One Integration\sapjre_6_64\jre\bin

4.5 Type ‘keytool.exe’ and press enter, the line of usable commands for keytool should open, from which we see the syntax for the instruction that we will need to execute:
‘-importcert’

4.6 In the same root type the following command and press ‘ENTER’
Syntax:
keytool -importcert -file <Thefilecreatedin step 3.4> -keystore "<full path to the file where the cacert was stored in step 4.1>"
In my example:
keytool -importcert -file EdicomNew.cer -keystore "C:\InstalationPackage\SAPBusinessOnePatches\CacertEdicomnew\cacerts"
4.7 Here the command prompt will ask you for a password, do enter ‘changeit’ and press ‘ENTER’

4.8 the line of command will ask you if you trust, you must type ‘yes’ and press ‘ENTER’

A message must say that certificate was added to keystore

If you check now the cacerts file of step 4.1 you will see that is not anymore date 19/05/2012 but the day of today 13/12.2012
 STEP 5: CHANGE THE CACERTS
swap the current cacerts that is located in the security folder of java, that was used until now, for the new cacerts.
We do recommend renaming the existing one before swap

You can see here that I backed up the cacerts that was in use ‘cacertsNote’, and as well the original cacerts that came with the java installation ‘cacertsOriginal’
STEP 6: RE START SAP BUSINESS ONE INTEGRATION SERVICE
To ensure changes in java have been taken by Integration solution for SAP Business One
STEP 7: TEST CONNECTION
In Integration Framework, in SLD select the SLD of Edicom MX-WS-EDICOM and test connection to ensure that new web certificate is ok

Last Reminder
PACs can change thieir data connection: destProtocol, destHost, desPort, desPath to provide this service, and you should contact with the PAC to ensure that your data for connection are correct, and for the right service and that you have the right user name and password
