I have recently had the pleasure to be able to play around with SAP Screen Personas and have really enjoyed experimenting with the scripting.
For those that are familiar with SAP Inside Track events or were at Mastering SAP Technologies in Johannesburg you may have seen the presentation where an end to end mobile application is created inside 40 minutes. The steps include creating the model and runtime classes in an ERP system and enabling the model and service in the IMG. This step takes around 20 minutes. I thought I would try to automate this step with SAP Screen Personas and was able to reduce the time to less that 2 minutes with scripting.
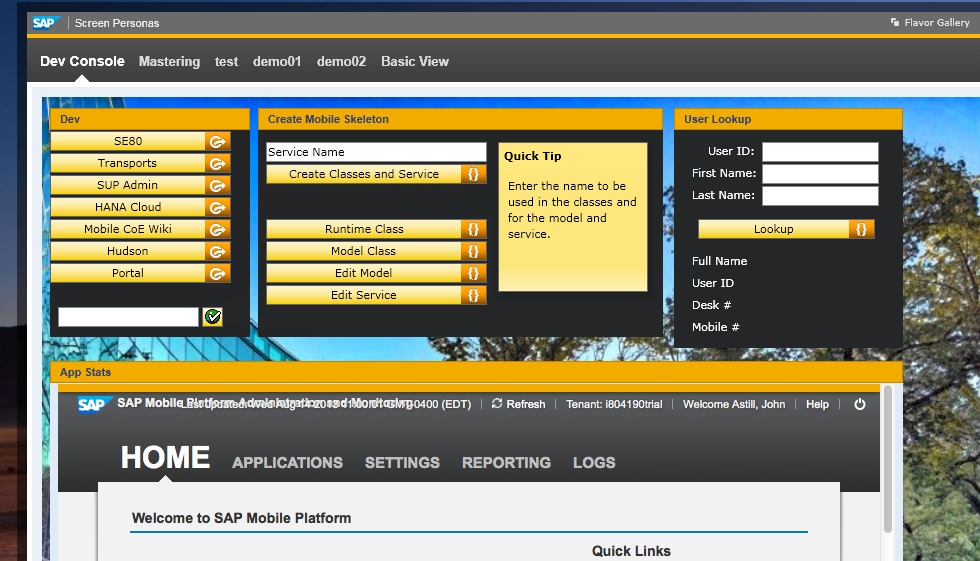
The screen below is my flavor that I use in my development system on a daily basis, actually my home page. Common tasks and pages I need to access I have in one group, another group for automating the class creation, one for user lookup (I have a mac, this is the easiest way) and the last I embed my cloud account page.
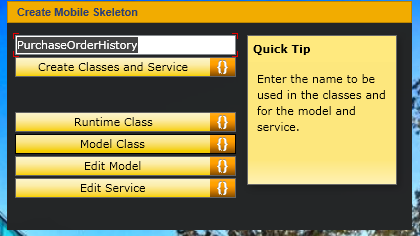
The middle group "Create Mobile Skeleton" is the one we will focus on. When creating an OData application we typically start with two class, the model class and the runtime class. The model (as the name suggests) provide the entities for the model, and the runtime implements the runtime handling e.g. GetEntitySet. Once these classes are created the model and service then need creating in the IMG. Those steps can be seen as distinct buttons at the bottom of the group.
To perform all 4 of these step we need only provide the ServiceName and press the button "Create Classes and Service" .
The resultant script is 857 lines long. That might sound daunting but to create it was relatively straightforward. A series of 5 recordings was used, with the contents of each script then merged together with an external editor.
The first step (flavor already existed) was to create the input field and script button within a group.
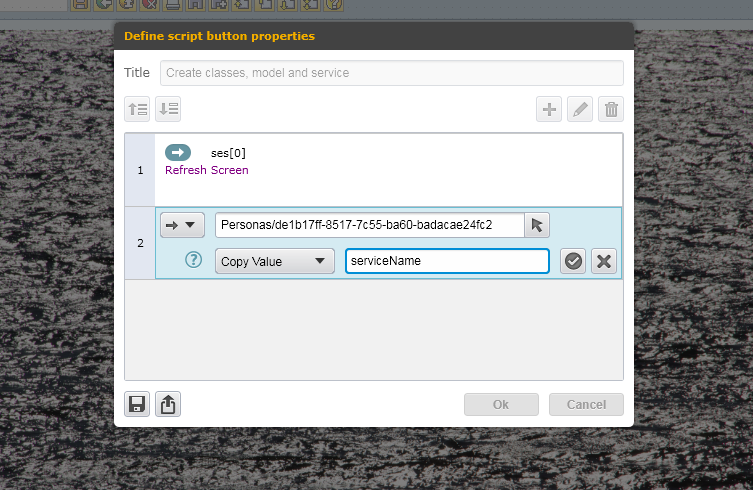
With the UI pieces in place the next step is to create the initial part of the script in the script editor:
Row 1: refreshes the screen
Row 2: the value in the textfield is copied into the variable 'serviceName'. This variable will be used later when created the class and service names.
Save the script locally, this will be used later to be combined with other script fragments.
The next step was is to start in the Basic view. Start a recording and execute all of the transactions in the process. For this scenario that includes calling SE24 twice (once for model class and once for service class), transaction /iwbep/reg_model to register our model and /iwbep/reg_service to register our service.
During the class, model and service creation, the names used were noted. These are used later in the script editing as placemarkers to easily identify where we need to paste a variable value. We need to replace those values with new values created from the serviceName variable we get in the first step.
After all the steps were complete the recording was saved. This resulted in over 800 lines of script.
From the 2 text files we now have we need to merge them. To merge the files I use a JSON Editor in Eclipse, the text formatting makes seeing each step within the script more visible. My demo is created in an SP00 system so you won't see line numbers or comments that came with SP01.
As can be seen the script is stored as JSON, with the formatting it makes it very easy to read.
The script initially created does not include any imperative logic, so it is a linear series of steps inside the "Actions" array (as seen above). Both scripts are opened in Eclipse and the JSON Objects from the actions entries from the first script inserted into the start of the "Actions" array of the second script.
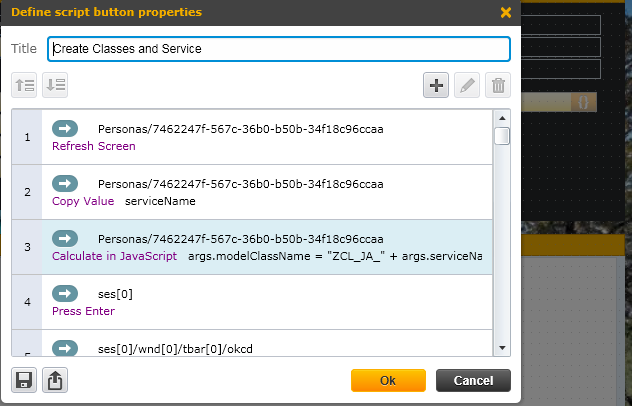
This now gives us one long script that we can work with. We can either edit this in the JSON editor or upload back into the script button. Uploading into the script button allows us to more easily edit the steps without having to know what Action 8192 is.
The remaining steps are to create the class, model and service names using a javascript. For the subsequent steps we need four names, model class name, service class name, model name and service name. For each of these a javascript entry is used to create the variable name. As can be seen below, the access to the variables in javascript entries is preceded with "args.".
Scanning through the script for the names that were noted down when recording the transactions, the steps were then replaced. The recorded script will have an "Enter Value" step. This needed replacing with a "PasteValue" step that pastes the values from variables created with javascript entries into the respective fields.
This is an example of the Enter Value but not the exact one changes (the eagle eyed will spot that this is where the superclass is set).
The Paste Value with the class name.
Once the four Enter Value steps were replaced with Paste Value the script is complete and ready to run.
The initial script works well but did not include an error handling. Validation of the entered data and a status response are next on my list of enhancements. The initial script is included as an attachment to this blog.
If there is enough interest I can also create a video of how I created the script and update the blog.