I have configured my SAP NetWeaver AS ABAP 7.02 SP6 32-bit Trial Version for developing and testing my custom workflows just for the purpose of learning. Here I share with the community how I did this in a step by step manner.
Introduction
SAP Business Workflow allows to automate business processes resulting in enhanced efficiency and performance of business processes. The purpose of SAP Business Workflow is that during the execution of business process, right person gets the right work delivered at the right time. SAP provides hundreds of prebuilt workflow templates for different business processes with its Business Application packages. You can also develop custom workflows if you want. I describe here the configuration steps those are required to develop and run workflows successfully on SAP NetWeaver AS ABAP 7.02 SP6 32-bit Trial Version.
Configuration for running Workflows.
Step 1
Ensure that you are logged in with a user having super-administrator authorization.
Execute the Transaction SWU3.
Menu Path: Tools -> Business Workflow -> Development ->Utilities->Automatic Workflow Customizing
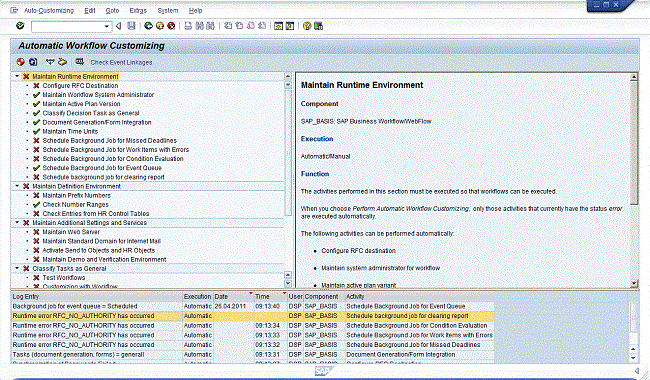
The following figure shows the transaction initial screen.

Red crosses in rows in left pane indicate that these customizing activities have not yet been performed.
Step 2
Select the Maintain Runtime Environment node and click on Perform Automatic Workflow Customizing button on application toolbar. You may get a popup asking you that RFC User has wrong password and weather to synchronize passwords as shown in figure.

Click on Yes. The system starts to perform customizing activates. After few seconds many of the rows with red crosses under the Maintain Runtime Environment node changes to rows with green check marks as shown in figure. Also in the lower pane of screen a log of activities appears as shown in following figure.

Step 3
Note the rows in the activities log showing RFC_NO_AUTHORITYerror. This is because system has created user WF-BATCH for background processing of different workflow activities but this background user needs some authorizations explicitly assigned to it. So execute transaction SU01. In the user field enter user WF-BATCHand click on change button on application toolbar. On the next screen select Profilestab page and assign authorization profile SAP_ALL for this background system user to be used by SAP Workflow Runtime Environment as shown in figure below and then save the changes you have made.

Step 4
Now again repeat Step 2 for the node Maintain Runtime Environment. Now this time it should be completed without any error messages.

Step 5
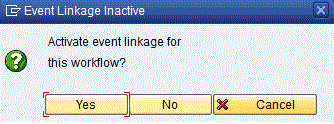
Now click on Start Verification Workflow button . After a few seconds a popup will appear as shown.

Click on Yes. And then again after a few seconds, systems informs with the popup telling that Verification workflow started. This confirms the fact that SAP Workflow Runtime Environment is working fine.
Step 6
Now execute transaction SO01 (SAP Business Workplace). You can also start this on SAP Easy Access Menu by clicking on button . Then click to Inbox. Here you will see a SAP Workflow Work Item in your inbox having title “First step in workflow verification” as shown in figure.

Now select this work item and click on Execute button . The work item executes this step and a screen appears having title “First step in workflow verification” as shown below.

Click on option Execute background step immediately. The workflow work item executes the step and work item disappears from inbox and two emails appear in your inbox. First email informs that first step of workflow was completed successfully and user made the user decision. The second email informs that Verification workflow completed correctly & The system has been configured correctly. That’s it. You have successfully configured your system for SAP Workflow execution.
For developing and testing custom workflows some manual configuration will be required which I'll describe in second part of this blog.
