How to create customer attributes for projects – Part 2
This blog is a continuation of the blog “How to create customer attributes for projects – Part 1”: How to create customer attributes for projects – Part 1 .
The steps presented in the two blogs (Part 1 and Part 2) explain:
- The difference between customer attributes for objects and project keywords (Part 1)
- How to create a database table for customer attributes (Part 1)
- How to define customer attributes in IMG and (Part 2)
- How to assign the attributes to objects in projects (Part 2).
After you finished the definition of the DB table for customer attributes, you can continue with definition of the customer attributes.
Define customer attributes for projects in IMG
Start transaction SPRO to define customer attributes:

Follow this path: SAP Solution Manager -> Capabilities (Optional) -> Business Blueprint and Configuration -> Object Attributes ->Definition of Customer Attributes for Object Types

Go to IMG node Definition of Customer Attributes for Object Types to define the attributes, e.g. Bus_Prio (Business Process Priority).
Choose New Entries to add an entry and define a new customer attribute:

Mark the newly created attribute and click on Attributes properties to specify the DB table to store the attribute:

Click on New Entries to proceed:

Specify the table name and the field name for the attribute (refer to Part 1 of this blog); and identify if it is a single-value attribute or multi-value attribute:

Save.
Go to Assign Customer Attributes to Objects to define what object the attribute is relevant for:

Select the object and assign the attribute to this object – if the desired object is not displayed choose New Entries to add the object to the table (e.g. Transaction):

Double click on Assign Attributes and choose New Entries to add your attribute.
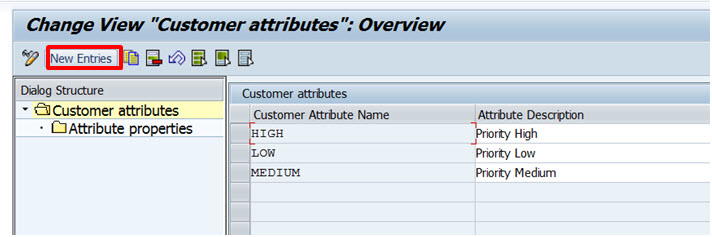
The below examples show two options to define business process priority attributes:
- You can use three different attributes as in Figure 1 below, or
- Use one attribute with three values as in Figure 2.
Figure 1

Figure 2

Save.
Now you are able to use the defined attributes.
Assign attributes to objects in transactions SOLAR01 and SOLAR02
Go to your project to assign the attributes to project entities e.g. process structure nodes, transactions, programs, IMG objects etc. Start transaction SOLAR01 or SOLAR02.
Select an assigned transaction from your business process structure and go to the Attributes icon:

On the Attributes Maintenance dialog you will find the tab Other Attributes – the tab is visible as soon as you have defined customer attributes in your system. All the attributes defined AND assigned to this object will be visible.
Now, you can select the values for your attribute:

Proceed similar with other attributes for other project entities.
