Cloud Connector Introduction:
The cloud connector serves as the link between on-demand applications in SAP HANA Cloud Platform and existing on-premise systems.
The cloud connector runs as on-premise agent in a secured network and acts as a reverse invoke proxy between the on-premise network and SAP HANA Cloud Platform. Due to its reverse invoke support, you don't need to configure the on-premise firewall to allow external access from the cloud to internal systems. The cloud connector provides fine-grained control over:
- On-premise systems and resources that shall be accessible by cloud applications;
- Cloud applications that shall make use of the cloud connector.
In This blog showing Configuration settings of cloud connector while connecting with SAP MII.
- Extract zip file and run go.btach file.
- Launch cloud connector by entering https ://< hostname>:8443 in browser where <hostname> is the host name of the machine on which you have installed the cloud connector.
- If you access the cloud connector locally from the same machine, you can just enter localhost where 8443 is an open port.
- Log in to the Cloud Connector:
While logging first time provide username as “Administrator”
Password as “manage”.
Note: Both UserName and Password are case sensitive.
- You will find two installation types,
- Master Installation
- Shadow Installation
Use Master Installation, if you are installing a single cloud instance.
- Change your Password from default.
- Establish connectivity between Cloud Connector and Cloud Platform
Provide Account Name and Account user details of SAP HANA Cloud platform.

- The Connector State shows as below with respective cloud account:

- Configuring Access control (HTTP)
Select back - end type as SAP Application Server Java,Click "Next" and select Protocol as "HTTP"

- Provide IP address and Port number of server on which SAP MII is running.

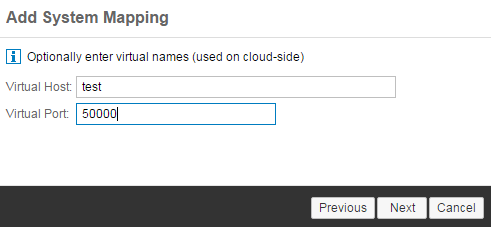
- Provide Virtual host and Port as URL Property of the HTTP destination configuration in SAP HANA Cloud Platform.
- As Virtual host name we can give any dummy name which does not need to exist for example in above image given as “test”.
- The Virtual Port allows you to distinguish between different entry points of your back-end system, for example, HTTP/80 and HTTPS/443, and have different sets of access control settings for them.
Click Next

Now the Status shows as “There are no accessible resources”
- Limiting the Accessible Services for HTTP
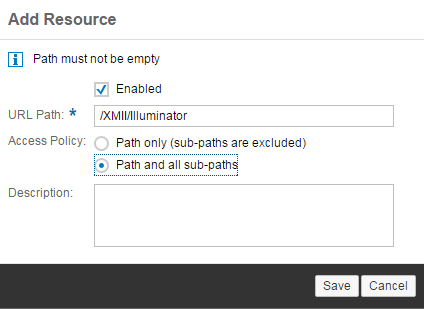
After adding resources Host status changes to “Green”.

- Additionally we can check connectivity status of connector with Cloud by logging in Cloud platform.
- Login to Cloud platform.
- Go to Connectivity Tab, Select Cloud Connectors and check the details of Configured Cloud connector and Exposed back end.
Note: While Configuring Destinations in cloud platform, provide Virtual host name and Port number in URL.
Check the connectivity status by clicking on “Test Connection”
