
- SAP Community
- Products and Technology
- Technology
- Technology Blogs by SAP
- Hello World extension for SAP Lumira
Technology Blogs by SAP
Learn how to extend and personalize SAP applications. Follow the SAP technology blog for insights into SAP BTP, ABAP, SAP Analytics Cloud, SAP HANA, and more.
Turn on suggestions
Auto-suggest helps you quickly narrow down your search results by suggesting possible matches as you type.
Showing results for
Former Member
Options
- Subscribe to RSS Feed
- Mark as New
- Mark as Read
- Bookmark
- Subscribe
- Printer Friendly Page
- Report Inappropriate Content
12-19-2013
4:14 AM
Please switch to VizPacker for SAP Web IDE
SAP now recommends using VizPacker for SAP Web IDE for creating extensions. To find out more about the benefits and get started please read: SAP Web IDE - Analytics.
------
older post is below
-----
We have some great news for coders!
Updated for SAP Lumira 1.20 as there were improvements made for creating SAP Lumira extensions since this was first written.
SAP Lumira (for desktop) includes the vizPacker utility that makes it quick and easy to create and package visual extensions for SAP Lumira.
I am going to walk you through every developers favorite example of Hello World using the vizPacker.
Step by step guide
What applications do you need?
You need to install:
- SAP Lumira 1.20 or later (which includes vizPacker), you can get your free Personal Edition here
- Google Chrome as vizPacker only works with Google Chrome
What languages or libraries do you need to know?
To be able to create visual extensions for SAP Lumira you need to have a good understanding of:
- HTML5
- JavaScript
- D3 (Data Driven Documents)
- SVG (Scalable Vector Graphics)
Create the Hello World extension
Follow these steps to create and test your Hello World extension inside the vizPacker:
- Using Google Chrome
Open: <installdir>\SAP Lumira\Desktop\utilities\vizPacker\vizPacker.html - If the welcome screen is displayed you can optionally take the introductory tour.
When you have finished the tour close the welcome screen.
- The LAYOUT DESIGN tab is where you define the ID, Name and Layout of your extension as well as edit the code
- Using the LAYOUT DESIGN tab, turn off the Title and Legend as we do not need them for the hello world extension
- Click the X to the right of the Title
- Click the X at the top of Legend

- Using the LAYOUT DESIGN tab, set the ID and Name for your extension:
- Click the outer gray box to display the chart visualization properties:

- About IDs:
- The ID naming convention is similar to making unique Java class names
- You use the reverse of your company web address and then add the name of the extension
For example: com.sap.sample.helloworld - IMPORTANT note:
- The ID must be all lowercase otherwise it will not work inside SAP Lumira
- Settings:
- ID: sap.viz.ext.helloworld
- Name: Hello World
- Note: As you close the properties window or move between fields the vizPacker updates the ID and Name used in the code editor
- Click the outer gray box to display the chart visualization properties:
- Using the LAYOUT DESIGN tab, set the ID and Name of the extension plot area:
- Click the inner plot area gray box to display the chart plot area properties:

- About IDs:
- Follow the same rules as for the extension ID, but append module to the end
- Settings:
- ID: sap.viz.ext.helloworldmodule
- Name: Hello World Module
- Note: As you close the properties window or move between fields the vizPacker updates the ID and Name used in the code editor
- Click the inner plot area gray box to display the chart plot area properties:
- Using the LAYOUT DESIGN tab, find the render function and remove the sample code:
- Scroll to the top of the code editor and find the render function
- Delete all the code between these two comments:
// START: sample render code for a column chart
// END: sample render code - Then delete the two comments as well
- The render function should now look like this:
var render = function(data, container, width, height, colorPalette, properties, dispatch) {
//prepare canvas with width and height of container
container.selectAll('svg').remove();
var vis = container.append('svg').attr('width', width).attr('height', height)
.append('g').attr('class', 'vis').attr('width', width).attr('height', height);
}; - This render function passes in an SVG container along with its width and height.
- The extra code then creates an SVG tag and a g tab inside the container and assigns them to the variable vis.
- Using the LAYOUT DESIGN tab, edit the render function to say Hello World!:
- Note: vis is the name of the SVG tag that we can append the hello world text to
- Use this code in the render function to (1 - append a text element into vis, 2 - set the text to Hello World!, 3 - set the y position to 20 pixels, 4 - set the CSS font size to large):
var render = function(data, container, width, height, colorPalette, properties, dispatch) {
//prepare canvas with width and height of container
container.selectAll('svg').remove();
var vis = container.append('svg').attr('width', width).attr('height', height)
.append('g').attr('class', 'vis').attr('width', width).attr('height', height);
vis.append("text").text("Hello World!").attr("y",20).attr("font-size","large");
};
- Validate your code inside the vizPacker:
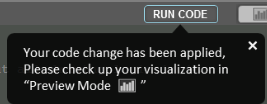
- Click on Run Code:

- If you see this message then your code has been validated without errors.
- Otherwise, if you get a JavaScript error message then there is something wrong with your code:
- Close the JavaScript error message
- Right-click on code editor and select Inspect Element to enable the Google Chrome developer area
- Then go to the Console tab and look at the error messages
- Fix your code in the vizPacker code editor and then click Run Code again
- If you see this message then your code has been validated without errors.
- Click on Run Code:
- Once your code is validated, preview your extension inside the vizPacker:
- Click to turn on preview mode:

- The preview window will appear inside the code editor and you should see your Hello World text:

- Click to turn on preview mode:
- Next you are ready to pack (package) and test inside SAP Lumira
Pack (package) and install your extension into SAP Lumira
- Click Pack

- The extension will be packed into a ZIP file. Click the ZIP file link:

- Google Chrome will download the packed ZIP file.
- Select the downloaded ZIP file and select Show in folder

- Extract out the the packed extension and install it into SAP Lumira:
- Extract out all the files and folders from the ZIP file
- The bundles folder has sub-folders inside it, the sub-folder names are based on the extension ID, which is why the ID is so important as that stops your extension files from clashing with files from somebody else.
- So sap.viz.ext.helloworld becomes zip/viz/ext/helloworld within the ZIP file.
- Copy the bundles/sap folder to <installdir>\SAP Lumira\Desktop\extensions\bundles
For example: <installdir>\SAP Lumira\Desktop\extensions\bundles\sap - If you already have an sap folder within bundles you will be asked to merge the folder. That is Okay because the sub-folders will make sure our files do not clash with those from somebody else in the sub-folders.
- Next we can test the extension inside SAP Lumira
Test your Hello World extension inside SAP Lumira
- Start SAP Lumira
- Go to Home > Try with Samples > BestRunCorp - Margin Analysis
Note: It doesn't matter which data set we use with Hello World because we only ever display the text Hello World!
- Click + to add a new visualization:

- Select the Hello World extension:

Note: If you do not see the extra extension menu or Hello World is not listed inside it, go back and check that your extension and plot area IDs to make sure they are only using lowercase letters - In SAP Lumira the render function for an extension is only called once you have passed some data to it
- So select Quantity sold as the Y Axis measure and Lines as the X Axis dimension
- You should now see Hello World! displayed inside SAP Lumira

Note: If this does not work, you will need to refer to the SAP Lumira SDK Getting Started Guide on how to debug within SAP Lumira - That's it, you have created, packaged and tested your first extension using the vizPacker!
- Congratulations and happy coding...
More information
Have a look at the:
Resources
You can find all of the Hello World files on GitHub.
- SAP Managed Tags:
- SAP Lumira
22 Comments
You must be a registered user to add a comment. If you've already registered, sign in. Otherwise, register and sign in.
Labels in this area
-
ABAP CDS Views - CDC (Change Data Capture)
2 -
AI
1 -
Analyze Workload Data
1 -
BTP
1 -
Business and IT Integration
2 -
Business application stu
1 -
Business Technology Platform
1 -
Business Trends
1,658 -
Business Trends
91 -
CAP
1 -
cf
1 -
Cloud Foundry
1 -
Confluent
1 -
Customer COE Basics and Fundamentals
1 -
Customer COE Latest and Greatest
3 -
Customer Data Browser app
1 -
Data Analysis Tool
1 -
data migration
1 -
data transfer
1 -
Datasphere
2 -
Event Information
1,400 -
Event Information
66 -
Expert
1 -
Expert Insights
177 -
Expert Insights
297 -
General
1 -
Google cloud
1 -
Google Next'24
1 -
Kafka
1 -
Life at SAP
780 -
Life at SAP
13 -
Migrate your Data App
1 -
MTA
1 -
Network Performance Analysis
1 -
NodeJS
1 -
PDF
1 -
POC
1 -
Product Updates
4,577 -
Product Updates
343 -
Replication Flow
1 -
RisewithSAP
1 -
SAP BTP
1 -
SAP BTP Cloud Foundry
1 -
SAP Cloud ALM
1 -
SAP Cloud Application Programming Model
1 -
SAP Datasphere
2 -
SAP S4HANA Cloud
1 -
SAP S4HANA Migration Cockpit
1 -
Technology Updates
6,873 -
Technology Updates
420 -
Workload Fluctuations
1
Related Content
- Embracing TypeScript in SAPUI5 Development in Technology Blogs by Members
- Experiencing Embeddings with the First Baby Step in Technology Blogs by Members
- Cloud Integration: AMQP Adapter, Client Certificate, Solace PubSub+ [2]: Certificate Chain in Technology Blogs by SAP
- 10+ ways to reshape your SAP landscape with SAP Business Technology Platform – Blog Series in Technology Blogs by SAP
- 10+ ways to reshape your SAP landscape with SAP Business Technology Platform – Blog Series in Technology Blogs by SAP
Top kudoed authors
| User | Count |
|---|---|
| 37 | |
| 25 | |
| 17 | |
| 13 | |
| 7 | |
| 7 | |
| 7 | |
| 6 | |
| 6 | |
| 6 |