One of the most important factor that determines the usability of an application is response time. Decision table when encapsulated in calculation view is even more efficient as the execution happens in calculation engine. In this blog, I will explain you how to use decision table procedure (generated after activation of the decision table) in scripted calculation view.
Here are some facts –
- Decision table that ONLY has Parameter as Action can be used in scripted calculation view. This is because the calculation view generates a read-only procedure but a decision table with table columns in action has ability to update the database table – which is a conflicting behavior. Hence, it is not possible to use decision table – with table column as Action – in scripted calculation view
Let us take the example of getting DISCOUNT on a product based on QUANTITY and MODEL. Assuming that we already have a decision table created on tuples ORDER and PRODUCT. [ Note: You may follow my blog to model such decision table, if not already done ] Your decision table would appear as follows - where you notice that DISCOUNT (used as Action) is a parameter and not a table column

Figure 7.1 - Data foundation of the decision table with DISCOUNT parameter as Action

Figure 7.2 - Decision table with values
Assuming that this decision table is already activated (if not then Activate the decision table). Once activated the generated procedure could be found at –
HANA System/Catalog/ _SYS_BIC/ Procedures/<your-package-name>/<your-decisiontable-name>
Now, we model the calculation view using this decision table procedure. Let us get started –
- Create a new calculation view of type ‘SQL Script’.

Figure 7.3 - Calculation View of 'SQL Script' type shown to be created
- In the Calculation View editor, Select Script_View in the Scenario panel, on the left

Figure 7.4 - Script view editor of the calculation view. This would be used later to add the content from generated decision table - Open the procedure that was generated on activation of the decision table. Copy the contents - between the tags BEGIN returned_tt = and END; (make sure it is the last END tag) - and paste it after var_out = in the Details section of scripted calculation view as shown below. Since, the output of a scripted calculation view is always through variable var_out - make sure that the contents of the procedure are selected into ‘var_out’

Figure 7.5 - Content from decision table procedure pasted against 'var_out' output variable - Next, you have to define the Output of the scripted view. The Ouput of the scripted calculation view must match the output of the decision table procedure content that you have just copied from the decision table. To do so, Right click on the ‘Columns’ in the Output pane of the calculation view editor and select Create Target. A popup shown below opens. Select the ADD button in the table to add target columns to the Output.

Figure 7.6 - Output of the scripted calcutation view. Output is same at the columns of the Table Type generated after activating decision table

Make sure that the Name, Data type, Length and Scale of the target column matches the name, data type, length and scale of the generated table type on which the decision table procedure is written.
 The generate table type is available under
HANA System/ Catalog /_SYS_BIC /Procedures /Table Types /<your- package name>/<your decision table name>/TT.
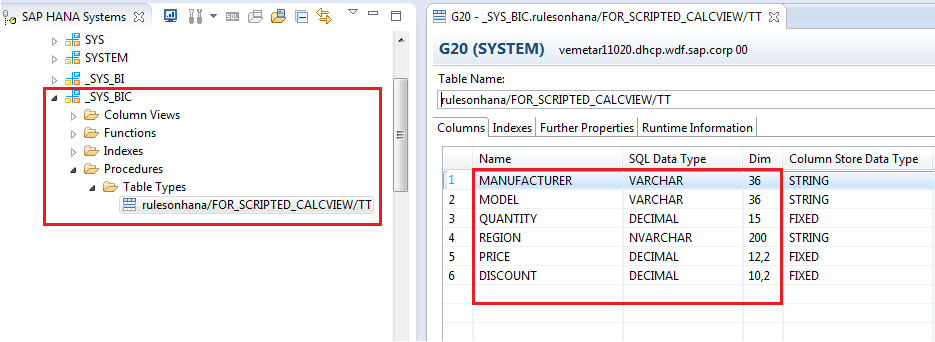
Figure 7.7 - Table type that is generated after activation of decision table - Select the Semantics node in the Scenario panel, and add required target columns as Measure or Attribute

Figure 7.8 - Type (Attribute or Measure) is set for the output of the scripted view - Save, Validate and Activate the calculation view. Your calculation view is now ready to be used for analytical purpose. Here I, would show you a glimpse of data preview for this calculation view. Try and change the Value axis for discount or price and see the trends.

Figure 7.9 - Data preview of the scripted calculation view
With this you can use decision table runtime object into calculation view. There is however a restriction, that the Actions must always be of Parameters type. However the benefits outweigh the restriction especially because calculation view uses the most advanced and optimized engine for execution. Try it out yourself with different modeling scenarios like decision tables only on parameters, with more than one parameters in actions etc. and share your experience andfeedback so that we can improve better.
Other Related Blogs
