This is part 3 of the series, part 2 can be found here
This part of the series is working to build and prepare target system ready to accept data.

Attached are example of "real life" screen shots of the step required to create a target or receiving instance for your parallel load ie, At the end of the process below there will be an "empty" as far as SAP data of the correct size database , with sapinst (migration monitor) waiting for incoming data.
As a prerequisite you will need a xwindows environment to start the installer we used vncserver. In principle this is no different to standard installer.
AIX 6.1 was used in this example.
- Define Java home, in this case it is java14

- Start a vncserver session

- On vncsession we start sapinst from the NW Installer master CD, Media 51041254 (ERP6 EHP5)

- The Installer Window is displayed, We choose EHP5, ERP6 -> Software Life Cycle -> System Copy -> Oracle -> Target System Installation -> Central System->Based on AS ABAP -> Central System

- Choose Custom

- Target system is called ECP and it is unicode.

- Define Domain

- Define Master Password -> Write it down.

- Define Database SID and hostname (same as source)

- Confirm OK to ignore we dont have 500GB of Swap space

- Define 720 Kernel location. Note you cannot use the EXT2 kernel with this media, you use the default and then patch the kernel latter.

- Define the location in which the exporter (flatfiles) will be found, in this case we have a temporary directory called /backup/PRDexp.

- Define database configuration, our server had 150GB of RAM which we will "say" 131GB is available to the target instance. Remember only 1/2 of that will be allocated (65GB) to the Oracle database, the other 1/2 to the SAP ABAP instance which will not be used during the migration

- Define Oracle Configuration, we use Oracle 11.2 (recommended) and we set max datafile size to 20GB and we choose advance configuraiton

- Define the known passwords to standard Database users which you will need from the source system.

- Oracle Listener.
Important to note here that a non-standard name (LISTENER_ECP) and non standard port (15271) are selected , this MUST be different to the current in used system PRD which has the default configuration. ( LISTENER on port 1527)

- Now we choose the configuration customization options for Oracle, naturally this is very dependent on your customers requirements.

- Define the standard Oracle filesystems to be used.

- Choose or simply confirm sapdata mappings

- Define database configuration parameters.
Note for performance we have 6 * 1GB redo logs that are not mirrored. We will enable the mirrors only after the data has been loaded (before productive go live)

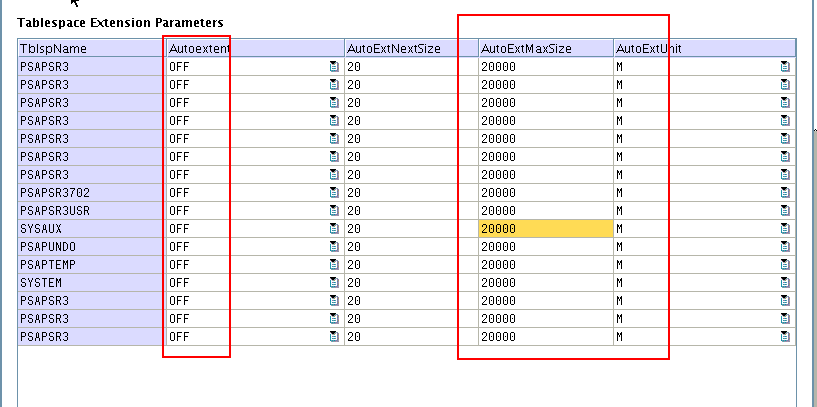
- Here we adjust the filesystem sizes, for some reason SYSTEM and SYSAUX didnt calculate correctly, undersized, so we manually increased each to 2GB.

- Confirm or adjust maximum size, suggest 20GB for all sapinst can and does through strange errors if not.
- Define PSAPUNDO and PSAPTEMP to be NOLOGGING (for performance) and TEMPORARY.

- Confirm tablespace storage parameters as default.

- Confirm we have use oracle LOCALLY managed table-space extent management.

- We will load the database compressed saving 50% of table size ( see here for explanation advanced row compression). It is important to note that indexes are not compressed and these have to be compressed post load.

- Now we choose the R3load configuration. As a rule of thumb you can have 4 R3load jobs per core, but since we are in paralleled exporting and importing then start a figure of double the number of CPU cores. The machine I used had 23 IBM Power7 cores, thus I choose 45 parallel processes.
Note that Parallel export and and import is selected (well this is the point of this blog), and advance parameters selected.

- Here we choose the location of the communication directory (for the inbuilt migration monitor) eg /backup/PRDmigmon (which should be an empty directory with full read/write ("777") authorizations.

- Oracle supports fast direct path direct load to improve performance particularly with Oracle 11.2. To enable append -loadprocedure fast .

- Stats take far to long with default selection ( 10 hours+) so we skip them in the build, naturally these are done but as a post import step using a 80 parallel threads ( rather than 8 as below "-p 8")

- Choose the default ports note that these will class with existing ports eg if source and target systems lets say use instance id 00. At this stage it is OK, but during downtime we have to edit /etc/services sapms<SID> and do a bit of a flip/flop of message server ports before we can start the new instance. As a special note if this is executing on a host running real production system that cannot experience downtime, then you cannot use the same instance # (port) thus choose a different port number eg 3683. 3983.

- As per above we have to do some post load reconfiguration so we choose to interrupt before starting SAP.

- Enter the known 000 DDIC password.

- SL_CONTROLLER_700 software location

- Oracle client location if needed.

- Confirm all details as above and choose NEXT to start the install


- Enter the Solman Key

- Allow the installer to run until it is waiting to import the first package.
(as below it has been waiting 80 minutes for the package to arrive in the /backup/PRDexp directory installer will be checking the /backup/PRDMigMon directory every 10 secords or so)

- Optimization of Oracle Cache for import process. We customize the oracle profile in /oracle/<SID>/112_64/dbs/init<SID>.ora
Read and follow the recommendations of note 936441 remember however the guide is based on having the entire system occupied by one database, we have to split 50:50 between the exporter and importer.
Set pga_aggregate_target to 70% of the RAM available to this instance
Set db_cahce_size to 20% of the RAM available to this instance.Since we are performance in parallel export import we roughly divide memory 50:50. Thus on a host with 150GB of RAM, the import instance will have 75GB allocated to it of that 75GB 70% of that 52GB is allocated to pga_aggregate_target and 20% of 75GB , 15GB allocated to db_cache_size.
- Increase PSAPTEMP for index builds. During the course of the project I found that PSAPTEMP are undersized correctly so I wrote a sqlplus script containing a number of "alter tablespace PSAPTEMP add datafile '/oracle/ECP/sapdata...' size 20GB As a starting point PSAPTEMP at least the size of the top 3 biggest indexes.
sqlplus / as sysdba @/sapcd/utils/create_datafiles_ECP.sql
This concludes Step 3, we have a tuned for import target database "empty vessel" sapinst waiting for the first data to be pushed to it.
Next we move to Step 4 the optional table split calculations which will help divide and conquer the top 50 huge tables including the slow to load nasty to handle cluster tables.
