If you know me...you know I love to build blog series...but this time, I'm not going to talk about PHP, Ruby or Python. I'm going to talk about SMP and what can we do with it. Of course, being this my first blog on the matter, I will start with a very basic program, that will read a public web service and return us some information back.
First off all...I gotta admit that I based myself on the great video series created by my friend and team mate ingo.sauerzapf.
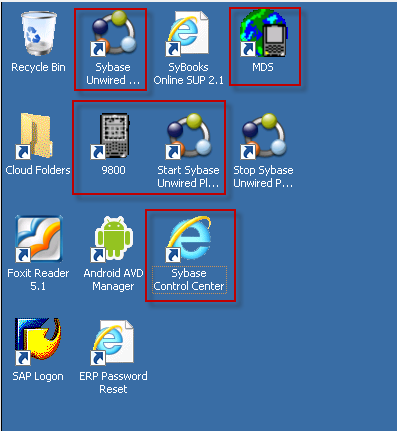
For this blog, I'm using the Developer Center for SMP. So the first thing is to open some application in order: Start Sybase Unwired Platform, MD5, 9800, Sybase Control Center and Sybase Unwired WorkSpace.
When we log into the Sybase Control Center, we must create a user for our application.

After we have created our user, we can move to the BlackBerry emulator and choose the "Workflow" application. Which is going to be of course empty, so we need to configure it by going to it's settings.

We're using the same User Name and Activation Code that we used on the Sybase Control Center. Next step is to open the Sybase Unwired WorkSpace and create a new Mobile Application Project and call it "Weather_Convertion". (I know...I have a typo...should be Conversion...but I have all the pictures taken, so you guys corrected when creating your applications).
We must create an Mobile Business Object and name it "Weather_Object".

As we're going to use a Web Service, we need to choose it as the Data Source and create a Profile for it, which is basically provide the Web Service to use. We're going to use this one: http://www.w3schools.com/webservices/tempconvert.asmx?WSDL It's important that we change the default String value on the Attributes Mapping to (3)...because 100 it's just too much :wink:
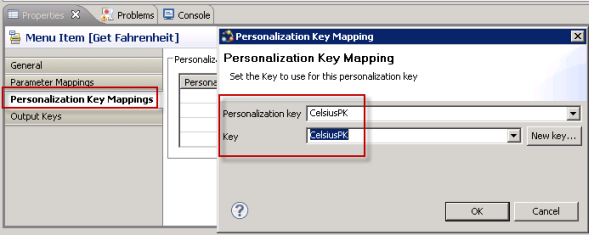
Next step is to create a Personalization Key which we will call CelsiusPK.

On our Mobile Business Object, we should go to the attributes, and then load arguments to establish the personalization key we just created.

After that, a simple right click to Deploy Project would be more than enough.

We're now ready for the next step, which should be the "GUI" to call it in a way...let's create a Mobile Workflow Forms Editor object and call it Weather_Convertion (Again...sorry for the typo), here it's important to check the first checkbox, which will state that our application can be started on demand. When everything is ready, we need drag and drop our Weather_Object into our Form Editor environment.

We it's done, we can double click on the "Start Screen" and add a Menu Item with the name "Get Fahrenheit", with the following options.


We need to link this to our Weather_Object, so let's search it and call it's query operation. Also we can Generate an error screen and set the default success screen, which is the screen which should be shown is everything went right.

It's very important to go to the Personalization Key Mapping and link the Personalization Key with the Object Key.
With that set...we can right click and call the "Generate Mobile Workflow Package...". And we can even assign our application to work only for certain users.

Without a single line of code, we can test our little application and confirm that it's working just fine...


I hope you liked this first blog, even when it's really basic...I promise that my next blog is going to be really nice...might take me a while, as it's not easy, but I'm sure it's going to be something worth to wait for :cool:
