

- SAP Community
- Products and Technology
- Additional Blogs by Members
- The Full Monty - Part 13 - BObj Integration Kit SP...
Additional Blogs by Members
Turn on suggestions
Auto-suggest helps you quickly narrow down your search results by suggesting possible matches as you type.
Showing results for
glen_spalding
Participant
Options
- Subscribe to RSS Feed
- Mark as New
- Mark as Read
- Bookmark
- Subscribe
- Printer Friendly Page
- Report Inappropriate Content
08-04-2010
3:15 PM
Previous blog The Full Monty - Part 12 - Crystal Reports 2008 V1 SP3 Install
In this blog, I downloaded, installed & configured the BObj Integration Kit, which enables communication between my NSP SAP system, my BusinessObjects Edge 3.1, and my Crystal Reports 2008. I was tempted to split this into more than one part as is rather lengthy and detailed, but in the end, I left it as is.
FYI: I do not have any Office Suite, specifically Excel, installed at this point. It is not required.
Once again assisted by Ingo Hilgefort's efforts, documented in his "Installation and Configuration" blogs.
Be mindful of the NSP compiling when you give it jobs to do for the first time. E.g. I Published a Crystal Report for the first time, and it took about 15 minutes. If in doubt, at least look at the Process Overview for activity in transaction SM50.
This blog has eight main stages, with further precise steps in each:
- Downloads
- Obtain License Key
- Java Connector Install
- BObj Integration Kit Install
- NSP Integration Kit Transports
- NSP Integration Kit Configure
- BObj Edge Integration Kit Configure
- Testing
Downloads
Java Connector
I tried to use the latest JCo offering 3.0.5 at the time, but when it came to importing the SAP Roles during the BObj Edge configuration (see later), a known error occured - "An error occurred: com/sap/mw/jco/JCO$Function".
See SAP Note: 1274700 - SAP Role Import error: com/sap/mw/jco/JCO$Function.
So I had to resort to the JCo 2.1.9.
The Java Connector 2.1.9 simply consists of three files.
- sapjco.jar
- sapjcorfc.dll
- librfc32.dll
Files are obtained from the SAP Market Place, http://service.sap.com/connectors -> SAP Java Connector ->Tools and Services(left hand side).
I scrolled down to the 32bit version "SAP JCo 2.1.9 as zip file", clicked the link then saved the file. I continued to unzip the contents to a location on my machine.
Integration Kit
I was hoping the Integration Kit download would be easy, and at first, it seemed so, however, using the link on SDN, proved otherwise.
From the Main SDN home page, I navigated to the Downloads (tab) page. Towards the bottow, under "FREE DOWNLOAD CATALOG", I clicked the link for the "BusinessObjects Integration Kit for SAP". I then chose the "Click here to download the file directly" link. This is what I got

Because of the above error, I was forced to download via the SAP Market Place. Fortunately, I found an SP3 version of the Integration Kit, which I doubt would have been available via SDN.
I went to, SAP Market Place->Downloads(tab)->Business Objects Downloads(tab). Then, under the "Installations and Upgrades" section on the page, I found a "... or simply click here" link, which took me to the SAP BusinessObjects Portfolio. Then SBOP INTGR. FOR SAP->BOBJ INTGR. FOR SAP XI 3.1->Installation->WINDOWS
I downloaded the object 51038935, titled "SBOP INTGR. FOR SAP XI 3.1 SP3 Win Server on IA32 32bit", 237756kb in size.
SAP GUI
The SAP GUI delivered with my NSP, did not come with the BW 3.x Add-On, required for the BObj Integration Kit. Therefore, I used this opportunity to download and install the latest SAP GUI NW 7.0 Presentation - 7.20 Compilation.
The object 50098620_4 "NW 7.0 Presentation - 7.20 Compilation 1 Present . 1/2"
From here, SAP Market Place->Downloads(tab)->SAP Installations & Upgrades(tab). Then, under the "Installations and Upgrades" section on the left pane, "Installations and Upgrades - Entry by Application Group"->SAP Frontend Components->SAP GUI FOR WINDOWS->SAP GUI FOR WINDOWS 7.20 CORE->Installation
Obtain License Key
From the same location as the SP3 Integration Kit (See above)
I downloaded the other object, titled "Integration Kit License Keys", #01200314692000000593, 4kb in size.
Java Connector Install
The Java Connector install is not like a usual automated installation. It is merely some file copies and a setting added. This must be performed now, before the "Setup.exe" of the BObj Installation Kit - done later.
I navigated to the location where I unzipped my Java Connector files.
I copied "sapjcorfc.dll" to the Windows System32 directory
"C:WindowsSystem32"
and the "sapjco.jar" file to the Tomcat Web Server's "Lib" directory
"C:Program FilesBusiness ObjectsTomcat55commonlib"
The "librfc32.dll" would normally get copied to the Windows System32 directory, however, as I had a late version of the SAP GUI (7.1), I had a newer version of this file, already in the Windows System32 directory. I did not overwrite the newer version with an older one.
Note: If you are installing on Windows Server 2008, then the "librfc32.dll" must also reside in the "WindowsSysWOW64" directory.
The Tomcat "Java Classpath", required the sapjco.jar file's location to be added. I did this by navigating to "Windows Programs->Tomcat->Tomcat Configuration". On the "Java" tab, and added the following line at the beginning of the "Java Classpath" field. INCLUDING THE SEMICOLON
C:Program FilesBusiness ObjectsTomcat55commonlib;
BObj Integration Kit Install
After unzipping the downloaded SP3 Integration Kit, I executed the "Setup.exe" file, to begin the installation.
I kept the default language

The window disappeared for about 2 minutes, eventually returning with the following screen

I accecpted the License Agreement

Then I opened up the downloaded "Integration Kit License" document, and used the second key from the top.
Headed ...
"If you are installing SAP Integration Kit for Business Objects Enterprise XI 3.0, or version XI 3.1, or Business Objects Edge XI 3.0, this is your activation key:"
To add to the next installation screen

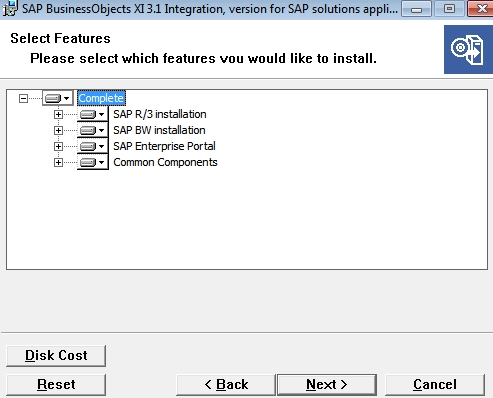
I then chose the "Custom" option

and installed all components
For the "CMS Name", make sure you use the "Node" name given during the Edge Installation. In my case I left the Edge Installation Node name as it was, which assumed my PC's name "PC". So this is what must be used for the "CMS Name". Excuse the "I" bar which I happened to catch when making the screen shot.
I then gave the the appropriate user Administrator's password given during the Edge installation

I then entered the details for the SAP NSP RFC connection.
Program ID:
- Type a descriptive string to identify the BW Publisher service. The Program ID can take any value, but must be 64 characters or fewer, and may not contain spaces. The Program ID is case-sensitive.
Gateway Host:
- Type the name of your BW server. If you have a BW cluster, enter the name of the central instance of BW. I entered my Fully Qualified Domain Name
Gateway Service:
- Type the port number that the Gateway Host is listening on. For example, type 33##, where ## represents the instance number of your SAP Gateway. My NSP instance number is 00, and so the value for this field is 3300.
Here they are

Next, I chose "Yes", to deploying web applications

I left the Tomcat defaults

Next, I confirmed that I had performed the installation for the SAP Java Connector. This must be done before get here

The installation commenced

Soon after, I received the following message. This is not the first time I have seen this message happen.

I checked the file was present, then performed a "Retry" and all was well. So I don't know what that was all about.
Shortly after, the installation completed successfully
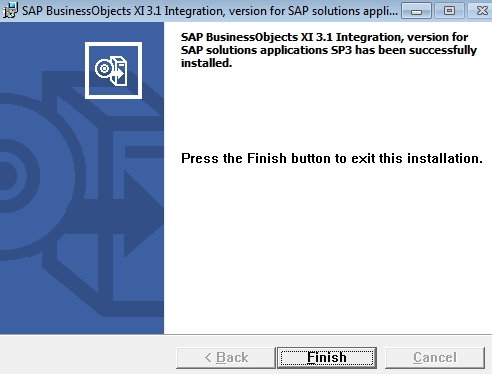
A look at the CCM reveals a new entry "BW Publisher Service 12"

It was stopped, which is fine, as the NSP SAP system was also down. This Service will require manually starting, when we begin working with it. I dare say it can be configured to start up automatically. The SAP NSP system needs to be started before the "BW Publisher Service 12" can run.
BObj Integration Kit Transports
Just a heads up, the SP3 Transports will not go in without a problem. SAP have a known issue. Read on...
I started up the NSP with the MMC.
Whilst that was underway, I navigated to the downloaded BObj Installation Kit, directory "Transport/unicode_compatible", (the NSP is a unicode system,) to reveal two further directories - "cofiles" & "data". I coped the contents of each directory, into the corresponding directories of the NSP under "C:usrsap rans"


Unfortunately, when I returned to see the progress of the NSP in the MMC, it had not started up successfully. I found the developer trace had identified that my VM 1.5GB RAM is not enough. To get over this immediate hurdle, I learnt that if I shut down the BObj Services first, then start up the NSP, then re-start the BObj Services, the NSP will be fine. This soon became a pain as I worked on.


After the BOBj Services had Stopped, it was sufficient for me to successfully start the NSP.
I then logged on to the NSP as DDIC in client 000, to begin the SAP Transport imports with transaction STMS, and navigated to the Transport Overview.

I then double clicked my NSP entry

and began adding my Transports in numerical order to the Transport Queue

Here is the list of transports with descriptions. Note, I am using the NSP as a Backend (OLTP), AND a BW Server(OLAP), so all Transports were imported
Important: Transports were added to queue in the numerical order below to avoid conflicts.
If your SAP system is running on a 6.20 BASIS system or later, you must use the files listed below:
- Open SQL Connectivity transport (K900687.r21 and R900687.r21)
- Info Set Connectivity transport (K900688.r21 and R900688.r21)
- Row-level Security Definition transport (K900689.r21 and R900689.r21)
- Cluster Definition transport (K900690.r21 and R900690.r21)
- Authentication Helpers transport (K900691.r21 and R900691.r21)
The following files must be used on an SAP BW system:
- Content Administration transport (K900692.r21 and R900692.r21)
- Personalization transport (K900693.r21 and R900693.r21)
- MDX Query Connectivity transport (K900694.r21 and R900694.r21)
- ODS Connectivity transport (K900695.r21 and R900695.r21)


and here is the first Transport in the Queue ready for importing

the seqeunce above was repeated for all the Transports, until they were all present in the queue, in the correct order.
After all Transports were loaded, I began the import. I pressed (Ctlr +F9) to import the complete queue.

I entered my "Target Client" as "000" and, I executed in "Synchronous" mode, due the dependencies of the transports
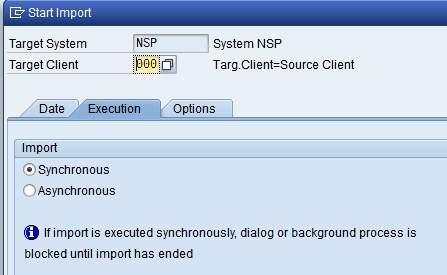
then I chose "Immediate" to begin

the import was under way

shortly after, my import queue was empty

a quick look at the import history

unfortunately revealed that one of the imported Transports failed. I double clicked the red blob at the end, to drill down

I then selected the log icon next to the first red line

I found the errors were due failed activations of some objects

I looked up the Transport - R21K900693, in The SAP Market Place to find this was a know error.

I simply tried to re-import the Transports again, but same thing happened.
I flaffed about with my NSP system, trying to load the original Integration Kit (SP1), but to no avail. I thought it had a problem with namespaces, so in SE03, I created a "/CRYSTAL/" namespace, still no fix. I re-read the note, and began looking for a Fix Pack.
I eventually went to, SAP Market Place->Downloads(tab)->Business Objects Downloads(tab) and found this "click here" link.

It took me to the SAP BUSINESSOBJECTS PORTFOLIO page, where I navigated through to a Windows Server section

and eventually found a bunch of Fix Packs for the Integration Kit
I downloaded the 2.6 version
![]()
as well as the lastest 2.8 version (I did not use the 2.8 version, because there was some SAP note involved which only complicated matters)
After downloading, I ran the 2.6 version, self extracting file "BOBJINTGRSAP02_6-10007514.exe" file. It began extracting to my "Windows/temp" directory. After extraction, it wanted to begin an installation, I recognized the Language Popup Window. I clicked cancel to stop the installation, after all, I was only interested in the Transports, and navigated to my "Windows/temp" directory, from within I could recognize a "Transports" directory.
I eventually understood what the SAP note meant, when it says "Import a previous version of the transport files e.g. FickPack 2.6 then reimport the service pack 3 transport files.
So I navigated to the "unicode_compatible" directory from my "Windows/temp" directory, and further to both "cofiles" and "data" directories, to copy the four BW transports K900665.R1 through to K900668.R21, from each "cofiles" & "data" directory, into the corresponding directories under "C:usrsap rans" of the NSP.
After they were copied, I began the Transport import tasks by adding them to the queue, in the correct numerical order. Then I performed the "Import All Requests (Ctrl+F9). For the Import, again, I made sure they would be imported synchronously, and under the "Options" tab, I chose the option to overwrite original versions. I am not really sure if this is necessary, nonetheless, that is what I did.
The Transports went in without a problem

I then reloaded the SP3 Transports once again, from K900692 to K900695. Important, when you select the Transports, there is an option to "Import Again". Make sure it is select.

After the four Transports were back in the queue again, I performed the "Import for all Transports" (CTRL+F9), again, in synchronous mode, and overwritting the original objects.
Finally, they went in without any problem

NSP Integration Kit Configure
Unlike Ingo's blog, I began my Integration Kit Configuration with the SAP NSP System. It also differs with Ingo's, as I am using the SP3 version, and some steps in the earlier version are no longer required. Finally, as I said earlier, I am going to utilize the delivered user BCUSER from my NSP system.
I began by logging on to the NSP system, with BCUSER, client 001.
NSP Crystal Role
My first step was to create an SAP Crystal Role for my user, so that when Reports are Published, they have somewhere to "hang" from. This should be clearer later.
I ran the Role Maintenance transaction - PFCG
Typed in my Role Name "ZCRYSTAL", and pressed the create "Single Role" button

I gave it a meaningful description, and saved it.
I then selected the "Menu" tab, and added an arbitrary transaction, so I thought the "Administer Crystal Report Content" - "/CRYSTAL/RPTADMIN" would be appropriate.

Then I selected the "Authorizations" tab, and to generate the necessary authorizations. I selected the button that proposes a "Profile Name"

Then I selected the "Change Authorization Data" to generate the Role's objects. I saved when prompted.

I then generated the authorizations

After generating the authorizations, I returned back to my Role

Next I chose the "User" tab, to assign my BCUSER user

I added my user, chose "User Comparison" button.
Another window popped up, prompting me to "Complete comparion" (button) which I did and saved when prompted.
I ended up with my "ZCRYSTAL" Role, assigned to my User, with a valid "Menu" and "Authorizations"

NSP BCUSER user
Next, I prepared the BCUSER user, and made some other changes whilst I was here
I ran "User Maintenance" - SE01, and edited user "BCUSER". On the main screen I chose to change the "First name" & "Last name" to reflect this was the BCUSER and not DDIC as it suggested

I gave it a default printer

I added the Profile "SAP_NEW"
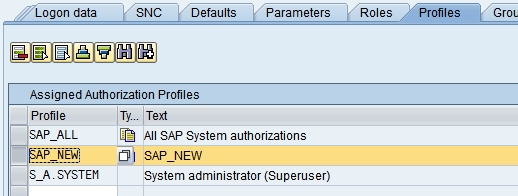
and checked for Role "ZCRYSTAL" as created and configured earlier

I logged out and back in, to put the changes into affect

NSP RFC Connection
I needed to create an RFC connection for the BW Publishing Service in the CCM.

I ran the "Configuration of RFC Connections" transaction - SM59, and pressed the create button

I gave the name "BW_PUBLISHING" as the "RFC Destination", and a "Connection Type" of "T". I pressed the enter key, and then gave it a description.

Further down, I chose the option "Registered Server Program", for the "Activation Type", and for the "Program ID" I gave it the same name, as entered during the Bobj Integration Kit "setup.exe" installation process - "BWPub"

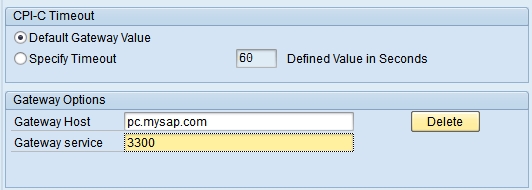
Towards the bottom, I chose the "Default Gateway Value" for the timeout, and the two other parameters, "Gateway Host", and "Gateway service" as entered during the Bobj Integration Kit "setup.exe" installation process.
I saved my RFC Connection, and in the MMC, I started the "BW Publisher Service 12"

it started ok

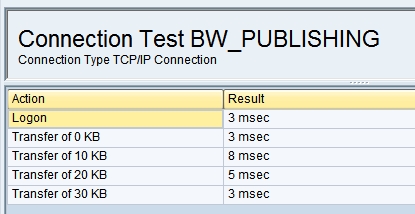
I returned back to the NSP, in SM59 for my RFC connection, to test it

A successful connection as displayed below
NSP BObj Server Configuration
All three parts of Ingo's blog BusinessObjects and SAP - Publishing of Crystal Reports expand on my information. BusinessObjects and SAP - Publishing of Crystal Reports Part 1 of 3, BusinessObjects and SAP - Publishing of Crystal Reports Part 2 of 3, BusinessObjects and SAP - Publishing of Crystal Reports Part 3 of 3
In my NSP, I needed to tell it more about the BusinessObjects Server
I ran the new "Administer Crystal Report Content" transaction - "/CRYSTAL/RPTADMIN"

I entered an alias, and the fully qualified domain name of my CMS server (excuse me catching the "I" bar in the screen shot)

then the RFC connection to the BW Server Service
Trying to "Verify the BOE definition" at this point, only returned a error

I will return to this, later
I entered some more http parameters, based on my Tomcat server

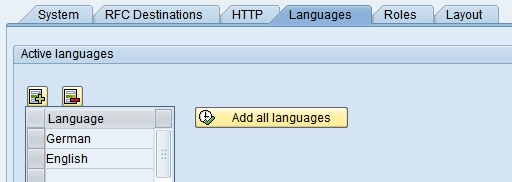
I chose to add all languages
Then I added the "ZCRYSTAL" Role created earlier

and finally some other default information. The "Content base folder" information is consistent with the BusinessObjects Edge 3.1 SP3 file structure, so I left it as is

I then saved the information, to be returned to the main screen, with my "BObj" System defined.

Next I had to set some more parameters. Still in the "Content Administration Workbench", I double clicked the "Set BW source parameters"

At the table screen, I selected the "Edit" mode

I passed through the information popup

and entered my BW's Application Server's fully qualified domain name, and System Number of my NSP.

NSP ICF Setting
Next I had to make some changes to the NSP's "BW" Service, in transaction SICF. I entered "BW" to fetch the Service.

I double clicked the "ce_url" item. Note the items are inactive (greyed out - I activated them at the end of this process)

I then selected the "Handler List" tab, and put the screen in "edit" mode

I selected the first item in the Handler List, and pressed the "Add" button, then inserted the Crystal specific handler class "/CRYSTAL/CL_BW_HTTP_HANDLER" into the first position

then saved. At the "Make repairs ..." information popup
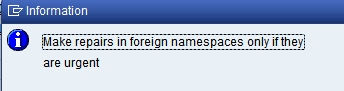
I created a new Request/Task, for the changes

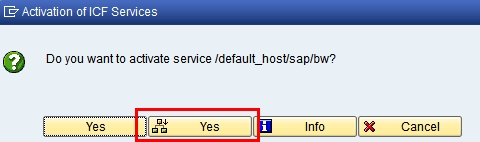
after returning to the Service Screen, I right clicked on the "bw"node, to activate the service

and all below
again, returning to the "Service" screen, only this time, the nodes were all active, which can been seen, as they are no longer greyed out

BObj Edge Integration Kit Configure
For these steps, the NSP needed to be up and running. As I said earlier, the only way I could get both systems up were by stopping all the BObj Edge Services in the CCM first, then starting the NSP in the MMC. When the NSP was up and running, starting the "Apache Tomcat", BW Publisher Service", & "Server Intelligence Agent" Services from the CCM.

I then logged on to the Central Management Console (CMC), as administrator

and navigated to the "Authentication" page

and double clicked the "SAP" item

Under the "Entitlement Systems" tab, I entered my NSP System details

and clicked "Update", and the "Logical system name" was auto populated

then, under the "Options" tab, I checked the "Enable SAP Authentication" & "Automatically import users". I also checked the "Default system" was my NSP logical system name.

under the "Role Import" tab

I selected my "ZCRYSTAL" entry Role assigned to my BCUSER, and pressed the "Add" button, then "Update"

I then exited the "Authentication" screen
To check the above "Authentication" settings, I navigated to the "User and Groups", "User List" to see my NSP BCUSER was present, it was

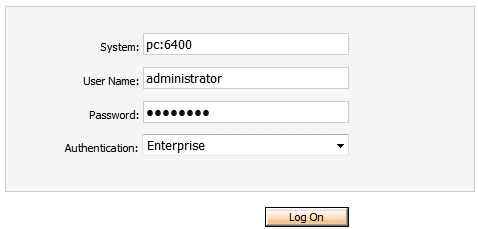
A final "Authentication" validation, was to log on to InfoView

with my BCUSER, using "SAP" Authentication


I now had a folder structure for the NSP System. See under "Folders" and follow the hierarchy below

I needed to give this folder, permissions for my imported "BCUSER" user which is used to Publish items & create certain objects under the "NSPCLNT001" node.
I right clicked on it, and chose "User Security"

then, I was able to press the "Add Principals" button

at the "Add Principals" screen, I chose "Groups" to identify my new User/Role combination as a Group. I selected the "NSP~001@ZCRYSTAL" entry

and added that over to the right hand side "Selected users/groups"

for me to press the "Add and Assign Security" button
At the "Assign Security" screen, I selected the "Advanced" tab, the the "Add/Remove Rights" link
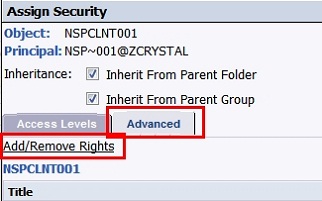
In the "Add/Remove Rights" screen, I selected the "tick" option for all entries, then pressed the "OK" button

back at the "Assign Security" screen, I pressed the "OK" to apply the changes and exit

back at the "User Security" screen for my Folder NSPCLNT001, I could see my new Principal

That was the final step to configuring the BObj Integration Kit.
Finally, I can verify my BObj definition from within my NSP.
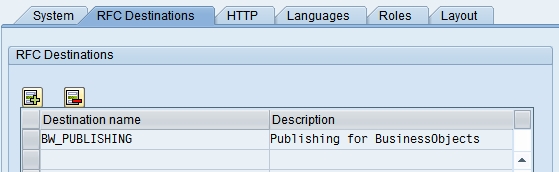
I logged in to my NSP, and ran transaction "/CRYSTAL/RPTADMIN". I double clicked my "BObj" definition under "Enterprise System"->"Available system". I navigated to the "RFC Destinations" tab, selected my "BW_PUBLISHING" item, and pressed the "Verify BOE definition" button.
After some serious compiling, I eventually was returned a success message

MEGA IMPORTANT !!
For whatever reason, the file "EnterpriseFramework.dll" may become de-registered, in Windows, and will fail the "Verify BOE definition" test. If it does fail, and you believe you have configured everything as it should be, run the following command from Windows -> Run... line. Including the "".
regsvr32 "C:Program FilesBusiness ObjectsBusinessObjects Enterprise 12.0win32_x86EnterpriseFramework.dll"
More information can be found here http://ingohilgefort.blogspot.com/2009/07/sap-netweaver-bw-and-crystal-reports.html
You cannot harm the system if you run this more than once
SAP GUI Installation
I required a newer SAP GUI as the NSP delivered and currently installed one, did not supply me with the BW 3.X Add-Ons required for Crystal Reports. When I ran Crystal I should see an "SAP" menu, however, I did not.
So I continued to uninstall the SAP GUI, via Windows Control Panel->Programs and Features
![]()
The remaining of the uninstall was pretty eventless, so I have not bothered to add anything further.
I stopped my NSP from the MMC, and also stopped my BObj Services from the CCM.
I navigated to the directory "NW_7.0_Presentation 7.2 Comp1NW_7.0_PresentationPRES1GUIWINDOWSWIN32", where I unzipped the download object, and executed the "SetupAll.exe" program to begin installation.

the installation wizard began, I clicked "Next"

I selected my components
- SAP GUI for Windows 7.20 (Compilation 1)
- BW 3.50 Add-on for SAP GUI 7.20
- KW Add-On for SAP GUI 7.20
- Business Explorer

I kept the path defaults for the FrontEnd

I kept the path defaults for the Business Explorer

the installation commenced, and completed. I then re-booted.
I looked at the new Program Group to see what I now have. I still do not have any Microsoft Office Suite Applications installed, so a couple of icons remain blank

I then ran the "SAP Logon"

to see my new SAP Logon Pad

I also ran Crystal Reports to make sure I now had an "SAP" menu

Testing
To finally test my BObj Installation Kit configuration, I made sure my NSP, and all necessary BObj Services were up and running. Don't forget I have to start the NSP, before the BObj Services

Preparation
To test the Publishing, I used an Info Set in the SAP delivered, "Flight" Scenario, that already exists in my NSP. However, there was a little preparation for the test.
I logged on to the NSP, with my BCUSER user, and ran the program "SAPBC_DATA_GENERATOR" from transaction SE38. This populated some SAP tables for the "Flight" scenario

I chose the "Standard Data Record" set

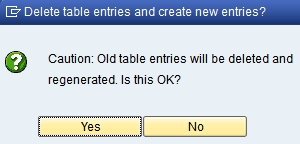
I confirmed the caution
returning to the program screen with my data populated and ready
Next, I had to assign my user BCUSER to an SAP "User Group" so that we can see some SAP Info Set objects from within Crystal Reports. This is a little SAP authorization overhead that needs to be done, just for this example. It is required because when I run Crystal Reports and look for an Info Set, the user I am using must have privilages for the "User Group" that contains the Info Sets I want to choose. If I do not do this, I will not be able to see any Info Sets with my user BCUSER.
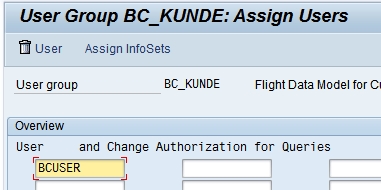
I ran the transaction for "User Groups" - SQ03
At the initial screen, I chose "User Group" "BC_KUNDE". This is the one for the "Flights" Scenario

on the next "Assign Users" screen, I added my user "BCUSER", and Saved, then Exited
That's the BCUSER / Info Set stuff prepared
Crystal Reports
Next, I ran Crystal Reports

After, "OK" to the "Evaluation" prompt, from the initial Crystal Reports page, I selected the "Report wizard"

I then was presented with a window for my connections. As I had none at this stage, I dropped down the "Create New Connection" node

and navigated down to "SAP Info Sets". After clicking on the "SAP Info sets" node, I was prompted with a "SAP System Logon" window. I selected the "NSP" node, and clicked "Next". I had to select the "NSP" system before "Next"

I entered my NSP client "001", "BCUSER" user and password details

then "Finish"

I expanded the selection
my host (pc)->Info Sets (I)->Global (G)
and selected the Info Set "BCS1". I then went to add it the "Selected Tables:" pane

because this Info Set has a number of parameters, I was prompted to enter them. The only mandatory parameter was the "Also Display Cancellations" under the "PA_CANC" section. I set that to "True"

then scrolled all the way down to the bottom of this screen, to click "OK"

now with my "BCS1" Info Set in the "Selected Tables:" pane, I pressed "Next"

I then began building my Report
I arbitrarily chose some "Fields" by selecting them from the left "Available Fields:" and adding them to the right "Fields to Display:"

in a similar fashion to above, I selected some fields for "Grouping"

and kept the proposed "Summarized Fields"

I kept the defaulted "Group Sorting", as is

and kept the defaulted "No Chart" option

then chose the "Carrier Name" and "Flight Date" for "Record Selections"

I kept the defaulted "No Template"

and so I "Finished" and off the report went to access the database

a short while after, I was returned to Crystal Reports screen with my Report displayed in "Preview" mode

I was finally ready for "Publishing"
From the Crystal Reports menu, I chose SAP->Save Report...

I was prompted, again for some parameter values

I navigated to my mandatory parameter, I mentioned earlier, and chose "True"

I was then prompted to Generate the data, so I could actually save the report

I was prompted to log on to my NSP system

then I gave it the name "Flights". I recognized my "ZCRYSTAL" Role description "my crystal menu", it found. I was happy to "hang" my Report from under this Role.

then I chose to "Automatically publish to Enterprise" for this report

I was returned to the Crystal Reports main screen, with the cursor timer going

It must have been a good 10 - 15 minutes, probably compiling in the NSP, before it went "splat" and gave me a synchronizing error

As a workaround, I made my BObj Edge "NSP~001/BCUSER" user a member of the BObj Edge "Administrators". This rather made the BObj Edge Folder "NSPCLNT001" Security steps performed earlier redundant, but I could not find anything wrong with the Security steps I performed, so I had to do this
I logged on to the BObj Edge, as "Administrator" and navigatied to the "Users and Groups". I clicked the "User List", and right clicked my "NSP~001/BCUSER", then "Join Group"

I then selected the "Administrators" group, and added

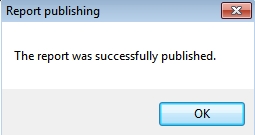
After performing the same Report Saving tasks, I eventually successfully "Published"
NSP
I then had a look around the NSP System and noticed my "User Menu" for user "BCUSER" now had the "Flights" Report

In the Role Maintenance - transaction PFCG, for my Role "ZCRYSTAL", I see the Report present under my Role Menu. Also, the "Authorizations" tab has gone red, for whatever reason. I left it as is for now.

I navigated to the NSP Crystal "Content Administration Workbench", transaction "/CRYSTAL/RPTADMIN". I double clicked the "Selelect reports and roles to publish" filter, then selected my "BObj" "Enterprise System", and "OK"

to reveal my NSP system has knowledge of the my "Flights" report, being "Published"

BObj Edge - InfoView
I logged on to the BObj InfoView, and selected the "Document List"

I navigated to "My Groups" and "my crystal menu", to see my "Flights" Report

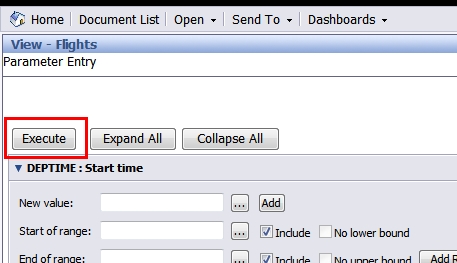
I double clicked my "Flights" Report, to be presented with a selection criteria

where under the "PA_CANC" section, I changed the current value from "False" to "True"

I then "Executed" the Report
and was presented with my data

BObj Edge - Central Management Console
In the CMC BObj Edge under the "Folders", I saw my hierarchy now contains my "ZCRYSTAL" Role, with the Report "Flights". I right clcked on my "Flights" Report and chose "Schedule"

I selected the "Database Logon" from the left hand side, and entered my BCUSER user password

Then I chose the "Parameters" option, and updated the "PA_CANC" selection to "True"

Then I pressed the "Schedule" button

I could see my "Flights" Report started "Running"

and finished, successfully

That's the BObj Integration Kit, in and done!
I can now begin to learn and play around the Scheduling and Maintenance of Published Reports.
All this should lead me nicely into my next blog
The Full Monty - Part 14 - Dashboard Design (Xcelsius) & Live Office Install & Configure
7 Comments
Related Content
- Integration of SAP Service and Asset Manager(SSAM) with SAP FSM to support S/4HANA Service Processes in Enterprise Resource Planning Blogs by SAP
- ABAP Cloud Developer Trial 2022 Available Now in Technology Blogs by SAP
- What's new with Collaborative Maintenance? in Supply Chain Management Blogs by SAP
- Quick Start guide for PLM system integration 3.0 Implementation in Product Lifecycle Management Blogs by SAP
- SAP Enable Now setup in Technology Blogs by Members