Introduction
Having worked and played with SAP NetWeaver Composition Environment for a while, I realized that quite a few people download the server, maybe even run through the installation process, but don’t perform the basic configuration steps.
This is why I decided to write this quick walkthrough. It doesn’t cover everything you can configure and depending on your system landscape, you might want to perform additional configuration tasks described in the documents in the “Further reference” section. However, the settings described here set up all the major components of your CE system and should enable you to perform most development tasks.
This webblog can be considered a sub-blog of my upcoming “Composition in the Cloud” blog about setting up a CE trial in the cloud using Amazon Web Services EC2, so the drive letters, paths, hostname, Windows Administrator password and AS Java Administrator and master passwords are consistent with that blog. Replace those entries with your own settings as needed.
Preconditions
- You have installed but not configured your CE trial: sapinst.exe is completed and the server is up and running.
- You have a current Java Runtime Environment (e.g. JRE 6 Update 16 - download at http://java.sun.com/), which contains the Java Webstart tool you need to start to Enterprise Services Builder.
1. Log on to NetWeaver Administrator
Once the CE server is up and running, launch your browser and go to http://localhost:50000/nwa to start SAP NetWeaver Administrator. Log on with username Administrator and the master password you defined during the installation procedure, in my case “cloud1pw”.
2. Download and install a license key
The first step is to retrieve your system’s hardware key from SAP NetWeaver Administrator. Go to Configuration Management > Infrastructure > Licenses. Copy your “Active Hardware Key” into the clipboard.

Go to http://www.sap.com/minisap, fill out the form, and paste your hardware key from the clipboard. Submit the form.

After a few minutes you will receive an email containing the license key file “CE1.txt”. While you’re waiting for the email, you can as well continue with step 3 and run some configuration wizards. We’ve got no time to waste if we want to get through the major tasks in fifteen minutes!
Has the mail from SAP arrived? Then save the attached file CE1.txt to your file system.
On the License Management screen of your CE system, click “Install from File”, and choose your license file.
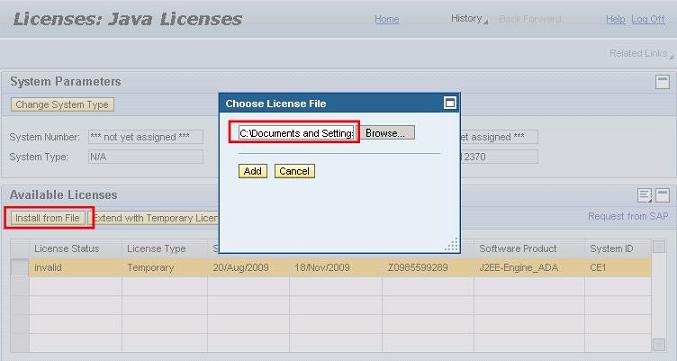
The resulting license:

You have now installed a license that will be valid for 90 days. When the period has expired, repeat the procedure to renew the license key.
3. Run the Configuration Wizards
In NWA, go to Configuration Management > Scenarios > Configuration Wizard.
- Start the first task, “BPM All Configuration Tasks Combined”. When prompted about Mail Server Connectivity and Notification Message Configuration, leave all fields blank and click “Next”. After the task has been completed, return to the task list.
- Scroll down to the bottom and start task “Services Registry Destinations Creation”. When prompted for the Destinations user, enter “Administrator” and your CE master password. Return to the task list.
- Start task “Initial setup of functional unit SLD”. Select configuration mode “Typical”. On the following screen, enter your CE master password three times. It will be used as the password for some newly created technical users. On the following screen, select “Setup a new local SLD server”. Loading the SLD content will take about thirty minutes.
First coffee break: Large Latte Macchiato
This one takes a little longer, so help yourself to a large, hot coffee. You’ve got about 30 minutes to finish it.
Afterwards, please return to the task list.


- Start task “Initial setup of functional unit ADS”. Select configuration mode “Typical” and enter your master password three times. Return to the task list.
4. Install Enterprise Services Repository
Before we can configure ESR, we must deploy the archives. They were included in the CE trial download from SCN, but not deployed by default.
Locate the ESR archives in directory E:CE711SP1_SDN-PreviewAdditionalESR_SCAs:
- SAPXIESR01_0.SCA
- SAPXIGUI01_0.SCA
- XICNTSAPBASIS01_0.SCA
Copy these files into the import directory E:usrsapCE1SYSEPSin.
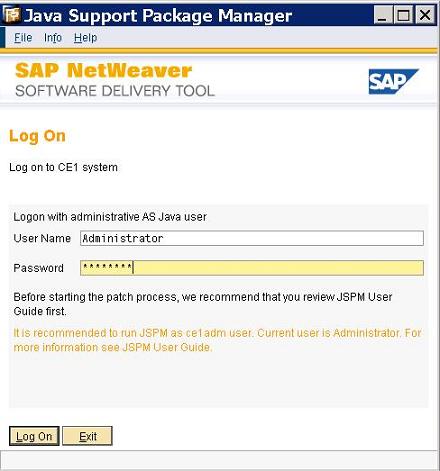
Start JSPM by running program E:usrsapCE1J00j2eeJSPMgo.bat and logon with your Administrator user and the master password you defined earlier.
On the following screen, select “New Software Components”.

Select all three software components for deployment and click “Next”.

Ignore the warning on the following screen and start the import.
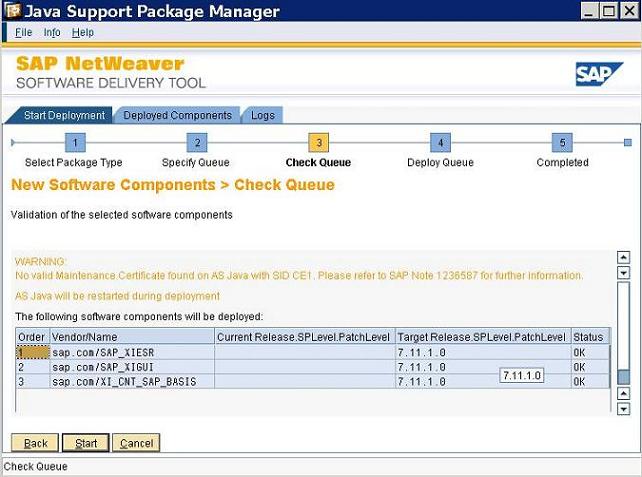
Deploying the archives will take about fifteen minutes because the application server will be shut down and restarted during the deployment process. You can follow the progress of the deployment process on the “Logs” tab and in the SAP Management Console.
Second coffee break: Wiener Melange in preparation for SAP TechEd 09 Vienna
Treat yourself to a smaller but good cup of coffee such as a proper Wiener Melange. What better way to fill fifteen minutes?
Finish the process by clicking “Exit” on the JSPM “Start Deployment” tab.
5. Configure Enterprise Services Repository
Go back to the Configuration Wizards screen in NWA and start task “Configuration of ESR in CE”.
Enter the password you chose for your Administrator user.

On the following screen, select “Local SLD”. Confirm the following message about running “Setup of functional unit SLD” first.

Enter your master password two times so that the new technical users are created with the same password.

Repeat this procedure on the next screen.

Importing the XI content will take several minutes. (While you're waiting, you can already proceed to step 6 and assign the ESR role to your user in a different browser window.) When the task is finished, you can leave the configuration wizards screen.
6. Assign the ESR role to your Administrator user
Start the user administration application of your application server (http://localhost:50000/useradmin).
Select user Administrator and go to the Assigned Groups tab.
Click “Modify”, then search for “*ESR*” in the Available Groups table.
Mark group “SAP_ESR_ADMINISTRATOR” and click “Add” to add it to the Assigned Groups table.
Click “Save” to save your changes.

7. Launch the Enterprise Services Builder
You're through with the actual configuration - just testing and exploring now. Go to URL http://localhost:50000/rep and click on Enterprise Services Builder. Logon with your Administrator user.

On the following popup window, select usage profile “Unrestricted”.
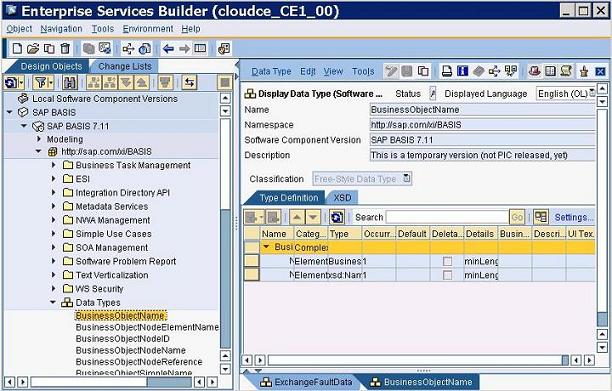
That’s it, you have logged on to the Enterprise Services Builder. The configuration of your server is complete. Enjoy!
Third coffee (not a break): Espresso
Now that your system is ready to be used, have a piping hot espresso, really strong and with lots of sugar, and start developing some weird stuff!

Further reference
