This is a very basic blog for the use of pop-up windows in VC. I have seen few beginners asking several questions on the same and thus to help my friends I thought to ink down a blog on the same.
Scenario: A main window consists of an input field and a button. User inserts some value in the input field and clicks on the button. The same input value is passed to the pop-up view. Now, user modifies this value on the pop-up window and closes the window. When user returns back to the main view he/she can see the same value updated.
Steps:
- Create a new model in VC
- Add an iView to this model.


 3. Double click the iView and drag a from view from the right hand side.


 Open context menu for the Main View and select Configure Element.


5. Add an input field and name it as Input.

Similarly add a pushbutton named PushButton


Select the push button and open its properties.

8. Change the label of the button to Push Button or Open PopUp as per your choice under Display tab.


9. Assing an action named OPEN_POPUP under Action tab.


10. Come back to the Main View and drag a link from the output port of the Main View Form and select Open Pop-Up from the context menu.


11. Select Create New iView radio button and give a name to the new pop-up iView.


12. Double click on the link and on the right hand side select the event as open_popup from the dropdown.

 13. Double click the newly created pop-up view. Here, you can design the way your pop-up should look like. In our case, it is going to be as simple as the Main View. Add a Start Point and add a parameter to the start point to get the value from the main view as shown in the pic. below

14. Add a form view to display input field and button to the pop-up view.

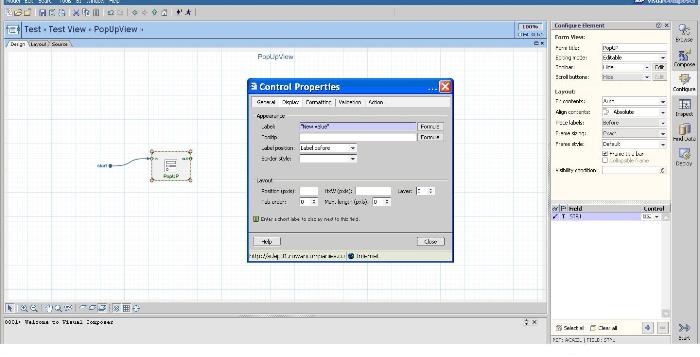
 15. Once you link your start point and popup view, you can see STR1 as shown in the picture below but the display box in not checked.


16. Check the display box for STR1.

17. Edit the label for the input field as "New Value" under Display tab.

18. Add a push button to the pop-up view as we did for the Main View to close the pop-up window.

19. Add an custom action named "CLOSE" to the close button under Action Tab.

20. Drag a link from the output port of the pop-up view and select End Point and select the event as close.

21. We will pass the edited value in the pop-up back to the Main View thus we will map STR1 in the window displayed.

22. Now, go back to the Main View.

23. Map the pop-up Input "STR1" with the input of our Main View "input" (this is the mapping which takes value from Main View and displays in the pop-up View).

24. Map the input of our Main "input" view to the pop-up Output "STR1" just below ( this is the mapping which takes value from the pop-up and give it back to the Main View).

25. Just check once under Tool-->Option-->Compiler is set to Flash because pop-ups won't work with the webdynpro compiler.

26. Go to the deploy tab and deploy your view.

27. Click on Run Test_view to execute the application J
Main View (Content Hello)

Pop-up prefilled with Hello and edited to Hello World

Close the pop-up window to get the updated value in the Main View.

