Many a times integrating existing applications with web services is really challenging. SAP-XI’s SOAP adapter makes the calls to web services simpler. This weblog guides you through the steps required to invoke a web service using the SAP-XI receiver SOAP adapter.. At the end, quick steps have been provided to develop and deploy a simple calculator web service.
Scenario
web service client invokes a web service using SAP-XI’s SOAP Adapter. The web service used here is a simple calculator application, that computes the sum of two numbers.

Fig.1 SOAP-XI-SOAP scenario
Prerequisite
A simple Calculator web service or any other webservice should have been deployed which can be invoked. Steps to develop and deploy a simple calculator web service have provided at the end of the weblog.
Sequence of Steps
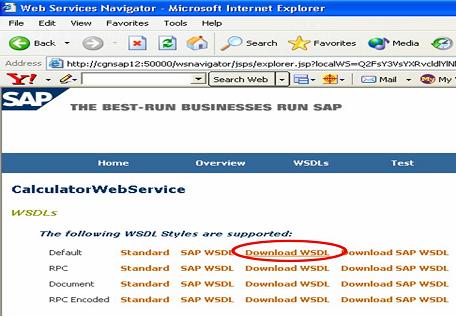
Fig.3 Download the WSDL File- Download WSDL and save it as WSDL.zip. Save the Config1_CalculatorWebServiceVi_document.WSDL separately from porttypes folder as it is used for creating message mappings/interface in Integration Repository. The main.wsdl contains the URL that will be used in the receiver SOAP adapter configuration.

Fig.4 Downloaded WSDL Files of web service
In Design Time
- Import the WSDL file (which is under porttypes folder) as external definitions. The request and the response messages are seen in the messages tab.

Fig.5 Importing WSDL into IB- Create an Inbound synchronous Message Interface (CalculatorWS_IN_MI)using the message types in external definition.
Define the other necessary data types.(Calc_input_DT has 2 parameters>arg1 and arg2. and Calc_out_DT has 1 param> result). Define the corresponsing Message types.
- Create an Outbound synchronous Message Interface (Calc_OUT_MI) using the message types defined in Integration Directory.
- Define necessary Message mappings and Interface mappings. (2 Message mappings and 1 Interface mapping should be developed)

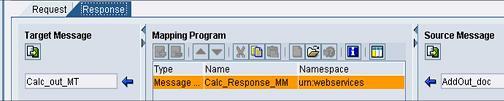
Fig.6 Interface Mapping
In Configuration Time
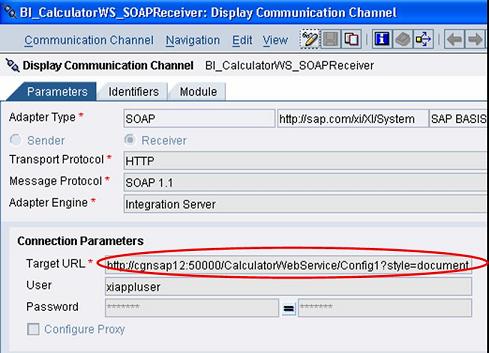
Fig.8 Receiver SOAP Channel Configuration- Create all the required Configuration Objects (Sender Agreement, Receiver Determination, Interface Determination and mapping, Receiver Agreement.
Testing
The Integration Scenario’s developed in XI are web service ready. So a web service Client Tool(Altova XMLSPY) is used to test the scenario. Refer to Testing XI exposed Web-Services for further details on .
- Use the web service wizard to generate a WSDL file for the Integration Scenario. This WSDL file is used by the web service client to send a request to XI.
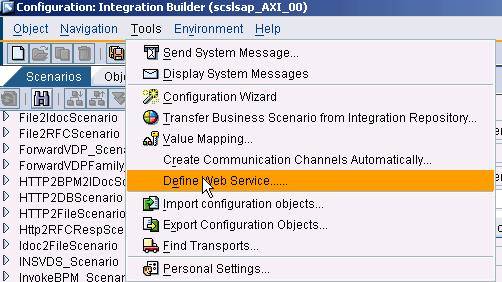

Fig.10 Create new Request using XMLSPY
Developing and Deploying a simple Webservice
Some Quick steps to develop, deploy a webservice.
- Create a Java Project, a package structure and a java file(Calculator.java).
- Include the code given.
Code snippet of java file that is deployed as web service
- Switch to web services perspective.
- Right click on java file to create a new web service.( A Virtual interface, web services definition, webservice are generated in the process)
!https://weblogs.sdn.sap.com/weblogs/images/37118/1_JavaWS.jpg|height=319|alt=image|width=512|src=htt...!
Fig.12 Create a web service
- Go the Project and build an .ear file
Go to window>preferences> J2EE engine and specify the WebAs system on which the webs ervice should be deployed.(XI server can also be choosen for deployment.)
Result
You should now be able to invoke a web service using SAP-XI SOAP adapter.
