Christmas is over and a few days free, a good time to write my first weblog.
In the Webdynpro Tutorial “Using an Email Web Service in Web Dynpro” we use a web service offered by http://www.xmethods.com to send an email. Why don’t develop an own web service? We have the tools, we have the application server, we are young ….
Prerequisites
- You have launched the SAP NetWeaver Developer Studio.
- You have access to the J2EE Engine (Release 6.30)
- You have access to a SMTP-Server without authorization
- You have downloaded and installed the javamail-api
(http://java.sun.com/products/javamail)
The idea is to build an Java Class that is able to send an email. After that we will create a web service from this class.
In this weblog we work with a SMTP-Server without authentification. It could be a new good Weblog to do this with authenification.
Creating a Java Project
- File -> New -> Project
- Choose WebService -> Java Project. Choose Next
- Project name: WSMailService. Choose Next
- Java Settings: On Tabstrip “Libraries” add the external JAR “mail.jar”
Now we have our project and need to build a class.
Creating a Class
- Open the Java Perspective and choose the Package Explorer
- Click on WSMailService and choose from the context menue New -> Class
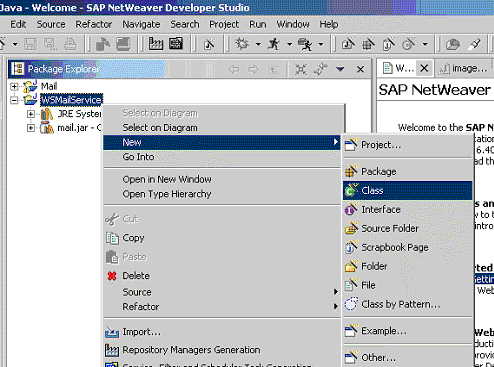
- Fill Package: com.sap.mail, Name: WSMailService. Choose Finish

OK, we have the Project and we have the Class. Now we need the method to send the Mail. To be honest, I am an ABAP-Coder and friends of me say that I am coding ABAP in Java. Please don’t citisize me to much because of my code.
Ofcourse I would never give back a String filled with “No Error” in a productive Software 🙂

Now we can start to build the WebService!
- Change the Perspective to WebService Perspective
- Choose the Java Explorer
- Open WSMailService – com – sap – mail
- Click on WSMailService.java and choose from the context menue New -> WebService
- Web Service Name: WSMailService. Choose Next

- Choose the Methods to be contained. We have only one method: Choose Next
- On the next page you can change the name of the Virtual Interface and the name of the Web Service definition. Do not change it and click finish.
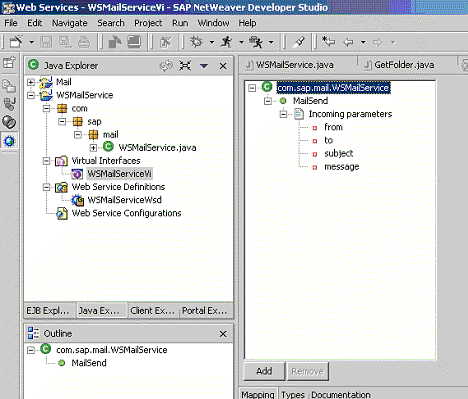
After that wizard you should have a Virtual Interface, a Web Service Definition and a Web Service Configuration

Check the new Webservice
You can test the new Webservice. Call the URL http://Your.Server:50000/index.html and click on Web Service Navigator. If everything is ok the Webservice WSMailService should appear. Click on it.
Click on the menue “Test” and on the operation “MailSend” and you will see this page:

You can fill the parameters and send these values. If everything is ok you will see the resultpage page and an Email arrived-
Congratulations!
