
- SAP Community
- Products and Technology
- Technology
- Technology Blogs by SAP
- Computer vision with SAP Data Intelligence
Technology Blogs by SAP
Learn how to extend and personalize SAP applications. Follow the SAP technology blog for insights into SAP BTP, ABAP, SAP Analytics Cloud, SAP HANA, and more.
Turn on suggestions
Auto-suggest helps you quickly narrow down your search results by suggesting possible matches as you type.
Showing results for
Advisor
Options
- Subscribe to RSS Feed
- Mark as New
- Mark as Read
- Bookmark
- Subscribe
- Printer Friendly Page
- Report Inappropriate Content
03-16-2022
8:08 AM
In the time that I have spent coding, not a single day has gone by without opening up stack overflow to copy code. And on days that I use SAP Data Intelligence (DI), not a single day has gone by without scouring the SAP community hoping to find the code I need, waiting to be copied. Sometimes I have found the code snippets that I need in the many blogs in the community. Sometimes I have run into zilch online. Those are the rare days when even Google doesn't know the answers. This blog was born a long time ago, from one of those frustrating experiences of being unable to copy code and having to write one that works, from scratch. I am unable to share the entire code publicly, but if you are internal to SAP, please write to me and I am happy to share our github repository for this piece of work.
Specifically, this blog is a list of things that worked for us while setting up image classification in DI, should you like to try the same on your instance. This is of course not the only way to get things working but hopefully serves as a cheat sheet for those starting out afresh. This is also not a guide to building your first ML model in DI, so I do not explain all steps of the way. There are many useful blogs for that in the community and I have left links to these in the references section. This blog assumes you know the basics of setting up ML models in DI and only delves on what might be different when you deal with images.
Debugging errors is not the most fun part of development, but there is an undeniable sense of victory when you find that fix. So I have also thrown in a few general errors we faced along the way, and what worked for us to fix them. If you find this useful, give us a like and share, and pass it along to those to whom it might be of help. If you have faced other errors and have figured out the fix, do share it in the comments below.
Our training & test images were uploaded in the DI Data Lake. The below code works in both Jupyter Notebooks as well as the Python operator in pipeline. But first we tested out that it works in Notebooks. The code loops over all images in a folder in the DI data lake, reads each image as a numpy array and appends the incoming arrays as it goes into a list.
If you see an error as below in Jupyter, it means you need someone with an admin role to increase the memory allocation to Jupyter notebooks. Alternately, if you can change the code to use less memory you can sail through.
Subsequently, you can continue with the rest of your training code as you would on your local system.
Here's what our initial docker image looked like.
However, as vitaliy.rudnytskiy was quick to point out, firstly it does not collect the shared Py module dependencies only once, but collects them again and again for every single “pip install” run. Secondly, it creates layer over layer over layer of files in the Docker container. It means a bigger than needed Docker image size, which in turn will take more time to start and will be slower to execute. The simplified docker image, looks as below, and works just as well.
This what the tags associated with our docker looked like. The order of the tags is immaterial.
It is essential to mention the version for tornado. Else you may not be able to execute the pipeline and you will see this error in your status tab. Essentially it means the pipeline was unable to find your tagged docker file.
If pip install opencv-python fails for you, try pip install opencv-python-headless. As the documentation here suggests, "these packages are smaller than the two other (opencv) packages because they do not contain any GUI functionality (not compiled with Qt / other GUI components). This means that the packages avoid a heavy dependency chain to X11 libraries and you will have for example smaller Docker images as a result. You should always use these packages if you do not use
The most convenient (and perhaps less error prone) approach to setting up a pipeline is to create one from the pre-configured templates. We use a Python Producer template for the training. Keep all operators in the suggested template intact as much as possible. The Training operator can be edited to follow the training code that worked for you in Jupyter. Once the model (clf in our case) is ready, save it as a pickle file and pass it to the model port.
Create the inference pipeline from the Python Consumer template. The only changes you need to make are in the Python operator where your inference code needs to go in. The key thing to identify is how your client will pass the image to the DI API call. If your client will pass a base64 image, your inference code should carry below code. You will notice the sample code from the template before the image read code. I personally find the log an easy way to debug how far along the code executed successfully before running into an error and exiting the operator. The sample inference template provides a simple framework to establish this and liberal usage of log along the code makes debugging easier during inference. The rest of the code would be similar to how you do inference on your model in Jupyter notebook.
Once you prediction is ready, pass it to the output port as below.
The inference code, in DI's Jupyter will be as below.
The inference on your local Jupyter notebook could read from your local file. In which case it would look as below.
To check in Postman, just take a json dump of your payload so you can later copy it over into the Body of the post call.
Within postman, set the call to POST and add the DI deployment URL. Under Auth select Basic Type and enter your credentials. The username format should be tenant_name\user_name. Headers should be entered as in image below.
Open your payload json and copy over the contents to the body of Postman. If you see double quotes before and after the string, remove them.
You should see the response from DI if you click Send.
In your API call to DI, if you pass the image in any other format, you will just need to make sure the input is unpacked correctly in DI. A simple way to check this would be to just try it out in Jupyter. For eg. when you create your payload in Jupyter, unpack it with the same code you use in DI and see if it works with your subsequent inference code. If the unpacking works in Jupyter, it should work in DI.
For eg, below code packs and unpacks the base64 payload and can be verified in DI's Jupyter.
Also, below code packs and unpacks image as numpy array and can also be verified in DI's Jupyter.
Both times, the create payload will go before point of inference in python. Read payload will go into DI's Python operator. In the second case, adjust body of postman with the numpy array as input.
This covers all that would be different when you deal with images in SAP Data Intelligence, as compared to structured data. The same extends to voice and video files as well. I hope you found it useful and saved you a little time today. Drop your questions (or new bugs you're facing) into the comments section below and I will try to answer them if I know the answers.
Thanks to vitaliy.rudnytskiy for pointing out the inefficiency of our initial docker file.
BIG thanks to Vinay Bhatt for helping out with the reusable code snippets.
Create your first ML scenario by Andreas Foster
Deploy your first HANA ML pipelines by Andreas Foster
Hands on tutorials by Denys van Kempen
DI with tensor flow by Frank Schuler
Specifically, this blog is a list of things that worked for us while setting up image classification in DI, should you like to try the same on your instance. This is of course not the only way to get things working but hopefully serves as a cheat sheet for those starting out afresh. This is also not a guide to building your first ML model in DI, so I do not explain all steps of the way. There are many useful blogs for that in the community and I have left links to these in the references section. This blog assumes you know the basics of setting up ML models in DI and only delves on what might be different when you deal with images.
Debugging errors is not the most fun part of development, but there is an undeniable sense of victory when you find that fix. So I have also thrown in a few general errors we faced along the way, and what worked for us to fix them. If you find this useful, give us a like and share, and pass it along to those to whom it might be of help. If you have faced other errors and have figured out the fix, do share it in the comments below.
The Exploration Phase
Reading from the data lake
Our training & test images were uploaded in the DI Data Lake. The below code works in both Jupyter Notebooks as well as the Python operator in pipeline. But first we tested out that it works in Notebooks. The code loops over all images in a folder in the DI data lake, reads each image as a numpy array and appends the incoming arrays as it goes into a list.
train_images = []

train_labels = []

shape = (200,200)


directory='/shared/ml/data/<insert your path here>/AllImages/'

client = InsecureClient('http://datalake:50070')


for filename in client.list(directory):

    with client.read(directory+filename) as reader:

        # Spliting file names and storing the labels for image in list

        train_labels.append(filename.split('_')[0])


        # Read and resize all images to a specific shape

        img = BytesIO(reader.read())

        img = np.array(Image.open(img))

        img = cv2.resize(img,shape)

        train_images.append(img)
If you see an error as below in Jupyter, it means you need someone with an admin role to increase the memory allocation to Jupyter notebooks. Alternately, if you can change the code to use less memory you can sail through.

Kernel restarting abruptly
Subsequently, you can continue with the rest of your training code as you would on your local system.
x_train1,x_test,y_train1,y_test = train_test_split(train_images, train_labels, test_size=0.2, random_state=1,stratify=train_labels)
Setting up the training pipeline
Docker Build
Here's what our initial docker image looked like.
FROM $com.sap.sles.base


RUN python3.6 -m pip install --upgrade pip setuptools wheel --user

RUN python3.6 -m pip install opencv-python-headless --user


RUN python3.6 -m pip install numpy==1.16.4 --user

RUN python3.6 -m pip install pandas==1.0.3 --user

RUN python3.6 -m pip install scikit-learn --user

RUN python3.6 -m pip install hdfs --user

RUN python3.6 -m pip install mahotas --user

RUN python3.6 -m pip install Pillow --user
However, as vitaliy.rudnytskiy was quick to point out, firstly it does not collect the shared Py module dependencies only once, but collects them again and again for every single “pip install” run. Secondly, it creates layer over layer over layer of files in the Docker container. It means a bigger than needed Docker image size, which in turn will take more time to start and will be slower to execute. The simplified docker image, looks as below, and works just as well.
FROM $com.sap.sles.base


RUN python3.6 -m pip install --upgrade pip setuptools wheel --user

RUN python3.6 -m pip install opencv-python-headless numpy==1.16.4 pandas==1.0.3 scikit-learn hdfs mahotas Pillow
This what the tags associated with our docker looked like. The order of the tags is immaterial.

Docker Tags
It is essential to mention the version for tornado. Else you may not be able to execute the pipeline and you will see this error in your status tab. Essentially it means the pipeline was unable to find your tagged docker file.

Status error
If pip install opencv-python fails for you, try pip install opencv-python-headless. As the documentation here suggests, "these packages are smaller than the two other (opencv) packages because they do not contain any GUI functionality (not compiled with Qt / other GUI components). This means that the packages avoid a heavy dependency chain to X11 libraries and you will have for example smaller Docker images as a result. You should always use these packages if you do not use
cv2.imshow et al. or you are using some other package (such as PyQt) than OpenCV to create your GUI." Given we don't need to visualise in our training operators, the headless package is ideal for us.Training Pipeline
The most convenient (and perhaps less error prone) approach to setting up a pipeline is to create one from the pre-configured templates. We use a Python Producer template for the training. Keep all operators in the suggested template intact as much as possible. The Training operator can be edited to follow the training code that worked for you in Jupyter. Once the model (clf in our case) is ready, save it as a pickle file and pass it to the model port.
pickled_clf = pickle.dumps(clf)

api.send("modelBlob", model_blob)
Setting up the inference pipeline
Editing the Python operator
Create the inference pipeline from the Python Consumer template. The only changes you need to make are in the Python operator where your inference code needs to go in. The key thing to identify is how your client will pass the image to the DI API call. If your client will pass a base64 image, your inference code should carry below code. You will notice the sample code from the template before the image read code. I personally find the log an easy way to debug how far along the code executed successfully before running into an error and exiting the operator. The sample inference template provides a simple framework to establish this and liberal usage of log along the code makes debugging easier during inference. The rest of the code would be similar to how you do inference on your model in Jupyter notebook.
if is_json(user_data):

                api.logger.info("Received valid json data from client - ready to use")

                log = log + 'data is json. '


                image = base64.b64decode(user_data)

                log = log + 'image ready\n\n'


                jpg_as_np = np.frombuffer(image, dtype=np.uint8)

                log = log + 'buffer ready\n\n'


                img = cv2.imdecode(jpg_as_np, flags=1)

                log = log + 'decoded ready\n\n'
Once you prediction is ready, pass it to the output port as below.
if success:

        msg.body = json.dumps({'Results': result, 'Prediction' : str(prediction[0]), 'Log ' : log})

    else:

        msg.body = json.dumps({'Results': False, 'Error': error_message, 'Log': log})


    new_attributes = {'message.request.id': msg.attributes['message.request.id']}

    msg.attributes =  new_attributes

    api.send('output', msg)
Inferencing in Jupyter
The inference code, in DI's Jupyter will be as below.
import base64

import requests

import json

import io

from io import BytesIO

from hdfs import InsecureClient

client = InsecureClient('http://datalake:50070')


credential = "default\\<insert DI username>:<insert DI password>"


#With base64 image

with client.read('/shared/ml/data/<insert path to inference image>/Inf_img1.jpeg') as reader:

        payload_arr = BytesIO(reader.read())

        payload=base64.b64encode(payload_arr.getvalue()).decode()


url = "<insert DI deployment URL here>v1/uploadjson"


headers = {

  'Content-Type': 'application/json',

  'X-Requested-With': 'XMLHttpRequest',

  'Authorization': 'Basic '+str(base64.b64encode(credential.encode("utf-8")), "utf-8")

}


response = requests.request("POST", url, headers=headers, data = payload)

response.json().get("Prediction")
The inference on your local Jupyter notebook could read from your local file. In which case it would look as below.
import base64

import requests

credential = "default\\<insert DI username>:<insert DI password>"


with open("<insert source pathname of image file>", "rb") as image_file:

    payload = base64.b64encode(image_file.read())


url = "<insert DI deployment URL here>/v1/uploadjson"


headers = {

  'Content-Type': 'application/json',

  'X-Requested-With': 'XMLHttpRequest',

  'Authorization': 'Basic '+str(base64.b64encode(credential.encode("utf-8")), "utf-8")

}


response = requests.request("POST", url, headers=headers, data = payload)

response.json().get("Prediction")
Inferencing in postman
To check in Postman, just take a json dump of your payload so you can later copy it over into the Body of the post call.
with open('/Users/<insert pathname to destination file>/Payload.json', 'w') as outfile:

    json.dump(payload, outfile)
Within postman, set the call to POST and add the DI deployment URL. Under Auth select Basic Type and enter your credentials. The username format should be tenant_name\user_name. Headers should be entered as in image below.

Headers tab in postman
Open your payload json and copy over the contents to the body of Postman. If you see double quotes before and after the string, remove them.
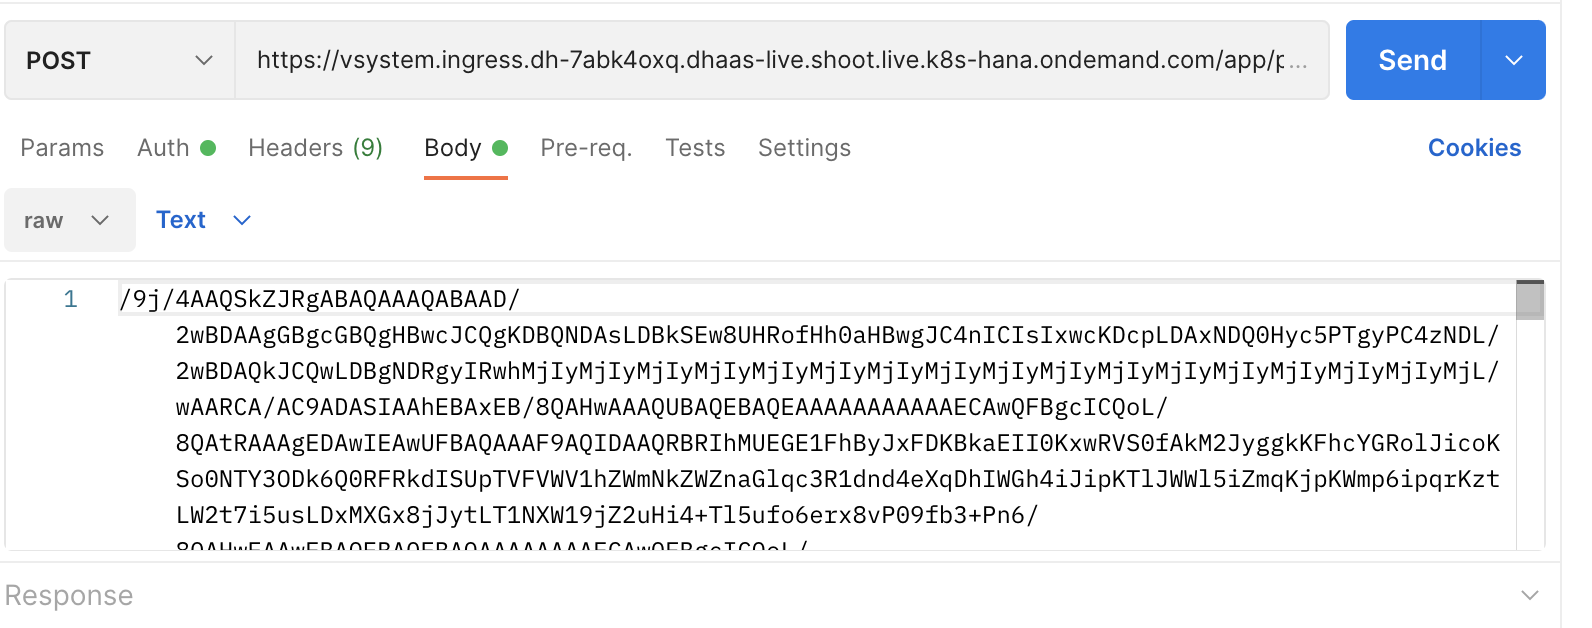
Body tab in postman
You should see the response from DI if you click Send.
Packing and unpacking payload
In your API call to DI, if you pass the image in any other format, you will just need to make sure the input is unpacked correctly in DI. A simple way to check this would be to just try it out in Jupyter. For eg. when you create your payload in Jupyter, unpack it with the same code you use in DI and see if it works with your subsequent inference code. If the unpacking works in Jupyter, it should work in DI.
For eg, below code packs and unpacks the base64 payload and can be verified in DI's Jupyter.
#Create payload

with client.read('/shared/ml/data/<insert path to inference image here>/Inf_img1.jpeg') as reader:

        payload_arr = BytesIO(reader.read())

        payload=base64.b64encode(payload_arr.getvalue()).decode()


#Read payload

image = base64.b64decode(payload)

jpg_as_np = np.frombuffer(image, dtype=np.uint8)

img = cv2.imdecode(jpg_as_np, flags=1)
Also, below code packs and unpacks image as numpy array and can also be verified in DI's Jupyter.
#Create payload

import cv2

from PIL import Image

shape = (200,200)

with client.read('/shared/ml/data/<insert path to inference image>/Inf_img1.jpeg') as reader:

    payload_arr = BytesIO(reader.read())

    payload = np.array(Image.open(payload_arr))

    payload = cv2.resize(payload,shape)

    payload = json.dumps(payload.tolist())


#Read payload

img_arr = np.asarray(json.loads(payload),dtype=np.uint8)
Both times, the create payload will go before point of inference in python. Read payload will go into DI's Python operator. In the second case, adjust body of postman with the numpy array as input.
Conclusion
This covers all that would be different when you deal with images in SAP Data Intelligence, as compared to structured data. The same extends to voice and video files as well. I hope you found it useful and saved you a little time today. Drop your questions (or new bugs you're facing) into the comments section below and I will try to answer them if I know the answers.
Credits
Thanks to vitaliy.rudnytskiy for pointing out the inefficiency of our initial docker file.
BIG thanks to Vinay Bhatt for helping out with the reusable code snippets.
References
Create your first ML scenario by Andreas Foster
Deploy your first HANA ML pipelines by Andreas Foster
Hands on tutorials by Denys van Kempen
DI with tensor flow by Frank Schuler
- SAP Managed Tags:
- Machine Learning,
- SAP Data Intelligence,
- SAP Business Technology Platform
Labels:
2 Comments
You must be a registered user to add a comment. If you've already registered, sign in. Otherwise, register and sign in.
Labels in this area
-
ABAP CDS Views - CDC (Change Data Capture)
2 -
AI
1 -
Analyze Workload Data
1 -
BTP
1 -
Business and IT Integration
2 -
Business application stu
1 -
Business Technology Platform
1 -
Business Trends
1,658 -
Business Trends
92 -
CAP
1 -
cf
1 -
Cloud Foundry
1 -
Confluent
1 -
Customer COE Basics and Fundamentals
1 -
Customer COE Latest and Greatest
3 -
Customer Data Browser app
1 -
Data Analysis Tool
1 -
data migration
1 -
data transfer
1 -
Datasphere
2 -
Event Information
1,400 -
Event Information
66 -
Expert
1 -
Expert Insights
177 -
Expert Insights
293 -
General
1 -
Google cloud
1 -
Google Next'24
1 -
Kafka
1 -
Life at SAP
780 -
Life at SAP
13 -
Migrate your Data App
1 -
MTA
1 -
Network Performance Analysis
1 -
NodeJS
1 -
PDF
1 -
POC
1 -
Product Updates
4,577 -
Product Updates
341 -
Replication Flow
1 -
RisewithSAP
1 -
SAP BTP
1 -
SAP BTP Cloud Foundry
1 -
SAP Cloud ALM
1 -
SAP Cloud Application Programming Model
1 -
SAP Datasphere
2 -
SAP S4HANA Cloud
1 -
SAP S4HANA Migration Cockpit
1 -
Technology Updates
6,873 -
Technology Updates
419 -
Workload Fluctuations
1
Related Content
- Benchmarking in the data-driven era in Technology Blogs by SAP
- Enter the era of spatial computing for enterprise with SAP Build Code in Technology Blogs by SAP
- Modellierung ‘24 Conference: A Glimpse At The Future of Process Modeling in Technology Blogs by SAP
- AI Engineering in Technology Q&A
- Deliver Real-World Results with SAP Business AI: Q4 2023 & Q1 2024 Release Highlights in Technology Blogs by SAP
Top kudoed authors
| User | Count |
|---|---|
| 35 | |
| 25 | |
| 14 | |
| 13 | |
| 7 | |
| 7 | |
| 6 | |
| 6 | |
| 5 | |
| 5 |