
- SAP Community
- Products and Technology
- Technology
- Technology Blogs by SAP
- Tomcat 8 runtime in HCP - Part 2 - Servlet 3.1
Technology Blogs by SAP
Learn how to extend and personalize SAP applications. Follow the SAP technology blog for insights into SAP BTP, ABAP, SAP Analytics Cloud, SAP HANA, and more.
Turn on suggestions
Auto-suggest helps you quickly narrow down your search results by suggesting possible matches as you type.
Showing results for
Advisor
Options
- Subscribe to RSS Feed
- Mark as New
- Mark as Read
- Bookmark
- Subscribe
- Printer Friendly Page
- Report Inappropriate Content
05-03-2016
12:08 PM
As I have mentioned in my previous blog, HCP has introduced a new runtime that is JAVA Web Tomcat 8 which is the natural predecessor of JAVA Web Tomcat 7 runtime. Also in future a Certified EE 7 runtime is planned. The following diagram will show the release flow of the runtimes:

Tomcat 8 introduced Servlet 3.1. The main topic that we will concentrate on in this blog is to see how non-blocking IO feature works in Servlet 3.1.
In a typical Servlet scenario we see generally three kinds of operations. Read, Write and all other operations. The following diagram will show the typical flow of these operations:

However, since the Read and Write operations are synchronous the Task 2 will wait until task 1 is complete. And here is the issue for very high volume of data streaming. Task 2 will wait long enough to degrade the performance. In Servlet 3.1 the IO mechanism has been put in a asynchronous manner. The following diagram explains the flow:

Servlet 3.1 when runs on a asynchronous mode, registers two listener classes - For reading data you need to implement a class with interface ReadListener. For Writing data out you need to implement a class with interface WriteListener. You can find the Javadoc for these interfaces in the links below:
ReadListener (Java(TM) EE 7 Specification APIs)
WriteListener (Java(TM) EE 7 Specification APIs)
So, let's try to create a Servlet and try out non-blocking IO feature.
Pre-requisite: As I mentioned in my previous blog please set up your local environment for Java Web Tomcat 8 runtime.
Step 1: Create a dynamic web project with the following option: Target Runtime = Tomcat 8; Dynamic web module = 3.1

Next -> Next -> Check on Generate web.xml and Finish.
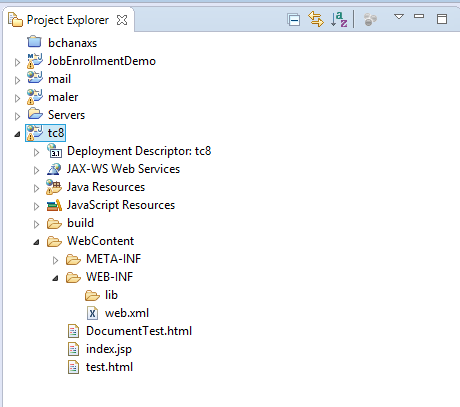
This will create the project in your eclipse:
Step 2: Create Servlet. I created a servlet 'UploadServlet' under package com.sap.web.
Important point that we need to mention asyncSupported=true in the @WebServlet annotation.
@WebServlet(name = "UploadServlet", urlPatterns = {"/UploadServlet"}, asyncSupported=true)
In this case I just implemented the doPost method, however similar approach can be taken for doGet.
Next get the context of the asynch request
AsyncContext context = request.startAsync();
And then you need to setup the listener on that context.
// set up async listener
context.addListener(new AsyncListener() {
public void onComplete(AsyncEvent event) throws IOException {
event.getSuppliedResponse().getOutputStream().print("Complete");
}
public void onError(AsyncEvent event) {
System.out.println(event.getThrowable());
}
public void onStartAsync(AsyncEvent event) {
}
public void onTimeout(AsyncEvent event) {
System.out.println("my asyncListener.onTimeout");
}
});
Now get the InputStearm object and instantiate your read Listener class.
ServletInputStream input = request.getInputStream();
ReadListener readListener = new ReadListenerImpl(input, response, context);
input.setReadListener(readListener);
Step 3: Now we need to create the ReadListnerImpl class which implements the ReadListener interface.
This Interface gives you some call back functions:
onDataAvailable() : This is the call back function that fires when the data is available in IO. So this is the right place to read the Stream.
StringBuilder sb = new StringBuilder();
int len = -1;
byte b[] = new byte[1024];
while (input.isReady() && (len = input.read(b)) != -1) {
String data = new String(b, 0, len);
sb.append(data);
}
and put this in a queue.
queue.add(sb.toString());
Note: queue is defined as a LinkedBlockingQueue
private Queue queue = new LinkedBlockingQueue();
Similarly you can define actions to do when all IO data are read in the following method: onAllDataRead()
In this simplistic example we kick started writing IO in this method.
public void onAllDataRead() throws IOException {
System.out.println("Data is all read");
// now all data are read, set up a WriteListener to write
ServletOutputStream output = res.getOutputStream();
WriteListener writeListener = new WriteListenerImpl(output, queue, ac);
output.setWriteListener(writeListener);
}
In error handling should be done in method: public void onError(final Throwable t)
public void onError(final Throwable t) {
ac.complete();
t.printStackTrace();
}
Step 4: Implement WriteListener.
Now we need to create a class implementing interface WriteListener.
public class WriteListenerImpl implements WriteListener
The write operation is defined in the call back method onWritePossible()
public void onWritePossible() throws IOException {
while (queue.peek() != null && output.isReady()) {
String data = (String) queue.poll();
output.print(data);
}
if (queue.peek() == null) {
context.complete();
}
}
And the error handling has to be done in onError method:
public void onError(final Throwable t) {
context.complete();
t.printStackTrace();
}
Testing
Now in order to test it I added a small HTML page that posts data via HTTP POST. (You could have used POSTMAN or Advanced REST console as well)
The code snippet for the HTML code is like below:
<!DOCTYPE html>
<html>
<head>
<meta charset="ISO-8859-1">
<title>Document Service Test</title>
</head>
<body>
<fieldset>
<legend>Upload File</legend>
<form action='UploadServlet' method='post' enctype='multipart/form-data'>
<label for='filename'>File: </label>
<input id='filename' type='file' name='filename' size='50'/>
<br/>
<input type='submit' value='Upload File'/>
</form>
</fieldset>
</body>
</html>
Deployment:
Now that the coding is complete I would like to run that. For that I need to deploy the project in my local runtime.
From the Server view right click and create a new server.
Choose Tomcat 8 under SAP as the server type.

Add the newly created project and finish.
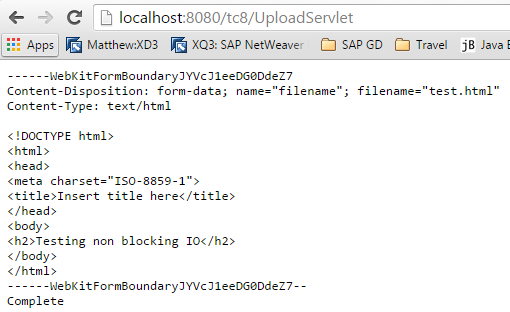
Once published, you can run a test by running the url: http://localhost:<port>/DocumentTest.html

Note: In this example we are converting the stream in String and writing it back. So we will test with a text file upload.
Original File content:
<!DOCTYPE html>
<html>
<head>
<meta charset="ISO-8859-1">
<title>Insert title here</title>
</head>
<body>
<h2>Testing non blocking IO</h2>
</body>
</html>
Result:
For your reference I am attaching the source code of the main Java files.
- SAP Managed Tags:
- SAP Business Technology Platform
You must be a registered user to add a comment. If you've already registered, sign in. Otherwise, register and sign in.
Labels in this area
-
ABAP CDS Views - CDC (Change Data Capture)
2 -
AI
1 -
Analyze Workload Data
1 -
BTP
1 -
Business and IT Integration
2 -
Business application stu
1 -
Business Technology Platform
1 -
Business Trends
1,658 -
Business Trends
93 -
CAP
1 -
cf
1 -
Cloud Foundry
1 -
Confluent
1 -
Customer COE Basics and Fundamentals
1 -
Customer COE Latest and Greatest
3 -
Customer Data Browser app
1 -
Data Analysis Tool
1 -
data migration
1 -
data transfer
1 -
Datasphere
2 -
Event Information
1,400 -
Event Information
66 -
Expert
1 -
Expert Insights
177 -
Expert Insights
299 -
General
1 -
Google cloud
1 -
Google Next'24
1 -
Kafka
1 -
Life at SAP
780 -
Life at SAP
13 -
Migrate your Data App
1 -
MTA
1 -
Network Performance Analysis
1 -
NodeJS
1 -
PDF
1 -
POC
1 -
Product Updates
4,577 -
Product Updates
345 -
Replication Flow
1 -
RisewithSAP
1 -
SAP BTP
1 -
SAP BTP Cloud Foundry
1 -
SAP Cloud ALM
1 -
SAP Cloud Application Programming Model
1 -
SAP Datasphere
2 -
SAP S4HANA Cloud
1 -
SAP S4HANA Migration Cockpit
1 -
Technology Updates
6,873 -
Technology Updates
427 -
Workload Fluctuations
1
Related Content
- There is a problem connecting to the database. JDBC PostgreSQL in Technology Q&A
- SAP Java Buildpack 2: Jakarta-Based, Fresh and New! in Technology Blogs by SAP
- What’s New in SAP Analytics Cloud Release 2024.04 in Technology Blogs by SAP
- Looking for a latest web reporting library for Crystal Reports viewing in Technology Q&A
- Unable to add subaccount to cloud connector in Technology Q&A
Top kudoed authors
| User | Count |
|---|---|
| 41 | |
| 25 | |
| 17 | |
| 14 | |
| 9 | |
| 7 | |
| 6 | |
| 6 | |
| 6 | |
| 6 |