Go to Part 1
5. Create a Project in Web IDE
Start from creating a new project File > New > Project from Template

- Choose Smart Template Application from Template Selection and click Next

- Provide Basic Information

- In Data Connection; select the system and OData service, then click Next


With that we are done and our project got created.
6. Edit Project in Web IDE

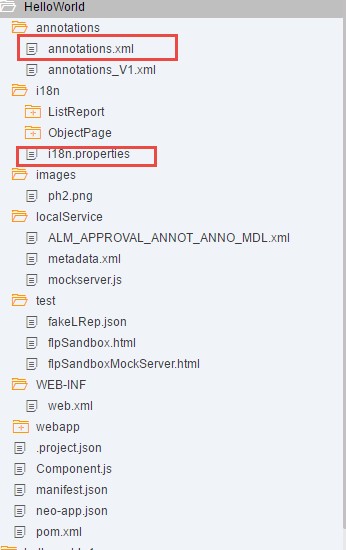
Note: i18n is used for internationalization purpose. Hence all the text will be maintained here.
- You can manually update annotation.xml. Annotation file can be edited in two different ways.
- Code Editor
- Annotation Modeler

Using Code Editor you will have to manually edit the code.
7. Edit using Annotation Modeler


- Now Add LineItem as Data Field


Click Apply.
6. Run the Application


The Application Preview is started, the application is loading and data is fetched from the OData Service.
7. Deploy the application to UI5 ABAP Repository
Now we deploy this Fiori Application to our on premise Fiori Launchpad
- Right click on the project->Deploy->Deploy to SAPUI5 ABAP Repository

- Deploy a new application or update an existing application

Now select the project from the existing list and Confirm.
Now go to ABAP system and check BSP application created for the project.

8. Deploy the app to an on Premise Fiori Launchpad
Create Launchpad Role; tcode LPD_CUST -> click on New Launchpad

Role: HelloWorld
Instance: Transactional

- Provide URL: /sap/bc/ui5_ui5/sap/* (your project name)
- Additional Information: SAPUI5.Component=HelloWorld (You can find Component from Compoent.js in Web IDE)

- We need a corresponding Semantic Object: tcode-> /UI2/SEMOBJ

- Now go to Fiori Designer to create Catalog, tile and group.
https://<host>:<port>/sap/bc/ui5_ui5/sap/arsrvc_upb_admn/main.html?sap-client=200&sap-language=EN
Enter User and Password

- Create a Tile

- Create Target Mapping

- Create role for SAP Fiori Tile Catalog

- Add the role into your user

- Finally run the application
https://<host>:<port>/sap/bc/ui5_ui5/ui2/ushell/shells/abap/FioriLaunchpad.html?sap-client=200&sap-ui-language=EN&sap-ui-appcache=false#helloworld-display

