


- SAP Community
- Products and Technology
- Technology
- Technology Blogs by SAP
- Developing a sample C4C extension application usin...
Technology Blogs by SAP
Learn how to extend and personalize SAP applications. Follow the SAP technology blog for insights into SAP BTP, ABAP, SAP Analytics Cloud, SAP HANA, and more.
Turn on suggestions
Auto-suggest helps you quickly narrow down your search results by suggesting possible matches as you type.
Showing results for
Employee
Options
- Subscribe to RSS Feed
- Mark as New
- Mark as Read
- Bookmark
- Subscribe
- Printer Friendly Page
- Report Inappropriate Content
10-09-2015
12:58 PM
In this section, we will create a Service Tickets Fiori Launchpad site with a tile for launching the Open Tickets application that we created in Part1. Along with it we will also create a dynamic tile to display live data.
Launch HANA Cloud Portal service
| Input | Output |
|---|---|
|  |
|  |
Create a Fiori Launchpad Site
| Input | Output |
|---|---|
|  |
|  |
The Publish Site confirmation dialog appears
|  |
The new Fiori Launchpad site is launched in a new browser tab.
|
|
Create new App Tile
| Input | Output |
|---|---|
|  |
|
|
|
|
|  |
|  |
|
|
Create a New Catalog.
| Input | Output |
|---|---|
|  |
|
|
Register to SAP Fiori Launchpad
| Input | Output |
|---|---|
| |
Application Name: OpenTickets Description: List of available service requests.
|  |
Type : Static Title : Open Tickets Subtitle: Outstanding open tickets Icon : Click on the Browse button to select an icon |
|
Catalog: Service Requests |
|
|  |
Manage Content in a Fiori Launchpad Site
In this section you will add the OpenTickets business applications as content to your Service Center Fiori Launchpad Site and customize application tiles.
Create a New Group of Tiles (applications)
Configure tile groups to organize the related applications in the current Fiori Launchpad site.
| Input | Output |
|---|---|
|
|
|  |
Preview the Fiori Launchpad Site
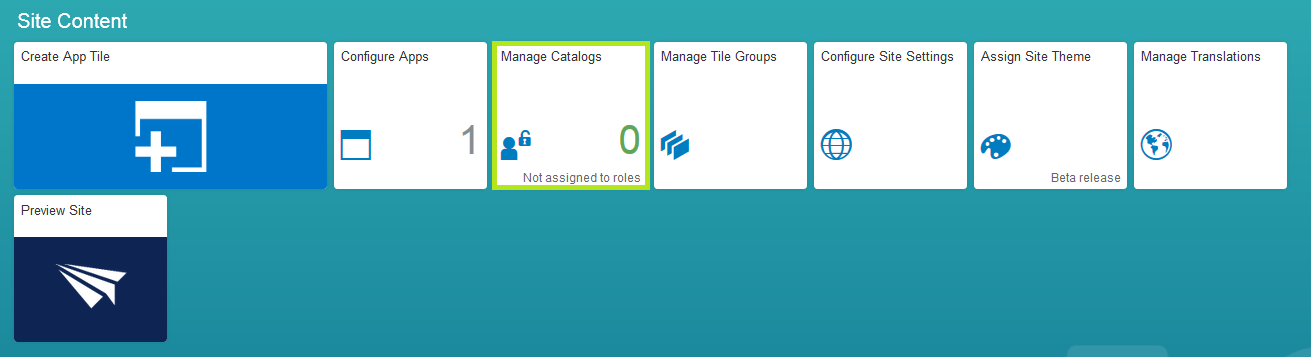
From the Site Content group of tiles in the Fiori Launchpad’s Configuration Cockpit.
| Input | Output |
|---|---|
|
|
Creating a Dynamic Tile.
| Input | Output |
|---|---|
Goto Services, click on SAP HANA Cloud Portal and then click on Go to Service Your cloud portal launch pad will be opened.
|
|
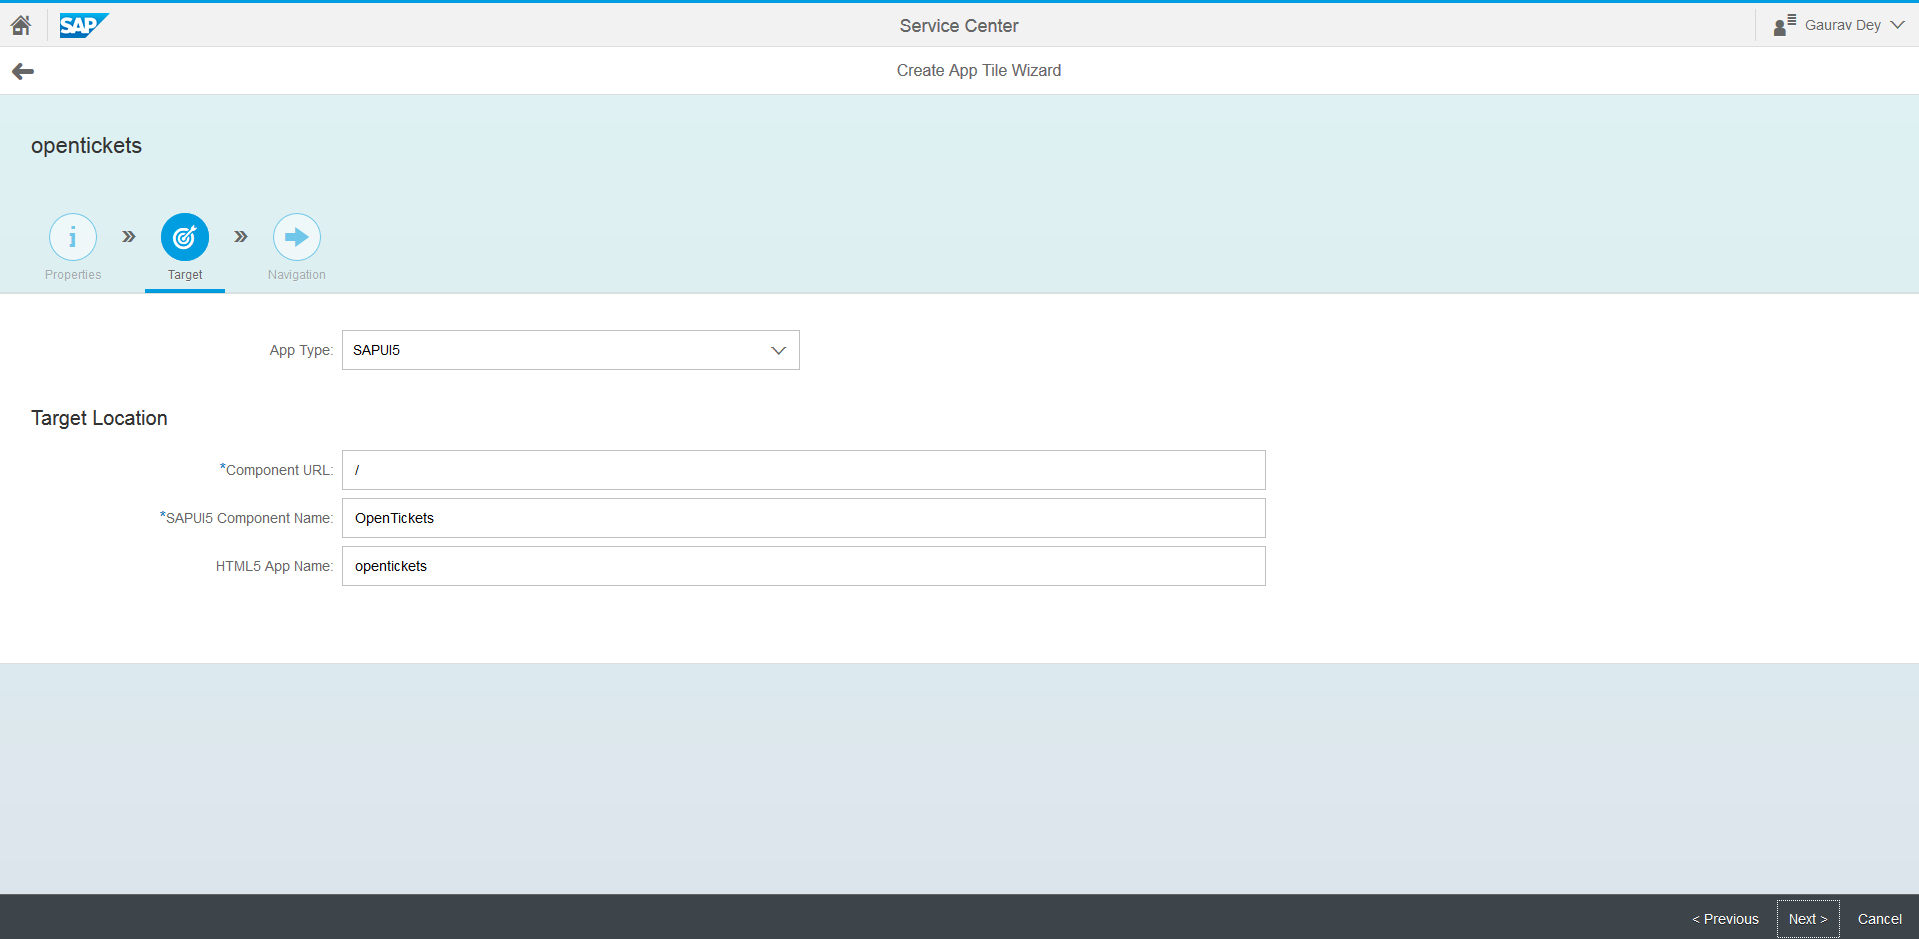
|  |
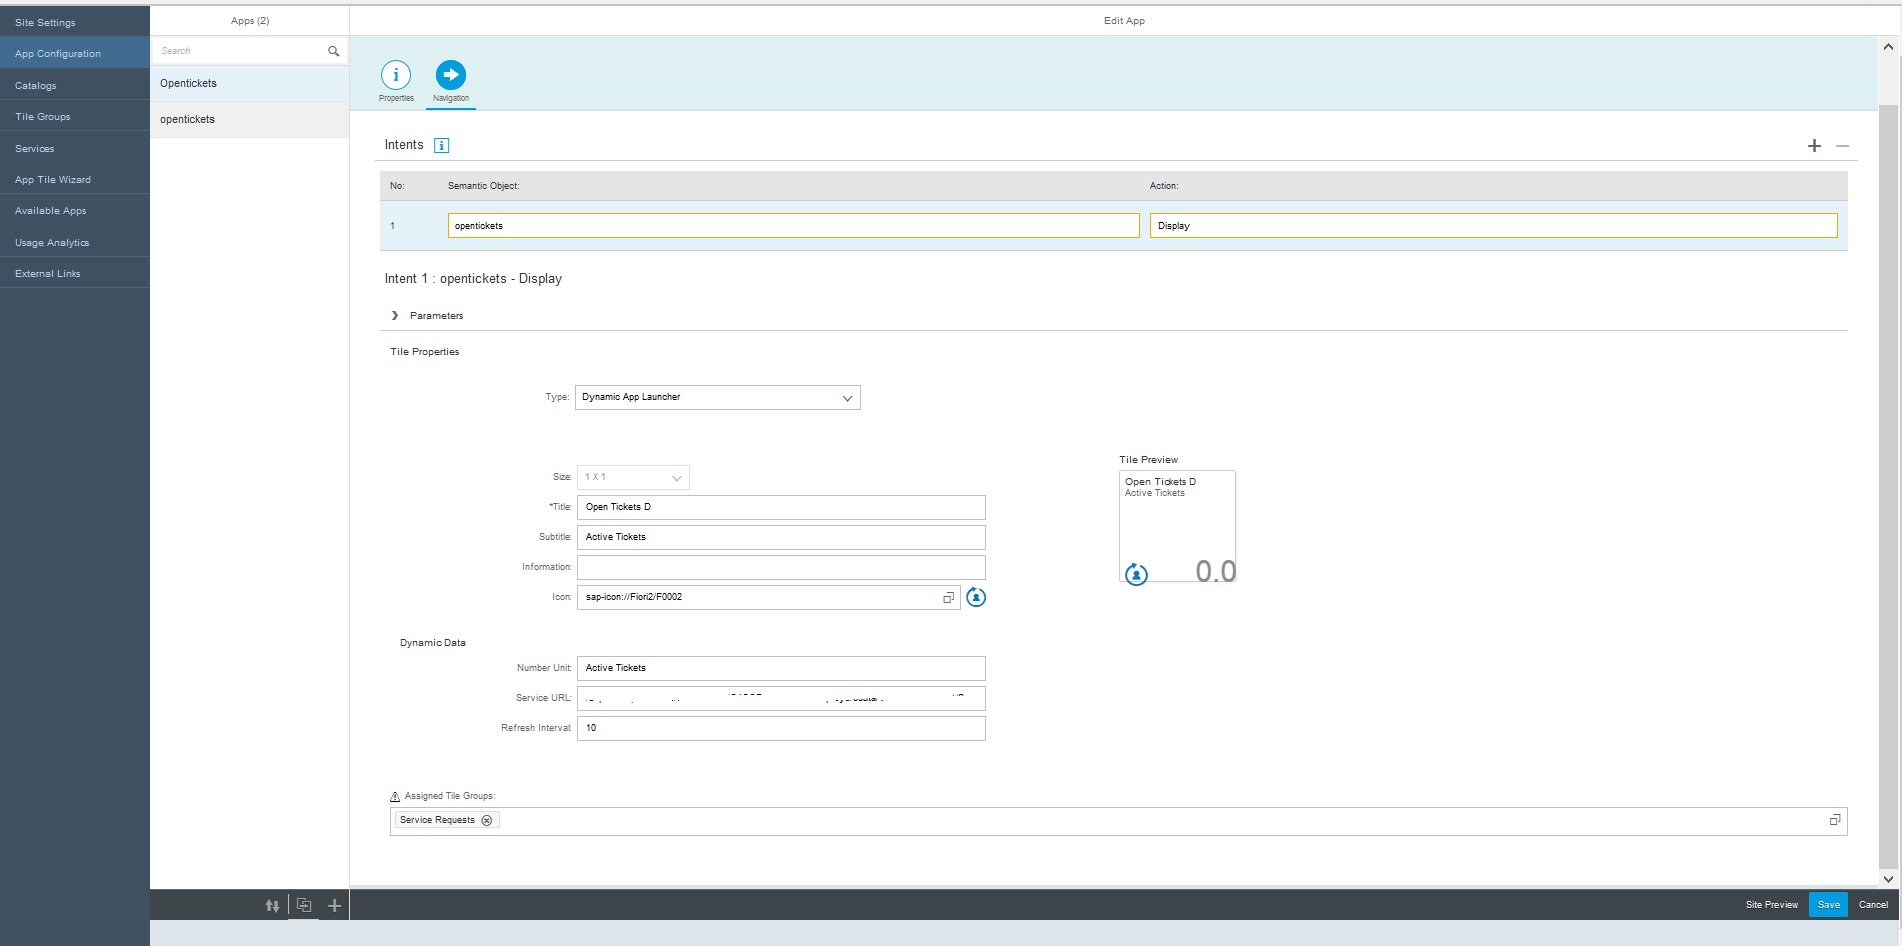
and other important properties of the dynamic tile. Enter the details as shown in the figure. Component URL: / SAPUI5 Component Name: OpenTickets HTML5 App Name: employees
|  |
Service URL: /sap/fiori/opentickets/destinations/C4CODataServices/sap/byd/odata/v1/ servicerequest/ServiceRequestCollection/$count This is the query that we have used in this example which shows the KPI of Open Tickets.
|  |
|  |
Congratulations! You’ve succeeded in developing a support site application and added it to a Fiori Launchpad Site.
- SAP Managed Tags:
- SAP Business Technology Platform
10 Comments
You must be a registered user to add a comment. If you've already registered, sign in. Otherwise, register and sign in.
Labels in this area
-
ABAP CDS Views - CDC (Change Data Capture)
2 -
AI
1 -
Analyze Workload Data
1 -
BTP
1 -
Business and IT Integration
2 -
Business application stu
1 -
Business Technology Platform
1 -
Business Trends
1,661 -
Business Trends
87 -
CAP
1 -
cf
1 -
Cloud Foundry
1 -
Confluent
1 -
Customer COE Basics and Fundamentals
1 -
Customer COE Latest and Greatest
3 -
Customer Data Browser app
1 -
Data Analysis Tool
1 -
data migration
1 -
data transfer
1 -
Datasphere
2 -
Event Information
1,400 -
Event Information
64 -
Expert
1 -
Expert Insights
178 -
Expert Insights
273 -
General
1 -
Google cloud
1 -
Google Next'24
1 -
Kafka
1 -
Life at SAP
784 -
Life at SAP
11 -
Migrate your Data App
1 -
MTA
1 -
Network Performance Analysis
1 -
NodeJS
1 -
PDF
1 -
POC
1 -
Product Updates
4,577 -
Product Updates
324 -
Replication Flow
1 -
RisewithSAP
1 -
SAP BTP
1 -
SAP BTP Cloud Foundry
1 -
SAP Cloud ALM
1 -
SAP Cloud Application Programming Model
1 -
SAP Datasphere
2 -
SAP S4HANA Cloud
1 -
SAP S4HANA Migration Cockpit
1 -
Technology Updates
6,886 -
Technology Updates
402 -
Workload Fluctuations
1
Related Content
- Consolidation Extension for SAP Analytics Cloud – Automated Eliminations and Adjustments (part 1) in Technology Blogs by Members
- 10+ ways to reshape your SAP landscape with SAP Business Technology Platform – Blog 4 in Technology Blogs by SAP
- Top Picks: Innovations Highlights from SAP Business Technology Platform (Q1/2024) in Technology Blogs by SAP
- SAP GUI for Java 8.10 on the Horizon in Technology Blogs by SAP
- WebIDE: Extending Create Purchase Requisition New (F1643A) in Technology Q&A
Top kudoed authors
| User | Count |
|---|---|
| 12 | |
| 9 | |
| 8 | |
| 7 | |
| 7 | |
| 6 | |
| 6 | |
| 6 | |
| 6 | |
| 4 |