Part 4- How to use the Debugger to do Root Cause Analysis of problematic SDK solutions
Now that you have successfully uploaded and activated a SDK solution, sometimes you may see defects in your tenant manifested by an application dump when an end user uses C4C. Application dumps are either caused by bad “back end” business object logic code or “front end” UI configuration. To do root cause analysis if your SDK solution is the source of the application dump, use the powerful debugging tool to easily step through the SDK “back end” business object logic code. If the debugger steps through the code with no problems then you have a "front end” UI configuration problem. If the latter is the case, you will need a UI consultant/developer to continue the root cause analysis.
Step 1- To use the SDK debugger… Go to Project Explorer and make sure the SDK solution you want to debug is loaded in the explorer. If it is not, go to the Solution Explorer and double click on the solution to load it. Once loaded, then enter into debug mode by going to Debug -> Start Debugging (or F5). It will ask you to activate the solution. As long as you activated the entire solution before then click no. Otherwise activate the solution.


Step 2- Create breakpoints so you can step through the “back end” business object code. The breakpoints will stop the application from running and allow you to step through the code and hopefully show you where the problem is. Before you create a break point, you need to guess where the problem is and put the break point before the code executes. Best way to do this is identify the “trigger” even that causes the application dump. If you see the dump when you click on the Save of the Ticket, then put the breakpoint in the before save exit of the Ticket (Service Request BO).
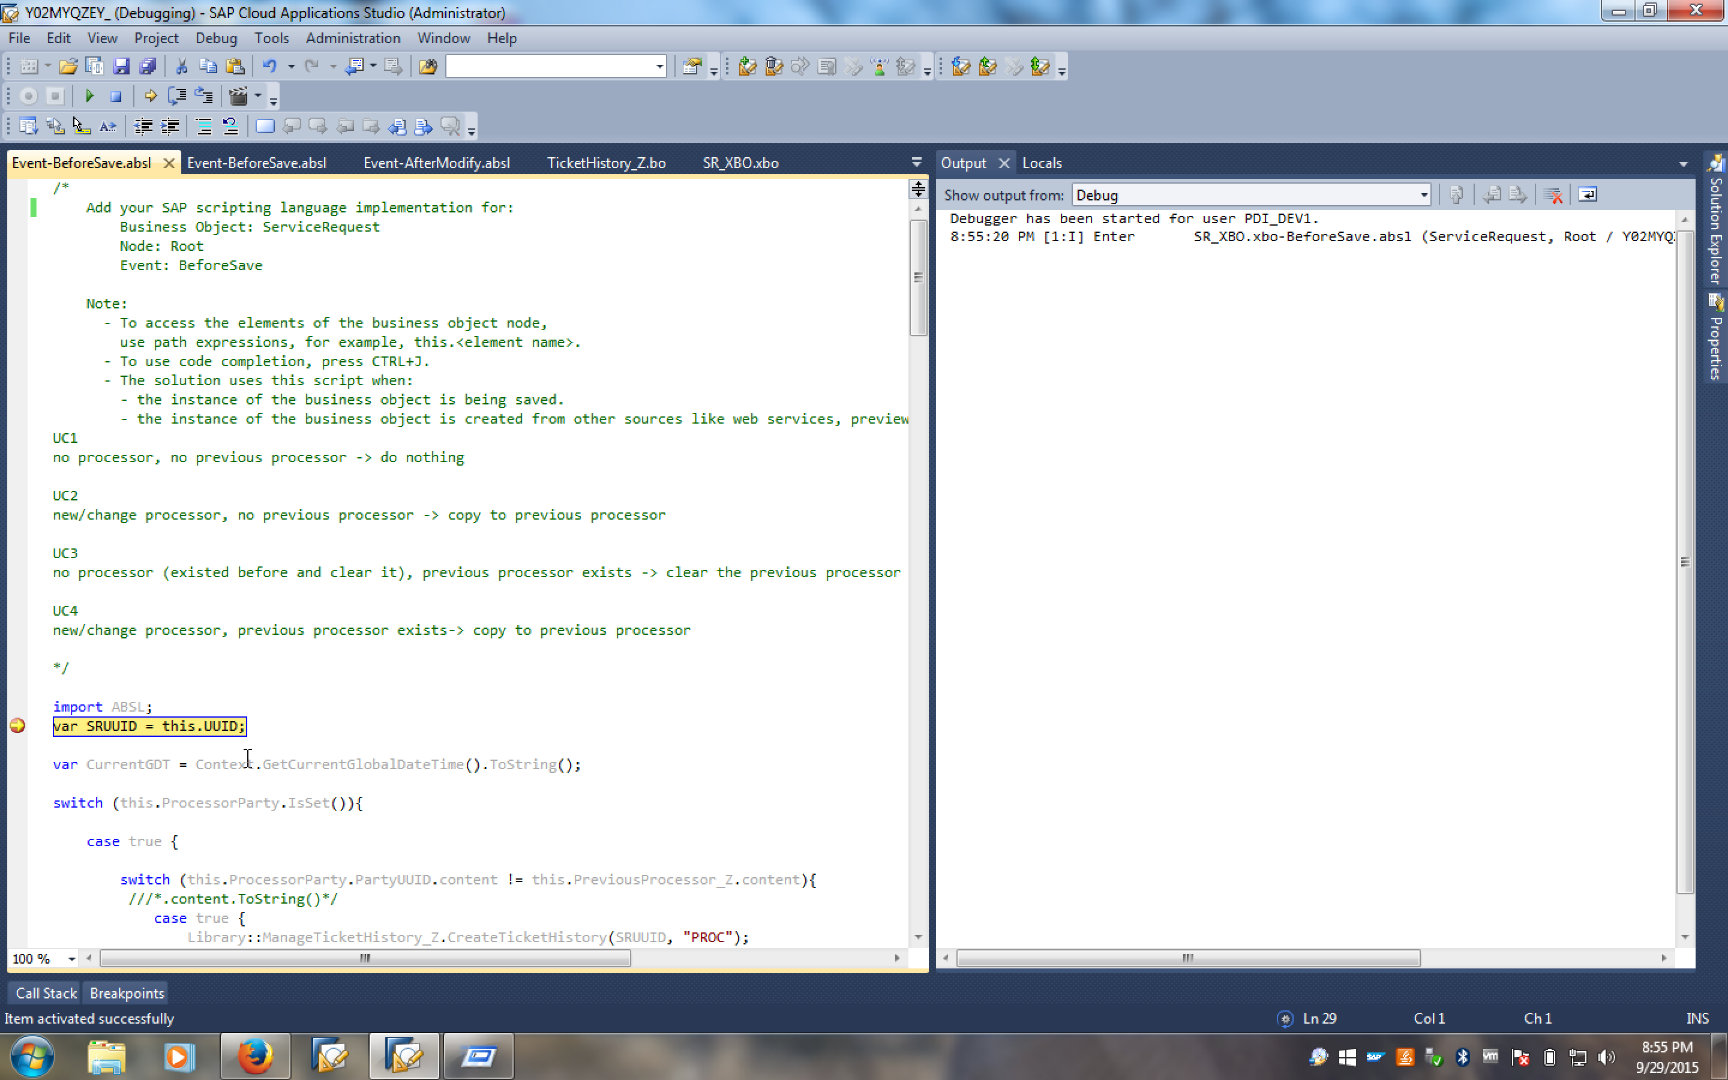
To create the break point… Find the SR_XBO-> Root.node -> Event-BeforeSave.absl in the Project Explorer and double click on it to load the script. (Hint: the business objects have a XBO or BO file name extension in the solution, and if there is a custom business logic code exit the Before Save or After Modify or Validation scripts have a ABSL extension in the solution). Click on the the left hand grey column next to the code where you put the break point. A red dot will appear the line will get highlighted red too as the example below.

Step 3- Login with the C4C SDK key user and open the ticket, make a change, and save it. This will cause a “save event” on the service request (C4C ticket) and will trigger the standard logic on save, as well as the custom logic above. Since the debugger is turned on and you have a break point, it will stop at the break point and will highlight it as yellow.
Step 4- If you want to step through the code, go to the tool bar and click on Step Over. This will then start to parse through the code line by line every time you click on the Step Over feature

Step 5- You can also add more break points while the debugger is running and skip to that break point if you click on the Continue feature.

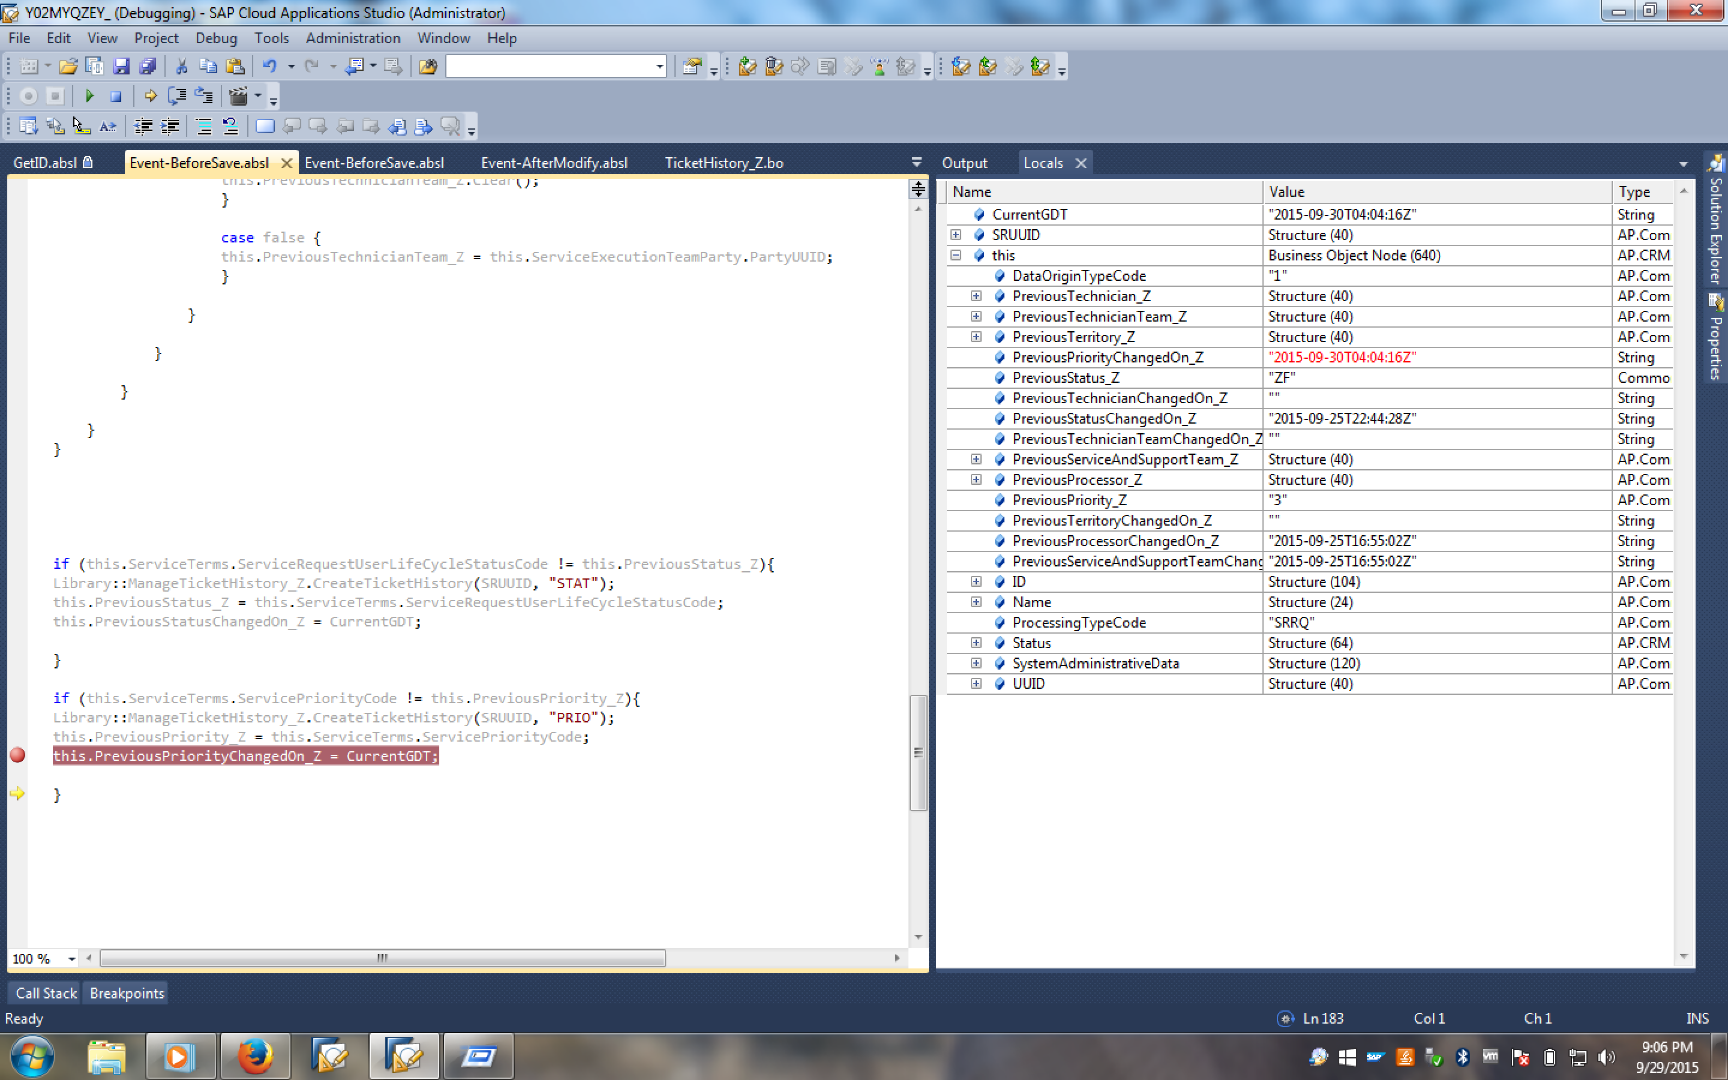
Step 6- As you debug, you may want to see the data being evaluated in code. Click on the Locals tab next to the debugger Output tab. This will show all of the data being generated by C4C in code. In the example below, code is being executed to generate the current tenant date/time and is stored as a custom field shown as red text in the this.PreviousPriorityChangedOn_Z field.
If the debugger executes with no dumps and errors, then the “back-end” business logic custom code is correct. If you are still seeing a dump then it is likely to be a “front-end” UI configuration problem, which should be diagnosed by a C4C UI consultant/developer.
Closure
I hope this blog series provides more insight on how easy it is to use the SDK for basic administration activities with point and click steps. Next in the series are SDK solution template examples to show common customization examples of what is possible in SDK. Stay tuned!
Rei Kasai
VP, Product Management
