
- SAP Community
- Products and Technology
- Technology
- Technology Blogs by SAP
- How to use Camera and Geo-Location plugins with SA...
Technology Blogs by SAP
Learn how to extend and personalize SAP applications. Follow the SAP technology blog for insights into SAP BTP, ABAP, SAP Analytics Cloud, SAP HANA, and more.
Turn on suggestions
Auto-suggest helps you quickly narrow down your search results by suggesting possible matches as you type.
Showing results for
Advisor
Options
- Subscribe to RSS Feed
- Mark as New
- Mark as Read
- Bookmark
- Subscribe
- Printer Friendly Page
- Report Inappropriate Content
02-12-2015
10:01 AM
Introduction
With this blog I would like to show you how to create an application with SAP Web IDE which runs on smartphones and make use of the camera and the geolocation features provided by the Cordova plugin. With this application we'll be able to capture photos using the phone's camera and to load as well pictures from the phone's gallery. Beside this we also display on the main view of the app, latitude, longitude and altitude information coming from the GPS sensor.
The main view for this application will be built by using the SAP Web IDE Layout Editor.
You can find here the complete source code for this project.
Let's get started!
Prerequisites
- SAP Web IDE 1.7 and later (you can register at SAP HANA Cloud Platform to get your development environment)
- Hybrid Application Toolkit 1.1.0 downloadable from here.
Walkthrough
Create the application on SAP Web IDE
- Open SAP Web IDE
- Choose File --> New --> Project from Template and click on Next
- Select the SAPUI5 Mobile Kapsel App Project and click on Next
- Enter a project name (i.e. "testcamera") and click on Next
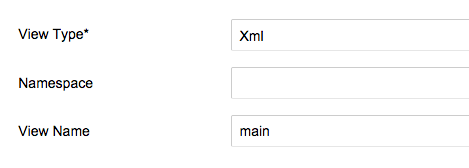
- Set the View Type to XML, leave the Namespace empty, enter the view name (i.e. "main") and click on Next
- Click on Finish. You have your application, now let's go in the view folder
Create the main view layout
- Right click on the view xml file (i.e. main.view.xml) and open it in the Layout Editor

- Change the page title to something like "Camera Test"

- Add 5 HBox controls to the view

- In the first HBox control add 2 buttons

- For the first button set the text to "Take a photo" and set the witdth to 150px
- For the second button set the text to "Pick from gallery" and set the witdht to 150px
- Save the file
- Add an image control to the second HBox
- Set the HBox's Justify Content property to Center

- Select the image you just added and change the following properties:
| Property | Value |
|---|---|
| Height | 200px |
| Width | 200px |
| Element ID | myImage |
- Save the file
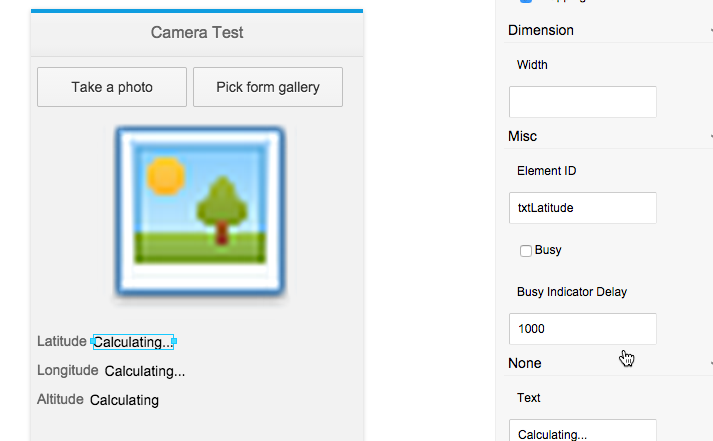
- Add a label and a text controls in the 3rd HBox and repeat this step also for the other two HBox controls

- For each one of the 3 added labels set the text property in the following order: Latitude, Longitude and Altitude
- For each one of the 3 added text controls set the text property to "Calculating..."
- For each one of the 3 added text controls change also the Element ID property and set it to txtLatitude,txtLongitude,txtAltitude, respectively
- Save the file
Create the main view controller
- Double click on the main view controller and delete in the file all the commented code

- Add the following content
sap.ui.controller("view.main", {

    oView : null,

    onInit : function() {

        oView = this.getView();

        navigator.geolocation.getCurrentPosition(this.onGeoSuccess, this.onGeoError, {enableHighAccuracy:true});

    },

    onGeoSuccess : function(position) {

        oView.byId("txtLatitude").setText(position.coords.latitude);

        oView.byId("txtLongitude").setText(position.coords.longitude);

        oView.byId("txtAltitude").setText(position.coords.altitude);

    },

    onGeoError : function() {

        console.log('code: '    + error.code    + '\n' + 'message: ' + error.message + '\n');

    },

    onPhotoDataSuccess :  function(imageData) {

        var myImage = oView.byId("myImage");

        myImage.setSrc("data:image/jpeg;base64," + imageData);

    },

    onPhotoURISuccess : function(imageURI) {

        var myImage = oView.byId("myImage");

        myImage.setSrc(imageURI);

    },

    onFail :  function(message) {

    console.log("Failed because: " + message);

    },

    getPhoto : function() {

        var oNav = navigator.camera;

        oNav.getPicture(this.onPhotoURISuccess, this.onFail, { quality: 50,

        destinationType: oNav.DestinationType.FILE_URI,

        sourceType: oNav.PictureSourceType.PHOTOLIBRARY });

    },

    capturePhoto : function() {

    var oNav = navigator.camera;

    oNav.getPicture(this.onPhotoDataSuccess, this.onFail, { quality: 10, destinationType: oNav.DestinationType.DATA_URL });

    }

});
Define the onpress event for the two buttons
- Reopen the view xml file and add the following functions to the press event of the two buttons:
- for the first button add the function press="capturePhoto"
- for the second button add the function press="getPhoto"

- Save the file
Deploy and run the app
- Right click on the name of the project and open Project Settings
- Go on Device Configuration
- Set the name of the project, the description, the application ID and choose the platforms which you want to run this app on

- Enable the Cordova plugins Geolocation, Camera and Access File and save the configuration

- Right click on the name of the project and choose Deploy --> Deploy to local Hybrid Toolkit
- Once deployed, right click on the index.html file and choose Run --> Run on --> iOS (Android) device.
- NOTE: Pay attention that if you want to use the emulator for testing, only the Android emulator can be used, because the iOS Simulator doesn't support camera emulation. Of course, for the Android emulator, camera emulation needs to be enabled in the AVD Manager. Geo-location only works on a real device

This is the final result

That's all folks!
- SAP Managed Tags:
- SAPUI5,
- SAP Enterprise Portal,
- Mobile
35 Comments
You must be a registered user to add a comment. If you've already registered, sign in. Otherwise, register and sign in.
Labels in this area
-
ABAP CDS Views - CDC (Change Data Capture)
2 -
AI
1 -
Analyze Workload Data
1 -
BTP
1 -
Business and IT Integration
2 -
Business application stu
1 -
Business Technology Platform
1 -
Business Trends
1,658 -
Business Trends
92 -
CAP
1 -
cf
1 -
Cloud Foundry
1 -
Confluent
1 -
Customer COE Basics and Fundamentals
1 -
Customer COE Latest and Greatest
3 -
Customer Data Browser app
1 -
Data Analysis Tool
1 -
data migration
1 -
data transfer
1 -
Datasphere
2 -
Event Information
1,400 -
Event Information
66 -
Expert
1 -
Expert Insights
177 -
Expert Insights
295 -
General
1 -
Google cloud
1 -
Google Next'24
1 -
Kafka
1 -
Life at SAP
780 -
Life at SAP
13 -
Migrate your Data App
1 -
MTA
1 -
Network Performance Analysis
1 -
NodeJS
1 -
PDF
1 -
POC
1 -
Product Updates
4,576 -
Product Updates
341 -
Replication Flow
1 -
RisewithSAP
1 -
SAP BTP
1 -
SAP BTP Cloud Foundry
1 -
SAP Cloud ALM
1 -
SAP Cloud Application Programming Model
1 -
SAP Datasphere
2 -
SAP S4HANA Cloud
1 -
SAP S4HANA Migration Cockpit
1 -
Technology Updates
6,873 -
Technology Updates
419 -
Workload Fluctuations
1
Related Content
- How to implement facial recognition between two images in sap mobile services mdk? in Technology Q&A
- abap2UI5 - (10) Extensions I: Exploring External Libraries & Native Device Capabilities in Technology Blogs by Members
- Create Maintenance Notification for SAP S/4HANA using IBM Watson and SAP services in Technology Blogs by SAP
- MDK Project: @nativescript/geolocation with "Allow all the time" option in Android in Technology Q&A
- Inventory Recording System - Small liquor store business in Technology Blogs by Members
Top kudoed authors
| User | Count |
|---|---|
| 35 | |
| 25 | |
| 17 | |
| 13 | |
| 8 | |
| 7 | |
| 6 | |
| 6 | |
| 6 | |
| 6 |