Purpose
In MSMP, Access Controls 10.0 and 10.1 provides extremely flexible and powerful tool to configure workflows. In this document we will see how to create BRF+ (NOT line item by line item) MSMP agent rule by taking example of real business case in context of Access Request.
Overview
In GRC 10/10.1 SAP has provided different ways for determining agents for a stage in access request. This scenario is more to determine the Role Owner for a role using Custom BRF+ application based on Functional Area field.
Functional area is a table. It is possible to maintain multiple functional areas in roles, so it is not possible to directly use functional area as attribute for roles in BRF+ decision table. Hence, this blog has been created which will be helpful for the consultants who have the requirement to use Functional Area as an attribute in determining the agent for roles. The below mentioned BRF+ agent rule is developed assuming each role will have a unique functional area :smile:
Ref SAP Note: 1890452 - Functional area attribute for role is not picked up by BRF+ rule
Ref Discussion on SCN: http://scn.sap.com/thread/3661923
Steps to build the BRF Rule:
Creating BRF+ Rule for determining Agent based on Functional Area
You have to generate the BRF Rule via Transaction SPRO in GRC system. Follow the below steps in your GRC system.
Run the transaction SPRO, Go to IMG => Governance, Risk and Compliance =>Access Control =>Workflow for Access Control => Define Workflow related MSMP rules.
Or
Directly execute Tcode GRFNMW_DEV_RULES
- Fill generation criteria (Process ID, Rule type, etc.)
- Specify Generation options
- Generate rule shell (Execute button)
 Click Execute or Press F8. This now generates a successful message for BRFPlus Rule with name and ID. You can run BRF+ Tcode and can check the newly created BRF+ application there.
 Now you can see the created BRF+ application as shown below.
Functions Signature Update
In BRF+ function, change the mode to “Event Mode” and activate the function as shown below
Now you can see the created BRF+ application as shown below.
Functions Signature Update
In BRF+ function, change the mode to “Event Mode” and activate the function as shown below

- Since Function mode has been changed to “Event mode,” the result data object has changed automatically, so it has to be reset manually
- In “Signature” tab of BRF Function, change the result data object to GRFN_MW_T_AGENT_ID
![]()
 Create Ruleset in BRF+ Application
Create Ruleset in your BRF+ application by clicking on “Create Ruleset” button under “ASSIGNED RULESETS” tab of function. Ruleset is a combination of business rules that can only be assigned to a function in the BRFPlus framework.
Create Ruleset in BRF+ Application
Create Ruleset in your BRF+ application by clicking on “Create Ruleset” button under “ASSIGNED RULESETS” tab of function. Ruleset is a combination of business rules that can only be assigned to a function in the BRFPlus framework.
 Enter any name for the Ruleset and click on “Create and Navigate to object” as shown below
 Ruleset will be created and you will be shown a success message as shown below
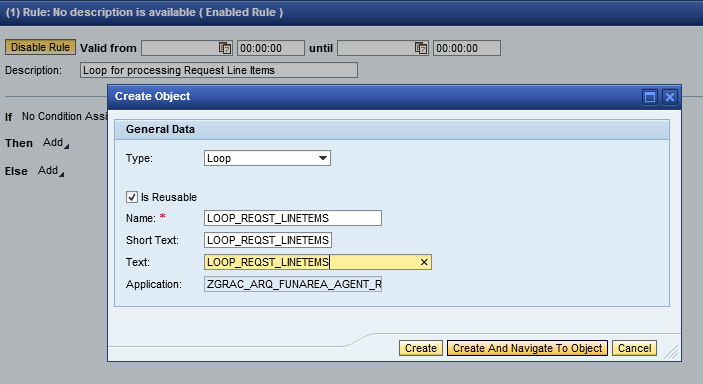
 Create Rule within Ruleset - Create Expression of Type “Loop”
- Click on “Insert Rule” button to create new rule
- From within rule, click on “Add” -> “Process Expression” -> “Create” to create a new expression
- Create expression of type “Loop” and provide suitable name and description

![]()

![]()
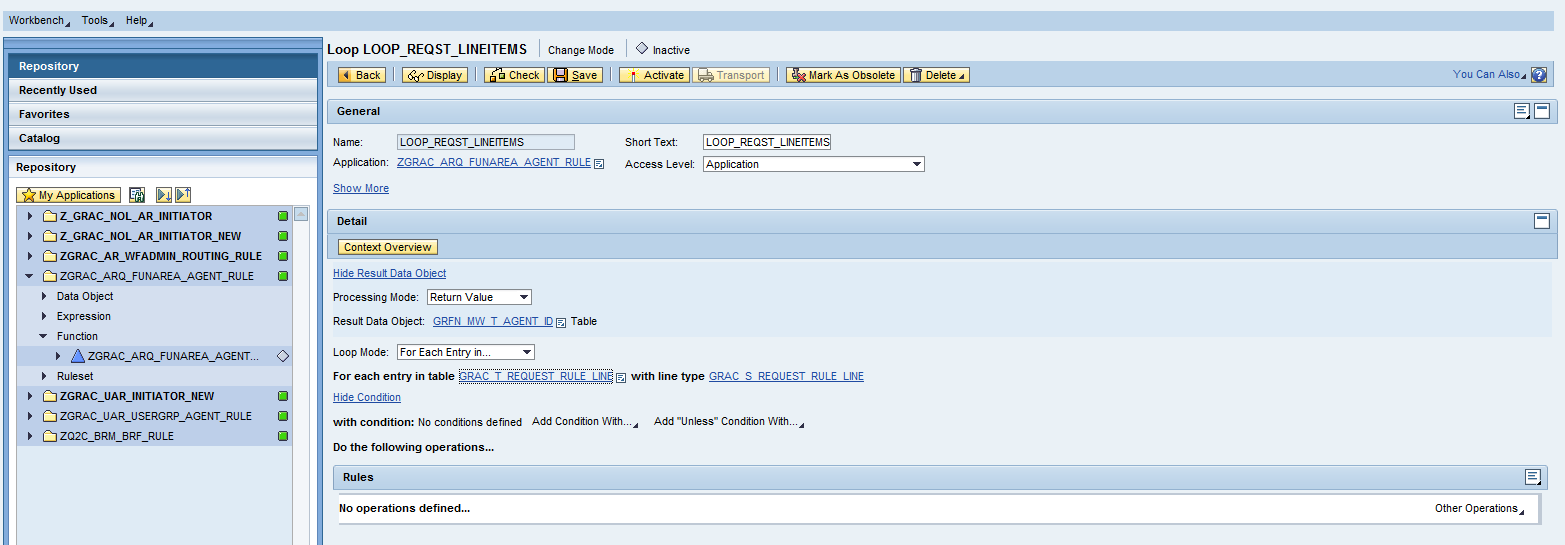
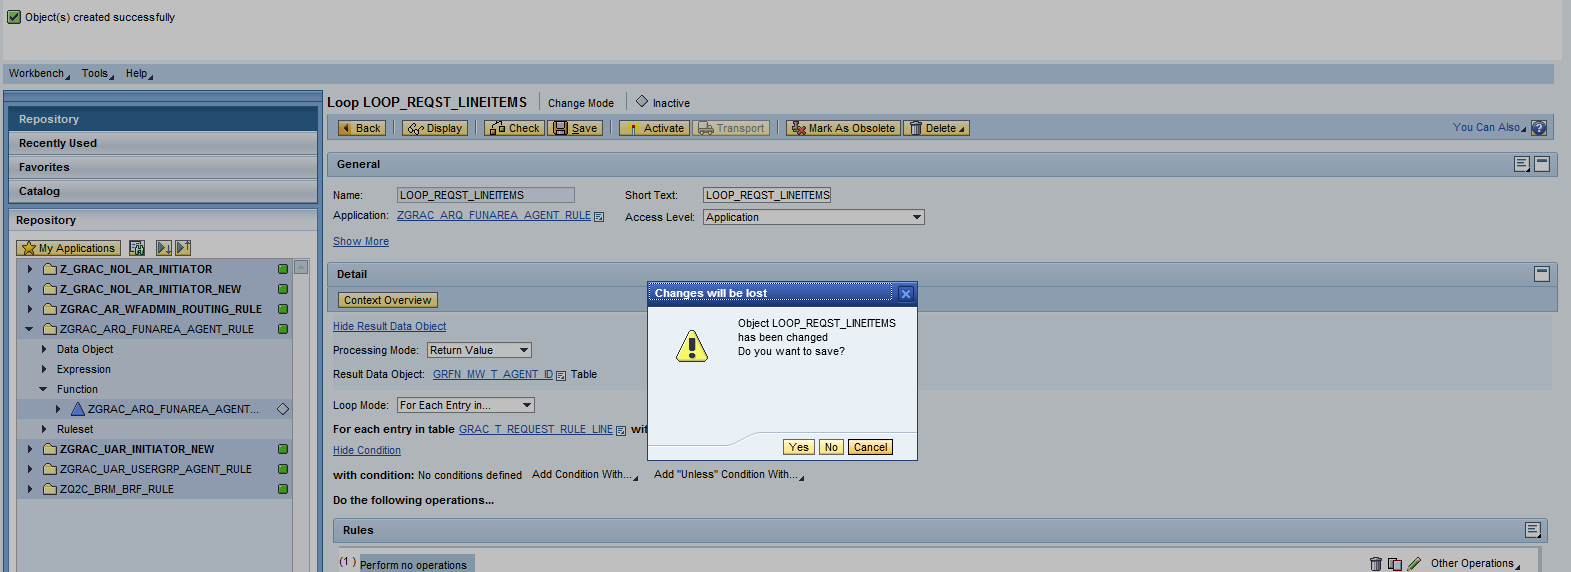
 Loop gets created as shown below. Processing Mode and Loop Mode maintain as mentioned below.
 Create Rules within Loop Expression
First Rule
Create Rules within Loop Expression
First Rule
![]()

![]()
![]()
![]()
![]()
![]()

![]()
![]()
![]()
Create expression of type “Table Operation” and provide suitable name and description. In this Table Operation, we will fetch the Functional area value from Functional area table and return the result in to Functional Area field which is part of structure GRAC_S_API_ROLE_FUNC_AREA

![]()


![]()
![]()

![]() Second Rule
Create an expression of type DECISION TABLE as shown below and create a rule change agent ID in agent ID structure after processing each entry in Decision table.
Second Rule
Create an expression of type DECISION TABLE as shown below and create a rule change agent ID in agent ID structure after processing each entry in Decision table.
![]()

![]()

![]()
![]()
![]()

![]()
![]()
![]()
![]()

![]()
![]()

![]()

![]()
![]()
![]()
![]()
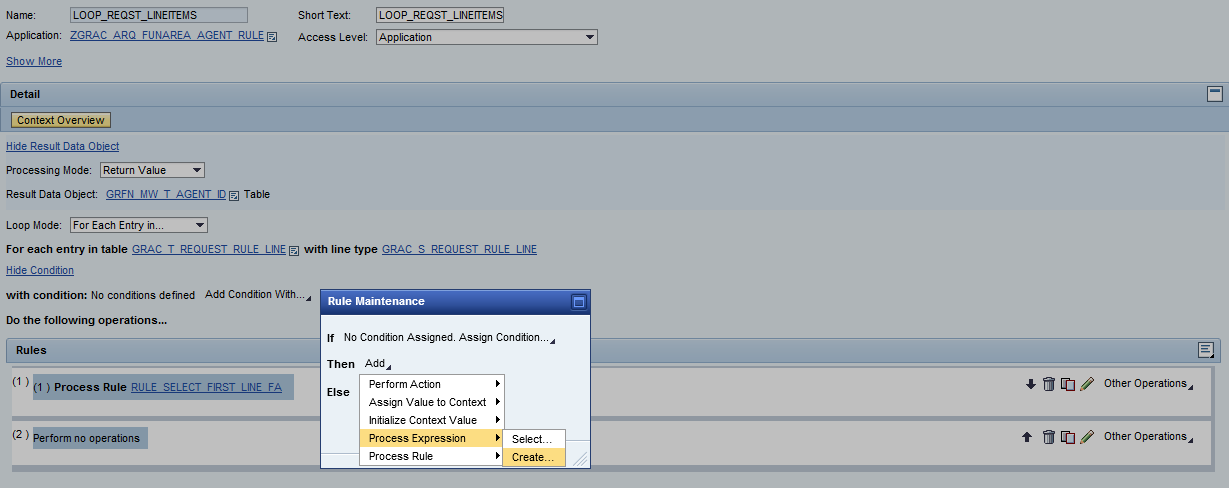
 Third Rule
Third rule is used to assign value to context as shown below. This rule will be included in your loop for inserting the values into Agent ID table after processing each LineItem.
Third Rule
Third rule is used to assign value to context as shown below. This rule will be included in your loop for inserting the values into Agent ID table after processing each LineItem.

![]()
![]()

![]()
![]()

