I recently worked on a project which entailed enhancing vendor master, updating CREMAS04 Idoc with a new segment for custom records and finally being able to generate IDOCS with new segment when these custom fields of (added to )vendor master are updated. In this 3 part blog I will try to cover the development effort required to achieve the aforementioned functionality in detail.
The entire development effort can be classified into three sections as follows:
1) Extending the vendor master
2) Enhancing method VMD_EI_API->MAINTAIN( ) method to programmatically update vendor master tables (LFA1, LFB1, LFM1, LFM2 .. ) - part2.
3) Enhancing the CREAMS04 basis type to include the new segment. - part3
Extending the vendor master.
Extending vendor master involves enhancing the vendor master database table and vendor master screen. For the purpose of this blog I am going to enhance LFA1 (vendor master general - header level ) table with custom fields.
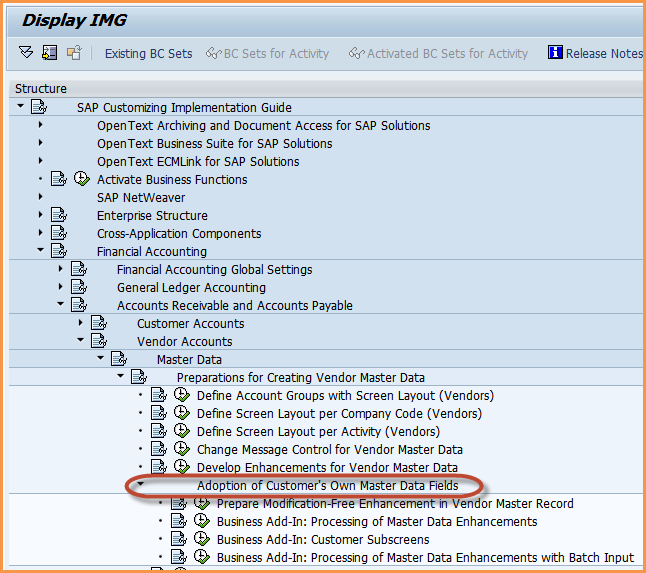
- Step 1: Carry out steps listed under step ‘Adoption of Customer’s Own Master Data Fields’. Follow this configuration path to reach this step.
SAP IMG->Financial Accounting->Accounts Receivable and Accounts Payable->Vendor Accounts->Master Data->Preparations for Creating Vendor Master Data->Adoption of Customer's Own Master Data Fields.
- Step 2:Execute step 'Prepare Modification-Free Enhancement in Vendor Master Record' step.
In this step you specify the screen group and screen number associated with the new vendor master fields.


- Step 3:Execute step "Business Add-In: Process of Master Data Enhancements'.
This steps allows user to create a implementation for BADI - VENDOR_ADD_DATA. In my example I am just activating the custom screen group
Add on , However this BADI provides other methods to query data for add on fields, save data to table other then vendor master, initialize add- on append structure ( discussed later ) and much more.


- Step 4:Execute the Business Add-In: customer subscreen step next.
This steps allows for creation of implementation of BADI- VENDOR_ADD_DATA_CS. This badi provides methods to manipulate the screen elements of subscreen which are all associated with the screen-group declared in previous group. It also provides methods to set values to and read values from the screen fields on the subscreens.
A filer with the screen group has to be specified before methods of this BADI can implemented.


- Step 5:Next, LFA1 has to be enhanced with append structure consisting of custom fields which will show up on the new subscreen (9030 in this case).
To do this, go to SE11 and open definition of table LFA1. Click on 'Append Structure..' option and then click on 'Create' to create new append structure. Since for this demo IDOCS have to be created for any change in values stored in these custom fields. Make sure that the 'Change document' option is turned on at the data element level .
Save all changes and active.


- Step 6:The Next Step involves adding the fields from append structure to the custom subscreen (accessible via XK** transaction ).
Execute transaction SE51 and create a new subscreen for program and screen number specified above ( step 4 and step2 respectively: program: SAPMZMSW_VEND_EPA, Screen: 9030 ).

Click on the 'Dictionary/Program fields window' button to select the append structure fields from LFA1 table structure.
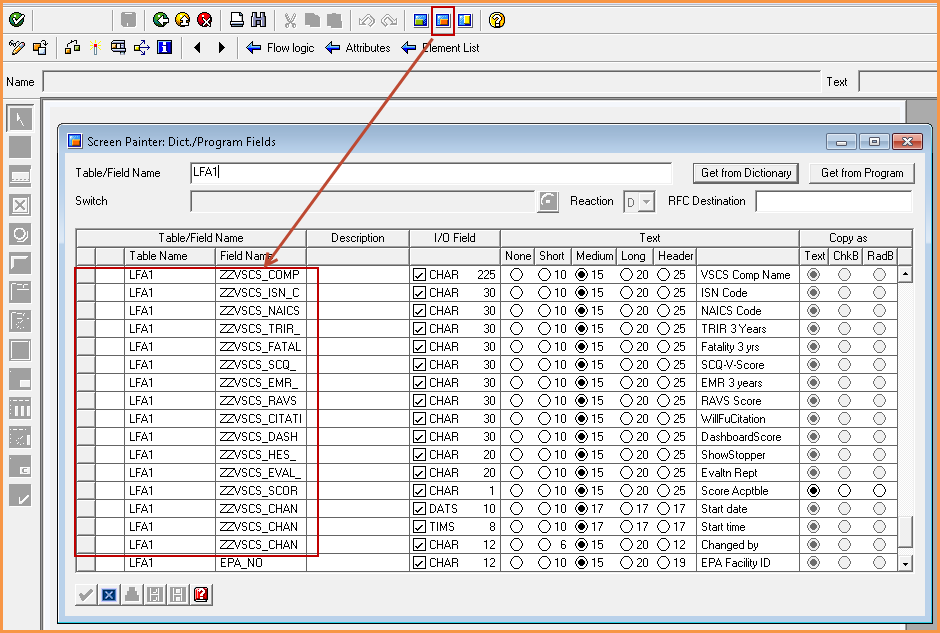
Arrange the fields on the layout screen and save all changes.

- Step 7: In this example the above added screen fields are all display only fields, hence no PBO is necessary. However to populate these fields for display, LFA1 needs to be declared as a global variable (TABLES) in the dynpro program. Standard processing routing will automatically populate the LFA1 structure with value in the database. Since the screen elements created above all refer to the LFA1 structure they values will automatically be passed to the screen fields and display.

- Step 8: Finally if all the steps are correctly followed you should be able to view a vendor in XK03 and see the subscreen that was added in the above step. However since all the fields on this subscreen are newly added fields they will all be empty. In the next part of this series, I will go over the steps required to update the LFA1 structure from an external source.


