In the
previous blog in this Materials Planning series, we focussed on the use of the
Maintain PIRs app to manage the lifecycle of PIRs as well as touched on the use of AI tools to help in the creation of a forecast to use as a basis for creating PIRs.
In this blog, we continue our exploration of the other apps that are available to you to plan and manage PIRs. Namely, we will look at the other possibilities that exist for you to generate a forecast (after all, not all products that you want to manage PIRs for are necessarily sold items, or maybe the idea of an average does not suit your requirements) and use that as a basis for your PIRs. Whilst we will not go into great detail about the
Create/
Change/
Display PIR Html GUI apps (as they all serve the same purpose of entering/displaying PIRs, we will highlight some of the features that are specific to these apps.
Creating a Forecast
In the previous blog, we showed you how we could in situ the Maintain PIRs app, generate and copy a forecast into the planning table, that was based on our average sales volume. Here we will show how you can leverage the Background Job ‘
Schedule Material Demand Forecast Runs’ to create a forecast but with more control and options. Before we do that though, we need to take a look at a Materials Master, in the Forecast view which is where the heart of the required settings are.
We will not delve into every possible detail, as Forecasting in itself could be worth an entire blog, but we will focus on the essentials.
The forecasting view of a material is presented below.
- This view is maintained at a plant level (meaning that you could forecast the same part differently in different plants)
- You can choose a forecast model yourself (constant, seasonal, 2nd order trend…or you can let the system carry out a test and decide which best model applies)
- The Period indicator – Important as this will decide how consumption numbers are stored and forecasts executed.
- You can choose how far back in the past you go to read historical data (the more you have the better ?) in order to determine the forecast
- Depending on your chosen model, you can enter factors such as Alpha, Beta, or Gamma that will influence the result
- You can execute a forecast for this single material, in the material master (I recommend this option as you test the various possibilities, to decide which model is best suited for a type of consumption/material)
- You can view or maintain the consumption values, as well as the forecasted values.

Material Master Forecast View
As this is a brand new material I don’t have any consumption (usage) history on it, so I will enter the history myself. Note that the 4 units (first line – left column) were updated by the system as a result of a goods movement - goods issue for delivery). All other values were entered by me.
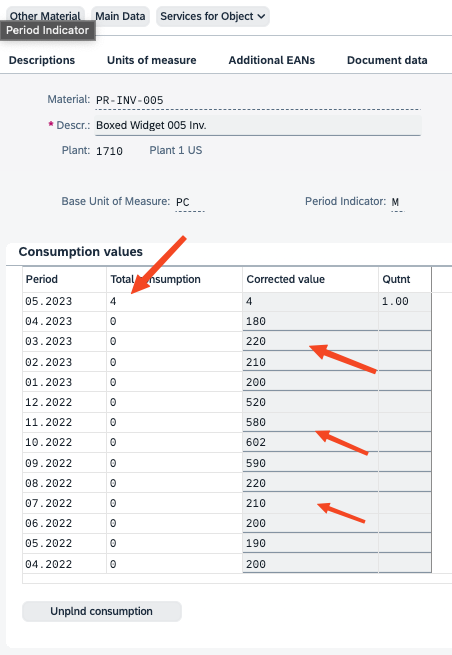
Manual entry of consumption values
As said, I could execute a forecast right here in the material, but I will use the background job to do so.
To do so, search for the app ‘
Schedule Material Demand Forecast Runs’ – this is the background processing app, with a specific variant. Click Create, follow the usual steps (keep the proposed variant, set for the job to run NOW and in the parameters, enter the parameters as appropriate.
In my case, I entered these parameters and scheduled the job.

Forecast Parameters
Once it has run, we can check the log to see the output log, which is quite rich in details, as below. A recap of the parameters applied or determined (which came from the material master – Forecast View).

Forecast Execution Parameters
The Historical data used as the basis for the forecast (that which I entered)

Historical data
As well as the determined forecast values and some execution messages.

Forecasted Values
For the purpose of this blog, we will not worry about the accuracy of this forecast – the point was, we wanted to generate one!
But now that we do have this forecast, how do we copy it into our PIRs plan?
You have two options:
- You can use a background job, accessible by searching for the app ‘Schedule copying total forecast runs’. The parameters are as below and they should be self-explanatory. Essentially, you can totally or partially (in terms of products/plants/periods) copy your forecast into an active or inactive version of a PIR plan or you can do a copy simulation.

Option to copy Forecast
- The other option is to do this copy 'live', in the Create or Change PIR app. So let’s do that.
So I have used the app Change PIR, and am in the planning table of the material we forecasted earlier.

Empty Planning Table
To copy the forecast we generated, use the menu as shown:

Menu to Copy Forecast
The next screen shows us the forecasted values on the right (and the current - empty - PIR plan on the left).

Forecasted Values
You can then selectively select and copy the forecasted values into your PIR plan.

Select and Copy Forecast Values

Selected values copied to PIR plan
As you leave the screen, select Transfer, and your selected forecasts are now copied into your PIR plan! You can amend the copied values as well as fill in other periods manually if you wish.

Values transferred to the PIR table
Splitting the PIRs
It could be that for a variety of reasons, you wish to split your PIRs from monthly buckets into smaller, say weekly or even daily buckets. Maybe you plan Monthly 12 months out, but the first 3 months are broken down weekly, or maybe for an exceptional reason your usual machines are down and you have to use different machinery that has less throughput and thus requires splitting your PIRs.
Not a problem. You can do so here as well. For this go to the Schedule Lines tab, and indicate in those periods you want to split, the splitting indicator of your choice. In our case, we will split the September PIRs from Monthly into Weekly.

Split indicator
After you hit Enter, the period will be split and the Monthly quantity of 233, equally (based on the number of working days in the split weeks) spread into weekly buckets.

As before, once we are happy with our values, we need to make the version Active, in order to have MRP see those requirements and plan them accordingly.
As you can see below, our weekly and monthly PIRs have now been transferred to MRP.

PIR Requirements passed to MRP
OK, you have waited long enough! In the next part of this series, we start looking at the planning strategies and see how they work!
Note: We will be covering a number but not all strategies, so if you have any specific use case you’d like to see covered, don’t hesitate to drop them in the comments.
