Authors: ak47_ , shreya.sinha01 and vipul.khullar
Previous Blogs in this series:
This is the third blog in the blog series End-to-End extensibility in Multi-Tenant CAP-based Application.
Perquisites:
- Have subscribed to the MTA.
- Assigned the roles to your user
- Create an extension
- Delete the extension
Note: The names of the roles will depend on the role names provided to you in the help documentation of that specific application.
- Already know about the allow list and blocklist
- Aware about the namespace
- Sap cds-dk should be greater than 6.3.0 or the latest, locally in the system where we are creating the extension locally.
Now let’s look at all the possible extension scenarios possible by extending your application.
To extend the subscribed solution use the following command
cds extend <app-url>/extend -s <subdomain> --force
example :

cds extend https://<AppName>.cfapps.<Region>.hana.ondemand.com/extend -s <subAccountName> --force
Once you have extended the solution you will see a project structure as follows:
Create a .cds file in DB package where all the below scenarios can be created apart from extending the service.
Sample

Extension Package Structure
Note :
- In this blog we are only showing metadata extension.
- in your extension. cds create a namespace of your choice adhering to the prefix rule of your project. This namespace will reference the newly created entities when you try to extend your service.
- In your service extension, create a namespace that will reference any new service you are trying to create other than extending your existing service.
- If you want to see all the below steps individually, then after adding each block of code use cds activate command followed by the passcode.
- If you want to see all the functionality in one go after adding all the blocks at once then after adding use cds activate command followed by the passcode.
- If cds activate does not work then try with
cds activate --to https::/<AppName>.cfapps.<Region>.hana.ondemand.com/extend -s <subAccountName>
Scenario 1: adding a new field in the existing entity

Field Level Extension
Scenario 2: adding a new entity in the extension project

Entity Level Extension
Metadata for Entity Level Extension
Scenario 3: extending the service with the new entity

Extending the current Service

Metadata for Extended Service
Scenario 4: creating a new service for the extension project

Create a new Service

Metadata for new Service
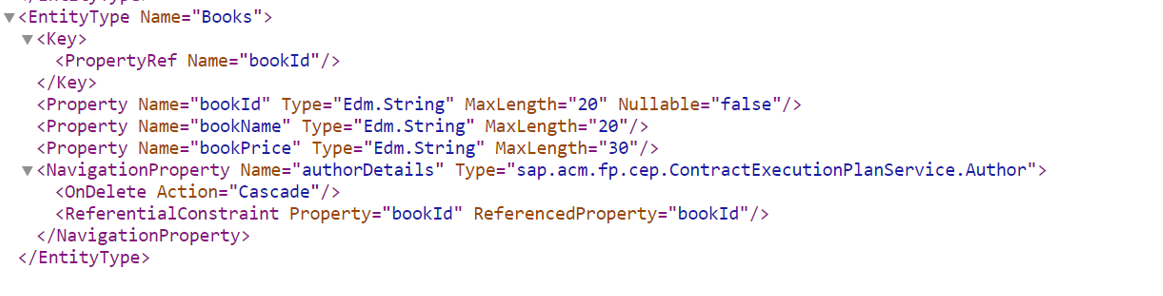
Scenario 5: Create a composition of an existing

Adding Entity as Composition

Metadata for the above Entity
Note: Associations can also be created in a similar fashion and can be directly consumed on the UI. The only challenge with the association will be to populate the data separately, whereas, in the case of composition, we can insert, and update the data in parent-child format.
Conclusion:
This concludes the end of the blog series on creating
in-app field-level, entity-level, and service-level extensions.
Let us know if you have any other thoughts on the topics and if you want us to clarify any further points related to creating such extensions.
Happy reading!
