
- SAP Community
- Products and Technology
- Technology
- Technology Blogs by SAP
- How to activate your SAP Build with your SAP S/4HA...
Technology Blogs by SAP
Learn how to extend and personalize SAP applications. Follow the SAP technology blog for insights into SAP BTP, ABAP, SAP Analytics Cloud, SAP HANA, and more.
Turn on suggestions
Auto-suggest helps you quickly narrow down your search results by suggesting possible matches as you type.
Showing results for
Product and Topic Expert
Options
- Subscribe to RSS Feed
- Mark as New
- Mark as Read
- Bookmark
- Subscribe
- Printer Friendly Page
- Report Inappropriate Content
11-18-2022
7:25 PM
Want to hear amazing news? SAP Build is now included in GROW with SAP and RISE with SAP solutions (SAP S/4HANA Cloud). SAP Build is SAP’s solution for low code no code development designed with business users in mind first to create and augment amazing, web and mobile enterprise applications, design business sites, and automate tedious and repetitive processes, all with drag-and-drop simplicity.
New customers have access to various Build entitlements based on their adopted SAP S/4HANA Cloud solution. If you want to learn more about what’s included in your new bundle, reach out to your Account Executive to clarify the correct entitlement package.
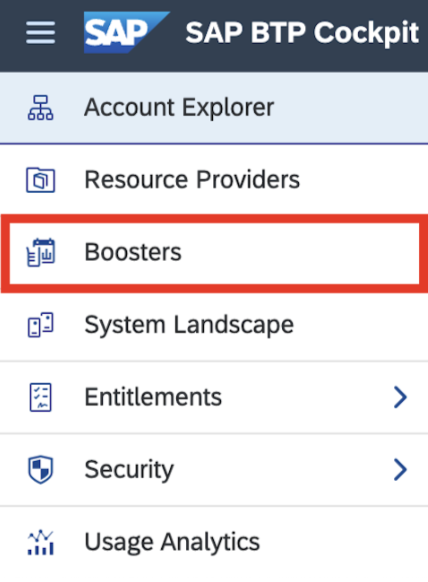
1. First navigate to SAP BTP Cockpit, on the left-hand side from the menu list, and click on “Boosters”.
2. Once the Boosters overview page opens, in the search field type “SAP Build Process Automation” (1) and under Set up account for SAP Build Process Automation click the “Start” button (2).
3. SAP Build Process Automation overview page will open up, you can then proceed forward by clicking on “Start”.
4. The booster will then automatically perform a prerequisite test to confirm the service and your credentials. Once the two green boxes show to confirm the test has been completed successfully, you can click on “Next” at the bottom of the page.
5. On this page you can choose if you want to create a new sub-account or use an existing one. In this example we will choose “Create sub-account" scenario (1). Click on “Next” (2) to configure account.
6. On this page you assign the quota for this sub-account. You will first delete the marked services as they are not required before you click on “Next”.
7. On this page you can add the users who will access SAP Build Process Automation tool, administrators (standard users) and developers (advanced users). Note that any user who will be added as a developer will automatically be added as an administrator as well, but the opposite is not true. You can always add or edit users later.
Click on “Next” (3) to confirm users added.
8. In the last step you can review the summary of your setup. Once you confirm all information is accurate, click on “Finish”.
9. To get the service up and ready for you, the booster will then start the deployment process which can take up to five minutes. In the meantime, pamper yourself with a cup of coffee, you deserve a break!
10. Once the process is complete, a success message will pop up on the screen. Click on “Navigate to the Subaccount.”
11. In the subaccount on the left-hand side of the menu click on “Instances and Subscriptions.”
12. You get now an overview on the activated services, and you can move directly to the application by clicking on the icon in the red box.
13. Ladies and gentlemen, the moment you’ve been waiting for has now arrived. You made it to the lobby of the application development page within SAP Build Process Automation. You can streamline your business processes, create forms and build your automations.
1. First navigate to SAP BTP Cockpit, on the left-hand side from the menu list click on “Boosters”.

2. Once the Boosters overview page opens, in the search field type “SAP Build Apps” and under Get started with SAP Build Apps, click the “Start” button.
3. Once the three green boxes show “Done”, that means the test has been completed successfully. Click on “Next” at the bottom of the page to proceed forward.
4. You can choose if you want to create a new sub-account or use an existing one. In this example, we will choose the “Create subaccount" scenario. Click on “Next” to configure the account.
5. On this page you select the standard plan and assign the quota for this subaccount. Then click on “Next”.
6. You can add the users who will access SAP Build Apps, administrators, and developers. You can always add or edit users later. Once you assign your users, click on “Next”.
7. In the last step you can review the summary of your setup. Once you confirm all information is accurate, click on “Finish”.
8. To get the service up and ready for you, the booster will then start the deployment process which can take up to five minutes.
9. Once the process is complete, the following window will pop up. Press on “Navigate to Subaccount”.
10. In the subaccount on the left-hand side of the menu click on “Instances and Subscriptions”. You get now an overview of the activated services, and you can move directly to the application by clicking on the icon in the red box.
This will take you to the solution's main lobby where you can build an enterprise application without any coding prior experience. Let the fun begin!
If you have activated SAP Build Apps or SAP Build Process Automation, chances are you already activated SAP Build Work Zone as well. Double-check by heading to your subaccount, clicking on “Instances and Subscriptions” and confirming if Build Work Zone, standard edition is subscribed.
If not, follow the activation steps below:
1. In your subaccount, navigate to “Service Marketplace”, on the left-hand side from the menu list, and in the search, enter SAP Build. Then click on “SAP Build Work Zone, standard edition”.
2. Under the “Applications Plans” tab, click the Actions icon “…” and select “Create” to create a new subscription.
3. In the New Instance or Subscription dialog box that opens, leave the basic information that appears there and click “Create”.
The Site Directory opens. This is where you’ll create and manage your sites.
For more information on SAP Build, please refer to the following resources:

New customers have access to various Build entitlements based on their adopted SAP S/4HANA Cloud solution. If you want to learn more about what’s included in your new bundle, reach out to your Account Executive to clarify the correct entitlement package.
Below is a step-by-step guide on how to activate each Build product from the BTP cockpit:
1- SAP Build Process Automation:
1. First navigate to SAP BTP Cockpit, on the left-hand side from the menu list, and click on “Boosters”.
2. Once the Boosters overview page opens, in the search field type “SAP Build Process Automation” (1) and under Set up account for SAP Build Process Automation click the “Start” button (2).

3. SAP Build Process Automation overview page will open up, you can then proceed forward by clicking on “Start”.

4. The booster will then automatically perform a prerequisite test to confirm the service and your credentials. Once the two green boxes show to confirm the test has been completed successfully, you can click on “Next” at the bottom of the page.

5. On this page you can choose if you want to create a new sub-account or use an existing one. In this example we will choose “Create sub-account" scenario (1). Click on “Next” (2) to configure account.

6. On this page you assign the quota for this sub-account. You will first delete the marked services as they are not required before you click on “Next”.

7. On this page you can add the users who will access SAP Build Process Automation tool, administrators (standard users) and developers (advanced users). Note that any user who will be added as a developer will automatically be added as an administrator as well, but the opposite is not true. You can always add or edit users later.
Click on “Next” (3) to confirm users added.

8. In the last step you can review the summary of your setup. Once you confirm all information is accurate, click on “Finish”.

9. To get the service up and ready for you, the booster will then start the deployment process which can take up to five minutes. In the meantime, pamper yourself with a cup of coffee, you deserve a break!

10. Once the process is complete, a success message will pop up on the screen. Click on “Navigate to the Subaccount.”

11. In the subaccount on the left-hand side of the menu click on “Instances and Subscriptions.”

12. You get now an overview on the activated services, and you can move directly to the application by clicking on the icon in the red box.

13. Ladies and gentlemen, the moment you’ve been waiting for has now arrived. You made it to the lobby of the application development page within SAP Build Process Automation. You can streamline your business processes, create forms and build your automations.

Curious to get started quickly? visit our store to browse the many pre-built content to help you save time and automate right away. Head to Store and filter by product type S/4HANA.

2- SAP Build Apps:
1. First navigate to SAP BTP Cockpit, on the left-hand side from the menu list click on “Boosters”.
2. Once the Boosters overview page opens, in the search field type “SAP Build Apps” and under Get started with SAP Build Apps, click the “Start” button.

3. Once the three green boxes show “Done”, that means the test has been completed successfully. Click on “Next” at the bottom of the page to proceed forward.

4. You can choose if you want to create a new sub-account or use an existing one. In this example, we will choose the “Create subaccount" scenario. Click on “Next” to configure the account.

5. On this page you select the standard plan and assign the quota for this subaccount. Then click on “Next”.

6. You can add the users who will access SAP Build Apps, administrators, and developers. You can always add or edit users later. Once you assign your users, click on “Next”.

7. In the last step you can review the summary of your setup. Once you confirm all information is accurate, click on “Finish”.

8. To get the service up and ready for you, the booster will then start the deployment process which can take up to five minutes.

9. Once the process is complete, the following window will pop up. Press on “Navigate to Subaccount”.

10. In the subaccount on the left-hand side of the menu click on “Instances and Subscriptions”. You get now an overview of the activated services, and you can move directly to the application by clicking on the icon in the red box.

This will take you to the solution's main lobby where you can build an enterprise application without any coding prior experience. Let the fun begin!

3- SAP Build Work Zone:
If you have activated SAP Build Apps or SAP Build Process Automation, chances are you already activated SAP Build Work Zone as well. Double-check by heading to your subaccount, clicking on “Instances and Subscriptions” and confirming if Build Work Zone, standard edition is subscribed.

If not, follow the activation steps below:
1. In your subaccount, navigate to “Service Marketplace”, on the left-hand side from the menu list, and in the search, enter SAP Build. Then click on “SAP Build Work Zone, standard edition”.

2. Under the “Applications Plans” tab, click the Actions icon “…” and select “Create” to create a new subscription.

3. In the New Instance or Subscription dialog box that opens, leave the basic information that appears there and click “Create”.

4. You’ll get confirmation that your subscription is being created. Once you confirm your subscription, double-tap on the SAP Build Work Zone to head to the application.

The Site Directory opens. This is where you’ll create and manage your sites.
For more information on SAP Build, please refer to the following resources:
- Explore: SAP Build Product Page | SAP Build Product Demo | Help Portal
- Engage & stay up to date: Build activities| Build Newsletter | Builders Community
- Become Build Certified: SAP Learning Journey
Labels:
23 Comments
You must be a registered user to add a comment. If you've already registered, sign in. Otherwise, register and sign in.
Labels in this area
-
ABAP CDS Views - CDC (Change Data Capture)
2 -
AI
1 -
Analyze Workload Data
1 -
BTP
1 -
Business and IT Integration
2 -
Business application stu
1 -
Business Technology Platform
1 -
Business Trends
1,658 -
Business Trends
91 -
CAP
1 -
cf
1 -
Cloud Foundry
1 -
Confluent
1 -
Customer COE Basics and Fundamentals
1 -
Customer COE Latest and Greatest
3 -
Customer Data Browser app
1 -
Data Analysis Tool
1 -
data migration
1 -
data transfer
1 -
Datasphere
2 -
Event Information
1,400 -
Event Information
66 -
Expert
1 -
Expert Insights
177 -
Expert Insights
297 -
General
1 -
Google cloud
1 -
Google Next'24
1 -
Kafka
1 -
Life at SAP
780 -
Life at SAP
13 -
Migrate your Data App
1 -
MTA
1 -
Network Performance Analysis
1 -
NodeJS
1 -
PDF
1 -
POC
1 -
Product Updates
4,577 -
Product Updates
343 -
Replication Flow
1 -
RisewithSAP
1 -
SAP BTP
1 -
SAP BTP Cloud Foundry
1 -
SAP Cloud ALM
1 -
SAP Cloud Application Programming Model
1 -
SAP Datasphere
2 -
SAP S4HANA Cloud
1 -
SAP S4HANA Migration Cockpit
1 -
Technology Updates
6,873 -
Technology Updates
420 -
Workload Fluctuations
1
Related Content
- SAP Enable Now setup in Technology Blogs by Members
- SAP HANA content for SAP CARAB table not found error while activation in Technology Q&A
- SAP Build Code is now on SAP BTP Trial in Technology Blogs by SAP
- SAP Analytics Cloud: Continuous Quality Checks in Technology Blogs by SAP
- Introducing the SAP Cloud ALM Learning Portal in Technology Blogs by SAP
Top kudoed authors
| User | Count |
|---|---|
| 37 | |
| 25 | |
| 17 | |
| 13 | |
| 7 | |
| 7 | |
| 7 | |
| 6 | |
| 6 | |
| 6 |