
- SAP Community
- Products and Technology
- Technology
- Technology Blogs by SAP
- SAP BTP Security: How to handle Authorization and ...
Technology Blogs by SAP
Learn how to extend and personalize SAP applications. Follow the SAP technology blog for insights into SAP BTP, ABAP, SAP Analytics Cloud, SAP HANA, and more.
Turn on suggestions
Auto-suggest helps you quickly narrow down your search results by suggesting possible matches as you type.
Showing results for
Product and Topic Expert
Options
- Subscribe to RSS Feed
- Mark as New
- Mark as Read
- Bookmark
- Subscribe
- Printer Friendly Page
- Report Inappropriate Content
08-15-2022
12:57 PM
This blog post gives a simple example of using authorization in a simple project.
It also shows a simplistic way of using attributes.
The project is based on Node.js and runs on SAP BTP Cloud Foundry. Security is based on XSUAA and relies on SAP ID Service as Identity Provider.
The next blog post uses IAS.
Disclaimer: this is not an official reference application.
0. Introduction
1. Sample Application
2. Role Configuration in Cockpit
3. Run
Appendix 1: Sample Code
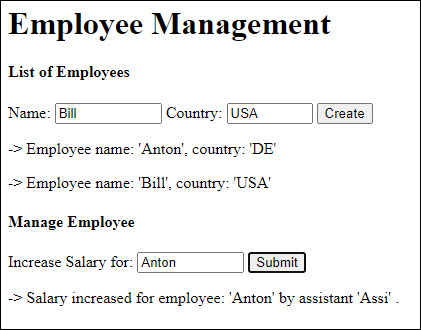
We imagine an application that shows a list of employees and has basic functionalities like create new employee and manage existing employee (e.g. increase salary).
And has basic (ugly) look and feel:
After quick and dirty (and ugly) prototyping, we introduce authentication:
We want to protect the app, such that only registered users can access it.
For protection we use the XSUAA service and the approuter component handles the login of users.
The last step is to add authorization:
Here we follow the consideration that not everybody who is authenticated should be allowed to execute actions in the app.
We’ll discuss such considerations in a section below.
(The very last step would be to make the app more beautiful or better delete it).
Architecture
Below diagram shows the components of our application:
The application consists of 2 components:
1. The service app
It is based on Node.js and Express web framework..
It stores the employees and offers 2 endpoints for create and manage.
Endpoints are protected, so the app is bound to an instance of XSUAA
2. The user interface app
It consists of a simple html page and an approuter.
The approuter handles the user login and it forwards the calls for create and manage to the service app.
Access to the homepage is restricted to authenticated users by approuter, so approuter is bound to XSUAA as well.
Authorization Handling
Along with the application, we define the security artifacts in the security descriptor, which usually is named xs-security.json.
There, we define "scopes" which are wrapped by "role-templates".
A "sope" is a technical definition of a user-role.
In our example, we require that only managers and assistants, who have a certain role, are allowed to execute the "create" action. As such, it is up to our app to define this role.
On a technical level, it is expressed by a "scope" which is checked by the app code.
A "role-template" is a template definition for a role, and it defines which scopes are mentioned.
A "role" is created in the cloud cockpit and can then be assigned to users.
In xs-security.json, we can also define "attributes" which are referenced by role templates.
After creating an instance of XSUAA based on the config in the xs-security.json file, we can find the role templates in the BTP cockpit.
Based on a template, we can create a specific Role. In the role config screen, we decide what to do with the attribute.
Means which value is expected, or how it is dynamically retrieved.
This will become clearer in the course of this and following blog post.
Finally, the role is added to a "role collection" which is assigned to a specific user (or dynamically mapped to a group. We’ll cover this in the next blog post).
In our example, we define a scope “create”.
We also define the corresponding role-template and an attribute in the file.
In BTP, we create a Role called e.g. “CreateRoleGerman” or "GermanCreator" which is based on the role template.
It assigns a fix value “Germany” to the “country” attribute.
This means that only German users will get this role.
To make this role assignable, we create a role collection, add this role and assign the role collection to a German user.
Our application code will check the scope and the country before creating anything.
Note that this is just a silly example, please forgive.
Authorization Model
In our simple scenario we distinguish 3 personas:
User
This persona can be an employee or anybody allowed to view employees.
Assistant
This is an assistant who works with human resources.
Manager
The big boss of everybody, assistants and employees.
Considering these personas, we define 3 basic roles:
User Role
Allowed to view list of employees.
Assistant Role
Allowed to view list.
Allowed to create new employee.
Allowed to manage an employee, if country is the same.
Manager Role
Allowed to view list.
Allowed to create new employee.
Allowed to manage an employee, regardless of his country.
That’s the high-level view.
Coming to the details, we choose:
Scopes are concrete:
view, create, manage
Roles have semantic info
contain multiple scopes plus country info:
User, Assistant (for country), Manager
Role Collections are human readable:
Users, Assistants, Managers
Enforcement in the code:
The /create endpoint checks for “create”-scope.
The /manage endpoint checks for “manage"-scope or “create”-scope.
“create” scope is only accepted if country of the employee is same as country of logged-in user (assistant).
This latter example sounds a bit strange, but we use it to illustrate the possible usage of attributes.
(No doubt, in your professional scenario, you have better use case.)
To follow this tutorial, we need
To prepare for deploying the application, we create the sample project on file system as illustrated below.
Create Project Structure
To follow this tutorial, we create a project attri which contains our application with 2 components:
C:\attri
app
package.json
server.js
approuter
resources
homepage.html
package.json
xs-app.json
manifest.yml
xs-security.json
Or see this screenshot:
The file content can be copied from the appendix1.
In our sample scenario, we have one simple application which consists of web app (html page plus approuter) and service app.
We need just one service instance.
The XSUAA instance is used to protect our application and to handle user login (together with approuter).
But also, it is responsible to create the authorization artifacts, as defined by below config parameters:
xs-security.json
We define 3 scopes and 3 corresponding role templates.
We define one attribute “Country” with no default value.
We set “value required” to false, otherwise we would be forced to specify static default value in this file. However. we want to use the cockpit to create specific roles for specific countries.
The attribute is referenced only by the “AssistantRole” template.
The assistant role is kind of special role, because under certain circumstance (same country), it has additional capabilities. This dynamic authorization handling is possible via attribute.
We also define default role collections, so the admin doesn’t need to create them.
However the "AssistantRoles" collection will contain the special (dynamic) Assistant Role without attribute value. This doesn't make sense and we keep it for testing purpose only.
On command line, we navigate to folder c:\attri and execute the following command:
cf cs xsuaa application attriXsuaa -c xs-security.json
After service creation we can check the cockpit for the newly created roles and role collections.
Our service app is based on the node package express and exposes 2 endpoints, for creating (POST) and managing (PUT) employees.
Authentication
The app is bound to the instance of XSUAA, hence protected with OAuth.
Protection is handled by the node package “passport” which is configured with the XSUAA service instance.
Authorization
Authorization needs to be manually checked in code, according to our authorization model described above.
To check the authorization of a logged-in user, the incoming JWT token is used.
We’re checking the authorization based on 2 elements: scope and attribute.
scope
To check if the logged-in user has the required role, we look into the JWT token, read the contained scopes and check if the expected scope is contained.
For convenience. we can use a helper method on the authInfo object. This object is injected into the request object by the security library xssec.
attribute
To check the attribute, we need to manually access it in the JWT token, then compare the value.
In our example:
Employees are created with name and country.
When an employee is modified (PUT request), we retrieve the country of this employee.
Then we retrieve the country of the logged-in assistant, who attempts to modify the employee.
Only assistant with same country as employee is allowed to modify.
Sounds reasonable, doesn’t it?
One more comment
As we’re here to have fun and to learn little things about JWT etc, we’re adding some code which prints JWT token info to the console.
To do so, we create a function which is added as middleware and is executed on each request.
It requires valid authentication, otherwise no JWT token would be present.
The full file content can be found in appendix1.
As usual for user-centric applications, we use the approuter to handle user login and JWT token flow.
In the approuter config file, xsapp.json, we define 2 routes, pointing to the html page and the service app.
Second route:
The second route is used when an end-user opens the application.
The main entry point is the approuter base URL, without path.
As we’ve specified a welcomeFile, the approuter knows where to redirect the user:
Approuter uses the second route to redirect the user to the local folder “resources”, where the welcome-file “homepage.html” is located.
The interesting configuration of this second route:
It requires that the user is authenticated with XSUAA (this is the instance which is bound to approuter).
It requires that the user has a certain scope (role). Means that the html page is only displayed if the user is authenticated AND authorized.
It is necessary to configure the scope here, because we have no chance to do so in the code.
Finally, it disables to csrf-token-requirement, which means that we don’t require a csrf-token for POST and PUT requests.
Note:
This is of course not recommended, but it makes our sample application a bit simpler.
First route:
The first route is used when an end user triggers an action on the web page, e.g. create.
In that case, the web page calls the REST endpoint of our service app, via this route.
The target is configured in a destination.
The destination is configured to forward the JWT token, which is kept in a session by approuter.
As such, the protected endpoint can be accessed by the logged-in user.
We don't need to configure the scope check here, as we'll anyways have to do it in the code.
We want to keep the whole sample application as minimalistic as possible, so we create only very tiny web app with one html page.
The html file is located in the resources folder and named homepage.html,
Note:
The name must match the welcomeFile parameter configured in xsapp.json
The html contains 2 sections:
- List of employees with input field and button for creating new entries.
- Manage employee with input field and button for modifying an existing entry.
Both buttons trigger a REST request (POST and PUT) to service endpoints through approuter.
The REST requests are implemented with jQuery.
We can see that the URL of the request uses a relative path to a route of approuter.
No need to add "authorization" header, as this is been taken care by approuter.
Remember: approuter takes care of user-login, then keeps the JWT token safe in a session.
Also, no need to fetch an x-csrf-token before sending the request, as we’ve disabled it in approuter-config.
After receiving response from service app, we write the response text at the end of the chosen section in the html page.
Note:
The existing employees are not fetched from service app, to make things easier.
They’re just written to the html page and they’re lost when refreshing the page.
Simple short-lived application…
The full file content can be found in appendix1.
After creating the required service instance and the application with its components, we’re ready for deploy.
Just short look at the deployment descriptor:
manifest.yml
We declare 2 applications, the server app and the approuter app (latter includes the web page).
Both are bound to the instance of XSUAA.
The approuter app defines an environment variable which is actually a workaround:
Instead of manually creating a destination in the BTP Cockpit, we define a destination as variable.
This is not recommended for real-world applications, but it makes a tutorial much shorter.
Approuter route points to this destination and will forward the JWT token to the server app endpoints.
Note:
The name of the destination must match the name used in the xs-app.json file.
Now we can deploy.
On command line, we navigate to folder c:\attri and execute the following command:
cf push
Before we can test our app, there are some configuration steps required to be done in the SAP BTP Cloud Cockpit: handle authorization stuff.
More concrete: Create and assign Roles and Role Collections.
As we know, a user without authorization is not allowed to do anything in our sample application.
Sure, the user wouldn’t miss much…. But anyways…
Our app requires authorization to be present when a user calls the app.
The app itself also provides these authorization definitions.
There's one step reserved for the admin of the cloud account: equipping the registered users with the proper authorization.
Create Role Collection
We go to our trial account, navigate to subaccount -> Security -> Role Collections.
Here we can see that our predefined role collections are already there.
We create a new role collection for German assistants, with name as e.g. “AssistantGermanyRoles”
Create Role
We go to the “Roles” screen, find the roles which we defined in the xs-security file.
We can see that only for the assistant role, there’s a “Create” button enabled.
It is enabled because we need to create a role with a configured attribute.
We press on create and type a name for the new role, in my example: "AssistantGermanyRole" and optional description e.g. Role for Assistants located in Germany
We configure the “Country” attribute with a “static” value as “DE” (press enter after typing text)
Finally, we add the new Role to the new Role Collection “AssistantGermanyRoles”.
Preconfigured role collections are not listed here.
Note:
What we’re doing here is good fun, but not professional.
Creating roles for each country with “hardcoded” static value doesn’t scale.
In real-world scenario, the users would be maintained in a custom Identity Provider (including values for attributes like “Country”, etc)
So the attribute in the Role configuration screen would be mapped to attributes of the Identity Provider.
We’ll try this in the next blog post.
I promise, herewith… (luckily, blog posts are editable….)
Assign User
Roles and Role Collections are useless as long as they aren’t assigned to users.
Only then, a logged-in user will be equipped with enough authorization.
However:
We skip this step for now.
The reason why we've skipped: testing.
To test the authorization checks, we would require 5 users for the 5 possible scenarios.
Instead of creating these 5 users, we use only one (as we have only one): our user.
As such, we need to change the role collection assignment of our user for each test.
So what we want to achieve in this last chapter:
See how our app behaves when it is accessed by users with different authorizations.
This testing (and this blog post) helps us to understand the authorization concept and mechanism in SAP BTP Cloud Foundry with XSUAA.
The URL of our application is in my example:
https://attrirouter.cfapps.us10.hana.ondemand.com
To view the additional information which we write into the Cloud Foundry log, we start log streaming with command:
cf logs attriapp
Note:
After each test we change the role collection assignment of our user.
However, the change is only effective after new user login.
Browser cache needs to be deleted, new incognito browser opened, etc
1. No Role
First of all, we test what happens if we access our applications without any role.
After attempting to open our app at https://attrirouter.cfapps.us10.hana.ondemand.com we need to login, then get the following result:
Result:
As expected, we cannot even see our web page, as the access is restricted by approuter.
We see just error message Forbidden
Status code in browser: 403 as expected
This response is sent by approuter.
The console doesn't show any log entries, because no request was fired to an endpoint of attriapp.
2. “User” Role
Now we go to BTP Cockpit and select the predefined role collection “UserRoles”, press “Edit” , add our user and “Save”.
Means, now we’re acting as a normal employee or user who is allowed to view the list of employees.
Result:
We are allowed to open the app and look at it (currently empty).
However, when trying to create an entry, we get an error message
Forbidden. Missing authorization for create.
In developer tools we can see the HTTP status code 403.
The URL is shown as https://attrirouter.cfapps.us10.hana.ondemand.com/route-me-to/create
So we can see that approuter has forwarded the request to our create endpoint.
The response and status is sent by our create endpoint
In the console, we can see that our user has scope and role for viewing only
3. “Assistant” Role
Next, we want to switch our role and take over the task of an assistant.
In the cockpit, we go to Security -> Users, select our user to view the details.
There we see the “UserRoles” role collection.
We remove it.
Then we assign the predefined role collection “AssistantRoles” (not the one which we created manually).
Again, we need to open new browser to enforce user login page.
We create an employee with name “Anton” and country “DE”, this works fine.
Then we type “Anton” in the maintenance field and press “Submit”.
Result:
We get an error message:
User Carlos (undefined) not allowed to manage Anton (DE) due to different country.
The error is expected, but why “undefined”?
Remember, we’ve assigned a predefined role collection to our user. The contained default role was not created manually, so it does not have a value for the “Country” attribute.
Hence, the incoming JWT token doesn’t contain a value for the attribute and blow statement returns “undefined”:
4. “Assistant” Role with “Country” Attribute
So now we want to try the behavior of our app when used by an assistant with maintained country.
We remove the “AssistantRoles” from our user.
Then we assign the manually created role collection “AssistantGermanyRoles”
This one contains the role with “Country” attribute maintained with fixed value as “DE”.
Again, we need to open new browser to enforce user login page.
We create user "Anton" with country “DE.
Then we try to manage this user.
Result:
It works fine, because our user has country "DE", as specified in the (manually created) Role.
The log shows the scope and role collections and the attribute.
Next we create a user "Bob" from "US".
When trying to manage this one, we get an error.
This is expected, because we coded like that.
Optionally, we could now create a new role and role collection, for assistants from a different country.
Then repeat the test to see that our generic authorization check works fine.
5. “Manager” Role
Finally, we switch to the omnipotent “Manager” Role.
A manager is anyways allowed to do everything, so no “Country” attribute is specified in his role-template.
When trying it with our app, we can see that creating and managing any employee from any country is allowed.
A dream.
As mentioned in the introduction, we have the choice to make the app more beautiful - or delete it.
To make the app more beautiful, we use these magic commands
cf d -r -f attrirouter
cf d -r -f attriapp
cf ds -f attriXsuaa
We’ve learned how to generally deal with authorization in SAP BTP based on XSUAA.
We’ve covered design, declaration, implementation at development-time, as well as configuration and test at runtime.
In addition, we’ve learned how to deal with attributes to make the authorization handling more fine-grained.
Authorization artifacts are defined in xs-security.json file and assigned to users in Cockpit.
Attributes are defined in xs-security.json file and mapped to fixed values in Cockpit.
We’ve been working with Trial account and the default SAP Identity Provider (SAP ID Service), thus advanced attribute handling could not be covered in this blog post.
However, there will be a next blog post (not too advanced, though).
Below sample code shows how to define scopes and attributes and reference them in role-templates.
Role collections are optional.
The implementation can use convenience method for scope check (when using passport and xssec 😞
To check attribute value, the JWT token needs to be decoded (can use xssec) and below claim needs to be retrieved.
Same scenario including external Identity Provider (IAS) and attribute mappings: next blog post.
SAP Help Portal:
Authorization Entities documentation.
Reference for xs.security.json parameters.
Application Router main entry and npm.
Passport homepage and download.
Node.js package xssec.
OAuth 2.0
Understanding of OAuth for dummies like me.
Security Glossary and link list.
xs-security.json
manifest.yml
app
package.json
server.js
approuter
package.json
xs-app.json
homepage.html
It also shows a simplistic way of using attributes.
The project is based on Node.js and runs on SAP BTP Cloud Foundry. Security is based on XSUAA and relies on SAP ID Service as Identity Provider.
The next blog post uses IAS.
Disclaimer: this is not an official reference application.
Quicklinks:
Quick Guide
Sample Code
Content
0. Introduction
1. Sample Application
2. Role Configuration in Cockpit
3. Run
Appendix 1: Sample Code
0.1. Introduction
We imagine an application that shows a list of employees and has basic functionalities like create new employee and manage existing employee (e.g. increase salary).
And has basic (ugly) look and feel:
After quick and dirty (and ugly) prototyping, we introduce authentication:
We want to protect the app, such that only registered users can access it.
For protection we use the XSUAA service and the approuter component handles the login of users.
The last step is to add authorization:
Here we follow the consideration that not everybody who is authenticated should be allowed to execute actions in the app.
We’ll discuss such considerations in a section below.
(The very last step would be to make the app more beautiful or better delete it).
Architecture
Below diagram shows the components of our application:

The application consists of 2 components:
1. The service app
It is based on Node.js and Express web framework..
It stores the employees and offers 2 endpoints for create and manage.
Endpoints are protected, so the app is bound to an instance of XSUAA
2. The user interface app
It consists of a simple html page and an approuter.
The approuter handles the user login and it forwards the calls for create and manage to the service app.
Access to the homepage is restricted to authenticated users by approuter, so approuter is bound to XSUAA as well.
Authorization Handling
Along with the application, we define the security artifacts in the security descriptor, which usually is named xs-security.json.
There, we define "scopes" which are wrapped by "role-templates".
A "sope" is a technical definition of a user-role.
In our example, we require that only managers and assistants, who have a certain role, are allowed to execute the "create" action. As such, it is up to our app to define this role.
On a technical level, it is expressed by a "scope" which is checked by the app code.
A "role-template" is a template definition for a role, and it defines which scopes are mentioned.
A "role" is created in the cloud cockpit and can then be assigned to users.
In xs-security.json, we can also define "attributes" which are referenced by role templates.
After creating an instance of XSUAA based on the config in the xs-security.json file, we can find the role templates in the BTP cockpit.
Based on a template, we can create a specific Role. In the role config screen, we decide what to do with the attribute.
Means which value is expected, or how it is dynamically retrieved.
This will become clearer in the course of this and following blog post.
Finally, the role is added to a "role collection" which is assigned to a specific user (or dynamically mapped to a group. We’ll cover this in the next blog post).

In our example, we define a scope “create”.
We also define the corresponding role-template and an attribute in the file.
In BTP, we create a Role called e.g. “CreateRoleGerman” or "GermanCreator" which is based on the role template.
It assigns a fix value “Germany” to the “country” attribute.
This means that only German users will get this role.
To make this role assignable, we create a role collection, add this role and assign the role collection to a German user.
Our application code will check the scope and the country before creating anything.
Note that this is just a silly example, please forgive.
Authorization Model
In our simple scenario we distinguish 3 personas:
User
This persona can be an employee or anybody allowed to view employees.
Assistant
This is an assistant who works with human resources.
Manager
The big boss of everybody, assistants and employees.
Considering these personas, we define 3 basic roles:
User Role
Allowed to view list of employees.
Assistant Role
Allowed to view list.
Allowed to create new employee.
Allowed to manage an employee, if country is the same.
Manager Role
Allowed to view list.
Allowed to create new employee.
Allowed to manage an employee, regardless of his country.
That’s the high-level view.
Coming to the details, we choose:
Scopes are concrete:
view, create, manage
Roles have semantic info
contain multiple scopes plus country info:
User, Assistant (for country), Manager
Role Collections are human readable:
Users, Assistants, Managers
Enforcement in the code:
The /create endpoint checks for “create”-scope.
The /manage endpoint checks for “manage"-scope or “create”-scope.
“create” scope is only accepted if country of the employee is same as country of logged-in user (assistant).
This latter example sounds a bit strange, but we use it to illustrate the possible usage of attributes.
(No doubt, in your professional scenario, you have better use case.)
0.2. Prerequisites
To follow this tutorial, we need
- Access to SAP Business Technology Platform (SAP BTP) and permission to create instances and to deploy applications.
- Basic Node.js skills.
- Some basic understanding of OAuth and JWT token.
- The tutorial is using the Cloud Foundry command line client, but all tasks can be done in the cockpit as well
0.3. Preparation
To prepare for deploying the application, we create the sample project on file system as illustrated below.
Create Project Structure
To follow this tutorial, we create a project attri which contains our application with 2 components:
C:\attri
app
package.json
server.js
approuter
resources
homepage.html
package.json
xs-app.json
manifest.yml
xs-security.json
Or see this screenshot:

The file content can be copied from the appendix1.
1. Create Application
In our sample scenario, we have one simple application which consists of web app (html page plus approuter) and service app.
We need just one service instance.
1.1. Create instance of XSUAA
The XSUAA instance is used to protect our application and to handle user login (together with approuter).
But also, it is responsible to create the authorization artifacts, as defined by below config parameters:
xs-security.json
"scopes": [{

        "name": "$XSAPPNAME.scopeforview",

    },{

        "name": "$XSAPPNAME.scopeforcreate",

    },{

        "name": "$XSAPPNAME.scopeformanage",

    }

],

"attributes" : [ {

        "name" : "Country",

        "valueType" : "string",

        "valueRequired" : "false"

    }

],

"role-templates": [{

        "name": "UserRole",

        "scope-references": ["$XSAPPNAME.scopeforview"]

    },{

        "name": "AssistantRole",

        "scope-references": ["$XSAPPNAME.scopeforview", "$XSAPPNAME.scopeforcreate"],

        "attribute-references": [ { "name" : "Country" } ]

    },{

        "name": "ManagerRole",

        "scope-references": ["$XSAPPNAME.scopeforview", "$XSAPPNAME.scopeforcreate", "$XSAPPNAME.scopeformanage"]

    }

],

"role-collections": [{

    "name": "UserRoles",

    "role-template-references": [ "$XSAPPNAME.UserRole" ]

  },{

    "name": "ManagerRoles",

    "role-template-references": [ "$XSAPPNAME.ManagerRole" ]

  },{

    "name": "AssistantRoles",

    "role-template-references": [ "$XSAPPNAME.AssistantRole" ]
We define 3 scopes and 3 corresponding role templates.
We define one attribute “Country” with no default value.
We set “value required” to false, otherwise we would be forced to specify static default value in this file. However. we want to use the cockpit to create specific roles for specific countries.
The attribute is referenced only by the “AssistantRole” template.
The assistant role is kind of special role, because under certain circumstance (same country), it has additional capabilities. This dynamic authorization handling is possible via attribute.
We also define default role collections, so the admin doesn’t need to create them.
However the "AssistantRoles" collection will contain the special (dynamic) Assistant Role without attribute value. This doesn't make sense and we keep it for testing purpose only.
On command line, we navigate to folder c:\attri and execute the following command:
cf cs xsuaa application attriXsuaa -c xs-security.json
After service creation we can check the cockpit for the newly created roles and role collections.
1.2. Service Application
Our service app is based on the node package express and exposes 2 endpoints, for creating (POST) and managing (PUT) employees.
Authentication
The app is bound to the instance of XSUAA, hence protected with OAuth.
Protection is handled by the node package “passport” which is configured with the XSUAA service instance.
const passport = require('passport')

passport.use('JWT', new JWTStrategy(UAA_CREDENTIALS))

app.use(passport.authenticate('JWT', {session: false}))
Authorization
Authorization needs to be manually checked in code, according to our authorization model described above.
To check the authorization of a logged-in user, the incoming JWT token is used.
We’re checking the authorization based on 2 elements: scope and attribute.
scope
To check if the logged-in user has the required role, we look into the JWT token, read the contained scopes and check if the expected scope is contained.
For convenience. we can use a helper method on the authInfo object. This object is injected into the request object by the security library xssec.
app.post('/create', (req, res) => {

   const auth = req.authInfo

   if (! auth.checkScope(UAA_CREDENTIALS.xsappname + '.scopeforcreate')
attribute
To check the attribute, we need to manually access it in the JWT token, then compare the value.
In our example:
Employees are created with name and country.
When an employee is modified (PUT request), we retrieve the country of this employee.
Then we retrieve the country of the logged-in assistant, who attempts to modify the employee.
Only assistant with same country as employee is allowed to modify.
Sounds reasonable, doesn’t it?
app.put('/manage', (req, res) => {

      ...

   const employeeEntry = DATABASE.find(e => e.name == employeeName)

   const employeeCountry = employeeEntry.country

   . . .

   const jwtDecoded = req.tokenInfo.getPayload()

   const userAttrCountry = jwtDecoded['xs.user.attributes'].Country

   if(userAttrCountry == employeeCountry){

      // assistant may go ahead
One more comment
As we’re here to have fun and to learn little things about JWT etc, we’re adding some code which prints JWT token info to the console.
To do so, we create a function which is added as middleware and is executed on each request.
It requires valid authentication, otherwise no JWT token would be present.
app.use(logJwtMiddle)

. . .


function logJwtMiddle (req, res, next) {

   const tokenEncoded = req.headers["authorization"].substring(7);

   . . .

   console.log(`==> JWT user attributes: ${JSON.stringify(jwtDecoded['xs.user.attributes'])}`

   . . .
The full file content can be found in appendix1.
1.3. Approuter
As usual for user-centric applications, we use the approuter to handle user login and JWT token flow.
In the approuter config file, xsapp.json, we define 2 routes, pointing to the html page and the service app.
{

  "welcomeFile": "homepage.html",

    "routes": [

      {

        "source": "^/route-me-to/(.*)$",

        "destination": "destination_attriapp",

        "authenticationType": "xsuaa",

        "csrfProtection" : false

      },

      {

        "source": "^/(.*)$",

        "localDir": "resources",

        "authenticationType": "xsuaa",

        "scope": "$XSAPPNAME.scopeforview",

        "csrfProtection" : false

      }

    ]

  }
Second route:
The second route is used when an end-user opens the application.
The main entry point is the approuter base URL, without path.
As we’ve specified a welcomeFile, the approuter knows where to redirect the user:
Approuter uses the second route to redirect the user to the local folder “resources”, where the welcome-file “homepage.html” is located.
The interesting configuration of this second route:
It requires that the user is authenticated with XSUAA (this is the instance which is bound to approuter).
It requires that the user has a certain scope (role). Means that the html page is only displayed if the user is authenticated AND authorized.
It is necessary to configure the scope here, because we have no chance to do so in the code.
Finally, it disables to csrf-token-requirement, which means that we don’t require a csrf-token for POST and PUT requests.
Note:
This is of course not recommended, but it makes our sample application a bit simpler.
First route:
The first route is used when an end user triggers an action on the web page, e.g. create.
In that case, the web page calls the REST endpoint of our service app, via this route.
The target is configured in a destination.
The destination is configured to forward the JWT token, which is kept in a session by approuter.
As such, the protected endpoint can be accessed by the logged-in user.
We don't need to configure the scope check here, as we'll anyways have to do it in the code.
1.4. Web Page
We want to keep the whole sample application as minimalistic as possible, so we create only very tiny web app with one html page.
The html file is located in the resources folder and named homepage.html,
Note:
The name must match the welcomeFile parameter configured in xsapp.json
The html contains 2 sections:
- List of employees with input field and button for creating new entries.
- Manage employee with input field and button for modifying an existing entry.
Both buttons trigger a REST request (POST and PUT) to service endpoints through approuter.
The REST requests are implemented with jQuery.
function callCreate(employeeName, employeeCountry){

   $.post({

      url: `/route-me-to/create`,

      data: JSON.stringify({

         name: `${employeeName}`,

         country: `${employeeCountry}`

      }),

      success: function(result, status, xhr){

         write(result, "createP")
We can see that the URL of the request uses a relative path to a route of approuter.
No need to add "authorization" header, as this is been taken care by approuter.
Remember: approuter takes care of user-login, then keeps the JWT token safe in a session.
Also, no need to fetch an x-csrf-token before sending the request, as we’ve disabled it in approuter-config.
After receiving response from service app, we write the response text at the end of the chosen section in the html page.
Note:
The existing employees are not fetched from service app, to make things easier.
They’re just written to the html page and they’re lost when refreshing the page.
Simple short-lived application…
The full file content can be found in appendix1.
1.5. Deploy
After creating the required service instance and the application with its components, we’re ready for deploy.
Just short look at the deployment descriptor:
manifest.yml
applications:

  - name: attriapp

    routes:

    - route: attriapp.cfapps.us10.hana.ondemand.com

    services:

      - attriXsuaa

  - name: attrirouter

    routes:

    - route: attrirouter.cfapps.us10.hana.ondemand.com

    env:

      destinations: >

        [

          {

            "name":"destination_attriapp",

            "url":"https://attriapp.cfapps.us10.hana.ondemand.com",

            "forwardAuthToken": true

          }

        ]

    services:

      - attriXsuaa
We declare 2 applications, the server app and the approuter app (latter includes the web page).
Both are bound to the instance of XSUAA.
The approuter app defines an environment variable which is actually a workaround:
Instead of manually creating a destination in the BTP Cockpit, we define a destination as variable.
This is not recommended for real-world applications, but it makes a tutorial much shorter.
Approuter route points to this destination and will forward the JWT token to the server app endpoints.
Note:
The name of the destination must match the name used in the xs-app.json file.
Now we can deploy.
On command line, we navigate to folder c:\attri and execute the following command:
cf push
2. Role Configuration in BTP Cockpit
Before we can test our app, there are some configuration steps required to be done in the SAP BTP Cloud Cockpit: handle authorization stuff.
More concrete: Create and assign Roles and Role Collections.
As we know, a user without authorization is not allowed to do anything in our sample application.
Sure, the user wouldn’t miss much…. But anyways…
Our app requires authorization to be present when a user calls the app.
The app itself also provides these authorization definitions.
There's one step reserved for the admin of the cloud account: equipping the registered users with the proper authorization.
Create Role Collection
We go to our trial account, navigate to subaccount -> Security -> Role Collections.
Here we can see that our predefined role collections are already there.
We create a new role collection for German assistants, with name as e.g. “AssistantGermanyRoles”
Create Role
We go to the “Roles” screen, find the roles which we defined in the xs-security file.

We can see that only for the assistant role, there’s a “Create” button enabled.
It is enabled because we need to create a role with a configured attribute.
We press on create and type a name for the new role, in my example: "AssistantGermanyRole" and optional description e.g. Role for Assistants located in Germany
We configure the “Country” attribute with a “static” value as “DE” (press enter after typing text)
Finally, we add the new Role to the new Role Collection “AssistantGermanyRoles”.
Preconfigured role collections are not listed here.
Note:
What we’re doing here is good fun, but not professional.
Creating roles for each country with “hardcoded” static value doesn’t scale.
In real-world scenario, the users would be maintained in a custom Identity Provider (including values for attributes like “Country”, etc)
So the attribute in the Role configuration screen would be mapped to attributes of the Identity Provider.
We’ll try this in the next blog post.
I promise, herewith… (luckily, blog posts are editable….)
Assign User
Roles and Role Collections are useless as long as they aren’t assigned to users.
Only then, a logged-in user will be equipped with enough authorization.
However:
We skip this step for now.
3. Run
The reason why we've skipped: testing.
To test the authorization checks, we would require 5 users for the 5 possible scenarios.
Instead of creating these 5 users, we use only one (as we have only one): our user.
As such, we need to change the role collection assignment of our user for each test.
So what we want to achieve in this last chapter:
See how our app behaves when it is accessed by users with different authorizations.
This testing (and this blog post) helps us to understand the authorization concept and mechanism in SAP BTP Cloud Foundry with XSUAA.
The URL of our application is in my example:
https://attrirouter.cfapps.us10.hana.ondemand.com
To view the additional information which we write into the Cloud Foundry log, we start log streaming with command:
cf logs attriapp
Note:
After each test we change the role collection assignment of our user.
However, the change is only effective after new user login.
Browser cache needs to be deleted, new incognito browser opened, etc
1. No Role
First of all, we test what happens if we access our applications without any role.
After attempting to open our app at https://attrirouter.cfapps.us10.hana.ondemand.com we need to login, then get the following result:
Result:
As expected, we cannot even see our web page, as the access is restricted by approuter.
We see just error message Forbidden
Status code in browser: 403 as expected
This response is sent by approuter.
The console doesn't show any log entries, because no request was fired to an endpoint of attriapp.
2. “User” Role
Now we go to BTP Cockpit and select the predefined role collection “UserRoles”, press “Edit” , add our user and “Save”.

Means, now we’re acting as a normal employee or user who is allowed to view the list of employees.
Result:
We are allowed to open the app and look at it (currently empty).
However, when trying to create an entry, we get an error message
Forbidden. Missing authorization for create.
In developer tools we can see the HTTP status code 403.
The URL is shown as https://attrirouter.cfapps.us10.hana.ondemand.com/route-me-to/create
So we can see that approuter has forwarded the request to our create endpoint.
The response and status is sent by our create endpoint
In the console, we can see that our user has scope and role for viewing only
3. “Assistant” Role
Next, we want to switch our role and take over the task of an assistant.
In the cockpit, we go to Security -> Users, select our user to view the details.
There we see the “UserRoles” role collection.
We remove it.
Then we assign the predefined role collection “AssistantRoles” (not the one which we created manually).
Again, we need to open new browser to enforce user login page.
We create an employee with name “Anton” and country “DE”, this works fine.
Then we type “Anton” in the maintenance field and press “Submit”.
Result:
We get an error message:
User Carlos (undefined) not allowed to manage Anton (DE) due to different country.
The error is expected, but why “undefined”?
Remember, we’ve assigned a predefined role collection to our user. The contained default role was not created manually, so it does not have a value for the “Country” attribute.
Hence, the incoming JWT token doesn’t contain a value for the attribute and blow statement returns “undefined”:
const userAttrCountry = jwtDecoded['xs.user.attributes'].Country4. “Assistant” Role with “Country” Attribute
So now we want to try the behavior of our app when used by an assistant with maintained country.
We remove the “AssistantRoles” from our user.
Then we assign the manually created role collection “AssistantGermanyRoles”
This one contains the role with “Country” attribute maintained with fixed value as “DE”.
Again, we need to open new browser to enforce user login page.
We create user "Anton" with country “DE.
Then we try to manage this user.
Result:
It works fine, because our user has country "DE", as specified in the (manually created) Role.

The log shows the scope and role collections and the attribute.
Next we create a user "Bob" from "US".
When trying to manage this one, we get an error.
This is expected, because we coded like that.

Optionally, we could now create a new role and role collection, for assistants from a different country.
Then repeat the test to see that our generic authorization check works fine.
5. “Manager” Role
Finally, we switch to the omnipotent “Manager” Role.
A manager is anyways allowed to do everything, so no “Country” attribute is specified in his role-template.
When trying it with our app, we can see that creating and managing any employee from any country is allowed.

A dream.
4. Delete
As mentioned in the introduction, we have the choice to make the app more beautiful - or delete it.
To make the app more beautiful, we use these magic commands
cf d -r -f attrirouter
cf d -r -f attriapp
cf ds -f attriXsuaa
Summary
We’ve learned how to generally deal with authorization in SAP BTP based on XSUAA.
We’ve covered design, declaration, implementation at development-time, as well as configuration and test at runtime.
In addition, we’ve learned how to deal with attributes to make the authorization handling more fine-grained.
Authorization artifacts are defined in xs-security.json file and assigned to users in Cockpit.
Attributes are defined in xs-security.json file and mapped to fixed values in Cockpit.
We’ve been working with Trial account and the default SAP Identity Provider (SAP ID Service), thus advanced attribute handling could not be covered in this blog post.
However, there will be a next blog post (not too advanced, though).
Quick Guide
Below sample code shows how to define scopes and attributes and reference them in role-templates.
Role collections are optional.
    "scopes": [{

            "name": "$XSAPPNAME.scopeforcreate",

            "description": "Scope required for creating new employee"

        }

    ],

    "attributes" : [ {

            "name" : "Country",

            "description" : "Contains country information of assigned user",

            "valueType" : "string",

            "valueRequired" : "false"

        }

    ],

    "role-templates": [{

            "name": "AssistantRole",

            "description": "Role for assistants, allows to view and create employees.",

            "scope-references": ["$XSAPPNAME.scopeforcreate"],

            "attribute-references": [ { "name" : "Country" } ]

        }

    ],

    "role-collections": [{

        "name": "AssistantRoles",

        "role-template-references": [ "$XSAPPNAME.AssistantRole" ]

      }

    ]
The implementation can use convenience method for scope check (when using passport and xssec 😞
auth.checkScope(UAA_CREDENTIALS.xsappname + '.scopeforcreate')To check attribute value, the JWT token needs to be decoded (can use xssec) and below claim needs to be retrieved.
const jwtDecoded = req.tokenInfo.getPayload()

const userAttrCountry = jwtDecoded['xs.user.attributes'].Country
Links
Same scenario including external Identity Provider (IAS) and attribute mappings: next blog post.
SAP Help Portal:
Authorization Entities documentation.
Reference for xs.security.json parameters.
Application Router main entry and npm.
Passport homepage and download.
Node.js package xssec.
OAuth 2.0
Understanding of OAuth for dummies like me.
Security Glossary and link list.
Appendix 1: Sample Code for Applications
xs-security.json
{

    "xsappname": "attrixsappname",

    "tenant-mode": "dedicated",

    "scopes": [{

            "name": "$XSAPPNAME.scopeforview",

            "description": "Scope required for viewing employee list."

        },{

            "name": "$XSAPPNAME.scopeforcreate",

            "description": "Scope required for creating new employee"

        },{

            "name": "$XSAPPNAME.scopeformanage",

            "description": "Scope required for managing existing employee"

        }

    ],

    "attributes" : [ {

            "name" : "Country",

            "description" : "Contains country information of assigned user",

            "valueType" : "string",

            "valueRequired" : "false"

        }

    ],

    "role-templates": [{

            "name": "UserRole",

            "description": "Role for end users, allows to view list of employees",

            "scope-references": ["$XSAPPNAME.scopeforview"]

        },{

            "name": "AssistantRole",

            "description": "Role for assistants, allows to view and create employees.",

            "scope-references": ["$XSAPPNAME.scopeforview", "$XSAPPNAME.scopeforcreate"],

            "attribute-references": [ { "name" : "Country" } ]

        },{

            "name": "ManagerRole",

            "description": "Role for managers, allows to view, create and manage employees.",

            "scope-references": ["$XSAPPNAME.scopeforview", "$XSAPPNAME.scopeforcreate", "$XSAPPNAME.scopeformanage"]

        }

    ],

    "role-collections": [{

        "name": "UserRoles",

        "role-template-references": [ "$XSAPPNAME.UserRole" ]

      },{

        "name": "ManagerRoles",

        "role-template-references": [ "$XSAPPNAME.ManagerRole" ]

      },{

        "name": "AssistantRoles",

        "role-template-references": [ "$XSAPPNAME.AssistantRole" ]

      }

    ]

}
manifest.yml
---

applications:

  - name: attriapp

    path: app

    memory: 64M

    routes:

    - route: attriapp.cfapps.us10.hana.ondemand.com

    services:

      - attriXsuaa

  - name: attrirouter

    path: approuter

    memory: 128M

    routes:

    - route: attrirouter.cfapps.us10.hana.ondemand.com

    env:

      destinations: >

        [

          {

            "name":"destination_attriapp",

            "url":"https://attriapp.cfapps.us10.hana.ondemand.com",

            "forwardAuthToken": true

          }

        ]

    services:

      - attriXsuaa
app
package.json
{

    "dependencies": {

        "@sap/xsenv": "latest",

        "@sap/xssec": "latest",

        "express": "^4.16.2",

        "passport": "^0.4.0"

    }

}
server.js
const xsenv = require('@sap/xsenv')

const serviceBindings = xsenv.getServices({

   myXsuaa: {tag: 'xsuaa'}

})

const UAA_CREDENTIALS = serviceBindings.myXsuaa

const DATABASE = new Array() // Global variable representing database


const express = require('express')

const app = express()

const xssec = require('@sap/xssec')

const passport = require('passport')

const JWTStrategy = xssec.JWTStrategy

passport.use('JWT', new JWTStrategy(UAA_CREDENTIALS))

app.use(passport.initialize())

app.use(passport.authenticate('JWT', {session: false}))

app.use(express.json())

app.use(logJwtMiddle)


/* App server */

app.listen(process.env.PORT)


/* Middleware */

function logJwtMiddle (req, res, next) {

   const tokenEncoded = req.headers["authorization"].substring(7)

   let jwtBase64Encoded = tokenEncoded.split('.')[1]

   let jwtDecodedAsString = Buffer.from(jwtBase64Encoded, 'base64').toString('ascii')

   let jwtDecoded = JSON.parse(jwtDecodedAsString)


   console.log(`===> The full JWT decoded: ${JSON.stringify(jwtDecoded)}`)

   console.log(`==> JWT scope: ${jwtDecoded.scope}`)

   console.log(`==> JWT role collections: ${JSON.stringify(jwtDecoded['xs.system.attributes'])}`)

   console.log(`==> JWT user attributes: ${JSON.stringify(jwtDecoded['xs.user.attributes'])}`)

   next()

}


/* App endpoints */

app.post('/create', (req, res) => {

   const auth = req.authInfo

   if (! auth.checkScope(UAA_CREDENTIALS.xsappname + '.scopeforcreate')) {

      res.status(403).end('Forbidden. Missing authorization for create.')

   }else{

      const body = req.body

      DATABASE.push({name: body.name, country: body.country})

      res.send(`Employee name: '${body.name}', country: '${body.country}'`)

   }

})


app.put('/manage', (req, res) => {

   const auth = req.authInfo

   const employeeName = req.body.name

   const employeeEntry = DATABASE.find(e => e.name == employeeName)

   if(employeeEntry === undefined){

      res.status(404).end(`Employee '${employeeName}' not found.`)

   }

   const employeeCountry = employeeEntry.country


   // authorization checks: manager is always entitled. Assistant is entitled only if in same country

   if (auth.checkScope(UAA_CREDENTIALS.xsappname + '.scopeformanage')) {

      res.send(`Salary increased for employee: '${employeeName}' by manager '${auth.getGivenName()}' .`)

   }else if(auth.checkScope(UAA_CREDENTIALS.xsappname + '.scopeforcreate')){

      const jwtDecoded = req.tokenInfo.getPayload()

      const userAttrCountry = jwtDecoded['xs.user.attributes'].Country

      if(userAttrCountry == employeeCountry){

         res.send(`Salary increased for employee: '${employeeName}' by assistant '${auth.getGivenName()}' .`)

      }else{

         res.status(403).end(`User ${auth.getGivenName()} (${userAttrCountry}) not allowed to manage ${employeeName} (${employeeCountry}) due to different country.`)

      }

   }else{

      res.status(403).end('Forbidden. Missing authorization for managing employee.')

   }

})
approuter
package.json
{

    "dependencies": {

        "@sap/approuter": "latest"

    },

    "scripts": {

        "start": "node node_modules/@sap/approuter/approuter.js"

    }

}
xs-app.json
{

  "welcomeFile": "homepage.html",

  "authenticationMethod": "route",

    "routes": [

      {

        "source": "^/route-me-to/(.*)$",

        "target": "$1",

        "destination": "destination_attriapp",

        "authenticationType": "xsuaa",

        "csrfProtection" : false

      },

      {

        "source": "^/(.*)$",

        "localDir": "resources",

        "authenticationType": "xsuaa",

        "scope": "$XSAPPNAME.scopeforview",

        "csrfProtection" : false

      }

    ]

  }
homepage.html
<html>

  <head>

    <script src = "https://code.jquery.com/jquery-3.6.0.min.js"></script>

    <script>

      function write(text, idOfP){

        const p = document.createElement("P")

        p.appendChild(document.createTextNode("-> " + text))

        document.getElementById(idOfP).appendChild(p)

      }


      function callCreate(employeeName, employeeCountry){

          $.post({

            url: `/route-me-to/create`,

            data: JSON.stringify({

              name: `${employeeName}`,

              country: `${employeeCountry}`

            }),

            headers: {

              'Content-Type': 'application/json'

            },

            success: function(result, status, xhr){

              write(result, "createP")

            },

            error: function(xhr, status, error){

              write(xhr.responseText, "createP")

            }

          })

      }


      function callManage(employeeName){

          $.ajax({

            type: "PUT",

            url: `/route-me-to/manage`,

            data: JSON.stringify({

              name: `${employeeName}`

            }),

            headers: {

              'Content-Type': 'application/json'

            },

            success: function(result, status, xhr){

              write(result, "manageP")

            },

            error: function(xhr, status, error){

              write(xhr.responseText, "manageP")

            }

          })

      }

    </script>

  </head>

  <body>

    <h1>Homepage Employee Management</h1>

    <h4>List of Employees</h4>

    <p id="createP">Create:

      <input id="employeeFieldId" size="10">

      <input id="countryFieldId" value="DE" size="7">

      <button type="button" onclick="callCreate(employeeFieldId.value, countryFieldId.value)">Submit</button></p>

    <h4>Manage Employee</h4>

    <p id="manageP">Increase Salary for:

      <input id="salaryFieldId" size="10">

      <button type="button" onclick="callManage(salaryFieldId.value)">Submit</button></p>

  </body>

</html>
Labels:
13 Comments
You must be a registered user to add a comment. If you've already registered, sign in. Otherwise, register and sign in.
Labels in this area
-
ABAP CDS Views - CDC (Change Data Capture)
2 -
AI
1 -
Analyze Workload Data
1 -
BTP
1 -
Business and IT Integration
2 -
Business application stu
1 -
Business Technology Platform
1 -
Business Trends
1,658 -
Business Trends
91 -
CAP
1 -
cf
1 -
Cloud Foundry
1 -
Confluent
1 -
Customer COE Basics and Fundamentals
1 -
Customer COE Latest and Greatest
3 -
Customer Data Browser app
1 -
Data Analysis Tool
1 -
data migration
1 -
data transfer
1 -
Datasphere
2 -
Event Information
1,400 -
Event Information
66 -
Expert
1 -
Expert Insights
177 -
Expert Insights
293 -
General
1 -
Google cloud
1 -
Google Next'24
1 -
Kafka
1 -
Life at SAP
780 -
Life at SAP
13 -
Migrate your Data App
1 -
MTA
1 -
Network Performance Analysis
1 -
NodeJS
1 -
PDF
1 -
POC
1 -
Product Updates
4,577 -
Product Updates
340 -
Replication Flow
1 -
RisewithSAP
1 -
SAP BTP
1 -
SAP BTP Cloud Foundry
1 -
SAP Cloud ALM
1 -
SAP Cloud Application Programming Model
1 -
SAP Datasphere
2 -
SAP S4HANA Cloud
1 -
SAP S4HANA Migration Cockpit
1 -
Technology Updates
6,873 -
Technology Updates
417 -
Workload Fluctuations
1
Related Content
- Onboarding Users in SAP Quality Issue Resolution in Technology Blogs by SAP
- Configure Custom SAP IAS tenant with SAP BTP Kyma runtime environment in Technology Blogs by SAP
- Switch on gCTS (for existing packages) in Technology Blogs by SAP
- Creating a JDBC Connection for Google BigQuery using SSO with Oauth 2.0 in Technology Q&A
- SAP HANA Cloud Vector Engine: Quick FAQ Reference in Technology Blogs by SAP
Top kudoed authors
| User | Count |
|---|---|
| 35 | |
| 25 | |
| 13 | |
| 7 | |
| 7 | |
| 6 | |
| 6 | |
| 6 | |
| 5 | |
| 4 |