This is the next blog post in this series. Here is the previous blog post
Getting Started with ABAP: How to Create Projection View
In the previous blog post, we learned how to create projection view.
In this blog post we will learn how to create maintenance view.
What is Maintenance View?
A single maintenance view can be used to modify the content of multiple related database table consistently.
All database tables grouped in maintenance view must be joined using foreign key relationship. The first table included in the maintenance view is known as the primary table of the maintenance view. The tables added to this primary table using foreign keys are known as secondary tables.
While selecting secondary table make sure
- If secondary table is check table then no more than one dependent data record exists in each of the secondary tables for a specific data record in the primary table
- If secondary table is Foreign key table then the foreign key fields must be key fields of a secondary table
How to Create Maintenance View
Step 1: Go to SE11. Select view and enter name of maintenance view.

Step 2: Click on Create. Select Maintenance View.

Step 3: Enter short description.

Step 4: I have two tables. One is Employee table and another one is department table.
ZAKTABLE

ZAK_DEP

Employee_id field is foreign key in ZAK_DEP table.
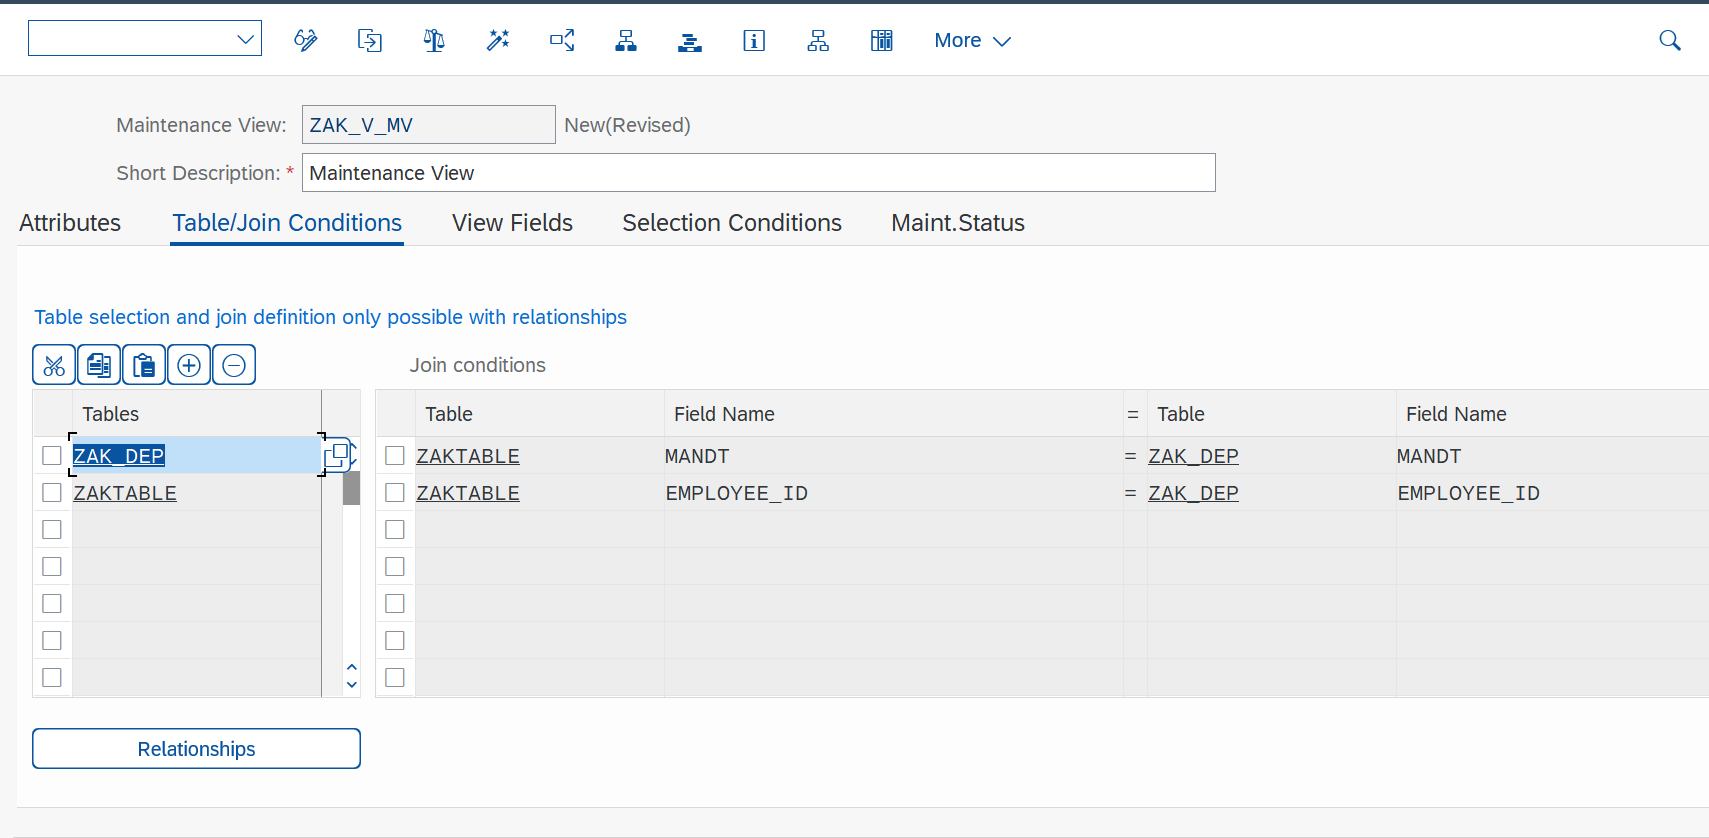
Enter ZAK_DEP name in table column first.

Step 5: Click on Relationships. Here we can see that ZAK_Dep table is connected using foreign key. Select that table.

Step 6: Join condition will be added.
Step 7: Click on View Fields.

Step 8: Click on Table fields and select first table.

Step 9: select fields from table.

Step 10: Click on Table fields and select second table.

Step 11: select fields name.

Step 12: In selection condition, you can put condition if you want.

Step 13: Here you can see that 4 options are there.
1.Read Only
That means you will be able to read data through maintenance view.
2.Read, change, Delete, and Insert
If you select this option then you will be able to read, change, delete and insert the data into the table through maintenance view.
3.Read and Change
If you select this option then you will be able to read and edit data into database table through this view.
4.read and change (time-specific Views)
If you select this option then you will be able to read and change the data if it is time-specific view. That means key of maintenance view contain data field and time field.
What is delivery class and Data browser/Table editing?
I have explained it in earlier blog post. Here you can check
Getting started with ABAP: How to Create Table Part 1

Step 14: Save and Activate it. Click on contents.

When you click on Contents, next screen is not getting display.
For maintenance view, we have to create maintenance dialog to read or to do any operation through this view.
Step 15: we can create maintenance dialog from transaction SE54. Go to SE54.
You will get below window.

Step 16: Click on Generated Objects. Click on Create/Change.

Step 17: Click on Yes.
What is Authorization group and maintenance type?
I have explained it earlier blog post. Here you can check
Getting Started With ABAP: Table Maintenance Generator

Step 18: Enter function group name. I selected maintenance type as one step and click on find screen number button.

Step 19: Click on create button.

Step 20: Now go to your maintenance view and click on Contents.
Now you will be able to read data.

Step 21: If you want to edit, insert and delete data then click on Edit button.


If want to delete just select that particular entry and right click it and delete it.
Here we have created maintenance view.
Here you can check next blog post
Getting Started with ABAP: How to Create Help View and Search Help Part 1
Follow my profile to be notified of the next blog post. Please feel free to ask any questions you have in the comments section below.
