This series of blog posts provides a good overview of how to configure
Relationship Intelligence which is now available with SAP Sales Cloud's Intelligent Sales Add-on.
Currently, we only support integration with Office 365 hence this is a prerequisite for this solution.
Please make sure you refer to all these blogs for end-to-end setup.
- Setting up your Application and Distribution List/Group in the Azure portal (This Blog)
- Generating Password Protected Self-Signed Certificate using open SSL
- Setting up Relationship Intelligence in SAP Sales Cloud
Setting up your Application in Azure is one of the first steps that you would need to perform in Relationship Intelligence. Ensure you have an Azure account with an active subscription.
There are 3 important steps in this and I will try to cover the steps you must follow with screenshots.
- Application Registration
- Grant API Permission for Application
- Create Distribution List/ Group
- Application Registration: Log in to your Azure portal using your admin credentials and go to Microsoft Entra ID

Azure Portal Home Page
Once you are in Azure Active Directory under
Manage, Select
App Registrations and then click on
New Registration

Azure New Registration
While registering the application using any suitable Name, select supported account type as Accounts in this organizational directory only, and since using Redirect URI is optional it can be skipped. Then Click on Register.

Application Registration Details
Once the application is registered it will take you to an overview page where you can see all the details related to the application, such as Application ID and Tenant ID. These will be required later on while creating the server connection inside the Relationship Intelligence administration page.

Application Overview
2.
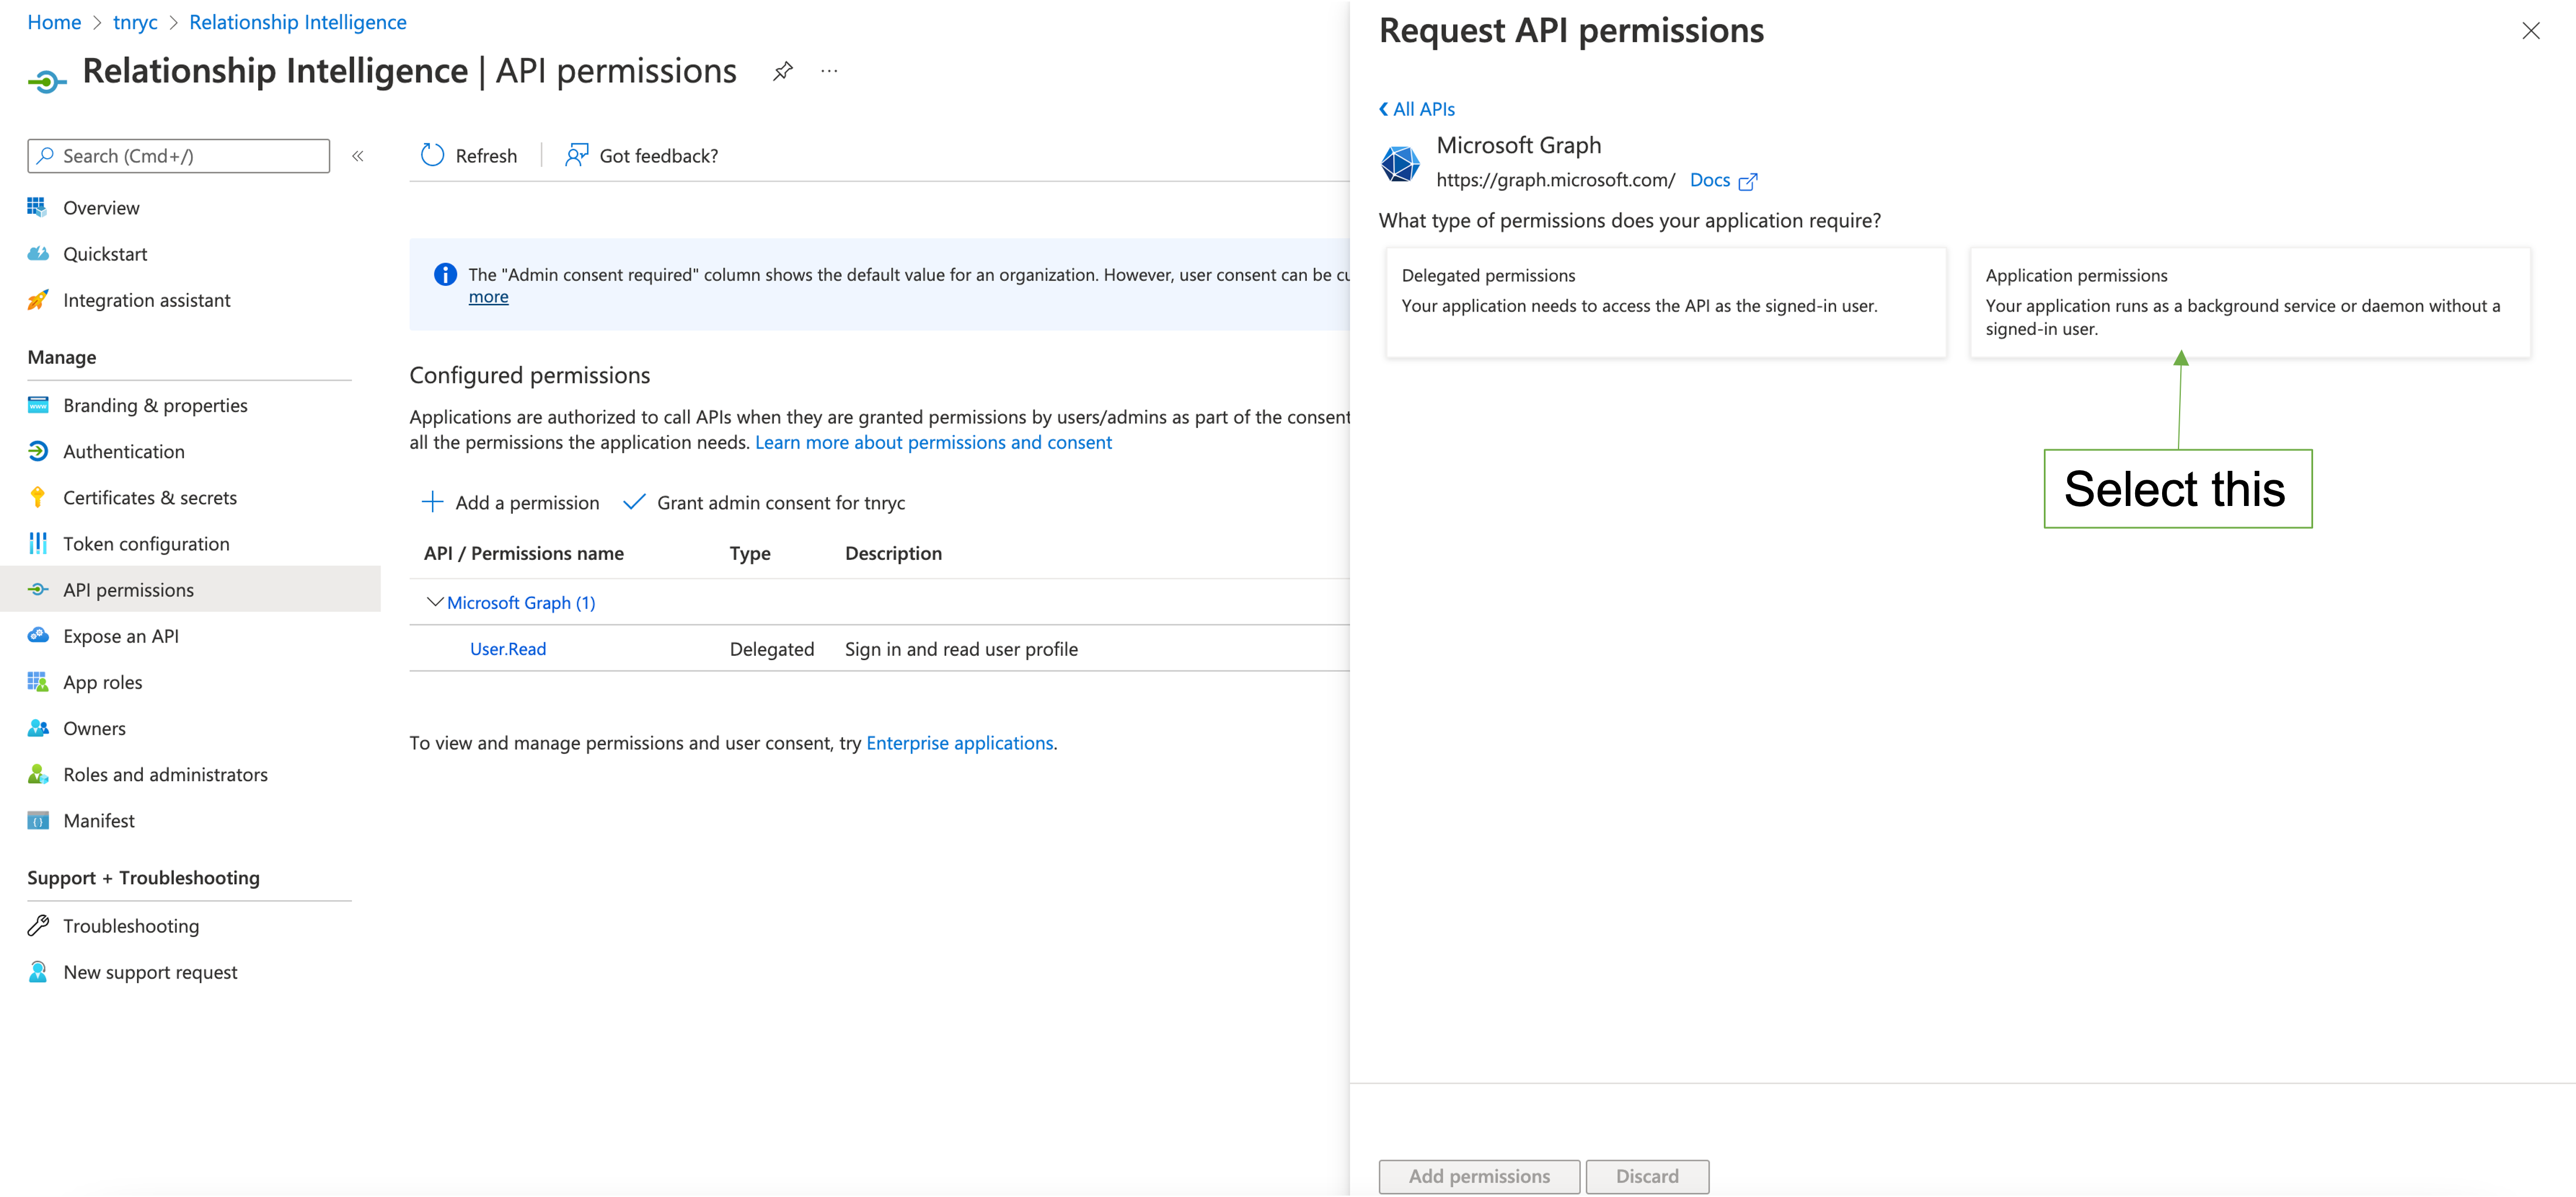
Grant API Permission for Application
Within the application under
Manage select
API Permission and click on
Add permission. Once you click on Add permission, you will see a pop-up -
Request API permission.
Here select
Microsoft Graph API -> A
pplication Permission and then search and add the below permissions
Calendars.Read
Group.Read.All
GroupMember.Read.All
Mail.ReadBasic.All
User.Read.All
Once you add these APIs make sure you Grant Admin Consent


3.
Create Distribution List/ Group :
You must ensure you have a valid group created. Relationship Intelligence monitors only those email addresses maintained in the group.
To create a group go to the
Azure Active Directory and under
Manage go to
Groups and click on
New Group

Create New Group
While creating the group ensure that you select
group type Microsoft 365 and
membership type as
Assigned. Ensure that the domain is the same as the one you that you have used while registering the application in the Azure portal

Create New Group
Once created make sure you have added members to the group
(of course also belonging to the same domain). Add only those members whose mailbox you wish to monitor.

Created Group

Adding Group Members
With the above 3 steps, the Azure Side setup would be completed. There is one more step to be done in Azure which is to upload the certificate for authentication, which requires you to generate a password-protected self-signed certificate. Please do share your feedback and thoughts in the comments.
You can refer to my Next Blog post
Generating Password Protected Self-Signed Certificate using open SSL for more details on certificate generation and upload.
