


- SAP Community
- Products and Technology
- Technology
- Technology Blogs by SAP
- What is all about Authorization Server (OAuth) SSO...
Technology Blogs by SAP
Learn how to extend and personalize SAP applications. Follow the SAP technology blog for insights into SAP BTP, ABAP, SAP Analytics Cloud, SAP HANA, and more.
Turn on suggestions
Auto-suggest helps you quickly narrow down your search results by suggesting possible matches as you type.
Showing results for
Product and Topic Expert
Options
- Subscribe to RSS Feed
- Mark as New
- Mark as Read
- Bookmark
- Subscribe
- Printer Friendly Page
- Report Inappropriate Content
04-21-2022
2:42 PM
With the announcement of SAP BusinessObjects BI 4.3 SP02 release, you might already aware about the new type of SSO mechanism introduced in BI Platform:
Let's see what is it all about the new type of SSO.
As we know BI Platform supports many ways of SSO, adding to those options, with BI 4.3 SP02 release, a new type of End to End SSO has been introduced. Salient features of this new way of SSO are as follows:
- Regards, Venkat.
End to End SSO with Authorization Server - OAuth SSO
Let's see what is it all about the new type of SSO.
- More about Authorization Server (OAuth) SSO
- Important Points to Note
- Steps to Configure Authorization Configuration
- Example: Snowflake related configuration
More about Authorization Server (OAuth) SSO:⮭
As we know BI Platform supports many ways of SSO, adding to those options, with BI 4.3 SP02 release, a new type of End to End SSO has been introduced. Salient features of this new way of SSO are as follows:
- Easy and simple configuration steps for configuring Authorization Server with new application named "Authorization Server Configuration".
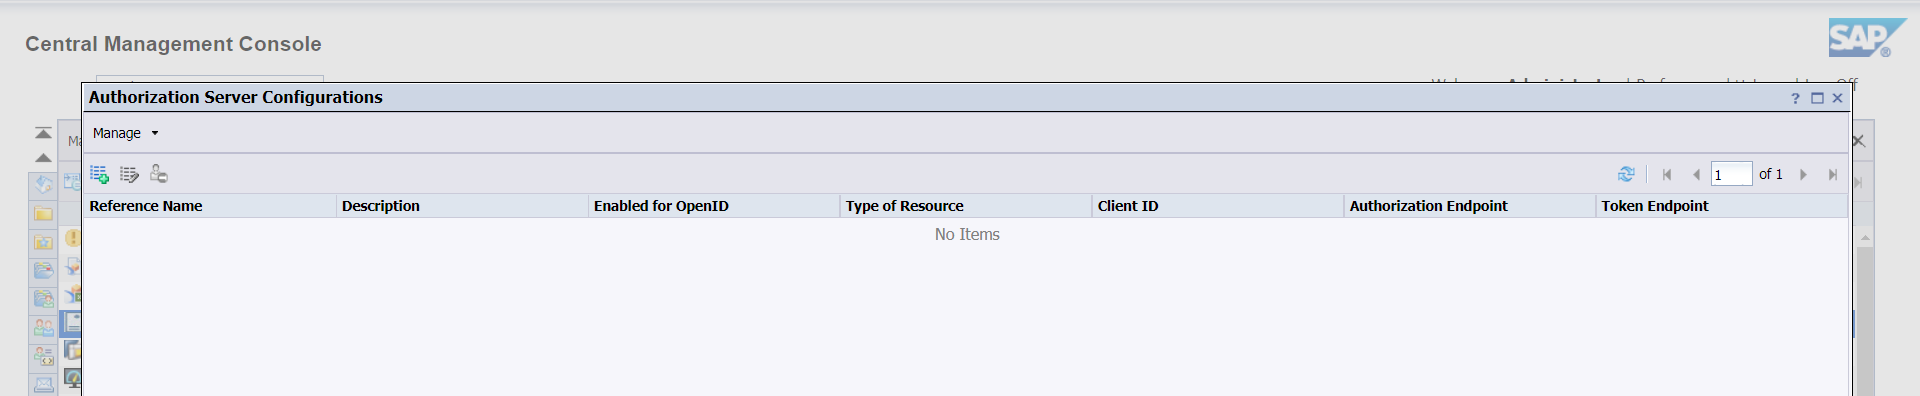
Authorization Server Configurations - Application
- Allows to configure multiple Authorization Servers.

Multiple Authorization Configurations in CMC
- Ability to restrict the configuration to certain Users or User Groups (User Security) - default object rights like view, modify/edit and delete are available to apply:

Applying User Security on Authorization Server Configuration
- Flexibility to manage and control the configurations to BI Administrators:
- Ability to differentiate different configurations with "Reference Name", which will be stored in the CMS DB with new infoobject type as "Authorization Reference".
- Restrict the configurations with security rights, as mentioned above.
- Ability to create, modify, query and delete the "Authorization Server Configurations" using your favorite BI Platform Java SDK - with the help of following API
- com.businessobjects.sdk.plugin.desktop.authorizationreference.IAuthorizationReference
- IAuthorizationReference.KIND
- Ability to promote the configuration using Promotion management / Promotion Wizard with the newly introduced infoobject "Authorization Reference".
- Note: At present dependency calculation for this infoobject is not available.

Promoting Authorization Reference (InfoObjects containing Authorization Server configuration).
- Freedom for BI Developers and BI Users without depending on the Administrators:
- BI Developers will be able to choose which configuration should act as Authorization server for their connection.

IDT - Snowflake Connection now supports SSO via OAuth (Authorization Reference)
- BI Users allowed to use the Authorization servers will be able to authorize themselves in BI Launchpad via the "Authorization Tokens" tab under "User Account" section in Settings.

Generate Authorization Token
- And provision to delete already established Authorization (Refresh Token) by the Users, in case if they see the need for the same at any time from the same "Authorization Tokens" tab in settings from BI Launchpad.
- Ability to establish End to End SSO for Datasource available on Cloud, without the help of any classic SSO methods.
- Opens up the following new capabilities in BusinessObjects BI Suite by acting as backend framework:
- Make personal data sources available at Cloud Drive as source to generate BI Content (Web Intelligence).
- Helps to establish End to End SSO, while using OData as the source to generate BI Content (Web Intelligence).
- OpenID Connect Authentication for the Enterprise Authentication.
- Schedule BI Content to Cloud Drive destination.
Important Points to Note:⮭
- This new type of SSO, Authorization Server SSO (OAuth SSO) works on OAuth 2.0 protocol
- That means, we can configure Authorization Servers (OAuth Servers) only which supports OAuth 2.0.
- Validation of configuration or Authorization against any configuration can be done via the same option "Authorization Tokens" section of Settings in BI Launchpad.
- BI Users or BI Developers who need to establish the Authorization against any configured server in BI Platform can be done via the BI Launchpad only.
- BI Administrators after configuring Authorization Server in CMC will be able to test the same by trying to establish the Authorization from the BI Launchpad, as there is no provision as of now in CMC "Authorization Configuration" Application.
- End to End SSO using Authorization Server for Datasource query and refresh is only supported for the following scenarios:
- In Relational Connection for Snowflake Data sources using JDBC driver and the connection can be created only via the Information Design Tool.
- While using Google Sheet Data source for Web Intelligence
- While using a Web Intelligence OData Data source from different BI Landscape as source for Web Intelligence document.
- Promotion of "Authorization Reference" object does not support dependency calculation.
- Effect of Deletion of any Authorization Server configuration:
- This makes Authorizations(Refresh Tokens) established by the Users against such configuration will become orphan. Will not be able to see the configuration under "Authorization Tokens" section in Settings, so they need to establish the Authorization again against any replacement configuration if any provided by the Administrator.
- Connection objects which were using deleted configuration will through error for any new query or refresh of existing queries, hence BI developers need to edit such connections manually to point to the replacement configuration via choosing the corresponding new "Authorization Reference" or switch to another method of Authentication.
Steps to Configure Authorization Configuration: ⮭
- Launch and login to Central Management Console as an Administrator
- In Home Page, click on "Applications" section under Manage column
- In Applications, double click on "Authorization Server Configuration" application
- In "Authorization Server Configurations" pop-up window Click on either "Manage > New Authorization Server Configuration" in top menu bar or click "Create a New Authorization Server Configuration" tool bar icon
- Fill the following parameters in "Create an Authorization Server Configuration":
- Reference Name - Choose an unique random string and enter the same to identify the configuration, to recognize and choose the configuration in different workflows for achieving Authorization based SSO.
- Description (Optional) - Enter any statement and keywords to describe and easily identify the configuration out of the list of available configurations.
- Note: Following fields are specific to "OpenID Connect Authentication", not required for Authorization SSO, you do not need to enable these unless this configuration is required to serve for OpenID Connect Authentication.
- A checkbox with following label "Enabled for "OpenID Connect" Authentication"
- Issuer URI
- JSON Web Key Sets URI (jwks_uri)
- ID Token Signing Algorithm
- Note: Following fields are specific to "OpenID Connect Authentication", not required for Authorization SSO, you do not need to enable these unless this configuration is required to serve for OpenID Connect Authentication.
- Authorization Endpoint - Enter the url of authorization server, with which one can get the authorization grant
- Token Endpoint - Enter the url of authorization server, with which one can request access token by exchanging the authorization code
- Client ID - Enter the name of the Application, which is used to register BI Landscape with Authorization Server
- Client Secret - Enter the specific secret code corresponding to the Application which is used in registering the BI Landscape with Authorization Server
- Redirect URL - Enter the url of the BI Landscape end point to which the authorization code has to be sent by Authorization server after the successful validation of the authorization. For this purpose a new endpoint has been introduced in the REST API of BI Platform i.e. /oauth2/callback. Hence the url should be as follows: https://<hostname:port>/biprws/v1/oauth2/callback.
- Note:
- Here the hostname will be the system name which is hosting the application server of the BI landscape, where RESTful webservices application (biprws) is deployed on it. And port will be the SSL port of application server.
- And the same url should be configured while registering the application (client app to register BI Landscape) on Authorization Server (OAuth Server) as the value for the callback URI.
- Note:
- Revocation Endpoint (Optional) - Enter the url of authorization server, with which application can request the revocation of all previously issued Access Tokens through a specific Refresh Token
- Authorization Scope - Enter the supported authorization scopes by the Authorization Server to define the limits for the Application (BI Landscape) access to different API resources available
- Note:
- BI Platform implementation of OAuth SSO is based on offline access, hence, if your aim for configuring the Authorization Server in BI Platform is to refresh data or access resources without being challenged for the Authorization validation every time, then you need to configure this field with required scope parameter along with one mandatory parameter i.e. either "refresh_token" or "offline_access" based on the vendor of your Authorization Server.
- Note:
- Type of Resource - Choose the desired resource type out of available list of supported Resource types by BI Platform. Following are the current list of resource types which are supported in BI Platform to configure and access through corresponding Authorization Server.
- Agnostic (default value) - Not specific to any vendor or protocol, to indicate any resource which can be accessed with a successful authorization grant by an Authorization Server
- GoogleDrive - To indicate that the configuration is of Google Authorization Server which can be used for accessing the Google Drive to different BI Platform scenarios. At any point of time only one configuration of type GoogleDrive can exist in the system.
- OData - Not specific to any vendor but to indicate that the configuration is related to a resource which can be accessed via the OData protocol with an authorization grant by an Authorization Server. And like GoogleDrive, at any point of time only one configuration of type OData can exist in the system.
- Note:
- "Type of Resource" parameter is nothing to do with OAuth 2.0 standard, however this is introduced in the configuration to avoid any possible ambiguity in identifying certain resources in the BI Platform, so the corresponding configurations can be easily picked and used in certain scenarios to achieve authorization.
- "Access Type" parameter is specific to Authorization configuration of type "Google Drive", and will be auto filled when the value for "Type of Resource" field is selected as "GoogleDrive".
- Note:
- Custom Parameters (Optional) - Enter any custom parameters required to send while requesting the authorization, based on any custom requirements (if required) of the Authorization Server being configured.
- Note:
- Name of the custom parameter should be unique in the configuration
- At maximum 5 custom parameters are allowed to be configured in any Authorization configuration

- Note:
- After filling all the required parameters, click on OK button to validate the details and save the configuration. And the configuration will be saved as an system object in the repository with kind "AuthorizationReference". And you can refer the configuration in all supported scenarios with its "Reference Name".
- Once successfully saving the configuration, to test it, launch BI Launchpad and login
- Note:
- As mentioned in the "Important Points to Note" section, at present it is not possible to test the configuration from CMC.
- Login as an administrator or with any BI Platform user account, which is not restricted to use the Authorization Configuration saved above
- Using the current login method configured for BI Launchpad i.e. Enterprise or any authentication method.
- Note:
- Navigate to Settings by clicking on the same from drop down menu under user icon in top right corner
- In Settings pop up window, navigate to Authorization Tokens tab in User Account section.
- Click on the Generate button under Manage Tokens column, which is against the Authorization Reference saved above
- As per your organization policy, based on the Authorization configuration in your authorization server, either the account validation will happen based on the certificates configured in the system or you will be challenged with the user name, password and/or multi factor authentication challenges based on the configuration settings, answer those challenges
- Once the credentials / certificate is successfully validated then BI Platform should haven been received the Refresh Token and it should have been stored securely in BI Platform Repository against the BI Platform user currently logged in, once all this is successful then you should see the following changes in the Authorization Token tab:
- In the Expires On column against the Authorization Reference from where you clicked on the "Generate" button, you should see the expiration value for the Token issued by the Authorization Server. If your Authorization Server issues Token with no expiry, then the column value will be updated as "No Expiry"
- And also under the Manage Tokens column, you should see a Delete button appearing next to Generate button.
- The Delete button is to delete the token issued by the Authorization Server and this delete is not only limited to delete the token from the BI Platform repository storage, can also be propagated to Authorization Server based on the configuration and support.
- That means if the optional parameter Revocation Endpoint is filled with the proper url based on your Authorization server's support for the same, then the issued token will be revoked at the Authorization server level as well, along with clearing it from the BI Platform repository storage.
- If the token is issued and Expires On column is updated according to the expiry of the token issued, then that means, configuration is successfully working, and ready for BI Developers and BI End users consumption.
Example: Snowflake related configuration: ⮭
- Launch Snowflake admin console of your Organization's Snowflake tenant (https://<account_identifier>.snowflakecomputing.com/console)
- Login with Admin Account
- Navigate to Worksheet section and click on New Worksheet
- In the New Worksheet console pane paste the SQL to create a security integration with your BI Landscape, for example:
create security integration MYSAPBOBI

  type = oauth

  enabled = true

  oauth_client = CUSTOM

  oauth_client_type = 'CONFIDENTIAL'

  oauth_redirect_uri = 'https://<my-bo-webapp-hostname>:<port>/biprws/v1/oauth2/callback'

  oauth_issue_refresh_tokens = true

  oauth_refresh_token_validity = 7776000

  ;

- Note: Here the callback url https://<my-bo-webapp-hostname>:<port>/biprws/v1/oauth2/callback, you need to replace the following:
- "my-bo-webapp-hostname" with your actual Application server hostname on which "biprws" application is deployed.
- "port" should be replaced with the secure (SSL (TLS)) port number of Application Server on which "biprws" application is deployed.
- Click on Run button
- Once it is successfully executed
- You need to get the OAUTH_CLIENT_ID and OAUTH_CLIENT_SECRET by executing the following command:
SELECT SYSTEM$SHOW_OAUTH_CLIENT_SECRETS('MYSAPBOBI');
- And the result for the same can be seen in the Results pane below as follows:
- The value shown against the "OAUTH_CLIENT_ID" should need to be filled in the "Client ID" parameter and similarly the value shown against the "OAUTH_CLIENT_SECRET" should need to be filled in the "Client Secret" parameter in Authorization Configuration corresponding to the snowflake in CMC.
- Note: For more information and help refer the Snowflake documentation "Configure Snowflake OAuth for Custom Clients".
- Now you can configure the Snowflake Authorization Server in CMC, as following:
- Reference Name: <desired_reference_name>
- Authorization Endpoint: https://<account_identifier>.snowflakecomputing.com/oauth/authorize
- Token Endpoint: https://<account_identifier>.snowflakecomputing.com/oauth/token-request
- Client ID & Client Secret as mentioned in the above step
- Redirect URL: https://<my-bo-webapp-hostname>:<port>/biprws/v1/oauth2/callback
- Authorization Scope: refresh_token
- Type of Resource value keep default, i.e. "Agnostic".
- Click OK button to save the configuration.
- To test the saved configuration, as mentioned in the "Steps to configure Authorization Configuration" section, perform the steps from 7 to 11 and validate the configuration.
- You can refer the configuration using its Reference Name, while creating the connection in Information Design Tool.
- To use End To End SSO (OAuth SSO) functionality, while querying data or to test the connection, perform the steps from 7 to 11 from "Steps to configure Authorization Configuration" section, by logging on to BI Launchpad with the respective BI Platform user account as a BI Developer who has the access to view the configuration saved in step 9, as follows:
- Enter the Snowflake account having the access to the required Databases to get the Authorization

- Allow the application access

- You should get the following message once the Authorization is successful
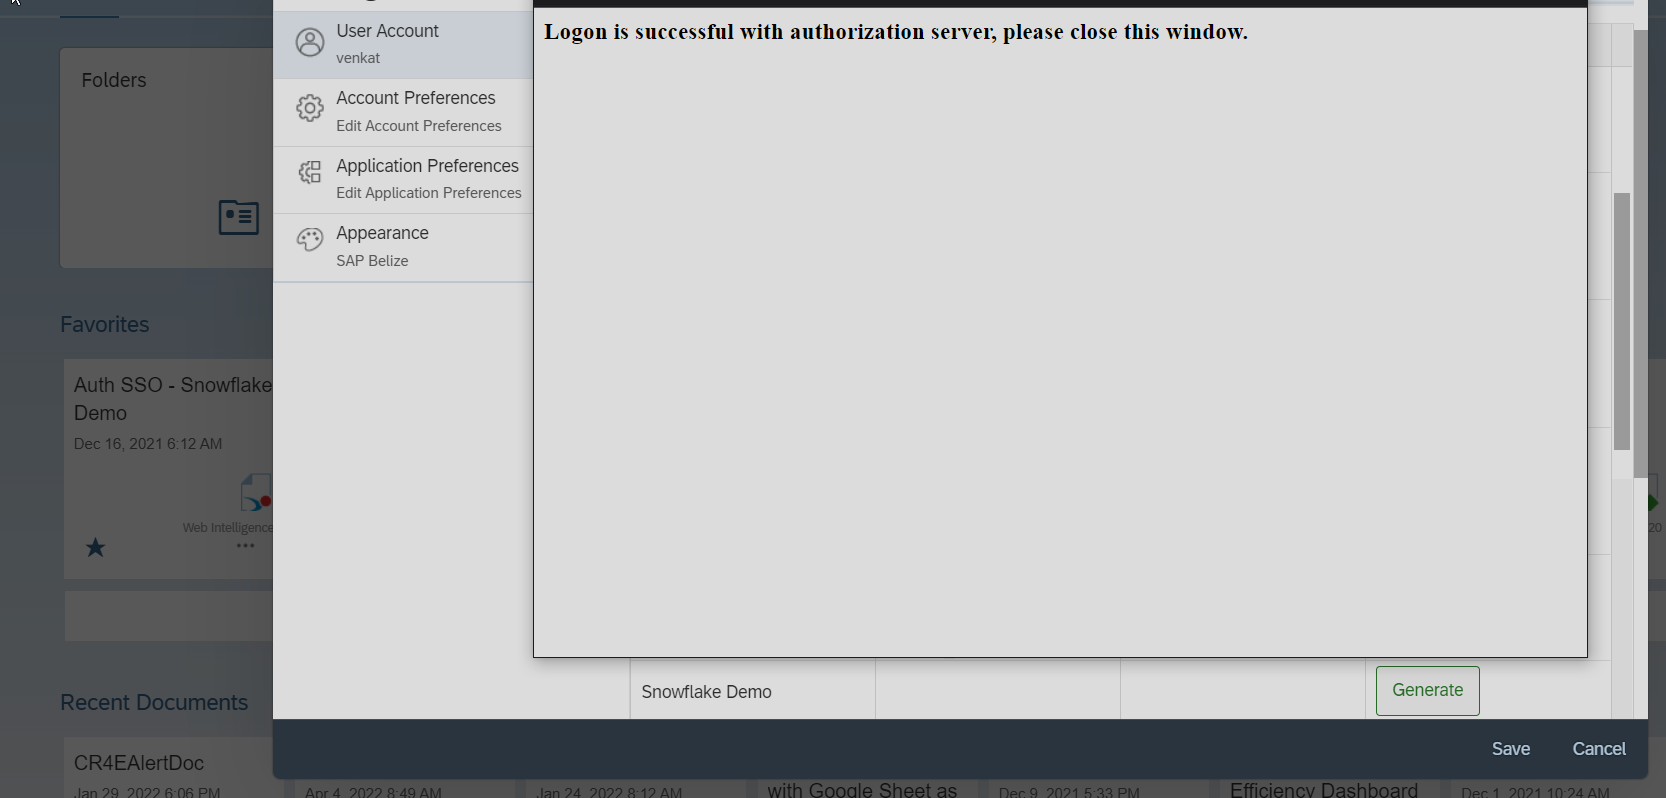
- And after closing the "Login is successful with authorization server..." message window, you should see the Expires On column and Authorization Token column against the Reference Name for which we started the process of Generating Token as follows:

- Enter the Snowflake account having the access to the required Databases to get the Authorization
- Once the user successfully gets the Authorization Token against the configuration saved in step 9, Launch Information Design Tool
- Login to your BI Landscape with the same user as in step 1 above by clicking on the Insert Session
- Right click on Connections folder and click on Insert Relational Connection option from menu
- Enter connection name as required in the Resource Name field and click on Next button
- From the Driver selection screen select Snowflake (Vendor) > Snowflake (Database) > JDBC Drivers from the Hierarchy List mode and click on Next button
- In the Parameters Screen select "Use single sign-on when refreshing reports at view time" option for "Authentication Mode" parameter, then you should see the "Authorization Reference" parameter field gets enabled
- From the "Authorization Reference" parameter list box, select the Auth. Reference you have saved earlier as mentioned in the step 9.

- Note: This "Authorization Reference" parameter will appear in the Parameters screen in Information Design Tool, only for the Relational Connection with Snowflake JDBC Driver.
- After that enter your Snowflake tenant details and required Warehouse and Database details on which you have access to query and refresh and click on Next button and Finish the connection creation.
- Click on Test Connection button for the connection saved above, you should see a Test Successful message popup.

- Note: here the Test validation for the connection is done via the Authorization Token available for the BI Platform User logged in, as there are no username and password saved in the connection.
- Now the connection is ready for Universe developers consumption. Build a universe using the connection created above and publish it to the BI Platform.
- To use End To End SSO (OAuth SSO) functionality, while querying data or to test the connection, perform the steps from 7 to 11 from "Steps to configure Authorization Configuration" section, by logging on to BI Launchpad with the respective BI Platform user account as a BI Developer who has the access to view the configuration saved in step 9, as follows:
- To achieve the End To End SSO (OAuth SSO), while querying data or report refresh at view time, perform the steps as performed above in 10.i, by logging on to BI Launchpad with the respective BI Platform user account as a BI Developer to create a Web Intelligence Document with the universe created above, hence this user should have the view, refresh permissions on the Universe and for the underlying connection along with the view access to the Authorization configuration used in the connection.
- Check you can create the Web Intelligence document using the universe, querying data and refreshing the report after that does not require any authorization or authentication challenges to be answered, as it should use the Token generated in the step above. As long as the Token is not expired you can perform the following scenarios without any interference of Authorization or Authentication challenges:
- Querying data while creating the Web Intelligence document
- Refreshing data in Web Intelligence document report
- Recurrence schedule of any schedule job based on Web Intelligence document.
- Regards, Venkat.
Labels:
16 Comments
You must be a registered user to add a comment. If you've already registered, sign in. Otherwise, register and sign in.
Labels in this area
-
ABAP CDS Views - CDC (Change Data Capture)
2 -
AI
1 -
Analyze Workload Data
1 -
BTP
1 -
Business and IT Integration
2 -
Business application stu
1 -
Business Technology Platform
1 -
Business Trends
1,658 -
Business Trends
93 -
CAP
1 -
cf
1 -
Cloud Foundry
1 -
Confluent
1 -
Customer COE Basics and Fundamentals
1 -
Customer COE Latest and Greatest
3 -
Customer Data Browser app
1 -
Data Analysis Tool
1 -
data migration
1 -
data transfer
1 -
Datasphere
2 -
Event Information
1,400 -
Event Information
66 -
Expert
1 -
Expert Insights
177 -
Expert Insights
299 -
General
1 -
Google cloud
1 -
Google Next'24
1 -
Kafka
1 -
Life at SAP
780 -
Life at SAP
13 -
Migrate your Data App
1 -
MTA
1 -
Network Performance Analysis
1 -
NodeJS
1 -
PDF
1 -
POC
1 -
Product Updates
4,577 -
Product Updates
344 -
Replication Flow
1 -
RisewithSAP
1 -
SAP BTP
1 -
SAP BTP Cloud Foundry
1 -
SAP Cloud ALM
1 -
SAP Cloud Application Programming Model
1 -
SAP Datasphere
2 -
SAP S4HANA Cloud
1 -
SAP S4HANA Migration Cockpit
1 -
Technology Updates
6,873 -
Technology Updates
423 -
Workload Fluctuations
1
Related Content
- Creating a JDBC Connection for Google BigQuery using SSO with Oauth 2.0 in Technology Q&A
- Upload Excel using SAP RAP Only in Technology Blogs by Members
- Deep dive into Q4 2023, What’s New in SAP Cloud ALM for Implementation Blog Series in Technology Blogs by SAP
- What’s New in SAP Analytics Cloud Release 2024.07 in Technology Blogs by SAP
- Deliver Real-World Results with SAP Business AI: Q4 2023 & Q1 2024 Release Highlights in Technology Blogs by SAP
Top kudoed authors
| User | Count |
|---|---|
| 40 | |
| 25 | |
| 17 | |
| 14 | |
| 8 | |
| 7 | |
| 7 | |
| 7 | |
| 6 | |
| 6 |