
- SAP Community
- Products and Technology
- Technology
- Technology Blogs by Members
- Notes on installing SAPGUI for Java for macOS
Technology Blogs by Members
Explore a vibrant mix of technical expertise, industry insights, and tech buzz in member blogs covering SAP products, technology, and events. Get in the mix!
Turn on suggestions
Auto-suggest helps you quickly narrow down your search results by suggesting possible matches as you type.
Showing results for
dylan-drummond
Contributor
Options
- Subscribe to RSS Feed
- Mark as New
- Mark as Read
- Bookmark
- Subscribe
- Printer Friendly Page
- Report Inappropriate Content
03-04-2022
8:57 PM
Intro
These notes might help people with the eponymous task; they are not as wide-ranging and thorough as the official instructions and guides from SAP, instead these are just some remarks based on author's recent experience, which might be helpful 👌 (or might not 😱 ).
This blog assumes you have local admin rights to your MacBook (though you might succeed as a standard user if you don't need Secure Login Client also); the ability to use Terminal for basic commands is needed for the JAR method of installing, and useful for modifying files in the main config folder (though you could use Finder instead for that).
You will want to get hold of the installation media of SAPGUI for Java version 7.70 or later (the freeware version 7.50 from e.g. SAP NetWeaver Developer Edition, has a different installation procedure (requires separate OpenJFX 11 library), and anyway the version 7.50 is well out of date at time of writing, March 2022). We will show how S-users and P-users can get hold of the relevant media (also we show how anyone can get an SAP Community P-user).
If you need SAP Secure Login Client, we show how an S-user can get hold of the installation media for that (this particular software might not be available to P-users, but then again SSO tends to be found more in organisations than in the SAP POC world of SAP Community developers).
[Note: later I realised that there are better ways to handle the SAPUILandscape file, at least more elegant ways. But as this blog was always just some rambling notes I ended up publishing, so I have no appetite to rewrite the material... actually I find it odd that this blog has so many views, as really these are just rough working notes].
Installing the SAPGUI for Java for MacBook software
First of all, we should note that nowadays it's not actually required to have an existing JVM nor to install any JVM, in the case where you will install SAPGUI for Java via the DMG package... as SAP put it:
https://help.sap.com/viewer/e665f2b67dbd4328ab6bd9e029b84581/770.00/en-US/c04839c662284b69b0acd616be...
"The platform-dependent installation programs use the inbuilt SapMachine during the installation, thus no installed Java Virtual Machine is required. Depending on your platform, the following files are applicable:
- Linux platform: PlatinGUI-Linux-Installation-<version>
- macOS platform: PlatinGUI-MacOSX-Installation-<version>.dmg
- Windows platform: PlatinGUI-Windows-Installation-<version>.exe"
So, if you intend to install using the DMG, then you can ignore all the advice below about manually getting hold of SapMachine JVM and configuring JAVA_HOME and so on.
Note that as of June 2022, the DMG available for P-users [version 7,70rev1] only installs on Intel-based MacBooks and does not work for M1 MacBooks; so, the DMG approach is only for those who either (a) have an Intel-based MacBook, or (b) have an M1 MacBook and can get hold of a working DMG [later versions such as 7,70rev6 works fine for M1 MacBook] via an S-user.
Manual setup of SapMachine JVM
To run the jar file which then installs the SAPGUI client on your MacBook, you will need a suitable Java SDK (a.k.a. JDK). (Note that you only need this JDK for installing – the SAPGUI client contains its own “internal” JVM that it runs on itself). Get the most suitable one free from SAP themselves: the JDK you need is available here - no registration required, just download the stuff you need:
https://sap.github.io/SapMachine/
Choose a latest stable version, choose JDK, choose the right kind of processor (for M1 Macs, that is “macOS aarch64”; for Intel Macs you would choose “macOS x64”), then take the latest minor version of the stable version. In March 2022 when this was written, the choices for an M1 Mac look like so:

Then download it. A dmg file is downloaded. Double-click on it, you should get a Finder window with the main folder shown. Now you can move those files into somewhere that makes sense on your computer, I made a folder under home drive called “SAPGUIforJava” and then created subdirectories “opt” and “jdk” and put the sapmachine-jdk folder there.
Next, it will be convenient to tell our computer the value of the JAVA_HOME environment variable, and to add the java binary directory to the main PATH environment variable, every time we login. (If you have already your own JVM and JDK preferences, then relax, this is only a temporary change that can be removed after installing SAPGUI client). We can do that as follows…
Open Terminal application. It should open by default to your home directory. To check the directory you are in, you can use:
pwd
To move to your home directory, you can use the “cd” command with no options, that returns you from wherever you are in the directory tree to your home directory:
cd
Check if the file called “.zshrc” exists:
ls -al
If it doesn’t yet exist, create it:
touch .zshrc
Once it is existing, we edit the file by adding two lines. So first open the file:
open .zshrc
Then add the paths that match to your locations of JDK's “Home” and “bin” folders, like so:
export JAVA_HOME=/Users/myhomedir/SAPGUIforJava/opt/jdk/sapmachine-jdk-17.0.2.jdk/Contents/Home
export PATH="/Users/myhomedir/SAPGUIforJava/opt/jdk/sapmachine-jdk-17.0.2.jdk/Contents/Home/bin:$PATH"
Save and close. Now you need to logout and login again, so that the info in this file is picked up.
Then you can open a Terminal again, and check that the following commands work fine:
java -version
javac -version

You should get similar results.
Ways to get hold of the installation media
Next, we need to get hold of the JAR archive or the DMG from SAP, for installing the SAPGUI for Java for macOS client on your MacBook.
There are three main ways to do this. The first way, if you have an SAP S-User with the appropriate permissions for downloading SAP software, is described below. The second way is if you do not have such S-user with special powers, but maybe you work in the same organisation as someone with such an S-user, and they may be able to provide you with the needed JAR archive or DMG. The third way works if you have a P-user (only for JAR archive), and is also described below (thanks to Declan McArdle for pointing out this third way in the Comments section).
Using an S-user to download the SAPGUI for Java media
So using an S-user... go to: https://launchpad.support.sap.com/ and click on the “Software Downloads” tile, which takes you here: https://launchpad.support.sap.com/#/softwarecenter

Now, this is not the most intuitive software repository ever, so the author can say it took a couple of hours to find the needed software.
To find the JAR archive… In the Search box enter the text “PlatinGUI770” and hit <Enter>. (In March 2022 7.70 was the latest version, you may want to search the SAP Help to check what is the latest version when you come to do this installation and adjust your search term accordingly). From the list, scroll down to get the highest version and revision that is suitable for Mac OS, e.g. at the time (11.02.2022) of screenshot-taking that was version 7.70 revision 4 (in March 2022 when this blog was published, revision 5 had become available, as kindly pointed out by Henning Marquard in the Comments section... always good to check for latest versions and revisions, yes):

To find the DMG... In the Search box enter the text “GUI770Inst” and hit <Enter>. (Here we assume that "770" is the latest version, again you should check from SAP Help and adjust that number to match the latest version). And scroll down to find the latest version+revision combination which is a DMG:

If you already have a working SAPGUI for Java client installed, you can get to the right set of downloadable software without needing a Search term (thanks to Mauro Martelli for providing this info in the Comments section): from the SAPGUI top menu, choose Help -> SAP Software Downloads. This takes you to the SAP Support Launchpad and returns a list of packages that might be useful. But it can happen that the linked page opens with Linux selected as the OS... so remember kids, check which OS is selected and if needed change to use "MAC OS":

... then you get a list, and you can choose either the latest DMG or the latest JAR from that list:

Update October 2022: SAP now releases processor-architecture specific versions of both DMG and JAR archives, so if you have an Mn-based MacBook (e.g. M1, M2,...), you should choose the "MACOS ARM64 64BIT" from the Drop-Down List Box, while if you have an older Intel-based MacBook, you choose "MACOS on X86_64BIT". (The X86_64 version ran for me ok on an M1 MacBook via the inbuilt Rosetta emulation of MacBook, but it's always wiser to choose the "native for processor version"):

In 2023, it seems that just clicking on the blue link with the name of the file on the left, starts the download ok. (In the past the easiest way to download stuff (no SAP Download Basket installation required) used to be to click on the I-Ching like icon and go to the "Content Info" link that appears, and from there hit the Download icon, so that is what is shown in this blog from 2022).

…

Using a P-user to download the SAPGUI for Java media
To get an SAP P-user, which is like an SAP Community ID for Private individuals (i.e. not linked to an SAP Customer or Partner number as the S-users are), go to https://account.sap.com and register there for a P-user. Once you have the P-user, go to:
https://developers.sap.com/trials-downloads.html
From the top right you can login to this SAP site using your P-user, so do that as only logged in users can download the software available on this site, In March 2022 you need to scroll near to the end of this page, you are looking for the package called SAPGUI for Java:

Accept the license terms and download the RAR archive. The native MacBook unzip tool doesn't know how to extract RAR archives, but no worries - in App Store, search for an excellent free tool called The Unarchiver:

So get that app and install it. If you want to check or modify which kinds of files The Unarchiver should extract, open the app and in Preferences you can review the options, make sure that "RAR Archive"-checkbox is ticked:

Now you can unpack the SAP_GUI_for_Java.RAR by e.g. right-click -> Open With -> The Unarchiver.app. As of March 2022, the version 7.70 revision 1 was what was available for the P-users, and that's fine for us:

Note that smoke-tests of this DMG in March 2022 (on M1 MacBook and on an Intel MacBook) to install SAPGUI didn't work (macOS complained that the Installer.app is damaged); however a new smoketest on the Intel MacBook in October 2022 using the same DMG was successful... so, for people using this P-user-path to get hold of installation media, using the JAR may (or may not) be the only feasible option.
Installing SAPGUI using the DMG
Double-click on the DMG file, which opens to display a SAPGUI for Java Installer icon; double-click on the icon to proceed (you may get a prompt warning that this installer-app was downloaded from the Internet - choose "Open" to continue):

The GUI-Installer starts up… skip forward a few lines to the section "Click through GUI Installer steps to install" below.
Installing SAPGUI using the JAR
So you have the relevant JAR on your local machine. You can put the downloaded JAR for safekeeping in some folder, or you can leave it in the Downloads folder. Anyway, open a Terminal, and using the “cd” command move to the directory the jar is in, e.g. since I put the jar in “SAPGUIforJava” then the command could be:
cd /Users/myhomedir/SAPGUIforJava
Then execute the jar… if your jar is called PlatinGUI770_4-70004682.JAR then:
java -jar PlatinGUI770_4-70004682.JAR
The GUI-Installer starts up…
Click through GUI Installer steps to install
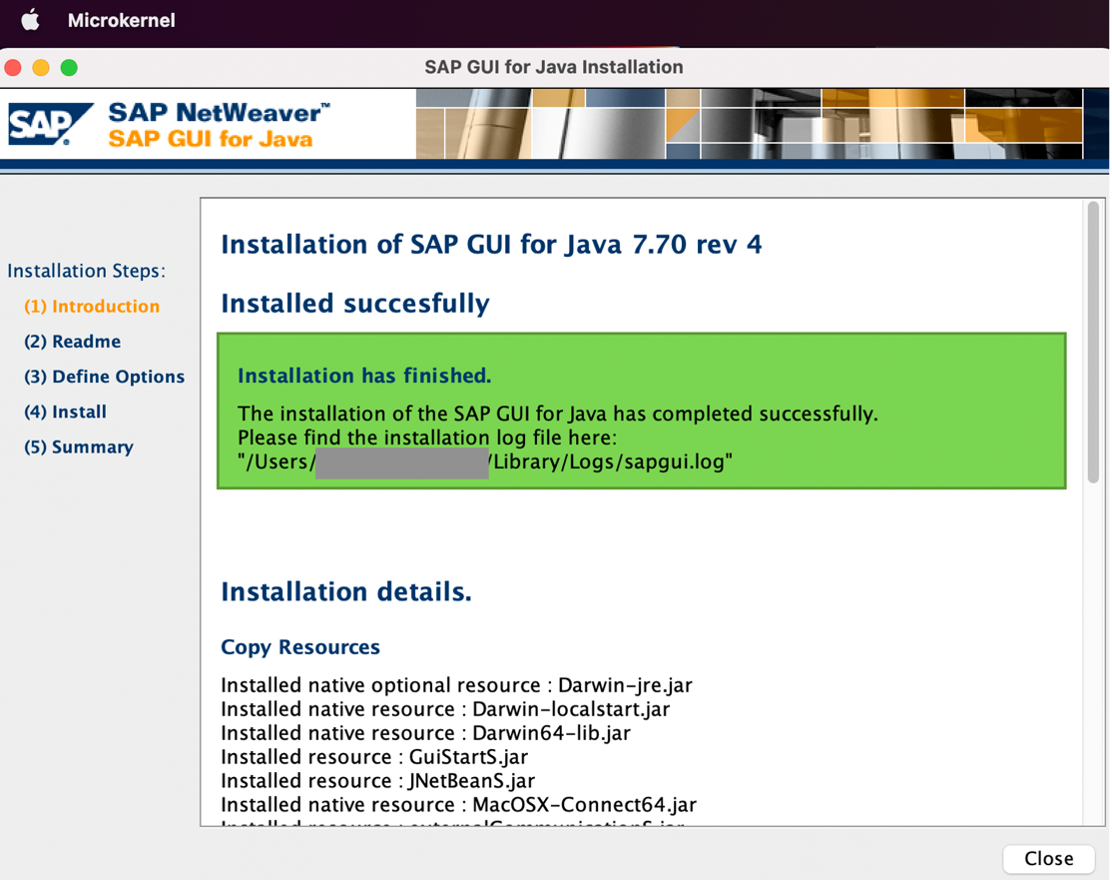
So this is just like any easy GUI-based installation: click through the steps then press "Install"...

... and hope it installs ok. Here is what success looks like:
You can now open it like any app in Applications (from Launchpad -> SAP Clients, or Spotlight, or Applications directory)… although it will look a bit empty…

…so, from MacBook upper menu (or from Dock-icon menu via Secondary Click) you can Quit SAPGUI (since we have other stuff to do still, and then you would need to restart SAPGUI later in any case). By the way, menu-based Quit is the correct way to close SAPGUI; it doesn’t close properly if you just close the window, and then you are left wondering how to get the window back – spoiler: you cannot, until you really Quit… so remember kids, just use the menu-based Quit and make your own life easier 😄 .
[For those who used the JAR method to install: if you like, you can open .zshrc file again and either comment out (using the ‘#’-character as the first character of a line) or delete the lines setting JAVA_HOME and PATH environment variables. Your SAPGUI client doesn’t need these variables set, as it has its own JVM instead. (In the past, the SAPGUI for Java clients relied on the local machine’s default JVM, which caused problems, especially for developers, or for everyone in case the corporate policy determined a non-compatible to SAPGUI for Java JVM… so this “internally packaged JVM” solution that arrived maybe in the late 2010s, is rather neat and useful)].
Configuring the SAPGUI client
Now there are two main ways to proceed here, which have their own advantages and disadvantages, so you can choose how you like from The Server Option or from The Local Option.
The Server Option
The Server Option means using Finder (or Terminal) to connect to the server on which the organisation’s SAPUI xml files are stored, and then specifying in the SAPGUI for Java app which server file you want to use, where the file is typically either accessible via NFS (from a Unix or Linux server), or if the file is on a Windows server then access is via the mounted directory in /Volumes of your local machine. (Below we will consider the case of a Windows server, as this is a rather common setup in organisations, including most of those the author has worked for in the last twenty years. If your organisation uses NFS, then you should be able to scour the internet for good advice about connecting using the “nfs://…” prefix, and then you can test how that plays out when specifying a file in Preferences of SAPGUI).
The advantage of The Server Option is that you are doing what the majority of SAP users do – using the remote “One Source of Current Truth” file maintained on the organisation’s network-servers; this way, you should always have an up to date set of SAP connection items in your SAPGUI client.
A main disadvantage for MacBook users is that you will often or always need to manually connect to the relevant company server and folder each time you have logged in to the company network. It’s possible to mitigate this by adding the server in question to your login items (shown also below), however this isn’t a perfect workaround, particularly if you sometimes work away from the office and thus need to connect to VPN before (manually) reconnecting to the company server with its SAPUI files.
The other disadvantage (affects the author, but probably not too many other people) is that if you are yourself doing various proof-of-concept activities around SAPGUI for Java, then it gets a bit complex when the local config is used on top of the server config option (more on that later).
Although MacBooks come with default support for the Samba protocol (“smb://…”), however according to my smoketesting and according to the below discussion on sap.com, the SAPGUI for Java for MacBook app does not support Samba:
https://answers.sap.com/questions/12966811/does-sap-gui-for-mac-750-rev-8-support-network-loc.html
As the SAP employee replies to the questioner:
“according to chapter "3.4.1 Providing Connection" of the manual:
Depending on the location of the configuration file, you can enter either a full pathname (for a local file) or an URL (for a file located on an intranet web server).
Latter means http or https URL.
smb:// is not supported. What might work is to have the share already mounted and use something like file:/Volumes/whereitismounted/configfile.txt
But this assumes it is already mounted and is expected to be not really reliable.”
If in your organisation there would be an identified need for the MacBook SAPGUI users to get their Landscape file from a server without having to assign the network location to /Volumes manually, then it would likely be a server running a lightweight HTTP server, so that we could use the HTTP protocol. Technically this is not so difficult to achieve, though there are many ways and many OS choices to make here. As a toy example for demo purposes only: on local machine, using python, we can tell a folder called "folder-for-http" containing a test xml file to act as our HTTP server, and let's choose port 7777 (why? because we can 😄 😞
cd ~/SAP/folder-for-http
python3 -m http.server 7777
Then in Preferences of SAPGUI we can specify the URL http://localhost:7777/SAPGUILandscapeTestHttp.xml and SAPGUI successfully discovers then uploads the relevant xml file:


So that was the HTTP approach. Let's turn now to using the Volumes approach for Samba protocol. So imagine that the location of the xml files is here:
[Windows:]
\\orga.nisat.ion\some-drive\001\SAPstuff\SAPUILandscape\
The equivalent URL in Samba format [Unix/Linux:]
smb://orga.nisat.ion/some-drive/001/SAPstuff/SAPUILandscape/
In MacBook, from Finder use the top-bar menu Go -> Connect to Server… connection string is in the Samba format; now you will be connecting to some Windows share or folder using Samba protocol, and what happens here is that macOS mounts the share or folder in question to /Volumes on your local MacBook.
For command-line aficionados, there are also ways to accomplish this connection and mounting to /Volumes from Terminal, the simplest is probably this way:
open smb://orga.nisat.ion/some-drive/001/SAPstuff/SAPUILandscape/
So with the relevant SAPUILandscape folder on the server mounted to /Volumes, now we can from SAPGUI app go to top-bar menu SAPGUI -> Preferences and in the Configuration -> Logon screen we put the Volumes-based filepath as value of the field “SAP UI Landscape” and press Apply, and then our client gets its Landscape file from the Windows server like almost everyone else does. So if the server “drive” is defined as (the last directory in path):
smb://orga.nisat.ion/some-drive/001/SAPstuff/SAPUILandscape/
…then the filepath in Volumes to a relevant xml file will be something like this:
/Volumes/SAPUILandscape/SAPUILandscapeGlobal.xml
(If you used NFS to connect to your server, then it could be that you can specify the “nfs://…” formatted filepath, or maybe just the plain filepath without prefix, in SAPGUI Preferences – I cannot test this at the time of writing, but if anyone does that test then feel free to leave a comment with the results and then we can modify this paragraph).
Detour about side-effects of explicitly specifying the xml file to use
[Begin-of-Detour:
It seems that after specifying own file (whether on the server, or even just your own local file) in Preferences, then trying to switch back to use another file, nothing found, or old default location file still there and that is what gets modified instead of our specified file… also it can be difficult to go back to “empty” state as no way to remove the “uploaded file” data … all seems a bit strange.
So the logic of this, how to explain (even to myself 😂 )… for example if I create (as a copy of default file) the SAPGUILandscapecopy.xml and explicitly reference it in SAPGUI Preferences, and (say) delete the SAPGUILandscape.xml file, then what happens is that the SAPGUILandscapecopy.xml file that is specified in Preferences becomes an “Included [read-only] file” for the new (if just deleted) or updated (if still existing) default SAPGUILandscape.xml file:

Note the part that says
Include url="file:/Users/myhomedir/Library/Preferences/SAP/SAPGUILandscapecopy.xml"
[BTW we don’t usually want to start specifying our own custom names of local files, the above was just for demonstration purposes; usually it just gets messy, having e.g. one read-only local file included as a reference from the default other local file].
So what the Include-logic means is that for items of the Included file, you cannot edit or delete any such items. On the other hand, you can still create new items or create a duplicate of existing items, and any such new or duplicated items are then editable and deletable.
So typically you would have the remote server file being specified in Preferences, and then any new or copied-then-modified items that you create, are being saved locally in SAPGUILandscape.xml (though most users will not need or want to make new entries).
But if you ever make the mistake of putting the local SAPGUILandscape.xml file itself as the file in Preferences, then that whole file becomes read-only and you cannot do anything with it, and it seems not to even save any new additions - I suspect it becomes somehow syntactically broken from the point of view of our client SAPGUI app as it is including itself as read-only.
Still, you can still get out of traps like this: here is the workaround for any situation where it is difficult to "fully reset"... you'll need either a remote server filepath via /Volumes, or a non-corrupted local backup file (unless you want to go back to having an "initial" local file like just after installation). Proceed as follows: empty the Preferences field for SAP UI Landscape and Apply; then close SAPGUI for Java. Then delete the useless or non-fully-writable or otherwise unwanted SAPGUILandscape.xml file. Now reopen SAPGUI, you will see that a new empty default file is “under creation” (saved to file when you close SAPGUI again):

Now you can either specify the remote file again (the Server Option); or, you can close SAPGUI, rename some appropriate backup file (that has no Include references) to be the SAPGUILandscape.xml file (if you are going for The Local Option), and open SAPGUI again – in that case the restored local file is once again fully writable.
Anyway, the main idea is that since in Preferences you would be more likely to specify a file on the corporate server, then this file should of course be read-only (since changes made to the file on the server would affect all SAP users, i.e. thousands of people)… probably that is why the rule is, that any specified file in Preferences field “SAP UI Landscape” becomes an included, read-only file which is then “called” or “read in” by a created or updated (local) SAPGUILandscape.xml file, the default local file which is always existing (recreated by the app if necessary).
So in summary: the local file wraps the specified “remote” file, and changes can only be made by creating new items (including duplications of read-only items), where all the new items are saved to the local file.
End-of-Detour].
To reconnect the server to /Volumes when logging in, you can do that as follows – open System Preferences -> Users & Groups -> Login Items. From Finder where you can see e.g. the SAPUILandscape Drive-icon, so click and drag that icon into Login Items. You end up with something like this:

Remember though that this automatic reconnection is only going to work if you already have a connection to the organisation’s network from more or less as soon you logged in to your MacBook, in practice that usually means being on the Office LAN i.e. on-site; typically when off-site, connecting e.g. via VPN to company network involves manual steps requiring 2FA, so in these cases the connection will not happen immediately after logging in to MacBook, and hence the reconnection to server fails:

… in these cases, you can still connect manually to the server using the ways described above, after you have established a VPN connection.
To find the SAPUILandscape folder as a Volume, you can do that by going to the root drive (e.g. Monterey HD, usually the name reflects the version of macOS), then make hidden folders visible (Command-Shift-<the dot character>), and from there you find /Volumes and your mounted drive (folder).
You can skip forward now to the section “Visibility of items tip”, or you can read the following section about other main option for getting the xml file with the SAP system details.
The Local Option
The main advantage of The Local Option is that you don’t need to think about making sure, every time you login, that the folder you need access to is mounted to /Volumes.
Another advantage for a few people - mainly SAP Developers and SAP Basis techies - is that keeping everything in the local file and using backups properly, is the neatest way for doing any POC work with the xml file.
The main disadvantage of the local option, is that eventually your local file contents will diverge from the server-maintained file, so if e.g. the logon details change for some SAP system on the server file, and you have only stale local information, you could be wondering “why can I not connect when everyone else can?”… so that’s something to bear in mind, that occasionally you might want to retrieve from the server the latest version of the relevant SAPUI xml file, and make that the new local file using move or copy commands (shown below).
[We note here that in SAPGUI for Java documentation, and for the actual default local file used by the SAPGUI for Java app, the main xml filename begins “SAPGUI…”; whereas in SAPGUI for Windows documentation, the main xml filename begins “SAPUI…” (<- no “G”). The thing to remember, is that we are using SAPGUI for Java, and therefore we must keep our local SAPGUI client software happy, by sticking with the “SAPGUI…” naming convention here; in fact the locally generated default file of the SAPGUI for Java app, is always called “SAPGUILandscape.xml”].
So let’s assume that you copy-pasted from the remote server, the SAPUILandscapeGlobal.xml file or whatever file it is you need. Once you have that “SAPUI…” xml file, in Terminal go to location ~/Library/Preferences/SAP:
cd ~/Library/Preferences/SAP
First backup the existing file in this directory, which is called “SAPGUILandscape.xml”, by renaming it to something like “SAPGUILandscape.xml_bac”:
mv SAPGUILandscape.xml SAPGUILandscape.xml_bac
If your SAPUILandscapeGlobal.xml file is, say, in Downloads, then copy it across to our SAP Preferences directory we are in, like so:
cp ~/Downloads/SAPUILandscapeGlobal.xml .
(Note the space followed by a dot character “ .” after the name of the file to be copied, this space plus dot tells the computer to copy the file to the current working directory the user is in).
Then, rename the copied file to be the new “SAPGUILandscape.xml” file, e.g.:
mv SAPUILandscapeGlobal.xml SAPGUILandscape.xml
See the “Detour” section above for advice about using the Preferences Logon tab… I strongly recommend that if you are using the Local Option, you don’t explicitly specify any file in that Logon tab, instead you should just leave it empty. If you want to work with multiple local files, the best way to manage this, is to have custom names for those files; then backup the current SAPGUILandscape.xml file, and copy the custom file you want to work with to become the current default file… for example:
mv SAPGUILandscape.xml SAPGUILandscape.xml_bac_20220304_v01
cp SAPGUILandscapeMyPrecious002.xml SAPGUILandscape.xml
In other words, you switch among your files in such a way, that the SAPGUI client app is always using the default file SAPGUILandscape.xml – this way you avoid the “Include [read-only]” complexities mentioned in the “Detour” section.
Visibility of items tip
Now, if you have specified either via The Server Option or The Local Option a list of SAP systems in the xml file, and you open SAPGUI, it can happen that only some empty workspace appears; if this happens, then go to View -> Show All Workspaces, and then the full list of SAP systems should be visible under the relevant workspace(s).

If you are not using SSO to login to SAP systems, then now you can double-click on the SAP system you want to logon to… in that case you can skip forward to the section “And Logon…”
Local-local workspaces
If you would like to create your own local workspaces and folders separately to the "local copy of server file", so that e.g. when replacing with a newer local copy of the server file, you can still keep your "truly local" workspaces, folders, and connection items, then this is possible. My advice based on bitter experience is that it is better to begin by directly modifying the XML file, instead of using the SAPGUI client... use any good XML Editor e.g. Visual Studio Code with some XML Tools add-on installed, and then format the Landscape file. Then you can manually create a Workspace line directly under the tag <Workspaces default="somelonguuidd01b4cf34">, such as:
<Workspace expanded="1" name="AardvarkSpace" uuid="12345678" description="Local items" hidden="0">

</Workspace>
Save the file, and open SAPGUI for Java client. Now what should happen is that you see your new workspace as a top-level node in Hierarchy view... if not, it might be that SAPGUI didn't like the uuid you provided e.g. it contained non-hexadecimal characters [outside {[0-9],[a-f]}] and so the SAPGUI client might generate a "real uuid" and decide that your new Workspace is just a (folder) Node under some existing workspace. Not to worry - quit SAPGUI, format/prettify the XML file, copy the generated uuid from <Node ... name="AardvarkSpace" .../>, then remove that node and rebuild your new Workspace under Workspaces tag as before, e.g:
<Workspace expanded="1" name="AardvarkSpace" uuid="10c1db2c-9ba4-483d-a708-e6b2f902fd4d" description="Local items" hidden="0">

</Workspace>
Save again... this time when you reopen SAPGUI for Java, your Workspace should be a top-level node, and you can then right-click on it to create a subfolder, and then e.g. from the subfolder you can right-click and make a New connection, and so on:

Once you quit SAPGUI, your changes will be persisted to the Landscape file SAPGUILandscape.xml as usual (and the nice formatting will be replaced by minimalist format). But in your code editor you can always reformat and check to see that all your local workspace changes have been persisted:

Later, when you decide to replace the copy of the server-file with a newer local copy, then from the older backed up file you can copy-paste this code into the new local copy i.e. restore your local workspace into the new SAPUILandscape file under Workspaces tag.
Note that in case you have Item lines in your local workspace i.e. connection items, as in our example we have one, then you also need to copy-paste their relevant Service lines across; to do this you search the xml on the serviceid value from the Item, and then copy the relevant Service line into the Services block, in our case we need this line:
<Service name="NPL NetWeaver 752 SP04" expert="1" uuid="cc6b04cf-9be0-428a-a7fe-a2aa552a999e" type="SAPGUI" server="192.168.65.3:3200" mode="1"/>
[There is a remote but non-zero chance, of uuid clash between your new main file and the uuids of your local-local xml lines, if you are paranoid you could search for clashing uuids before pasting in your local-local lines]. So all in all, a wee bit tricky yeh, but still in the realm of the possible 😅 ... good luck if you choose that path.
SAP Secure Login Client
If your organisation is using SAP SNC (Secure Network Connection) to enable SSO (Single Sign-On) then it means you need to do some SPNego/Kerberos type of negotiation between SAP Secure Login Client (3.0 as of Feb 2022) and the corporation’s authentication-servers. In such SSO-scenarios, trying to login to SAP without having the SAP Secure Login Client installed will fail (with an error message referring to SNC).
So what we need to get hold of in such cases, is this thing the cool kids are calling “SAP Secure Login Client”. I'm not aware of this being available for P-users, so what follows assumes you have an S-user or you know someone in your ogranisation who has an S-user and wants to help you.
So as an S-user, from the SAP site: https://launchpad.support.sap.com/#/softwarecenter
we can use search term “SAP Single” and from the Categories offered choose latest main version of SAP Single Sign On (3.0 as of March 2022), with the “Maintenance Product” type, like so:

From there choose “Comprised Software Component Versions”, and from there “Secure Login Client 3.0”. Then make sure to choose “MAC OS” in the dropdown box, since “WIN 32” will not at all get you the stuff you need here 🤣 … and choose the latest version, and download it using I-Ching icon or Download Basket:

Once you unzip the downloaded file, you can see it contains an installer pkg. So, double-click on it and follow the installer steps, it should install ok.
Next, I recommend to logout, and log back in again. If you are working remotely, make sure after logging in again that you have (re-)connected to the corporate network using VPN. (Because it is only if your computer is connected to corporate network, that the Secure Login Client is going to be able to get the stuff it needs to do secure login).
Once connected to corporate network, you can (if you like, but see below) open the new app “Secure Login Client”. Just remember to keep it open for as long as you intend to use SAPGUI SNC connections to SAP systems.
But actually, you don’t even need to open the Secure Login Client manually. Instead you can just leave it alone, then when via SAPGUI you double-click on some SAP system you want to logon to, SAPGUI itself realises that it has to open Secure Logon Client, and it does that successfully, so you should see the Secure Logon Client logo (a white tick on blue background) in the MacBook top menu bar:

..and thanks to the Secure Login Client, you should now be able to logon to your SAP systems.
And Logon…
Note that the first time that you logon to an SAP system from SAPGUI for Java, you are asked to assign a Trust Level Classification to the system you are accessing… for example you could accept the default value “Internal: Generally trusted…” and continue by pressing “OK”:

This Trust Level Classification for an SAP system can be edited later (when a user session in SAPGUI is open for said SAP system), either by menu path (SAPGUI top bar menu) File -> Edit Trust Level, or by using the Edit Connection button and go to Security tab. For example, you might want or need an SAP system to be able to download or upload files on your MacBook – generally, it is ok to assume that SAP systems of your own organisation have no malicious intent towards you.
If you want to investigate and/or configure the Trust Level concept in greater detail, go to SAPGUI -> Preferences -> Trust Level Editor.
So anyway, the main result here of interest is that now we can really connect to SAP systems using SAPGUI for Java for macOS… quod erat demonstrandum:

If you are using SSO via SAP Secure Login Client, but you get redirected to the Sign-In Screen of the SAP System instead of seeing the main landing screen, it means that SSO failed; the usual reason would be because you have no SAP user ID associated with the default client of the SAP System you are trying to log into. In that case, you should contact your organisation's SAP Authorisations team for advice.
By the way, if you try to Quit SAPGUI when there is a SAPGUI user session open for one or more SAP systems, you get a popup warning that you might lose data. Also, if you go ahead and close SAPGUI without logging off SAP, those sessions are left “headless” until usually they time-out, so the wise procedure is to always first logoff SAP sessions in the normal manner (System -> Log Off) before shutting down the SAPGUI client.
Reinstalling the SAPGUI for Java for MacBook software
In case you want or need to reinstall SAPGUI for Java (e.g. you got in a mess with the Server and/or Local Options and files), then here are the steps:
(a) Delete the SAP Clients folder containing the SAPGUI for Java app components from Applications folder
(b) Delete all the config (but make sure to first take backups of any local xml file you want to use later) – you can delete the config this way:
rm -rf ~/Library/Preferences/SAP/
(c) Reinstall the SAPGUI client (e.g. as shown above in this blog; if using the JAR method then make sure you have suitable java and javac versions available and environment variables set); then get any needed local xml files back into the (regenerated via install) folder: ~/Library/Preferences/SAP/
--EndOfFile
- SAP Managed Tags:
- UI SAP GUI for Java
34 Comments
You must be a registered user to add a comment. If you've already registered, sign in. Otherwise, register and sign in.
Labels in this area
-
"automatische backups"
1 -
"regelmäßige sicherung"
1 -
"TypeScript" "Development" "FeedBack"
1 -
505 Technology Updates 53
1 -
ABAP
14 -
ABAP API
1 -
ABAP CDS Views
2 -
ABAP CDS Views - BW Extraction
1 -
ABAP CDS Views - CDC (Change Data Capture)
1 -
ABAP class
2 -
ABAP Cloud
2 -
ABAP Development
5 -
ABAP in Eclipse
1 -
ABAP Platform Trial
1 -
ABAP Programming
2 -
abap technical
1 -
absl
2 -
access data from SAP Datasphere directly from Snowflake
1 -
Access data from SAP datasphere to Qliksense
1 -
Accrual
1 -
action
1 -
adapter modules
1 -
Addon
1 -
Adobe Document Services
1 -
ADS
1 -
ADS Config
1 -
ADS with ABAP
1 -
ADS with Java
1 -
ADT
2 -
Advance Shipping and Receiving
1 -
Advanced Event Mesh
3 -
AEM
1 -
AI
7 -
AI Launchpad
1 -
AI Projects
1 -
AIML
9 -
Alert in Sap analytical cloud
1 -
Amazon S3
1 -
Analytical Dataset
1 -
Analytical Model
1 -
Analytics
1 -
Analyze Workload Data
1 -
annotations
1 -
API
1 -
API and Integration
3 -
API Call
2 -
Application Architecture
1 -
Application Development
5 -
Application Development for SAP HANA Cloud
3 -
Applications and Business Processes (AP)
1 -
Artificial Intelligence
1 -
Artificial Intelligence (AI)
5 -
Artificial Intelligence (AI) 1 Business Trends 363 Business Trends 8 Digital Transformation with Cloud ERP (DT) 1 Event Information 462 Event Information 15 Expert Insights 114 Expert Insights 76 Life at SAP 418 Life at SAP 1 Product Updates 4
1 -
Artificial Intelligence (AI) blockchain Data & Analytics
1 -
Artificial Intelligence (AI) blockchain Data & Analytics Intelligent Enterprise
1 -
Artificial Intelligence (AI) blockchain Data & Analytics Intelligent Enterprise Oil Gas IoT Exploration Production
1 -
Artificial Intelligence (AI) blockchain Data & Analytics Intelligent Enterprise sustainability responsibility esg social compliance cybersecurity risk
1 -
ASE
1 -
ASR
2 -
ASUG
1 -
Attachments
1 -
Authorisations
1 -
Automating Processes
1 -
Automation
2 -
aws
2 -
Azure
1 -
Azure AI Studio
1 -
B2B Integration
1 -
Backorder Processing
1 -
Backup
1 -
Backup and Recovery
1 -
Backup schedule
1 -
BADI_MATERIAL_CHECK error message
1 -
Bank
1 -
BAS
1 -
basis
2 -
Basis Monitoring & Tcodes with Key notes
2 -
Batch Management
1 -
BDC
1 -
Best Practice
1 -
bitcoin
1 -
Blockchain
3 -
bodl
1 -
BOP in aATP
1 -
BOP Segments
1 -
BOP Strategies
1 -
BOP Variant
1 -
BPC
1 -
BPC LIVE
1 -
BTP
12 -
BTP Destination
2 -
Business AI
1 -
Business and IT Integration
1 -
Business application stu
1 -
Business Application Studio
1 -
Business Architecture
1 -
Business Communication Services
1 -
Business Continuity
1 -
Business Data Fabric
3 -
Business Partner
12 -
Business Partner Master Data
10 -
Business Technology Platform
2 -
Business Trends
4 -
CA
1 -
calculation view
1 -
CAP
3 -
Capgemini
1 -
CAPM
1 -
Catalyst for Efficiency: Revolutionizing SAP Integration Suite with Artificial Intelligence (AI) and
1 -
CCMS
2 -
CDQ
12 -
CDS
2 -
Cental Finance
1 -
Certificates
1 -
CFL
1 -
Change Management
1 -
chatbot
1 -
chatgpt
3 -
CL_SALV_TABLE
2 -
Class Runner
1 -
Classrunner
1 -
Cloud ALM Monitoring
1 -
Cloud ALM Operations
1 -
cloud connector
1 -
Cloud Extensibility
1 -
Cloud Foundry
4 -
Cloud Integration
6 -
Cloud Platform Integration
2 -
cloudalm
1 -
communication
1 -
Compensation Information Management
1 -
Compensation Management
1 -
Compliance
1 -
Compound Employee API
1 -
Configuration
1 -
Connectors
1 -
Consolidation Extension for SAP Analytics Cloud
2 -
Control Indicators.
1 -
Controller-Service-Repository pattern
1 -
Conversion
1 -
Cosine similarity
1 -
cryptocurrency
1 -
CSI
1 -
ctms
1 -
Custom chatbot
3 -
Custom Destination Service
1 -
custom fields
1 -
Customer Experience
1 -
Customer Journey
1 -
Customizing
1 -
cyber security
3 -
cybersecurity
1 -
Data
1 -
Data & Analytics
1 -
Data Aging
1 -
Data Analytics
2 -
Data and Analytics (DA)
1 -
Data Archiving
1 -
Data Back-up
1 -
Data Flow
1 -
Data Governance
5 -
Data Integration
2 -
Data Quality
12 -
Data Quality Management
12 -
Data Synchronization
1 -
data transfer
1 -
Data Unleashed
1 -
Data Value
8 -
database tables
1 -
Datasphere
3 -
datenbanksicherung
1 -
dba cockpit
1 -
dbacockpit
1 -
Debugging
2 -
Delimiting Pay Components
1 -
Delta Integrations
1 -
Destination
3 -
Destination Service
1 -
Developer extensibility
1 -
Developing with SAP Integration Suite
1 -
Devops
1 -
digital transformation
1 -
Documentation
1 -
Dot Product
1 -
DQM
1 -
dump database
1 -
dump transaction
1 -
e-Invoice
1 -
E4H Conversion
1 -
Eclipse ADT ABAP Development Tools
2 -
edoc
1 -
edocument
1 -
ELA
1 -
Embedded Consolidation
1 -
Embedding
1 -
Embeddings
1 -
Employee Central
1 -
Employee Central Payroll
1 -
Employee Central Time Off
1 -
Employee Information
1 -
Employee Rehires
1 -
Enable Now
1 -
Enable now manager
1 -
endpoint
1 -
Enhancement Request
1 -
Enterprise Architecture
1 -
ETL Business Analytics with SAP Signavio
1 -
Euclidean distance
1 -
Event Dates
1 -
Event Driven Architecture
1 -
Event Mesh
2 -
Event Reason
1 -
EventBasedIntegration
1 -
EWM
1 -
EWM Outbound configuration
1 -
EWM-TM-Integration
1 -
Existing Event Changes
1 -
Expand
1 -
Expert
2 -
Expert Insights
2 -
Exploits
1 -
Fiori
14 -
Fiori Elements
2 -
Fiori SAPUI5
12 -
Flask
1 -
Full Stack
8 -
Funds Management
1 -
General
1 -
General Splitter
1 -
Generative AI
1 -
Getting Started
1 -
GitHub
8 -
Grants Management
1 -
GraphQL
1 -
groovy
1 -
GTP
1 -
HANA
6 -
HANA Cloud
2 -
Hana Cloud Database Integration
2 -
HANA DB
2 -
HANA XS Advanced
1 -
Historical Events
1 -
home labs
1 -
HowTo
1 -
HR Data Management
1 -
html5
8 -
HTML5 Application
1 -
Identity cards validation
1 -
idm
1 -
Implementation
1 -
input parameter
1 -
instant payments
1 -
Integration
3 -
Integration Advisor
1 -
Integration Architecture
1 -
Integration Center
1 -
Integration Suite
1 -
intelligent enterprise
1 -
iot
1 -
Java
1 -
job
1 -
Job Information Changes
1 -
Job-Related Events
1 -
Job_Event_Information
1 -
joule
4 -
Journal Entries
1 -
Just Ask
1 -
Kerberos for ABAP
8 -
Kerberos for JAVA
8 -
KNN
1 -
Launch Wizard
1 -
Learning Content
2 -
Life at SAP
5 -
lightning
1 -
Linear Regression SAP HANA Cloud
1 -
Loading Indicator
1 -
local tax regulations
1 -
LP
1 -
Machine Learning
2 -
Marketing
1 -
Master Data
3 -
Master Data Management
14 -
Maxdb
2 -
MDG
1 -
MDGM
1 -
MDM
1 -
Message box.
1 -
Messages on RF Device
1 -
Microservices Architecture
1 -
Microsoft Universal Print
1 -
Middleware Solutions
1 -
Migration
5 -
ML Model Development
1 -
Modeling in SAP HANA Cloud
8 -
Monitoring
3 -
MTA
1 -
Multi-Record Scenarios
1 -
Multiple Event Triggers
1 -
Myself Transformation
1 -
Neo
1 -
New Event Creation
1 -
New Feature
1 -
Newcomer
1 -
NodeJS
2 -
ODATA
2 -
OData APIs
1 -
odatav2
1 -
ODATAV4
1 -
ODBC
1 -
ODBC Connection
1 -
Onpremise
1 -
open source
2 -
OpenAI API
1 -
Oracle
1 -
PaPM
1 -
PaPM Dynamic Data Copy through Writer function
1 -
PaPM Remote Call
1 -
PAS-C01
1 -
Pay Component Management
1 -
PGP
1 -
Pickle
1 -
PLANNING ARCHITECTURE
1 -
Popup in Sap analytical cloud
1 -
PostgrSQL
1 -
POSTMAN
1 -
Process Automation
2 -
Product Updates
4 -
PSM
1 -
Public Cloud
1 -
Python
4 -
Qlik
1 -
Qualtrics
1 -
RAP
3 -
RAP BO
2 -
Record Deletion
1 -
Recovery
1 -
recurring payments
1 -
redeply
1 -
Release
1 -
Remote Consumption Model
1 -
Replication Flows
1 -
research
1 -
Resilience
1 -
REST
1 -
REST API
2 -
Retagging Required
1 -
Risk
1 -
Rolling Kernel Switch
1 -
route
1 -
rules
1 -
S4 HANA
1 -
S4 HANA Cloud
1 -
S4 HANA On-Premise
1 -
S4HANA
3 -
S4HANA_OP_2023
2 -
SAC
10 -
SAC PLANNING
9 -
SAP
4 -
SAP ABAP
1 -
SAP Advanced Event Mesh
1 -
SAP AI Core
8 -
SAP AI Launchpad
8 -
SAP Analytic Cloud Compass
1 -
Sap Analytical Cloud
1 -
SAP Analytics Cloud
4 -
SAP Analytics Cloud for Consolidation
3 -
SAP Analytics Cloud Story
1 -
SAP analytics clouds
1 -
SAP BAS
1 -
SAP Basis
6 -
SAP BODS
1 -
SAP BODS certification.
1 -
SAP BTP
21 -
SAP BTP Build Work Zone
2 -
SAP BTP Cloud Foundry
6 -
SAP BTP Costing
1 -
SAP BTP CTMS
1 -
SAP BTP Innovation
1 -
SAP BTP Migration Tool
1 -
SAP BTP SDK IOS
1 -
SAP Build
11 -
SAP Build App
1 -
SAP Build apps
1 -
SAP Build CodeJam
1 -
SAP Build Process Automation
3 -
SAP Build work zone
10 -
SAP Business Objects Platform
1 -
SAP Business Technology
2 -
SAP Business Technology Platform (XP)
1 -
sap bw
1 -
SAP CAP
2 -
SAP CDC
1 -
SAP CDP
1 -
SAP CDS VIEW
1 -
SAP Certification
1 -
SAP Cloud ALM
4 -
SAP Cloud Application Programming Model
1 -
SAP Cloud Integration for Data Services
1 -
SAP cloud platform
8 -
SAP Companion
1 -
SAP CPI
3 -
SAP CPI (Cloud Platform Integration)
2 -
SAP CPI Discover tab
1 -
sap credential store
1 -
SAP Customer Data Cloud
1 -
SAP Customer Data Platform
1 -
SAP Data Intelligence
1 -
SAP Data Migration in Retail Industry
1 -
SAP Data Services
1 -
SAP DATABASE
1 -
SAP Dataspher to Non SAP BI tools
1 -
SAP Datasphere
9 -
SAP DRC
1 -
SAP EWM
1 -
SAP Fiori
3 -
SAP Fiori App Embedding
1 -
Sap Fiori Extension Project Using BAS
1 -
SAP GRC
1 -
SAP HANA
1 -
SAP HCM (Human Capital Management)
1 -
SAP HR Solutions
1 -
SAP IDM
1 -
SAP Integration Suite
9 -
SAP Integrations
4 -
SAP iRPA
2 -
SAP LAGGING AND SLOW
1 -
SAP Learning Class
1 -
SAP Learning Hub
1 -
SAP Odata
2 -
SAP on Azure
1 -
SAP PartnerEdge
1 -
sap partners
1 -
SAP Password Reset
1 -
SAP PO Migration
1 -
SAP Prepackaged Content
1 -
SAP Process Automation
2 -
SAP Process Integration
2 -
SAP Process Orchestration
1 -
SAP S4HANA
2 -
SAP S4HANA Cloud
1 -
SAP S4HANA Cloud for Finance
1 -
SAP S4HANA Cloud private edition
1 -
SAP Sandbox
1 -
SAP STMS
1 -
SAP successfactors
3 -
SAP SuccessFactors HXM Core
1 -
SAP Time
1 -
SAP TM
2 -
SAP Trading Partner Management
1 -
SAP UI5
1 -
SAP Upgrade
1 -
SAP Utilities
1 -
SAP-GUI
8 -
SAP_COM_0276
1 -
SAPBTP
1 -
SAPCPI
1 -
SAPEWM
1 -
sapmentors
1 -
saponaws
2 -
SAPS4HANA
1 -
SAPUI5
5 -
schedule
1 -
Script Operator
1 -
Secure Login Client Setup
8 -
security
9 -
Selenium Testing
1 -
Self Transformation
1 -
Self-Transformation
1 -
SEN
1 -
SEN Manager
1 -
service
1 -
SET_CELL_TYPE
1 -
SET_CELL_TYPE_COLUMN
1 -
SFTP scenario
2 -
Simplex
1 -
Single Sign On
8 -
Singlesource
1 -
SKLearn
1 -
Slow loading
1 -
soap
1 -
Software Development
1 -
SOLMAN
1 -
solman 7.2
2 -
Solution Manager
3 -
sp_dumpdb
1 -
sp_dumptrans
1 -
SQL
1 -
sql script
1 -
SSL
8 -
SSO
8 -
Substring function
1 -
SuccessFactors
1 -
SuccessFactors Platform
1 -
SuccessFactors Time Tracking
1 -
Sybase
1 -
system copy method
1 -
System owner
1 -
Table splitting
1 -
Tax Integration
1 -
Technical article
1 -
Technical articles
1 -
Technology Updates
14 -
Technology Updates
1 -
Technology_Updates
1 -
terraform
1 -
Threats
2 -
Time Collectors
1 -
Time Off
2 -
Time Sheet
1 -
Time Sheet SAP SuccessFactors Time Tracking
1 -
Tips and tricks
2 -
toggle button
1 -
Tools
1 -
Trainings & Certifications
1 -
Transformation Flow
1 -
Transport in SAP BODS
1 -
Transport Management
1 -
TypeScript
2 -
ui designer
1 -
unbind
1 -
Unified Customer Profile
1 -
UPB
1 -
Use of Parameters for Data Copy in PaPM
1 -
User Unlock
1 -
VA02
1 -
Validations
1 -
Vector Database
2 -
Vector Engine
1 -
Visual Studio Code
1 -
VSCode
1 -
Vulnerabilities
1 -
Web SDK
1 -
work zone
1 -
workload
1 -
xsa
1 -
XSA Refresh
1
- « Previous
- Next »
Related Content
- It has never been easier to print from SAP with Microsoft Universal Print in Technology Blogs by Members
- Installing Composable Storefront for SAP Commerce 2211.20 in Technology Blogs by SAP
- How to generate a SAPGUILandscape.xml for Java from a SAPUILandscape.xml for Windows? in Technology Q&A
- M-series Apple Chip MacBooks and Abap Platform Trial containers using Docker and Podman in Technology Blogs by Members
- SAP Build Process Automation : coming soon on MacOS ! in Technology Blogs by SAP
Top kudoed authors
| User | Count |
|---|---|
| 8 | |
| 5 | |
| 5 | |
| 4 | |
| 4 | |
| 4 | |
| 4 | |
| 4 | |
| 3 | |
| 3 |