Using SAP BW bridge for SAP Datasphere (Part 1: Cr...
Technology Blogs by SAP
Learn how to extend and personalize SAP applications. Follow the SAP technology blog for insights into SAP BTP, ABAP, SAP Analytics Cloud, SAP HANA, and more.
This blog post is part of a series where we will be looking at a few simple use cases and basics when using SAP BW bridge for SAP Datasphere. The purpose of this series is for you to have a walkthrough of how SAP BW bridge, SAP Datasphere, and SAP Analytics Cloud can work together.
In Part 1, we will be looking at creating simple objects from scratch in SAP BW bridge. These would be the same steps you would use if you were going for a greenfield implementation and building new models directly in SAP BW bridge.
When would I use this?
If I was rolling out a greenfield implementation with SAP BW bridge for SAP Datasphere
If I was using the Shell Conversion for SAP BW Bridge for SAP Datasphere but still needed to manually build objects that could not be transferred
If I had already used the Shell Conversion for SAP BW Bridge for SAP Datasphere and now have future enhancements or requirements to be built
Introduction to SAP BW bridge for SAP Datasphere
SAP BW bridge is the latest feature to be released for SAP Datasphere. The main benefit is being able to leverage existing on-premise designs in SAP BW, while also having access to the latest cloud-based functionality in SAP Datasphere. For a detailed breakdown, please head over to the Overview and Technical Deep Dive blog post.
Pre-requisites
In the following section, we will be using SAP HANA Studio or Eclipse, with the SAP BW Bridge Project.
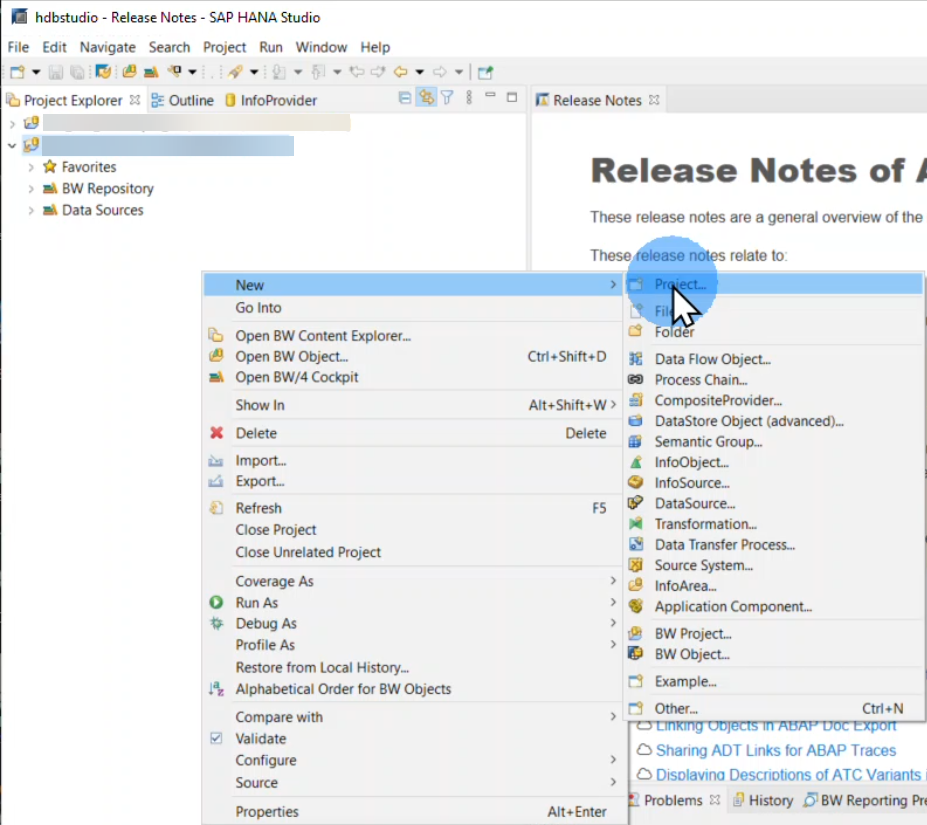
Right-clicking on a blank space in your Project Explorer
Select New and Project
Select BW Bridge Project
SAP HANA Studio: New Project
SAP HANA Studio: BW Bridge Project
Once you have added your BW Bridge Project, let's move on to creating objects.
Part 1: Creating Simple Objects in SAP BW bridge
We will run through how to create an InfoArea and an InfoObject.
Those of you who are familiar with modeling in SAP BW/4HANA using either Eclipse or SAP HANA Studio will feel quite at home since there is little to no change as we see below:
SAP HANA Studio
A) Creating an InfoArea
Step 1: Creating a New InfoArea
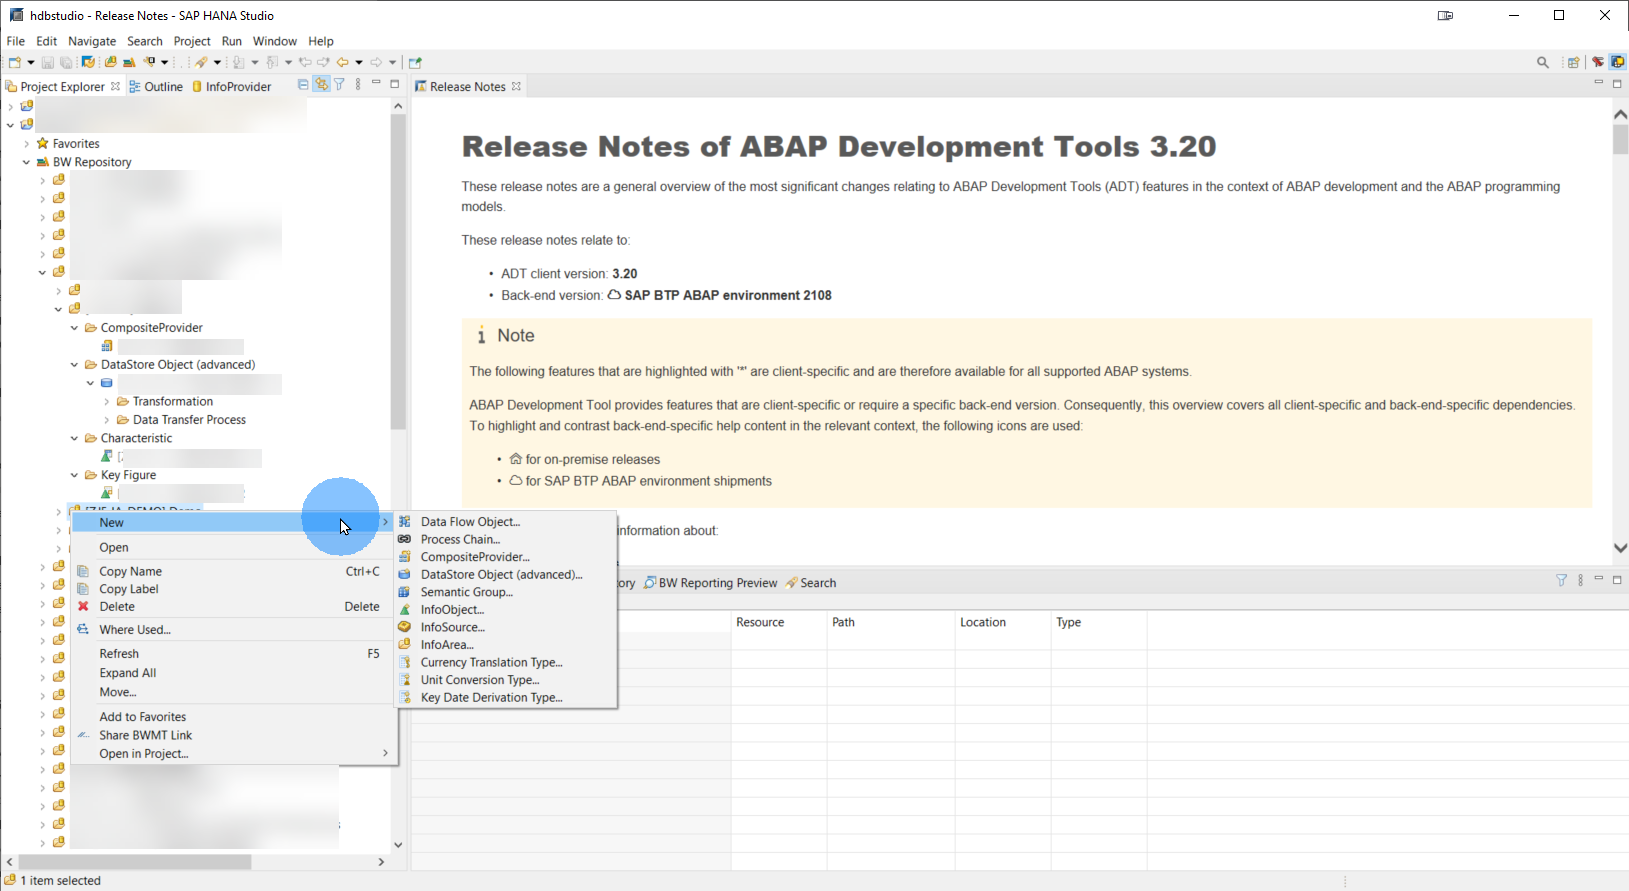
First, you Right-click on your BW Repository and select "New" and "InfoArea"
SAP HANA Studio: New InfoArea
Step 2: Naming the InfoArea
You then need to name your InfoArea. There are the usual pre-requisites like the BW Project and Package that need to be selected as well.
SAP HANA Studio: Naming InfoArea
Step 3: Assigning a Transport Request
Next, you need to either select an existing transport request or create a new transport request for your object.
SAP HANA Studio: Transport Request
Step 4: Saving and Activating
And finally, you select "Finish" for the object the be created in the background.
SAP HANA Studio: Saving & Activating
And here you see your activated InfoArea
SAP HANA Studio: Active InfoArea
InfoArea created! These are the same steps you would follow when modeling in SAP BW/4HANA as well.
B) Creating an InfoObject
Step 1: Creating a New InfoObject
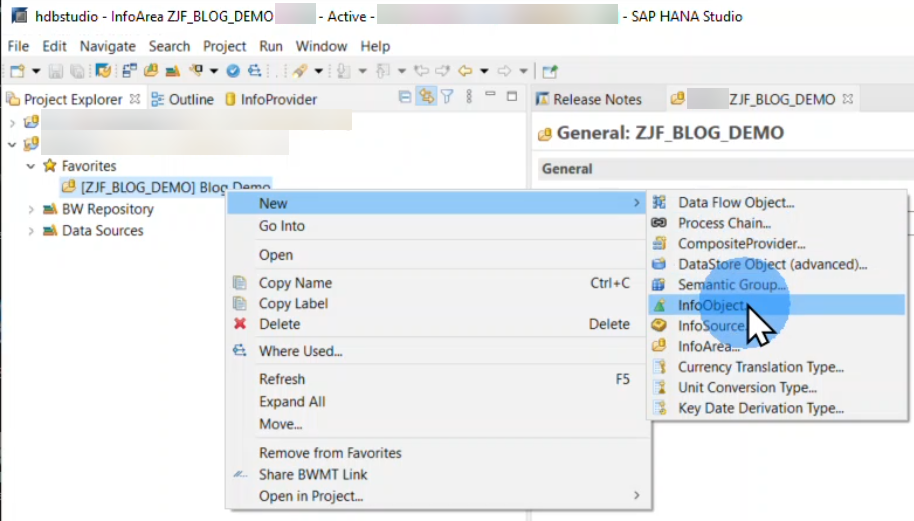
First, you Right-click on your BW Repository and select "New" and "InfoObject"
SAP HANA Studio: New InfoObject
Step 2: Naming the InfoObject
You then need to name your InfoObject. There are the usual pre-requisites like the BW Project, Package, and InfoArea that need to be selected as well before you select "Finish"
SAP HANA Studio: Naming InfoObject
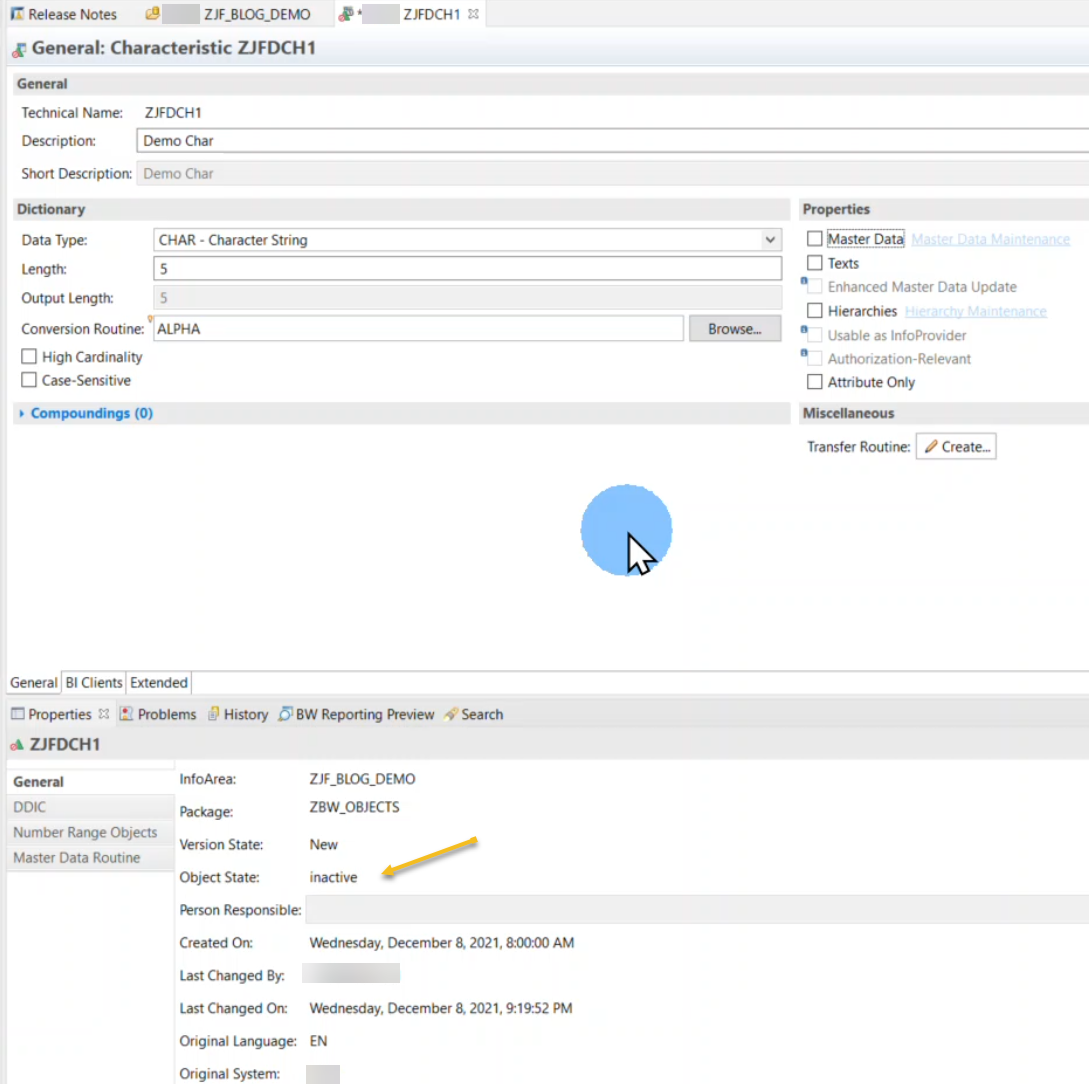
Step 3: Changing Properties
Next, you have the option of changing the properties of your InfoObject. As an example, you could still change the length, add Master Data and attributes, or even add Texts to load or maintain. This is because the object is still in an "Inactive" state as you can see below.
In this example, we will simply leave the standard selections.
SAP HANA Studio: InfoObject Properties
Step 4: Activating InfoObject
Finally, you activate your InfoObject by selecting "Activate" as seen below.
SAP HANA Studio: Activating InfoObject
Step 5: Active InfoObject
You can now see the InfoObject state has changed to "Active" as seen below
SAP HANA Studio: BW Bridge Project
InfoObject created! Again, these are the same steps you would follow when modeling in SAP BW/4HANA as well.
Do check out the demo in the next section where we walk you through the creation of a few more objects.
Demo
In the demo, we will be taking you through the steps for simple object creation in SAP BW bridge for SAP Datasphere.
Thank you for making it this far. We look forward to bringing you Part 2.
As we mentioned in the overview, this blog post is part of a series. You can find the additional parts below:
Part 1: Creating Simple Objects Using SAP BW bridge for SAP Datasphere (Demo)