Hi there! Have you ever heard of a function which is not so complicated that it offers the usage of an excel sheet? I know most of you, if not all, is already familiar with the application MS Excel and if you thought of using it in the future, then Workbook Calculation is the function for you.
Welcome to Workbook Calculation Adapter Blog Posts Series. In this first blog post, you’ll learn how to configure Workbook Calculation Adapter and will soon be confident in doing it in the future. Sounds interesting? Wait until we get to the most exciting part of it. But for now, let’s start with this Introductory blog post by knowing the overview of this function.
But before I proceed, first some background information and licensing prerequisite for PaPM 3.0. To use the Workbook Calculation Adapter in On Premise, a small SAP PaPM Cloud License has to be bought as well.
This is the reason, why we call it “Workbook Calculation” in cloud (because it is included) and “Workbook Calculation Adapter” in SAP PaPM 3.0 (because it is just an adapter to the SAP PaPM Cloud Workbook Calculation Service).
Now, what is this Workbook Calculation?
Workbook Calculation allows you to set up calculations in a way like the one used for defining formulas and sheets in an MS Excel workbook. Just like rules in other functions, after activation, these calculations are executed during the system runtime.
To configure Workbook Calculation Adapter, you can follow these steps:
- Configure the Header
- Configure the Input tab
- Configure the Look Up tab (Optional)
- Configure the Signature tab
- Configure the Rules tab
- Working with the Parameters Tab (Optional)
- Importing Files (Optional)
- Renaming Tabs (Optional)
The steps above will be explained as we go on with this blog post. Let’s start with the first one.
Configure the Header
The Calculation function detects dependencies between fields used in formulas and ensures that rules are executed in the correct order. Circular dependencies are not allowed.
Procedure
a. In the Calculation function, choose “Workbook Adapter” as Calculation Type.
b. Choose the previously created connection name as Connection Name.
c. Include Original Input Data is optional and can be left as is.
d. Result Mode Table is also optional and can be left empty.

For more information about the Header, see this link.
Configure the Input tab
Procedure
a. Maintain an Input table as Input Function.

For more information about the Input tab, see this link.
Configure the Look Up tab (Optional)
Note
Only Data functions (e.g Model Tables and Model Views) can be used as Look Up function for Workbook Calculation.
Maintain an Input table as Look Up function.
Procedure
a. Choose the Add Look Up (+) button.
b. Choose the Look Up table to maintain.
c. Choose OK.

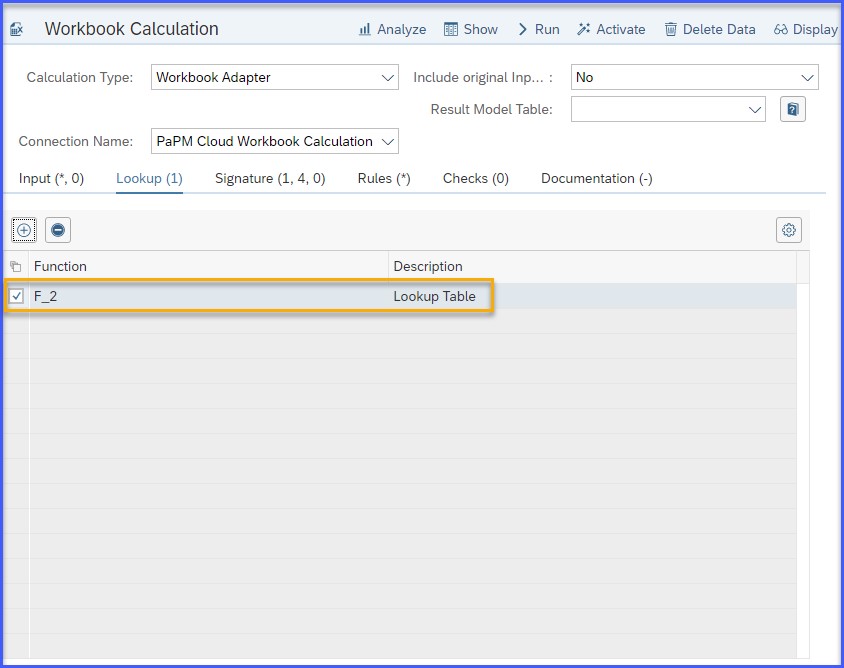
Note
After you have maintained the input function in the Look Up tab, the system displays the new sheet tab <Input Function ID> in the Calculation Rules node’s Workbook section which contains the fields from the input function.
For more information about the Look Up tab, see this link.
Configure the Signature tab
The Signature tab consists of three sections:
The fields from this list contain unique data records derived from the input function. Adding these fields ensures that the system processes data records from the input data in a grouped manner and that it considers all records from the input function for processing.
These are fields from the input function in the Selection field list. Adding the fields in the Selection section automatically includes the fields for calculation and result processing.
In the Calculation Workbook function, you can also use fields that are not part of the input function. To do so, add the required fields in the Action field section of the Signature node.
Procedure
a. Choose the Add (+) button.
b. Choose the field/s to maintain.
c. Choose OK.

Note
If you maintain fields in the Signature tab, the system will display Input and Result tabs (with table names _INPUT and _RESULT) on the calculation rules containing the maintained fields in the Signature tab. This will be more appreciated on the NEO UI side when configuring the calculation rules. You can add or create dummy data for the fields’ values to test the calculation logic during modeling. This dummy data is not used during the runtime of the system. Remember to save the changes in OP side to ensure the configurations is reflected in the NEO UI side.
Configure the Rules tab
To start configuring the calculation rules, choose Configure Workbook.
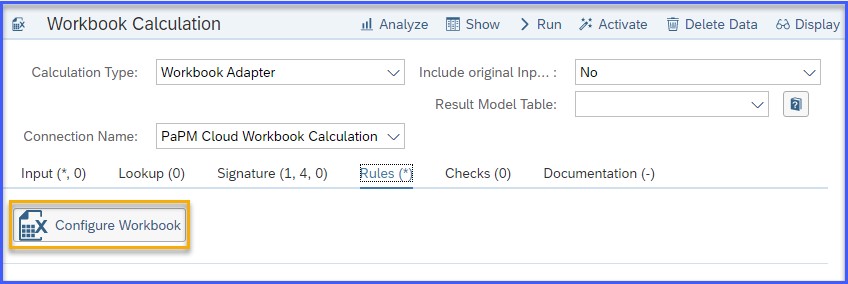
The system redirects you to a new tab showing a different user interface (NEO) where you can configure the calculation rules.

Note
The system creates a default sheet (Sheet1) for the Calculation Rules. This sheet has no data, even though the configurations have already been made.
To make the Input and Result tabs (Parameters tab, if applicable) visible, maximize the Calculation Rules sheet in the Properties panel and proceed as follows:
a. Choose Data from the menu options.
b. Choose Synchronize.
The system displays the tabs in the workbook.

c. Minimize the Calculation Rules > Workbook sheet.
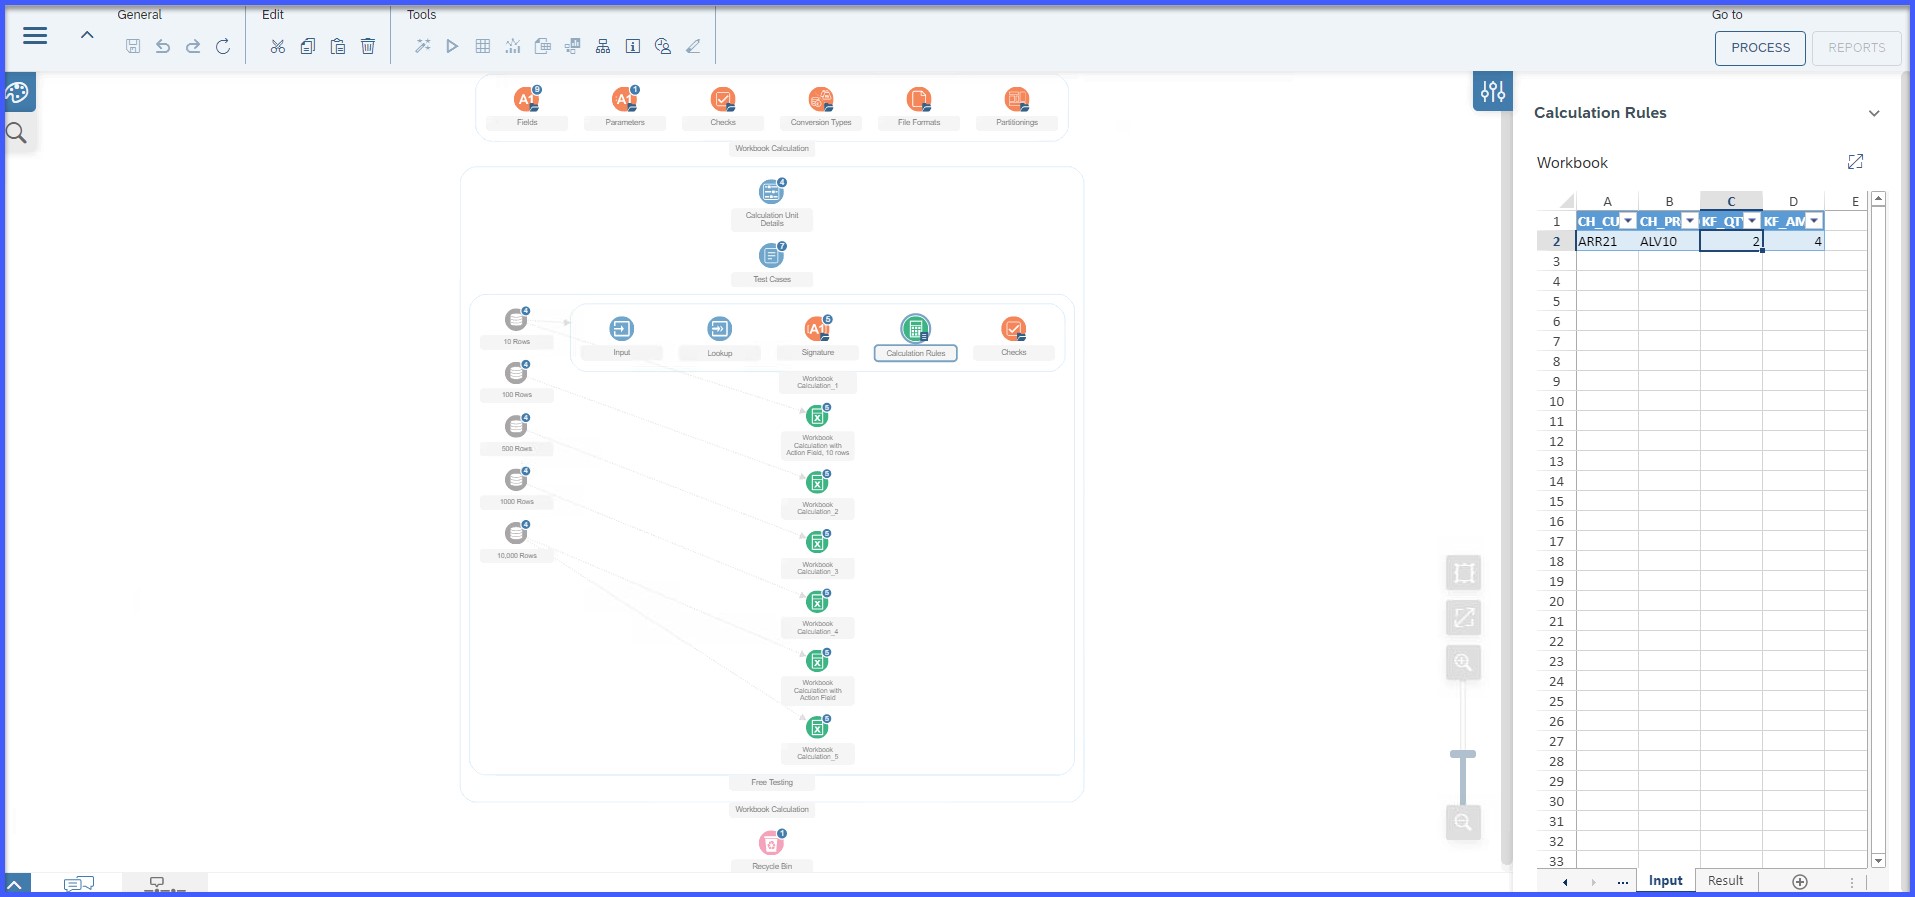
The properties panel now displays the Calculation Rules > Workbook sheet with the Input and Result tabs that show fields defined in the Signature node.
Note
If you have configured the Look Up node, the system also displays the <Input Function ID> tab.

Like other spreadsheet applications, the system can use formulas from multiple tabs for the calculation. After the calculation has been completed, the system displays the calculation result.
Note
During modeling, the tabs do not show the data records from your input and Look Up tables. Therefore, we recommend adding dummy data in the Excel tabs to test the Excel formula logic. These data are only used for modeling purposes and are not considered in the calculation during system runtime.
Working with the Parameters Tab (Optional)
If you create a parameter within the environment, the system displays a new Parameters tab with the table name _PARAMETERS. Like the Input and Result tabs, you can add or create dummy data for the parameter values to test the calculation logic during modeling. This dummy data is not used during the runtime of the system.

Procedure
a. Assign the Workbook Calculation function to a process template as an activity.
b. Enter a value for the parameter.

Note
If the process template is not used for running a workbook calculation function, the parameter value is set to initial.
Importing Files (Optional)
When you import an existing Excel or CSV file with formulas, the Workbook Calculation function tries to incorporate as much of the calculation logic as possible.
Note
Provide the data of the imported file in “TABLE” format to ensure that the function processes the data correctly.
Procedure
a. On the expanded workbook calculation rules, choose the File button located at the upper left of the workbook.
b. Choose Import.
c. Depending on the type of the file to be imported, choose either Import Excel File or Import CSV File.
d. Select the required import file.

Renaming Tabs (Optional)
Procedure
a. On the expanded workbook calculation rules, double-click the tab name you want to rename, then enter a new tab name.

For more information about Workbook Calculation in Cloud see here.
Thank you so much for reading this first blog post and watch out for the additional four more blog posts in this Workbook Calculation Blog posts Series. On the next blog posts, examples regarding Workbook Calculation Adapter will be discussed, so stay tuned!
For other SAP Profitability and Performance Management related inquiries, you can post your questions through https://answers.sap.com/questions/ask.html and use primary tag: SAP Profitability and Performance Management.
You can also read other SAP Profitability and Performance Management posts via https://community.sap.com/topics/profitability-and-performance-management.
