
- SAP Community
- Products and Technology
- Technology
- Technology Blogs by SAP
- SAP Event Mesh: Sample: Webhook with Security [1]:...
Technology Blogs by SAP
Learn how to extend and personalize SAP applications. Follow the SAP technology blog for insights into SAP BTP, ABAP, SAP Analytics Cloud, SAP HANA, and more.
Turn on suggestions
Auto-suggest helps you quickly narrow down your search results by suggesting possible matches as you type.
Showing results for
Product and Topic Expert
Options
- Subscribe to RSS Feed
- Mark as New
- Mark as Read
- Bookmark
- Subscribe
- Printer Friendly Page
- Report Inappropriate Content
11-15-2021
1:53 PM
This tutorial is about SAP Event Mesh (aka SAP Enterprise Messaging) running on SAP Business Technology Platform (SAP BTP, aka SAP Cloud Platform).
We send events to Event Mesh which delivers them via Webhook Subscription. The receiving endpoint is protected with OAuth. The scenario is deployed to Trial account of SAP BTP, Cloud Foundry environment.
0. Prerequisites
00. Preparation
0.1. Create Project
1. Event Mesh
1.1. Create Service Instance
1.2. Open Dashboard
1.3. Create Queue
2. Sender Application
2.1. Create Application
2.2. Deploy and Run
3. Receiver Application
3.1. without Security
3.2. with Security
A1 Sample Code Sender App
A2 Sample Code Receiver App without Security
A3 Sample Code Receiver App with security
In this simple tutorial we deploy 2 apps to SAP BTP, Cloud Foundry, Trial account (description for productive account).
First app is a simple sender that sends events to SAP Event Mesh. We use REST API for sending.
Second app is a simple receiver. It uses the webhook subscription mechanism.
That means: receiver app provides a REST endpoint and Event Mesh sends the events to it via HTTP POST request.
The goal of this tutorial: The endpoint should be protected with OAuth and scope.
How do we have to configure the Event Mesh, such that it calls our protected endpoint properly?
Below diagram shows the scenario including the involved artifacts:
This tutorial will guide you through all required steps, you don’t need to be expert – anyways, I’m not expert either.
Few requirements:
Basic understanding of working with SAP BTP.
Basic understanding of messaging/eventing.
Basic understanding of node.js.
For this little scenario, we need 2 little applications, developed on our little laptop, and in the little cloud, we need 2 little service instances, as described below.
To host our dev project, we create the following project structure:
We create the root folder C:\hookorcrook and
inside we create 2 app folders: receiver and sender
Like this:
C:\hookorcrook
receiver
sender
For your convenience, below screenshot shows the project on file system:
Note:
Yes, the apps are very simple and we could have done everything within 1 app.
However, I prefer it clear and comprehensible – rather than saving little time.
We need an instance of SAP Event Mesh service.
Note that below description is valid for Trial account.
Few things are different in Trial compared to productive account:
Event Mesh service plan: only "dev".
JSON Parameters are different / reduced.
Event Mesh service plan "standard" is available but reduced scope.
Event Mesh dashboard doesn’t include the “Test” tab.
Therefore, we need to create a sender application in order to easily send events to Event Mesh.
In a fresh new Trial account, you should be entitled to use Event Mesh and to follow this tutorial.
To verify:
Enter your trial subaccount and select "Service Marketplace" from the menu.
Find “Integration Suite” -> “Event Mesh” and check that Event Mesh service with service plan "dev" is available:
If you don’t see it, then you probably need to add the required entitlements.
To create instance of Event Mesh service, we need configuration parameters which we store in a config file in the "sender" app folder:
C:\hookorcrook\sender\config-messaging.json
The content of this file can be found in the Appendix 1 section.
Now we can go ahead, press "create" and choose service plan “dev”
Enter name as “hookorcrookMsg” and the following parameters (see file config-messaging.json😞
On command line:
cf cs enterprise-messaging dev hookorcrookMsg -c config-messaging.json
After instance creation, we can go ahead and open the "Event Mesh Administration" dashboard.
In our Trial subaccount, we select menu item “Services -> Instances”, find our Event Mesh instance, open the context menu (. . . ) and choose “View Dashboard”
Note:
In Trial, no need to subscribe to Event Mesh service plan “standard”
From the menu, we select Queues then press Create to create a queue with name "hookorcrookQueue".
Note:
I recommend to not change the queue name, otherwise the following steps of the tutorial will fail, or you need to adapt the queue names.
We will use this queue to send messages to. They will be put into the queue and stand there and wait wait wait to be consumed by an interested receiver.
But first, we need to produce and send messages.
For that, we create a simple sender app.
In the dashboard of trial account, we don’t have the "Test" tool for firing events (which is available in "default" plan).
Therefore, we take the opportunity to write a little application that sends events.
For today, we use the REST API which is offered by SAP Event Mesh.
It is easy to use, just like any REST API.
Note:
Our sender app is not protected. This is not in the scope of this tutorial, where we want to focus on protecting the receiver endpoint.
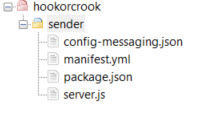
We go to our sender app folder and create the following files inside:
C:\hookorcrook\sender
manifest.yml
package.json
server.js
It will look like below screenshot:
We paste the file content which can be found in the Appendix 1 section.
Now let’s quickly go through the app – there’s not much to explain.
manifest.yml
Note that the "route" might need to be adapted to your data center domain.
Also the "name" might need to be adapted in case it is already used.
package.json
Just mentioning that we're declaring few dependencies to modules that we use to call the REST API.
Makes life little bit easier.
server.js
Our application code basically does 2 things:
1. Start a server that exposes 1 endpoint.
This endpoint represents our dummy tool: when we call it, then the app sends a dummy message.
2. send messages.
Some code is required to fetch the credentials of Event Mesh and to send a message to the queue.
The endpoint:
Above snippet shows the endpoint sending a message whenever it is invoked.
Note:
The name of the queue is passed as param to the helper function.
Adapt the name if you’re using different queue name.
The code for sending a message involves the following steps:
1. Read the credentials from binding:
2. Loop through the credentials to find the credentials for the REST API:
3. Use these credentials to compose the URL to which we send our messages, including our hardcoded queue name:
4. Before we actually can send a message, we need to fetch a JWT token, for authentication:
5. finally use the node module “fetch” to execute the REST request:
Note that we've chosen the content type for plain text, no JSON.
After deployment, we invoke the "/send" endpoint:
https://hookorcrooksender.cfapps.us10.hana.ondemand.com/send
As a result, we should get a response containing success status (204).
View Dashboard
After hitting refresh a few times, let’s have a look at our queue to see if the messages have arrived:
The receiver app is even smaller than the sender:
It just exposes an endpoint that is meant to be called by Event Mesh.
It receives the message and writes the content to the console.... Interesting...Instead of doing anything meaningful with it (e.g. read it and react upon its data, e.g. update own database, or similar)
The purpose of this tutorial is to learn how such endpoint can be protected and still successfully invoked by Event Mesh.
Nevertheless, if you’re new to this topic, you can first deploy and unsecured version of the app - to be on the safe side and see it working without trouble.
Otherwise, you can jump to chapter 3.2..
In this chapter we create a server app that exposes a simple endpoint that is not protected.
To create the unsafe receiver app, we go to our receiver folder and create the following files:
C:\hookorcrook\receiver
manifest.yml
package.json
server.js
See how it looks on the screenshot:
The file content can be copied from the Appendix 2 section.
And here some explanations
manifest.yml
Again, in manifest.yml file, you might need to adapt the app name and the route URL.
server.js
The application code without protection just exposes the endpoint that is called with POST request.
The request body contains the message payload.
That’s all.
Only one thing to note:
I’d like to draw your attention to the content type.
Remember that our sender app sends a hardcoded text which is just a string (not JSON).
Accordingly, the REST request of sender to the Event Mesh API specifies a header
Now, in our webhook endpoint, we receive the message content in the request body of the POST request sent by Event Mesh.
We need a body-parser module which passes the request body to our code.
We need to choose a body-parser that matches the content type.
In our example it is express.text()
I’m mentioning his, because the usual content type would be JSON, and the body parser extress.json()
The configuration of our server:
And the dummy application logic for handling the received message:
Deploy and nothing
After deploy – there’s nothing for us to do with the app.
Nothing for us…. But a lot to do for Event Mesh.
Create Webhook Subscription
After deploy, we go back to the Event Mesh dashboard and create a "Webhook Subscription".
We can enter a dummy "name" of our choice.
The webhook URL might need to be adapted in your case.
In my example:
https://hookorcrookreceiver.cfapps.us10.hana.ondemand.com/webhook/hookorcrook
The other settings can be entered according to below screenshot:
Run scenario
1. Send event
In order to send an event, we only need to call our sender app:
https://hookorcrooksender.cfapps.us10.hana.ondemand.com/send
2. Receive event
Our apps don’t have any UI, therefore the Cloud Foundry log is our friend, misused to replace the user interface.
Thus, to see the result of our scenario, we need to check the log.
To view the logs in the Cloud Cockpit, we go to “Applications” select our receiver app and click “Logs” in the menu:
Alternatively, the command line:
Last thing we can check: the queue.
Since we consumed the events via the webhook, the queue should be empty now.
I’m skipping the screenshot here (why should anybody want to see an empty queue…?)
We’re finally reaching the interesting part of this tutorial.
Now we want to protect our webhook endpoint.
Protection is done on 2 levels:
- Authentication via OAuth 2.0 is ensured by the passport node module.
- Authorization with a specific scope, that has to be enforced manually by us.
3.2.1. Create instance of XSUAA service
We want to protect our app endpoint with OAuth 2.0, therefore we need to bind our app to an instance of XSUAA.
To create the instance, we use a config file xs-security.json which we create in the app folder C:\hookorcrook\receiver.
The content can be copied from Appendix 3 section.
Creation command to be executed inside the receiver folder:
cf cs xsuaa application hookorcrookXsuaa -c xs-security.json
Or, in cockpit, in “Service Marketplace” find service “Authorization and Trust Management”, and create an instance with “application” plan, name as “hookorcrookXsuaa” and the following parameters (see xs-security.json)
Explanation
First of all, we define a unique "name" for our xsuaa instance:
"xsappname": "hookorcrookxsappname"
Next we define a "scope".
This is the authorization which we require for our endpoint.
It is common, and even required, to define a scope with a unique name.
That’s achieved by concatenating the (unique) value of our property "xsappname":
"$XSAPPNAME.scopeforhookorcrook"
This scope is defined and created in the context of our application.
It is our app which requires that scope.
The caller of our endpoint needs to have this scope.
If a human user would call our endpoint, then we would define a "role" containing that scope.
Afterwards, an admin would assign the role to the user, to call our endpoint.
But in our case, the endpoint is only invoked by Event Mesh.
We don’t want any human user to be allowed to call our endpoint.
As such, we don’t define any role.
However, how do we assign the scope to Event Mesh?
This is in fact, the wrong question.
Why?
Because we will give the credentials of OUR xsuaa to Event Mesh.
So Event Mesh will ask OUR xsuaa to provide a JWT token.
As such, that token will be survive our security validation.
With other words, Event Mesh ITSELF doesn't need the scope.
So we don't need to grant the scope to Event Mesh.
But how do we "give the credentials to Event Mesh"?
In the webhook subscription dialog.
How do we know our credentials?
We will view them in our app environment.
OK.
Event Mesh asks OUR xsuaa for a token and the token will be valid and will be accepted by our application (passport), because our app is bound to the same instance of xsuaa.
However, the JWT token won’t contain the scope.
As such, the request will be refused by our scope-validation.
Why?
In case of human user, the scope is assigned (granted) to the user in form of a "role".
Afterwards, the user-JWT will contain that scope.
In our case ("client_credentials"), that role-assignment is missing.
So what do we have to do?
Removing the scope-check from our code is not an option.
Yes, it would make this whole blog obsolete.
Instead, we learn the mechanism which is required for granting the scope to OURSELF.
So what is required to do, such that a JWT token issued by our own xsuaa contains the scope defined in our own xsuaa?.
It is the authorities property.
This means that our xsuaa instance ACCEPTS a scope.
The scope name is given as value.
And in our case, the scope is the one which we define in the same file: "$XSAPPNAME.scopeforhookorcrook"
With this setting, the JWT token, issued by our xsuaa for our OAuth client, will contain the required scope.
See, that's all I wanted to say in this blog post:
"authorities":["$XSAPPNAME.scopeforhookorcrook"]
And now is the right moment to have a look at a diagram:
We can see that our receiver app is bound to our instance of XSUAA.
We’ve created that instance with the "authorities" setting.
When Event Mesh calls us, it will turn to our xsuaa instance to fetch a JWT token.
Then it sends the token to our webhook endpoint.
How can Event Mesh use our xsuaa credentials?
We only need to specify them in the webhook subscription.
3.2.2. Create application
To enforce security, a few changes are required for all files.
All files can be found in the Appendix 3 section.
manifest.yml
In the manifest we need to bind our app to the new instance of xsuaa created above:
package.json
Here we need some security-related modules
server.js
And here’s the code which protects our endpoint.
1. First the configuration of passport with our xsuaa instance:
2. Second, configure our endpoint with the passport middleware:
The passport middleware is configured with a strategy that is configured with our xsuaa.
The passport middleware is executed before our code is reached.
We can safely rely on passport to reject all requests that do not carry a valid JWT bearer token.
3. Third, we manually check the incoming token for the scope which we defined above and which we require.
To check the scope we can use a helper method provided by xssec module
That’s all.
Deploy and don’t run
After deploy, we need to create a new webhook subscription, because we need to specify the OAuth credentials.
Create Webhook
As mentioned earlier, we need to pass the credentials of our xsuaa instance (to be more concrete, the OAuth client) to the Event Mesh.
Cloud Foundry provides access to the credentials in the environment of our deployed application.
View env
To view the environment variables of our app, we can run this command:
cf env hookorcrookreceiver
Alternatively, to view the environment variables in the cloud cockpit, we go to our subaccount, then to our space.
We click on the hookorcrookreceiver app, then click on "Environment Variables":
From the “xsuaa” section, we need to take a note of the following 3 properties:
clientid
clientsecret
url
The values of these properties are used as credentials when requesting a JWT token from the OAuth authorization server (xsuaa).
This is what Event Mesh needs to do and will have to do.
Create webhook
We create same webhook subscription as before, but with different authentication.
This time we choose "OAuth2ClientCredentials".
We enter the "clientid" and "clientsecret" and "url" which we copied from the environment.
Important:
The Url property needs to be completed.
We need to append the endpoint which issues JWT tokens.
The following segments have to be appended: /oauth/token
Effectively, the full URL looks similar like this:
https:// abc123trial.authentication.sap.hana.ondemand.com/oauth/token
Note:
Make sure to replace the "abc123trial" with your real subdomain.
See how it would look like:
Note:
If you aren't happy with this approach, of if you're just interested, have a look at the this blog post (productive account) to see an alternative approach of configuring the webhook subscription.
Run scenario
We can now send events from our sender app and view the result in the logs, as described before.
There’s no difference and it should be working fine.
Note:
If the messages are not consumed from the queue, you can check the details of the webhook subscription (click the icon in the webhook subscriptions list).
There might be an error for the “Last Failed Reason” (after some time).
The error would probably due to authorization issues and you would need to check that you copy&pasted everything correctly.
In this tutorial we’ve learned how to send messages via REST API of Event Mesh.
We’ve learned how to protect our webhook endpoint with OAuth and with scope.
And the focused learning: How to configure XSUAA and Event Mesh such that the protected endpoint can be invoked by Event Mesh.
The relevant setting was the “authorities” param in the xsuaa configuration.
See this blog post (productive account) for an alternative approach of protection.
For the receiver (webhook) app, create xsuaa with following security config:
View the credentials of THIS xsuaa instance, which is bound to receiver app.
Enter these credentials in the webhook subscription dialog.
SAP Help Portal:
SAP Event Mesh landing page.
The links section could never be complete without the blog posts of vvdries!
Don't miss it!
Next blog post is sibling blog for productive account.
Note: everything can be copy&pasted, only URLs need to be adapted
config-messaging.json
manifest.yml
package.json
server.js
Note: everything can be copy&pasted, only URLs need to be adapted
manifest.yml
package.json
server.js
Note: everything can be copy&pasted, only URLs need to be adapted
xs-security.json
manifest.yml
package.json
server.js
We send events to Event Mesh which delivers them via Webhook Subscription. The receiving endpoint is protected with OAuth. The scenario is deployed to Trial account of SAP BTP, Cloud Foundry environment.
Quicklinks:
Quick Steps
Sample Code
Content
0. Prerequisites
00. Preparation
0.1. Create Project
1. Event Mesh
1.1. Create Service Instance
1.2. Open Dashboard
1.3. Create Queue
2. Sender Application
2.1. Create Application
2.2. Deploy and Run
3. Receiver Application
3.1. without Security
3.2. with Security
A1 Sample Code Sender App
A2 Sample Code Receiver App without Security
A3 Sample Code Receiver App with security
Overview
In this simple tutorial we deploy 2 apps to SAP BTP, Cloud Foundry, Trial account (description for productive account).
First app is a simple sender that sends events to SAP Event Mesh. We use REST API for sending.
Second app is a simple receiver. It uses the webhook subscription mechanism.
That means: receiver app provides a REST endpoint and Event Mesh sends the events to it via HTTP POST request.
The goal of this tutorial: The endpoint should be protected with OAuth and scope.
How do we have to configure the Event Mesh, such that it calls our protected endpoint properly?
Below diagram shows the scenario including the involved artifacts:

0. Prerequisites
This tutorial will guide you through all required steps, you don’t need to be expert – anyways, I’m not expert either.
Few requirements:
Basic understanding of working with SAP BTP.
Basic understanding of messaging/eventing.
Basic understanding of node.js.
00. Preparation
For this little scenario, we need 2 little applications, developed on our little laptop, and in the little cloud, we need 2 little service instances, as described below.
0.1. Create Project
To host our dev project, we create the following project structure:
We create the root folder C:\hookorcrook and
inside we create 2 app folders: receiver and sender
Like this:
C:\hookorcrook
receiver
sender
For your convenience, below screenshot shows the project on file system:

Note:
Yes, the apps are very simple and we could have done everything within 1 app.
However, I prefer it clear and comprehensible – rather than saving little time.
1. Event Mesh
We need an instance of SAP Event Mesh service.
Note that below description is valid for Trial account.
Few things are different in Trial compared to productive account:
Event Mesh service plan: only "dev".
JSON Parameters are different / reduced.
Event Mesh service plan "standard" is available but reduced scope.
Event Mesh dashboard doesn’t include the “Test” tab.
Therefore, we need to create a sender application in order to easily send events to Event Mesh.
In a fresh new Trial account, you should be entitled to use Event Mesh and to follow this tutorial.
To verify:
Enter your trial subaccount and select "Service Marketplace" from the menu.
Find “Integration Suite” -> “Event Mesh” and check that Event Mesh service with service plan "dev" is available:

If you don’t see it, then you probably need to add the required entitlements.
1.1. Create Service Instance
To create instance of Event Mesh service, we need configuration parameters which we store in a config file in the "sender" app folder:
C:\hookorcrook\sender\config-messaging.json
The content of this file can be found in the Appendix 1 section.
Now we can go ahead, press "create" and choose service plan “dev”

Enter name as “hookorcrookMsg” and the following parameters (see file config-messaging.json😞
{

  "emname": "hookorcrookmessagingclient",

  "options": {

      "management": true,

      "messagingrest": true,

      "messaging": true

  }

}
On command line:
cf cs enterprise-messaging dev hookorcrookMsg -c config-messaging.json
1.2. Open Event Mesh Dashboard
After instance creation, we can go ahead and open the "Event Mesh Administration" dashboard.
In our Trial subaccount, we select menu item “Services -> Instances”, find our Event Mesh instance, open the context menu (. . . ) and choose “View Dashboard”

Note:
In Trial, no need to subscribe to Event Mesh service plan “standard”
1.3. Create Queue
From the menu, we select Queues then press Create to create a queue with name "hookorcrookQueue".
Note:
I recommend to not change the queue name, otherwise the following steps of the tutorial will fail, or you need to adapt the queue names.

We will use this queue to send messages to. They will be put into the queue and stand there and wait wait wait to be consumed by an interested receiver.
But first, we need to produce and send messages.
For that, we create a simple sender app.
2. Sender Application
In the dashboard of trial account, we don’t have the "Test" tool for firing events (which is available in "default" plan).
Therefore, we take the opportunity to write a little application that sends events.
For today, we use the REST API which is offered by SAP Event Mesh.
It is easy to use, just like any REST API.
Note:
Our sender app is not protected. This is not in the scope of this tutorial, where we want to focus on protecting the receiver endpoint.
2.1. Create Application
We go to our sender app folder and create the following files inside:
C:\hookorcrook\sender
manifest.yml
package.json
server.js
It will look like below screenshot:
We paste the file content which can be found in the Appendix 1 section.
Now let’s quickly go through the app – there’s not much to explain.
manifest.yml
applications:

  - name: hookorcrooksender

    routes:

    - route: hookorcrooksender.cfapps.us10.hana.ondemand.com

    services:

      - hookorcrookMsg
Note that the "route" might need to be adapted to your data center domain.
Also the "name" might need to be adapted in case it is already used.
package.json
Just mentioning that we're declaring few dependencies to modules that we use to call the REST API.
Makes life little bit easier.
server.js
Our application code basically does 2 things:
1. Start a server that exposes 1 endpoint.
This endpoint represents our dummy tool: when we call it, then the app sends a dummy message.
2. send messages.
Some code is required to fetch the credentials of Event Mesh and to send a message to the queue.
The endpoint:
app.get('/send', async (req, res) => {

   const response = await sendMessage('Remember: Hook or Crook', 'hookorcrookQueue', BINDINGS.myMessaging)

   res.send(`Done sending message (Status '${response}')`)
Above snippet shows the endpoint sending a message whenever it is invoked.
Note:
The name of the queue is passed as param to the helper function.
Adapt the name if you’re using different queue name.
The code for sending a message involves the following steps:
1. Read the credentials from binding:
const BINDING = xsenv.getServices({ myMessaging: { tag: 'enterprise-messaging' } })
2. Loop through the credentials to find the credentials for the REST API:
function _findMsgRest(messagingEntries){

    var result =  messagingEntries.filter(entry => {

        const protocolEntries = entry.protocol

        const res = protocolEntries.filter(protocolEntry => {

            if(protocolEntry === "httprest"){
3. Use these credentials to compose the URL to which we send our messages, including our hardcoded queue name:
function _composeMsgRestUrlForSendMsg (msgCredentials, queueName){

    const uri = _getUaaForRest(msgCredentials).uri

    return `${uri}/messagingrest/v1/queues/${queueName}/messages`
4. Before we actually can send a message, we need to fetch a JWT token, for authentication:
async function _fetchJwtToken (uaa){

    return new Promise ((resolve, reject) => {

        xssec.requests.requestClientCredentialsToken(null, uaa, null, null, (error, token)=>{

            resolve(token)
5. finally use the node module “fetch” to execute the REST request:
    const options = {

        method: 'POST',

        body: msg,

        headers: {

            Authorization: 'Bearer ' + jwtToken,

            'Content-Type': 'text/plain',

            'x-qos' : 1

        }

    }

    const response = await fetch(messagingRestUrl, options)
Note that we've chosen the content type for plain text, no JSON.
2.2. Deploy and Run
After deployment, we invoke the "/send" endpoint:
https://hookorcrooksender.cfapps.us10.hana.ondemand.com/send
As a result, we should get a response containing success status (204).
View Dashboard
After hitting refresh a few times, let’s have a look at our queue to see if the messages have arrived:

3. Receiver Application
The receiver app is even smaller than the sender:
It just exposes an endpoint that is meant to be called by Event Mesh.
It receives the message and writes the content to the console.... Interesting...Instead of doing anything meaningful with it (e.g. read it and react upon its data, e.g. update own database, or similar)
The purpose of this tutorial is to learn how such endpoint can be protected and still successfully invoked by Event Mesh.
Nevertheless, if you’re new to this topic, you can first deploy and unsecured version of the app - to be on the safe side and see it working without trouble.
Otherwise, you can jump to chapter 3.2..
3.1. Receiver without Security
In this chapter we create a server app that exposes a simple endpoint that is not protected.
3.1.1. Create and Deploy Application
To create the unsafe receiver app, we go to our receiver folder and create the following files:
C:\hookorcrook\receiver
manifest.yml
package.json
server.js
See how it looks on the screenshot:

The file content can be copied from the Appendix 2 section.
And here some explanations
manifest.yml
Again, in manifest.yml file, you might need to adapt the app name and the route URL.
server.js
The application code without protection just exposes the endpoint that is called with POST request.
The request body contains the message payload.
That’s all.
Only one thing to note:
I’d like to draw your attention to the content type.
Remember that our sender app sends a hardcoded text which is just a string (not JSON).
Accordingly, the REST request of sender to the Event Mesh API specifies a header
'Content-Type': 'text/plain'Now, in our webhook endpoint, we receive the message content in the request body of the POST request sent by Event Mesh.
We need a body-parser module which passes the request body to our code.
We need to choose a body-parser that matches the content type.
In our example it is express.text()
I’m mentioning his, because the usual content type would be JSON, and the body parser extress.json()
The configuration of our server:
const express = require('express')

const app = express();

app.use(express.text())
And the dummy application logic for handling the received message:
app.post('/webhook/hookorcrook', (req, res) => {

    console.log(`===> [/webhook/hookorcrook] Received message with payload: ${req.body}`)
Deploy and nothing
After deploy – there’s nothing for us to do with the app.
Nothing for us…. But a lot to do for Event Mesh.
Create Webhook Subscription
After deploy, we go back to the Event Mesh dashboard and create a "Webhook Subscription".
We can enter a dummy "name" of our choice.
The webhook URL might need to be adapted in your case.
In my example:
https://hookorcrookreceiver.cfapps.us10.hana.ondemand.com/webhook/hookorcrook
The other settings can be entered according to below screenshot:

Run scenario
1. Send event
In order to send an event, we only need to call our sender app:
https://hookorcrooksender.cfapps.us10.hana.ondemand.com/send
2. Receive event
Our apps don’t have any UI, therefore the Cloud Foundry log is our friend, misused to replace the user interface.
Thus, to see the result of our scenario, we need to check the log.
To view the logs in the Cloud Cockpit, we go to “Applications” select our receiver app and click “Logs” in the menu:

Alternatively, the command line:
![]()
Last thing we can check: the queue.
Since we consumed the events via the webhook, the queue should be empty now.
I’m skipping the screenshot here (why should anybody want to see an empty queue…?)
3.2. Receiver with Security
We’re finally reaching the interesting part of this tutorial.
Now we want to protect our webhook endpoint.
Protection is done on 2 levels:
- Authentication via OAuth 2.0 is ensured by the passport node module.
- Authorization with a specific scope, that has to be enforced manually by us.
3.2.1. Create instance of XSUAA service
We want to protect our app endpoint with OAuth 2.0, therefore we need to bind our app to an instance of XSUAA.
To create the instance, we use a config file xs-security.json which we create in the app folder C:\hookorcrook\receiver.
The content can be copied from Appendix 3 section.
Creation command to be executed inside the receiver folder:
cf cs xsuaa application hookorcrookXsuaa -c xs-security.json
Or, in cockpit, in “Service Marketplace” find service “Authorization and Trust Management”, and create an instance with “application” plan, name as “hookorcrookXsuaa” and the following parameters (see xs-security.json)
{

    "xsappname": "hookorcrookxsappname",

    "tenant-mode": "dedicated",

    "scopes": [

        {

            "name": "$XSAPPNAME.scopeforhookorcrook",

            "description": "Scope required to access webhook endpoint"

        }

    ],

    "authorities":["$XSAPPNAME.scopeforhookorcrook"]

}
Explanation
First of all, we define a unique "name" for our xsuaa instance:
"xsappname": "hookorcrookxsappname"
Next we define a "scope".
This is the authorization which we require for our endpoint.
It is common, and even required, to define a scope with a unique name.
That’s achieved by concatenating the (unique) value of our property "xsappname":
"$XSAPPNAME.scopeforhookorcrook"
This scope is defined and created in the context of our application.
It is our app which requires that scope.
The caller of our endpoint needs to have this scope.
If a human user would call our endpoint, then we would define a "role" containing that scope.
Afterwards, an admin would assign the role to the user, to call our endpoint.
But in our case, the endpoint is only invoked by Event Mesh.
We don’t want any human user to be allowed to call our endpoint.
As such, we don’t define any role.
However, how do we assign the scope to Event Mesh?
This is in fact, the wrong question.
Why?
Because we will give the credentials of OUR xsuaa to Event Mesh.
So Event Mesh will ask OUR xsuaa to provide a JWT token.
As such, that token will be survive our security validation.
With other words, Event Mesh ITSELF doesn't need the scope.
So we don't need to grant the scope to Event Mesh.
But how do we "give the credentials to Event Mesh"?
In the webhook subscription dialog.
How do we know our credentials?
We will view them in our app environment.
OK.
Event Mesh asks OUR xsuaa for a token and the token will be valid and will be accepted by our application (passport), because our app is bound to the same instance of xsuaa.
However, the JWT token won’t contain the scope.
As such, the request will be refused by our scope-validation.
Why?
In case of human user, the scope is assigned (granted) to the user in form of a "role".
Afterwards, the user-JWT will contain that scope.
In our case ("client_credentials"), that role-assignment is missing.
So what do we have to do?
Removing the scope-check from our code is not an option.
Yes, it would make this whole blog obsolete.
Instead, we learn the mechanism which is required for granting the scope to OURSELF.
So what is required to do, such that a JWT token issued by our own xsuaa contains the scope defined in our own xsuaa?.
It is the authorities property.
This means that our xsuaa instance ACCEPTS a scope.
The scope name is given as value.
And in our case, the scope is the one which we define in the same file: "$XSAPPNAME.scopeforhookorcrook"
With this setting, the JWT token, issued by our xsuaa for our OAuth client, will contain the required scope.
See, that's all I wanted to say in this blog post:
"authorities":["$XSAPPNAME.scopeforhookorcrook"]
And now is the right moment to have a look at a diagram:

We can see that our receiver app is bound to our instance of XSUAA.
We’ve created that instance with the "authorities" setting.
When Event Mesh calls us, it will turn to our xsuaa instance to fetch a JWT token.
Then it sends the token to our webhook endpoint.
How can Event Mesh use our xsuaa credentials?
We only need to specify them in the webhook subscription.
3.2.2. Create application
To enforce security, a few changes are required for all files.
All files can be found in the Appendix 3 section.
manifest.yml
In the manifest we need to bind our app to the new instance of xsuaa created above:
applications:

  - name: hookorcrookreceiver

    ...

    services:

      - hookorcrookXsuaa
package.json
Here we need some security-related modules
    "@sap/xsenv": "latest",

    "@sap/xssec": "latest",

    "passport": "^0.4.0"
server.js
And here’s the code which protects our endpoint.
1. First the configuration of passport with our xsuaa instance:
const serviceBindings = xsenv.getServices({

   myXsuaa: {tag: 'xsuaa'}

})

const UAA_CREDENTIALS = serviceBindings.myXsuaa

const JWTStrategy = xssec.JWTStrategy

passport.use('JWT', new JWTStrategy(UAA_CREDENTIALS))

app.use(passport.initialize())
2. Second, configure our endpoint with the passport middleware:
app.post('/webhook/hookorcrook', passport.authenticate('JWT', {session: false}), (req, res) => {The passport middleware is configured with a strategy that is configured with our xsuaa.
The passport middleware is executed before our code is reached.
We can safely rely on passport to reject all requests that do not carry a valid JWT bearer token.
3. Third, we manually check the incoming token for the scope which we defined above and which we require.
To check the scope we can use a helper method provided by xssec module
    const auth = req.authInfo

    if (! auth.checkScope(UAA_CREDENTIALS.xsappname + '.scopeforhookorcrook')) {

        res.status(403).end('Forbidden. Authorization for webhook access is missing.')
That’s all.
Deploy and don’t run
After deploy, we need to create a new webhook subscription, because we need to specify the OAuth credentials.
Create Webhook
As mentioned earlier, we need to pass the credentials of our xsuaa instance (to be more concrete, the OAuth client) to the Event Mesh.
Cloud Foundry provides access to the credentials in the environment of our deployed application.
View env
To view the environment variables of our app, we can run this command:
cf env hookorcrookreceiver
Alternatively, to view the environment variables in the cloud cockpit, we go to our subaccount, then to our space.
We click on the hookorcrookreceiver app, then click on "Environment Variables":

From the “xsuaa” section, we need to take a note of the following 3 properties:
clientid
clientsecret
url
The values of these properties are used as credentials when requesting a JWT token from the OAuth authorization server (xsuaa).
This is what Event Mesh needs to do and will have to do.
Create webhook
We create same webhook subscription as before, but with different authentication.
This time we choose "OAuth2ClientCredentials".
We enter the "clientid" and "clientsecret" and "url" which we copied from the environment.
Important:
The Url property needs to be completed.
We need to append the endpoint which issues JWT tokens.
The following segments have to be appended: /oauth/token
Effectively, the full URL looks similar like this:
https:// abc123trial.authentication.sap.hana.ondemand.com/oauth/token
Note:
Make sure to replace the "abc123trial" with your real subdomain.
See how it would look like:


Note:
If you aren't happy with this approach, of if you're just interested, have a look at the this blog post (productive account) to see an alternative approach of configuring the webhook subscription.
Run scenario
We can now send events from our sender app and view the result in the logs, as described before.
There’s no difference and it should be working fine.
Note:
If the messages are not consumed from the queue, you can check the details of the webhook subscription (click the icon in the webhook subscriptions list).
There might be an error for the “Last Failed Reason” (after some time).
The error would probably due to authorization issues and you would need to check that you copy&pasted everything correctly.
Summary
In this tutorial we’ve learned how to send messages via REST API of Event Mesh.
We’ve learned how to protect our webhook endpoint with OAuth and with scope.
And the focused learning: How to configure XSUAA and Event Mesh such that the protected endpoint can be invoked by Event Mesh.
The relevant setting was the “authorities” param in the xsuaa configuration.
See this blog post (productive account) for an alternative approach of protection.
Quick Steps
For the receiver (webhook) app, create xsuaa with following security config:
    "scopes": [{ "name": "$XSAPPNAME.yourscope"}],

    "authorities":["$XSAPPNAME.yourscope"]
View the credentials of THIS xsuaa instance, which is bound to receiver app.
Enter these credentials in the webhook subscription dialog.
Links
SAP Help Portal:
SAP Event Mesh landing page.
The links section could never be complete without the blog posts of vvdries!
Don't miss it!
Next blog post is sibling blog for productive account.
Appendix 1: Sender App
Note: everything can be copy&pasted, only URLs need to be adapted
config-messaging.json
{

  "emname": "hookorcrookmessagingclient",

  "options": {

      "management": true,

      "messagingrest": true,

      "messaging": true

  }

}
manifest.yml
---

applications:

  - name: hookorcrooksender

    memory: 128M

    routes:

    - route: hookorcrooksender.cfapps.us10.hana.ondemand.com

    services:

      - hookorcrookMsg
package.json
{

  "dependencies": {

    "express": "^4.17.1",

    "passport": "^0.4.0",

    "@sap/xsenv": "latest",

    "@sap/xssec": "latest",

    "node-fetch": "2.6.2"

  }

}
server.js
const fetch = require('node-fetch')

const xssec = require('@sap/xssec')

const xsenv = require('@sap/xsenv')

const express = require('express')

const app = express()


const BINDING = xsenv.getServices({ myMessaging: { tag: 'enterprise-messaging' } })


/* App Server */

app.listen(process.env.PORT, function () { console.log('===> Server started') })


/* App Endpoints */

app.get('/send', async (req, res) => {

   const response = await sendMessage('Remember: Hook or Crook', 'hookorcrookQueue', BINDING.myMessaging)

   res.send(`Done sending message (Status '${response}')`)

})


/* Helper */


async function sendMessage(msg, queueNamePostfix, msgCredentials){

    const uaa = _getUaaForRest(msgCredentials)

    const jwtToken = await _fetchJwtToken(uaa)

    const messagingRestUrl = _composeMsgRestUrlForSendMsg(msgCredentials, queueNamePostfix)


    const options = {

        method: 'POST',

        body: msg,

        headers: {

            Authorization: 'Bearer ' + jwtToken,

            'Content-Type': 'text/plain',

            'x-qos' : 1

        }

    }

    const response = await fetch(messagingRestUrl, options)

    return response.status

}


function _getUaaForRest(msgCredentials){

    const msgRest = _findMsgRest(msgCredentials.messaging)

    return {

        uri : msgRest.uri,

        clientid : msgRest.oa2.clientid,

        clientsecret : msgRest.oa2.clientsecret,

        url : msgRest.oa2.tokenendpoint

    }

}


function _findMsgRest(messagingEntries){

    var result =  messagingEntries.filter(entry => {

        const protocolEntries = entry.protocol

        const res = protocolEntries.filter(protocolEntry => {

            if(protocolEntry === "httprest"){

                return protocolEntry

            }

        })

        if(res[0]){

            return entry

        }

    })

    return result[0]

}


function _composeMsgRestUrlForSendMsg (msgCredentials, queueName){

    const uri = _getUaaForRest(msgCredentials).uri

    return `${uri}/messagingrest/v1/queues/${queueName}/messages`

}


async function _fetchJwtToken (uaa){

    return new Promise ((resolve, reject) => {

        xssec.requests.requestClientCredentialsToken(null, uaa, null, null, (error, token)=>{

            resolve(token)

        })

    })

}
Appendix 2: Receiver App without Security
Note: everything can be copy&pasted, only URLs need to be adapted
manifest.yml
---

applications:

  - name: hookorcrookreceiver

    memory: 64M

    routes:

    - route: hookorcrookreceiver.cfapps.us10.hana.ondemand.com
package.json
{

  "dependencies": {

    "express": "^4.17.1"

  }

}
server.js
const express = require('express')

const app = express();

app.use(express.text())


app.listen(process.env.PORT,  () => { console.log('===> Server started') })


app.post('/webhook/hookorcrook', (req, res) => {

    console.log(`===> [/webhook/hookorcrook] Received message with payload: ${req.body}`)

    res.status(201).send()

})
Appendix 3: Receiver App with Security
Note: everything can be copy&pasted, only URLs need to be adapted
xs-security.json
{

    "xsappname": "hookorcrookxsappname",

    "tenant-mode": "dedicated",

    "scopes": [

        {

            "name": "$XSAPPNAME.scopeforhookorcrook",

            "description": "Scope required to access webhook endpoint"

        }

    ],

    "authorities":["$XSAPPNAME.scopeforhookorcrook"]

}
manifest.yml
---

applications:

  - name: hookorcrookreceiver

    memory: 64M

    routes:

    - route: hookorcrookreceiver.cfapps.us10.hana.ondemand.com

    services:

      - hookorcrookXsuaa
package.json
{

  "dependencies": {

    "@sap/xsenv": "latest",

    "@sap/xssec": "latest",

    "express": "^4.17.1",

    "passport": "^0.4.0"

  }

}
server.js
const xsenv = require('@sap/xsenv')

const serviceBindings = xsenv.getServices({

   myXsuaa: {tag: 'xsuaa'}

})

const UAA_CREDENTIALS = serviceBindings.myXsuaa


const express = require('express')

const app = express();

const xssec = require('@sap/xssec')

const passport = require('passport')

const JWTStrategy = xssec.JWTStrategy

passport.use('JWT', new JWTStrategy(UAA_CREDENTIALS))

app.use(passport.initialize())

app.use(express.text())


app.listen(process.env.PORT,  () => { console.log('===> Server started') })


app.post('/webhook/hookorcrook', passport.authenticate('JWT', {session: false}), (req, res) => {

    const auth = req.authInfo

    if (! auth.checkScope(UAA_CREDENTIALS.xsappname + '.scopeforhookorcrook')) {

        console.log(`===> [/webhook/hookorcrook] ERROR scope for webhook access ('scopeforhookorcrook') is missing`)

^

        res.status(403).end('Forbidden. Authorization for webhook access is missing.')

    }else{

        console.log(`===> [/webhook/hookorcrook] Received message with payload: ${req.body}`)


        res.status(201).send()

    }

})
Labels:
1 Comment
You must be a registered user to add a comment. If you've already registered, sign in. Otherwise, register and sign in.
Labels in this area
-
ABAP CDS Views - CDC (Change Data Capture)
2 -
AI
1 -
Analyze Workload Data
1 -
BTP
1 -
Business and IT Integration
2 -
Business application stu
1 -
Business Technology Platform
1 -
Business Trends
1,661 -
Business Trends
87 -
CAP
1 -
cf
1 -
Cloud Foundry
1 -
Confluent
1 -
Customer COE Basics and Fundamentals
1 -
Customer COE Latest and Greatest
3 -
Customer Data Browser app
1 -
Data Analysis Tool
1 -
data migration
1 -
data transfer
1 -
Datasphere
2 -
Event Information
1,400 -
Event Information
64 -
Expert
1 -
Expert Insights
178 -
Expert Insights
274 -
General
1 -
Google cloud
1 -
Google Next'24
1 -
Kafka
1 -
Life at SAP
784 -
Life at SAP
11 -
Migrate your Data App
1 -
MTA
1 -
Network Performance Analysis
1 -
NodeJS
1 -
PDF
1 -
POC
1 -
Product Updates
4,577 -
Product Updates
327 -
Replication Flow
1 -
RisewithSAP
1 -
SAP BTP
1 -
SAP BTP Cloud Foundry
1 -
SAP Cloud ALM
1 -
SAP Cloud Application Programming Model
1 -
SAP Datasphere
2 -
SAP S4HANA Cloud
1 -
SAP S4HANA Migration Cockpit
1 -
Technology Updates
6,886 -
Technology Updates
405 -
Workload Fluctuations
1
Related Content
- explore the business continuity recovery sap solutions on AWS DRS in Technology Blogs by Members
- IBM Security Guardium in Technology Q&A
- Setup of Synthetic User Monitoring in SAP Cloud ALM in Technology Blogs by Members
- Empowering Vendors: The Transformative Impact of SAP Chatbot in Technology Blogs by Members
- How to develop Customer creation Application in SAP Build Apps with OData service in Technology Blogs by Members
Top kudoed authors
| User | Count |
|---|---|
| 13 | |
| 10 | |
| 10 | |
| 7 | |
| 7 | |
| 6 | |
| 5 | |
| 5 | |
| 5 | |
| 4 |