
- SAP Community
- Products and Technology
- Human Capital Management
- HCM Blogs by SAP
- Chatbot for SAP Commissions using SAP's Conversati...
Human Capital Management Blogs by SAP
Get insider info on SAP SuccessFactors HCM suite for core HR and payroll, time and attendance, talent management, employee experience management, and more in this SAP blog.
Turn on suggestions
Auto-suggest helps you quickly narrow down your search results by suggesting possible matches as you type.
Showing results for
Product and Topic Expert
Options
- Subscribe to RSS Feed
- Mark as New
- Mark as Read
- Bookmark
- Subscribe
- Printer Friendly Page
- Report Inappropriate Content
10-06-2021
2:49 PM
This blog post will give you an overview of how you can integrate SAP Commission with SAP Conversational AI using SAP Commission API end points.

Use case:
I've used a simple use case for this post. The use case is to retrieve the title for the position name(payee) that the user provides in the chatbot . We will be using the SAP Commission API endpoint for positions to get this info.
Prerequisites:
- SAP Business Technology Platform(BTP) Account
- SAP Cloud Foundry CLI
- SAP CAI account - Create account in https://cai.tools.sap/
- SAP Commissions user with RestAPI Basic Authentication. I have used the sandbox tenant for this use case.
Solution Diagram:

The blog post will be divided into 3 sections:
- Creating a python app to make REST API calls
- Host app in SAP BTP
- Creating a bot in SAP CAI
Creating a python app to make API calls
Below is the python app that interacts between SAP CAI and SAP Commissions. Copy the below python code and save the file as App.py in your desired local directory.
from flask import Flask, request, jsonify

import os

import json

import requests


app = Flask(__name__)

cf_port = os.getenv("PORT")

@app.route('/')

def hello():

    return '<h1>SAP Conversational AI</h1><body>The Commissions GetTitle webhook for use in SAP Conversational AI chatbots</body>'


@app.route('/Title',methods=['POST','GET'])

def bot():

    #Edit the url, username and password before deploying to SAP BTP

    url = "YourTenantUrl"

    Username='YourUserName'

    Password='YourPassword'

    ##########      GET SLUG        ##############

    data = json.loads(request.get_data())

    skill = data['conversation']['skill']

    if skill == 'commissions-gettitle':

        final_slug='initial'

        nlp = data['nlp']

        intents = nlp['intents']

        slug = intents[0]

        #print(slug)

        final_slug=slug['slug']


    ##########      GET TITLE        ##############

    if final_slug == 'gettitlename':

        position_value = data['nlp']['entities']['position']

        position = position_value[0]

        final_position=position['raw'].capitalize()

        print(final_position)

        base_url = url+"api/v2/positions?$filter=name eq "+final_position+" &select=name,title&expand=title"

        r = requests.get(base_url , auth=(Username,Password))

        print(r.text)

        pos_data = json.loads(r.text)

        for x in pos_data['positions']:

            #positionName=x['name']

            #print(x['name'])

            y = (x['title'])

            TitleName=y['displayName']

            print(y['displayName'])


        return jsonify(

        status=200,

        replies=[{

        'type': 'text',

        'content': 'The title name is %s' % (TitleName)

        }]

        )


if __name__ == '__main__':

	if cf_port is None:

		app.run(host='0.0.0.0', port=5000, debug=True)

	else:

		app.run(host='0.0.0.0', port=int(cf_port), debug=True)
Please note that you have to provide your SAP commission tenant's url and credentials(basic auth with rest api user) in the App.py file before pushing this app to SAP BTP.
In order to deploy this app to SAP BTP you will need 4 other files along with the App.py file.
- Procfile
- manifest.yaml
- requirements.txt
- runtime.txt
All of these files will have to be saved in the same directory as the App.py file.
Save the below as Procfile
web: python App.pySave the below as manifest.yaml
applications:

- name: getTitle

  random-route: true

  memory: 128M

  command: python App.py
Save the below as requirements.txt
Flask

requests
Save the below as runtime.txt
3.xOnce you're done you should be able to see all your files in the same folder, something like this as shown below. I've saved all my files under the directory CAI_Blog/Commission_GetTitle. Now that you have all the required files we can now push this to SAP BTP.

Host app in SAP BTP
Go to the directory/folder where you have saved the above files using your command line or code editor(like VS Code) and login to your CF using your email id and password.
cf login

Push the app to SAP BTP using the below command
cf push GetTitle

Once successfully hosted, you can login to your SAP BTP cockpit and check if the app is up and running. You should see something like this.

Once the app is deployed successfully you should get an Application route url, copy this. We will be using this when we create the bot in SAP CAI.

Create a bot in SAP CAI
The first step is to create a bot which will help the user interact with SAP Commissions. In case you are a first time user login to https://cai.tools.sap/ and create your account. Once you've created your account perform the below steps
- Create a new bot with the name GetTitle.

- Click on Perform Actions
- Under Select predefined skills for your bot, select Greetings. No additional skills are required for this use case

Select the following options and click create.


Next step is to train the bot with intents and entities.
First lets create a new intent with the name getTitleName


Click on this newly create @gettitlename intent. Save the below data as csv file and Import Expressions. These are basically different ways in which you are going to ask the bot for the title names for a position.
expression;language

Get title for position;en

title for position;en

position title;en

title for position;en

position's title;en

what is the title for position;en

what is the title;en

title;en

get title;en

get me the title for position;en

title for;en

You should be able to see the imported intents once the import is successful.

Next step is to add the entities. Here we are going to train the bot to to recognize position names. We will be providing a list of position names which we want the bot to recognize.


We will be creating a restricted entity with the name 'position' for our use case

Once created you will see the custom entity #position. Click on it . Save the below data as csv and import the entities. Please note, these will have to be a valid list of position names in your tenant. Otherwise this bot will not work.
value;language

User111;en

User112;en

User221;en

User222;en

User331;en

User441;en

User113;en

User332;en

User442;en


Once the entities and intents are setup its time to create a skill.
Go to the Build Tab and click on Add Skill. Name the skill as Commissions-GetTitle and click Add.

Click on the created skill Commissions-GetTitle and add triggers are shown below

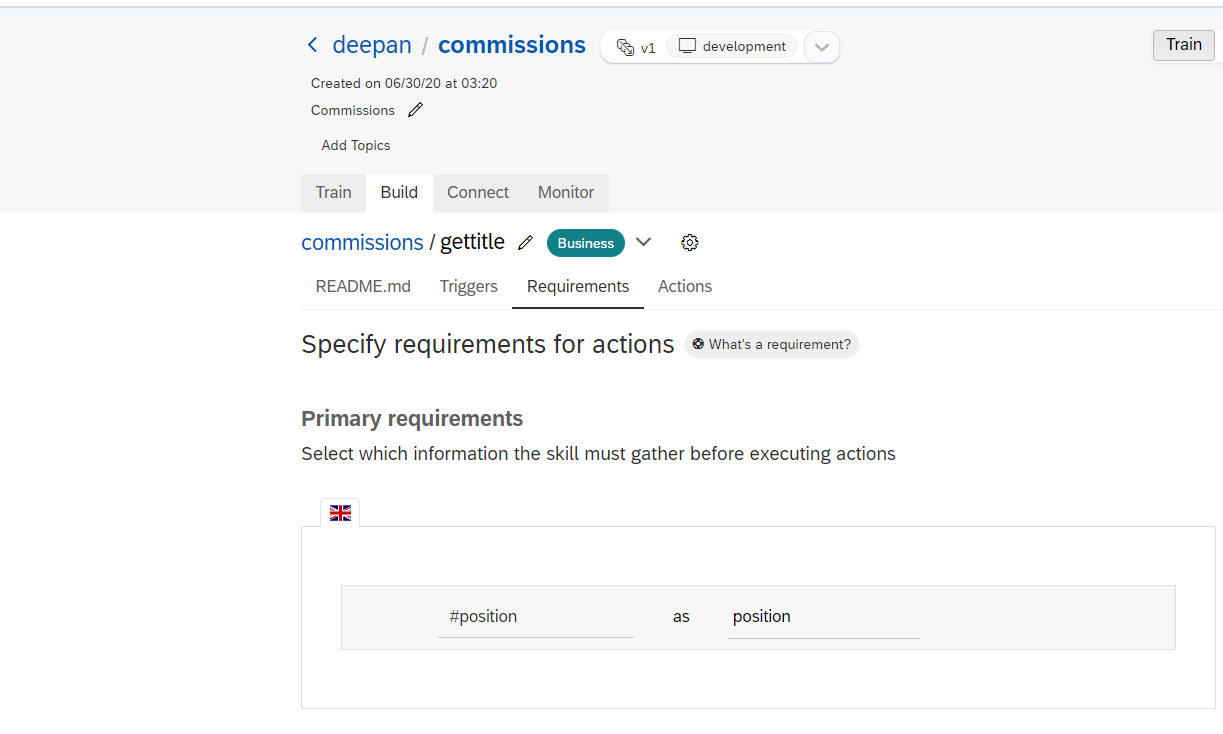
Then set up the requirements as shown below.
We will then need to setup the action. Click on create new action group.
Add the below condition to trigger action.

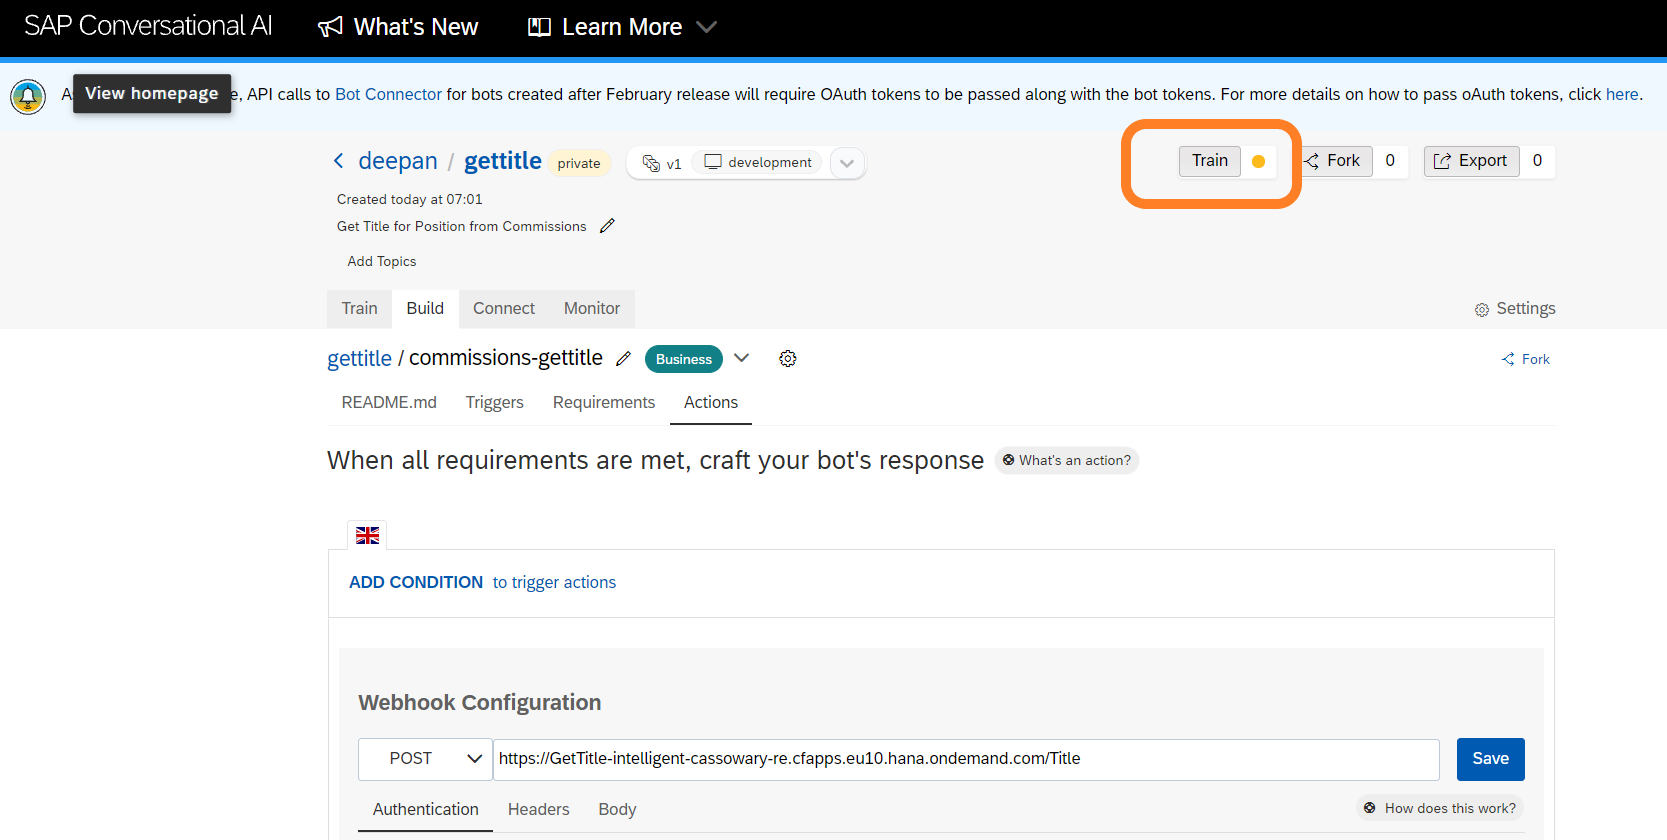
Click on Connect External Service and select Call Webhook option.

Here we will be using the application route url which was generated in SAP BTP described in Host app in SAP BTP section. Select POST request and paste the copied application route endpoint. Do not forget to append /Title at the end of the URL, because this is the route we have defined in our python app.
Click on Save.

Finally click on the Train button which will train the bot . The color should turn green once the bot is trained with the latest configuration.
Voila, our bot is now ready. Lets test our bot. Click on the chat preview at the bottom right.

Ask the bot for the title name for any of the positions provided in the entities list and it will return the title name.

You can go a notch further and integrate with any of the chat platforms like Slack, Teams or Skype etc. You simply have to follow all the steps provided in the this page. Do give it a try, it is quite simple.

Conclusion:
We were able to successfully build a simple chatbot using SAP's Conversational AI which can talk with SAP Commissions. We have used a very simple use case wherein we get the title for a position the user requests for.. However I'm sure the audience reading this, especially from SAP Commissions background have more complex requirements which I'm looking forward to hear .
Please drop in your comments, questions if any and also share your feedback.
Thanks for reading and happy learning.
Labels:
8 Comments
You must be a registered user to add a comment. If you've already registered, sign in. Otherwise, register and sign in.
Labels in this area
-
1H 2023 Product Release
3 -
2H 2023 Product Release
3 -
Business Trends
104 -
Business Trends
5 -
Cross-Products
13 -
Event Information
75 -
Event Information
9 -
Events
5 -
Expert Insights
26 -
Expert Insights
22 -
Feature Highlights
16 -
Hot Topics
20 -
Innovation Alert
8 -
Leadership Insights
4 -
Life at SAP
67 -
Life at SAP
1 -
Product Advisory
5 -
Product Updates
499 -
Product Updates
45 -
Release
6 -
Technology Updates
408 -
Technology Updates
12
Related Content
- New 1H 2024 SAP Successfactors Time (Tracking) Features in Human Capital Management Blogs by SAP
- Redefining Talent management with AI in Human Capital Management Blogs by Members
- Redefining Talent management with AI in Human Capital Management Blogs by Members
- Say hello to Joule - Your Digital Assistant for SuccessFactors and other SAP Cloud products in Human Capital Management Blogs by Members
- Empowering HR with AI: Revolutionizing Talent Management in Human Capital Management Blogs by Members
Top kudoed authors
| User | Count |
|---|---|
| 5 | |
| 3 | |
| 2 | |
| 2 | |
| 2 | |
| 2 | |
| 2 | |
| 1 | |
| 1 | |
| 1 |