

- SAP Community
- Products and Technology
- Technology
- Technology Blogs by SAP
- Enterprise Portal as a Content Provider to SAP BTP
Technology Blogs by SAP
Learn how to extend and personalize SAP applications. Follow the SAP technology blog for insights into SAP BTP, ABAP, SAP Analytics Cloud, SAP HANA, and more.
Turn on suggestions
Auto-suggest helps you quickly narrow down your search results by suggesting possible matches as you type.
Showing results for
Advisor
Options
- Subscribe to RSS Feed
- Mark as New
- Mark as Read
- Bookmark
- Subscribe
- Printer Friendly Page
- Report Inappropriate Content
09-14-2021
2:54 PM
Disclaimer: Note that this blog was published prior to the re-branding related to SAP Build portfolio, which was announced at SAP TechEd 2022. SAP Launchpad service and SAP Work Zone come together under the SAP Build Work Zone brand, with two editions: standard edition (formerly SAP Launchpad service) and advanced edition (formerly SAP Work Zone). You can learn more in this blog post by Aviad Rivlin. See also the announcement for SAP Build. In addition, SAP Cloud Portal service (mentioned in the blog) is a legacy product.
Starting from SAP NetWeaver Enterprise Portal 7.50 SP19, a new feature became available: EP as a Content Provider to SAP BTP (SAP Business Technology Platform).
This feature enables Enterprise Portal customers who run their business on the on-premise portal to consume their EP content through the different SAP Launchpad sites on SAP BTP, including SAP Work Zone, SAP SuccessFactors Work Zone, SAP Cloud Portal service and SAP Launchpad service. Note that in this blog post, I refer to all those services as “FLP@BTP”.
With this concept, you still have your Enterprise Portal running with all its content. In parallel, you use the SAP cloud solution of Portal Services on SAP BTP, as your central Fiori Launchpad.
The end users enter one entry point – the central Fiori Launchpad. From this cloud portal, they have EP tiles that render on the Enterprise Portal, in addition to the already existing tiles.
When is this solution relevant?
When companies still need their EP content to run their business, and this content cannot be implemented on SAP Cloud Portal.
In many cases a legacy content has tight coupling with the EP framework and infrastructure.
For example: Business packages, such as ESS (Employ Self-Service), MSS (Manager Self-Service), SAP ERP, SAP CRM and other legacy content.
This content uses different EP specific technologies and functionalities: OBN (Object Based Navigation), navigation between different iViews, WebDynpro Java and many more.
In other cases there can be custom EP applications, or just too many complex roles.
In a nutshell, this integration is done by defining the Enterprise Portal as a content provider to SAP Cloud Portal service. By defining EP as a content provider, customers can set up federation between the cloud and the on-premise SAP products. After connecting EP to the cloud, EP content can be synchronized to the cloud, and launched from the cloud directly.
You can read all about this feature in the latest formal SAP documentation:
Enterprise Portal as a Content Provider to SAP BTP
If you are interested in what’s new in each SP, then you can follow the “What’s new” documentation:
SP20: Enterprise Portal as a Content Provider to SAP Cloud Platform Launchpad and SAP Work Zone
SP21: Enterprise Portal as a Content Provider to SAP BTP
SP22: Enterprise Portal as a Content Provider to SAP BTP
Documentation clarification: starting with SAP NW 7.5 SPS 21, SAP Cloud Platform was rebranded to SAP Business Technology Platform (SAP BTP). as a result, in older SAP NW 7.5 SP20 and SP19 documentation we still use the term “SAP Cloud Platform”.
Important! For each one of the Service Packages (SPs), it is crucial to install the latest patch of EP-APPS-EXT.SCA, which includes the feature latest updates and fixes.
When implementing this feature, there are 3 main parts:
I will provide an overview about each topic and enhanced information on the parts that are purely related to the feature.
To define EP as the content provider for FLP@BTP, you first need to connect between the two platforms.
The connection is done by defining EP as a destination via the SAP BTP cockpit.
The first mandatory destination is the design-time destination, which is used to synchronize the relevant EP content in the administration environment.
The second mandatory destination is the runtime destination, which is used by the end users when launching EP tiles in their FLP@BTP cloud portal.
The third optional destination is the runtime for OData destination, which is used by the end users when rendering EP dynamic tiles in their FLP@BTP.
In my example, I am using tunneled access for the design-time destination.
The reason I am using this access type is because my SAP EP system is located on the Intranet, whereas the SAP cloud is located on the Internet.
As the Design-time requests are based on server-to-server communication, it is necessary to use a network component that will act as a reverse proxy to my EP system.
This special network component is the SAP Cloud Connector.
The tunneled access connects from the Cloud Foundry (SAP BTP), through the SAP Cloud Connector to an on-premise system – in this case EP.
Before defining the destination in the SAP BTP cockpit, we must configure the Cloud Connector, to expose EP to SAP BTP.
The Cloud Connector is located inside the on-premise network, exposing a virtual address and routes to the real EP address, such as a reverse proxy.
See an image of the landscape taken from the formal documentation:

You can find more information about the Cloud Connector in the formal documentation: Cloud Connector
The connectivity in the Cloud Connector is done by configuring HTTP Access Control to the EP system:

Here is my Cloud Connector with the new HTTP Access Control to my EP system:
*In the screenshot, I ran the check to ensure that the connection to EP was working. As a result, the column ”Check Result” has the ”Reachable” status.
Documentation about configuring HTTP Access Control in the Cloud Connector: Configure Access Control (HTTP)
After the configuration in the Cloud Connector, we can access the SAP BTP cockpit, and define a new HTTP Destination that will use our new virtual address.
The Proxy Type for tunneled access is “OnPremise”.
In the URL, add the following address, including the virtual host & port: https://myvirtualhost:50000/irj/servlet/prt/portal/prtroot/com.sap.portal.cdm.persistency.EPCDMEntit...
Documentation about creating HTTP Destinations in SAP BTP cockpit, and their authentication types: Create HTTP Destinations
In my example, I use direct access for the runtime destination.
I can use this access type because my end users can access EP from the browser (They run FLP@BTP from the company's Intranet).
It means that when an end user clicks on an EP tile from FLP@BTP, a new window/tab is opened with the EP's direct URL, and EP is rendered successfully.
With that approach I easily overcome all the obstacles described in section Other Connectivity Topics -> Same Origin Policy in this blog post.
Direct access is with the “Internet” Proxy Type.
In the URL property, the address is the real EP URL address.
In my example: https://myrealhost.mycompany.com:50000.
The runtime destination must have the following properties added, using the “New Property” button:
HTML5.DynamicDestination value: true
HTML5.PreserveHostHeader value: true
sap-platform value: EP
This destination is optional when creating a new Content Provider in the Site Manager.
You need to create this third destination if you have dynamic tiles in your exposed EP content, and your runtime destination is direct (Proxy Type "Internet").
Reason: Technically it is a browser restriction. Dynamic Tiles require sending an XHR (XMLHttpRequest) for OData requests directly from the Fiori Launchpad on BTP to EP. These requests are subject to the same origin policy.
Due to this restriction, you need an additional runtime destination with tunneled access (Proxy Type: "OnPremise"), instead of the default one, which is configured with direct access.
You can basically use the same settings as in the Design-Time Destination.
The only differences between the design-time destination and this OData runtime destination are the following:
The URL property only contains <protocol>://<virtual host>:<virtual port>.
In my example: https://myvirtualhost:50000.
Additional properties are required, as in the default Runtime Destination:
HTML5.DynamicDestination value: true
HTML5.PreserveHostHeader value: true
sap-platform value: EP
There are other topics that need to be covered when handling connectivity.
Like most customers, you probably use SSO (Single Sign-On) in your EP in order to connect to the backend systems, and many times also to EP.
In order to have this authentication ability when accessing EP content from SAP BTP, you can configure SSO between SAP BTP and EP. The configuration is described in details in the following blog post: Single Sign-On between SAP Cloud Platform Launchpad and SAP Enterprise Portal.
The first question that should be answered is whether the access to EP tiles is done through the internet or the intranet.
FLP@BTP can be accessed from the internet since it is in the cloud.
EP, however, is an on-premise installation, that by default runs in the intranet of the company. Whenever there is a need to access EP through the internet, there is a need for a reverse proxy in the DMZ that will route outside internet calls to the intranet EP address.
As EP connects to back-end systems, such as ITS, WAS, etc., those systems also need to be exposed to the internet via a reverse proxy, since they are being accessed directly through the browser.
For further details, there is a very nice blog that can shed some light on this subject:
Accessing Backend Content through the Enterprise Portal from the Internet.
As an Enterprise Portal customer, you know that one of the prerequisites when connecting from EP to back-end systems is to have the same domain for both EP and the backend. You probably have a setup of an SAP Web Dispatcher, or a different solution that best fits your network needs.
Why is it required?
When using browsers, there is no permanent link set up for HTTP to optimize the rate during the data transfer between the web server and the browser and to minimize the load of the servers. The system starts a separate connection for every transfer and the browser sends a query to the web server and waits for a response.
If web servers and the client applications of the portal run on different domains, this affects important functions of the Client Framework, including Client Eventing, Client Data Bag, Cross Navigation, Work Protect Mode or Session Management. A system landscape that covers different domains also causes problems regarding security. The security concept normally requires that all client applications in the browser are set up on the same domain. More information can be found in the following reference: SAP Note 632440 - “Domain barrier in the browser of the SAP Enterprise Portal”
This requirement is also valid for the runtime flow of the Federation Landscape between FLP@BTP and EP. Additional adjustments are required when using tunneled access as the default runtime destination.
When you use tunneled access at runtime, and click on an EP tile, a new window/tab opens with a special URL address. This URL address is provided by the BTP infrastructure, and contains the FLP@BTP domain, which is different from EP's domain.
One of the solutions is using a custom domain on SAP BTP, as described in the following documentation: Configuring Custom Domains
The specific custom domain documentation that is relevant for SAP Cloud Portal Service:
Configure a Custom Domain
Before using EP as a content provider, the relevant portal service and the content that will be exposed must be configured in EP.
When launching an EP tile from FLP@BTP, a new window or tab is opened with a lean framework page to render the corresponding iView/page.
Starting from SP20, there are 2 new Portal Desktops named “Federation Desktop” and “Federation Standards Desktop”, with new lean framework pages: “Federation Framework Page” and “Federation Standards Framework Page”, respectively.
To render the new desktops when launching EP tiles, you need to add 2 new rules to the Rule Collection:
After setting those rules, when you launch an EP tile, a new window or tab is opened with one of the paths:
<protocol>://<host>:<port>/irj/portal/federation
<protocol>://<host>:<port>/irj/portal/federation_ standards
The alias is defined according to the Default framework page document mode (quirks/standards) property in the portal service configuration (see the Portal Service Configuration section below), and the “Launch in New Window” iView/page property (NavMode – See SAP note: https://launchpad.support.sap.com/#/notes/0002054208).
*In SP19, the relative paths are: /irj/portal/interop and /irj/portal/interop_standards, and the rules that should be added to the rule collection are the following:
In the SAP NetWeaver Administrator, browse to the “Application Modules” page (<protocol>://<host>:<port>/nwa/app-modules).
In the Modules list search for the com.sap.portal.cdm.engine portal application.
In the Web Module details section, choose the EP2CDMConverterService Portal Service.
The service properties should be set according to how you use the portal:
Show role name in editor – This property defines whether to have PCD role titles or PCD role atomic IDs in the “Expose Portal Content to SAP BTP” editor. The property is useful if you have a large number of PCD roles in your portal. Since the editor lists all the portal PCD roles, it takes time to load all titles. Therefore, for performance reasons, if you have a large number of PCD roles, you should set this property to “false”.
Support Device Types – Change this property to “true” if you already configured your EP to use device types.
Setting to “true” analyzes the “Object ID of Device Group” property for each iView/page and sets the parallel EP tile on FLP@BTP with the device type- desktop/smartphone/tablet accordingly. (If the property value is empty, it will have no device type, and the tile won’t render! Just like in FLP@EP.)
Setting to “false” ignores the property, and does not set a device type for the EP tile in FLP@BTP.
Information about Device Types: Setting Device Types
Default framework page document mode (quirks/standards) – Set this property value according to the default framework page being used by your end users. For example, if you are using Fiori Framework Page (FFP@EP), then this framework page has the “standards” mode; The Classic Framework page and the old Ajax Framework Page have “quirks” mode.
This property influences the special federation framework page that is used when launching an EP tile from FLP@BTP.
See the Federation Desktop Configuration section in this blog post for information about the special framework page.
Enable Locked Group –If this property is set to “true”, during content exposure, the content is analyzed and all iViews/pages under the locked group will be mapped under the “Locked Group” in the FLP@BTP home page. Note that FLP@BTP does not support such functionality and hence the “Locked Group” is a regular group.
Set this property to “false” if you don’t use the Fiori Framework Page (FFP@EP), if you do use FFP@EP, but do not use the “locked group” functionality, or if you don’t want the locked group to be exposed to FLP@BTP, since this property influences performance
Information about locked group: Setting Up a Locked Group
List of excluded root folders (separated by ,) – PCD roles under this list of root folders don't appear in the content exposure editor.
This list of folders removes unnecessary PCD roles from the “Expose Portal Content to SAP BTP” table, making it leaner, and also prevents unnecessary roles from being exposed by mistake.
List of languages supported by the categories (separated by ,) - List of languages you support in your SAP Fiori launchpad categories. If titles are missing for some languages, the default language will be used.
Remove unnecessary or irrelevant languages from the list to improve performance.
Information about Fiori Launchpad Categories: Managing Categories in the Tile Catalog
Reminder: Don’t forget to save and restart the portal service on all instances for the changes to take effect.
Before starting to expose the PCD content, you must design it for optimal usage on FLP@BTP.
Fiori Launchpad uses groups and catalogs, business applications and roles, whereas in EP you have PCD objects (iViews, pages, roles, worksets, etc.) and categories.
The following is the mapping between EP content and Fiori Launchpad on BTP content:
FLP role -> PCD role
FLP business application (tile) -> PCD iView/page
FLP catalog -> the “Category Assignment” iView/page property
FLP group -> the “Category Assignment” + “Default App in Homepage” iView/page properties
*The value of the “Category Assignment” property is maintained in the Fiori Launchpad Categories iView. See Managing Categories in the Tile Catalog
If you haven’t configured categories in your portal, it is recommended to first configure categories, and then to relate the iViews/pages to those categories.
iViews/pages that are not related to any category, will be automatically related to the “General” category.
Warning: There is a restriction in FLP@BTP - a single role, group, or catalog cannot have more than 3000 entities.
After the content is ready for exposure, navigate in EP to System Administration -> Transport -> Content Provider to SAP BTP -> Expose Roles to SAP BTP.
(In SP19, the title is “Expose Roles to Central Launchpad”, and in SP20, the title is “Expose Roles to SAP Cloud Platform”, and the editor has less capabilities)
The editor that opens is responsible for generating CDM (Common Data Model) content from the PCD content (CDM format is used by FLP).
After choosing the relevant content in the table and clicking “Generate Content”, the content is generated and saved in the database with the following conversion (taken from the documentation):
Starting from SP21, the editor enables you to choose only part of the content inside of a role.
This ability also provides the option to check what content is visible for exposure before generating the content. This is unlike the functionality available in previous SPs, where you could only see what content is visible for exposure after the content generation operation finished, in the generation report.
Note: If you can’t find some content inside a role, check whether the content is marked as visible and whether it is under an entry point. Properties calculated during runtime such as merge, sort, and filter are not relevant.
After generating the content, a report is generated, listing all the objects and their status.
In case of a warning status, it is recommended to open the report and check which specific objects had unexpected statuses.
In SP19 and SP20, you could see all the content that was generated by looking at all the reports located under: usr\sap\TST\SYS\global\EP2CDM\EP2CDMAnalysis_*
Starting from SP21, you can see which content was already generated using the “Content Generation Status”:
In SP22, this editor allows you to delete already generated content. This deletion is sent to SAP BTP during the content synchronization. Prior to SP22, if you wanted to “delete” content from BTP, you had to change the content to invisible or delete it from the Portal Content, and then generate that content again.
(**All screenshots taken from SAP BTP might change in later releases)
If you already have a subaccount on SAP BTP, you are subscribed to the portal service in the cloud, and you created the destinations as described in phase #1 (connectivity settings), you need to create a new content provider in your Site Manager (under Provider Manager):
When you click “Save”, all content that is already generated on EP is synchronized.
For more information about the Site Manager, please read the formal documentation: Manage Content Providers (On Premise)
If during provider creation, you chose “Content Addition Mode” = “Manual addition of selected content items”, then you should first manually select what content you would like to use in your sites. This is done using “Content Manager -> Content Explorer” in the Site Manager:
For more information, refer to the documentation: Add Specific Roles to Your Subaccount Manually
After the EP roles are added to “My Content”, a role collection is created on SAP BTP for each EP role with the following format:
~<Provider ID>_<Role PCD Path with converted characters>
Example: ~ep_provider_portal_content:Test:Michal_test_role
Before using these roles in your sites, you need to assign the role collections to your SAP BTP users. For more information, refer to the documentation: Assigning Role Collections
Note: These EP roles should also be assigned to the users on the EP side.
After the users have the relevant authorizations to run the content, you can create the site and add EP content to it:
Creating a new site using the “Site Directory”:
After the site is created, you can edit the site and assign to it the required roles:
For more information about managing sites: Managing Sites
Result: When launching the EP tile from the created site, a new window or tab is opened with the relevant iView or page that was converted to this tile:
Starting from SP22, a new feature has been added for automatic synchronization of EP content on the SAP BTP side.
What does it do?
After every change of content (creation/update/deletion), a callback URL is sent to the SAP Cloud Portal service notifying about the content change.
This notification results in an automatic synchronization operation on the SAP Cloud Portal service, with no need for manual synchronization.
The feature is enabled by default.
If you want to disable it on the EP side, you can configure it via the SAP NetWeaver Administrator. Under Module List Name, enter com.sap.portal.cdm.persistency. Under Portal Service Details, set the property values for the NotificationService Portal Service as follows:
Enable Auto Sync. – If you want to disable the feature, change the property to “false”.
For information about other service properties, refer to section "Portal Services Configuration" part 3 in the following documentation: Enterprise Portal as a Content Provider to SAP BTP
Information about Automatic Updates on SAP BTP - SAP Launchpad Service side: Set Up Automatic Updates for a Content Provider - SAP Enterprise Portal
I hope that I have covered all the required information to make it easier for you to use EP as a content provider.
Starting from SAP NetWeaver Enterprise Portal 7.50 SP19, a new feature became available: EP as a Content Provider to SAP BTP (SAP Business Technology Platform).
This feature enables Enterprise Portal customers who run their business on the on-premise portal to consume their EP content through the different SAP Launchpad sites on SAP BTP, including SAP Work Zone, SAP SuccessFactors Work Zone, SAP Cloud Portal service and SAP Launchpad service. Note that in this blog post, I refer to all those services as “FLP@BTP”.
With this concept, you still have your Enterprise Portal running with all its content. In parallel, you use the SAP cloud solution of Portal Services on SAP BTP, as your central Fiori Launchpad.
The end users enter one entry point – the central Fiori Launchpad. From this cloud portal, they have EP tiles that render on the Enterprise Portal, in addition to the already existing tiles.
When is this solution relevant?
When companies still need their EP content to run their business, and this content cannot be implemented on SAP Cloud Portal.
In many cases a legacy content has tight coupling with the EP framework and infrastructure.
For example: Business packages, such as ESS (Employ Self-Service), MSS (Manager Self-Service), SAP ERP, SAP CRM and other legacy content.
This content uses different EP specific technologies and functionalities: OBN (Object Based Navigation), navigation between different iViews, WebDynpro Java and many more.
In other cases there can be custom EP applications, or just too many complex roles.
In a nutshell, this integration is done by defining the Enterprise Portal as a content provider to SAP Cloud Portal service. By defining EP as a content provider, customers can set up federation between the cloud and the on-premise SAP products. After connecting EP to the cloud, EP content can be synchronized to the cloud, and launched from the cloud directly.
You can read all about this feature in the latest formal SAP documentation:
Enterprise Portal as a Content Provider to SAP BTP
If you are interested in what’s new in each SP, then you can follow the “What’s new” documentation:
SP20: Enterprise Portal as a Content Provider to SAP Cloud Platform Launchpad and SAP Work Zone
SP21: Enterprise Portal as a Content Provider to SAP BTP
SP22: Enterprise Portal as a Content Provider to SAP BTP
Documentation clarification: starting with SAP NW 7.5 SPS 21, SAP Cloud Platform was rebranded to SAP Business Technology Platform (SAP BTP). as a result, in older SAP NW 7.5 SP20 and SP19 documentation we still use the term “SAP Cloud Platform”.
Important! For each one of the Service Packages (SPs), it is crucial to install the latest patch of EP-APPS-EXT.SCA, which includes the feature latest updates and fixes.
When implementing this feature, there are 3 main parts:
- Building the connectivity between SAP BTP and EP
- Configuring EP to expose content in the most optimal way according to EP custom usage
- EP content exposure and the consumption of this content in FLP@BTP
I will provide an overview about each topic and enhanced information on the parts that are purely related to the feature.
1. Building the Connectivity Between SAP BTP and EP
To define EP as the content provider for FLP@BTP, you first need to connect between the two platforms.
The connection is done by defining EP as a destination via the SAP BTP cockpit.
The first mandatory destination is the design-time destination, which is used to synchronize the relevant EP content in the administration environment.
The second mandatory destination is the runtime destination, which is used by the end users when launching EP tiles in their FLP@BTP cloud portal.
The third optional destination is the runtime for OData destination, which is used by the end users when rendering EP dynamic tiles in their FLP@BTP.
Design-time Destination
In my example, I am using tunneled access for the design-time destination.
The reason I am using this access type is because my SAP EP system is located on the Intranet, whereas the SAP cloud is located on the Internet.
As the Design-time requests are based on server-to-server communication, it is necessary to use a network component that will act as a reverse proxy to my EP system.
This special network component is the SAP Cloud Connector.
The tunneled access connects from the Cloud Foundry (SAP BTP), through the SAP Cloud Connector to an on-premise system – in this case EP.
Before defining the destination in the SAP BTP cockpit, we must configure the Cloud Connector, to expose EP to SAP BTP.
The Cloud Connector is located inside the on-premise network, exposing a virtual address and routes to the real EP address, such as a reverse proxy.
See an image of the landscape taken from the formal documentation:
You can find more information about the Cloud Connector in the formal documentation: Cloud Connector
The connectivity in the Cloud Connector is done by configuring HTTP Access Control to the EP system:
- In the Cloud Connector subaccount, choose “Cloud To On-Premise”.
- In the “Mapping Virtual to Internal System”, click “+” to add a new access control.
- A popup window is opened with a wizard to create the HTTP Control Access. In the first step choose “SAP Application Server Java”, and then follow the steps according to your system details. (In my example, the protocol is HTTPS and the virtual host and port are: host – myvirtualhost; port – 50000.)
- After finishing the wizard steps, in the second table “Resources Of…”, click “+”.
- In the wizard that opens, enter / for the URL path and in Access Policy, select “Path And All Sub-Paths”.
Here is my Cloud Connector with the new HTTP Access Control to my EP system:

*In the screenshot, I ran the check to ensure that the connection to EP was working. As a result, the column ”Check Result” has the ”Reachable” status.
Documentation about configuring HTTP Access Control in the Cloud Connector: Configure Access Control (HTTP)
After the configuration in the Cloud Connector, we can access the SAP BTP cockpit, and define a new HTTP Destination that will use our new virtual address.
The Proxy Type for tunneled access is “OnPremise”.
In the URL, add the following address, including the virtual host & port: https://myvirtualhost:50000/irj/servlet/prt/portal/prtroot/com.sap.portal.cdm.persistency.EPCDMEntit...

Design-Time Destination with Tunneled Access
- In my example, I use Basic Authentication. Change the authentication configuration according to your needs. For example, for SSO, you should choose “PrincipalPropagation”.
Documentation about creating HTTP Destinations in SAP BTP cockpit, and their authentication types: Create HTTP Destinations
Runtime Destination
In my example, I use direct access for the runtime destination.
I can use this access type because my end users can access EP from the browser (They run FLP@BTP from the company's Intranet).
It means that when an end user clicks on an EP tile from FLP@BTP, a new window/tab is opened with the EP's direct URL, and EP is rendered successfully.
With that approach I easily overcome all the obstacles described in section Other Connectivity Topics -> Same Origin Policy in this blog post.
Direct access is with the “Internet” Proxy Type.
In the URL property, the address is the real EP URL address.
In my example: https://myrealhost.mycompany.com:50000.
The runtime destination must have the following properties added, using the “New Property” button:
HTML5.DynamicDestination value: true
HTML5.PreserveHostHeader value: true
sap-platform value: EP
 Runtime Destination with Direct Access
- In my example, I use “NoAuthentication” because I launch EP tiles from the intranet, and hence the authentication to EP is done via a secure login client (SSO mechanism) on the desktop.
Runtime Destination for OData
This destination is optional when creating a new Content Provider in the Site Manager.
You need to create this third destination if you have dynamic tiles in your exposed EP content, and your runtime destination is direct (Proxy Type "Internet").
Reason: Technically it is a browser restriction. Dynamic Tiles require sending an XHR (XMLHttpRequest) for OData requests directly from the Fiori Launchpad on BTP to EP. These requests are subject to the same origin policy.
Due to this restriction, you need an additional runtime destination with tunneled access (Proxy Type: "OnPremise"), instead of the default one, which is configured with direct access.
You can basically use the same settings as in the Design-Time Destination.
The only differences between the design-time destination and this OData runtime destination are the following:
The URL property only contains <protocol>://<virtual host>:<virtual port>.
In my example: https://myvirtualhost:50000.
Additional properties are required, as in the default Runtime Destination:
HTML5.DynamicDestination value: true
HTML5.PreserveHostHeader value: true
sap-platform value: EP
Runtime Destination for OData with Tunneled Access
Other Connectivity Topics
There are other topics that need to be covered when handling connectivity.
Using Single Sign-On
Like most customers, you probably use SSO (Single Sign-On) in your EP in order to connect to the backend systems, and many times also to EP.
In order to have this authentication ability when accessing EP content from SAP BTP, you can configure SSO between SAP BTP and EP. The configuration is described in details in the following blog post: Single Sign-On between SAP Cloud Platform Launchpad and SAP Enterprise Portal.
Internet or Intranet?
The first question that should be answered is whether the access to EP tiles is done through the internet or the intranet.
FLP@BTP can be accessed from the internet since it is in the cloud.
EP, however, is an on-premise installation, that by default runs in the intranet of the company. Whenever there is a need to access EP through the internet, there is a need for a reverse proxy in the DMZ that will route outside internet calls to the intranet EP address.
As EP connects to back-end systems, such as ITS, WAS, etc., those systems also need to be exposed to the internet via a reverse proxy, since they are being accessed directly through the browser.
For further details, there is a very nice blog that can shed some light on this subject:
Accessing Backend Content through the Enterprise Portal from the Internet.
Same Origin Policy
As an Enterprise Portal customer, you know that one of the prerequisites when connecting from EP to back-end systems is to have the same domain for both EP and the backend. You probably have a setup of an SAP Web Dispatcher, or a different solution that best fits your network needs.
Why is it required?
When using browsers, there is no permanent link set up for HTTP to optimize the rate during the data transfer between the web server and the browser and to minimize the load of the servers. The system starts a separate connection for every transfer and the browser sends a query to the web server and waits for a response.
If web servers and the client applications of the portal run on different domains, this affects important functions of the Client Framework, including Client Eventing, Client Data Bag, Cross Navigation, Work Protect Mode or Session Management. A system landscape that covers different domains also causes problems regarding security. The security concept normally requires that all client applications in the browser are set up on the same domain. More information can be found in the following reference: SAP Note 632440 - “Domain barrier in the browser of the SAP Enterprise Portal”
This requirement is also valid for the runtime flow of the Federation Landscape between FLP@BTP and EP. Additional adjustments are required when using tunneled access as the default runtime destination.
When you use tunneled access at runtime, and click on an EP tile, a new window/tab opens with a special URL address. This URL address is provided by the BTP infrastructure, and contains the FLP@BTP domain, which is different from EP's domain.
One of the solutions is using a custom domain on SAP BTP, as described in the following documentation: Configuring Custom Domains
The specific custom domain documentation that is relevant for SAP Cloud Portal Service:
Configure a Custom Domain
2. EP Configuration
Before using EP as a content provider, the relevant portal service and the content that will be exposed must be configured in EP.
Federation Desktop Configuration
When launching an EP tile from FLP@BTP, a new window or tab is opened with a lean framework page to render the corresponding iView/page.
Starting from SP20, there are 2 new Portal Desktops named “Federation Desktop” and “Federation Standards Desktop”, with new lean framework pages: “Federation Framework Page” and “Federation Standards Framework Page”, respectively.
To render the new desktops when launching EP tiles, you need to add 2 new rules to the Rule Collection:
IF URL alias = portal/federation THEN Portal desktop = pcd:portal_content/every_user/general/federation/federation_desktop

IF URL alias = portal/federation_standards THEN Portal desktop = pcd:portal_content/every_user/general/federation_standards/federation_standards_desktop 
Adding 2 new rules to the Master Rule Collection
After setting those rules, when you launch an EP tile, a new window or tab is opened with one of the paths:
<protocol>://<host>:<port>/irj/portal/federation
<protocol>://<host>:<port>/irj/portal/federation_ standards
The alias is defined according to the Default framework page document mode (quirks/standards) property in the portal service configuration (see the Portal Service Configuration section below), and the “Launch in New Window” iView/page property (NavMode – See SAP note: https://launchpad.support.sap.com/#/notes/0002054208).
*In SP19, the relative paths are: /irj/portal/interop and /irj/portal/interop_standards, and the rules that should be added to the rule collection are the following:
IF URL alias = portal/interop THEN Portal desktop = pcd:portal_content/every_user/general/interop/interop_desktop

IF URL alias = portal/interop_standards THEN Portal desktop = pcd:portal_content/every_user/general/interop_standards/interop_standards_desktop
Portal Service Configuration
In the SAP NetWeaver Administrator, browse to the “Application Modules” page (<protocol>://<host>:<port>/nwa/app-modules).
In the Modules list search for the com.sap.portal.cdm.engine portal application.
In the Web Module details section, choose the EP2CDMConverterService Portal Service.

NWA Portal Service Configuration
The service properties should be set according to how you use the portal:
Show role name in editor – This property defines whether to have PCD role titles or PCD role atomic IDs in the “Expose Portal Content to SAP BTP” editor. The property is useful if you have a large number of PCD roles in your portal. Since the editor lists all the portal PCD roles, it takes time to load all titles. Therefore, for performance reasons, if you have a large number of PCD roles, you should set this property to “false”.
Support Device Types – Change this property to “true” if you already configured your EP to use device types.
Setting to “true” analyzes the “Object ID of Device Group” property for each iView/page and sets the parallel EP tile on FLP@BTP with the device type- desktop/smartphone/tablet accordingly. (If the property value is empty, it will have no device type, and the tile won’t render! Just like in FLP@EP.)
Setting to “false” ignores the property, and does not set a device type for the EP tile in FLP@BTP.
Information about Device Types: Setting Device Types
Default framework page document mode (quirks/standards) – Set this property value according to the default framework page being used by your end users. For example, if you are using Fiori Framework Page (FFP@EP), then this framework page has the “standards” mode; The Classic Framework page and the old Ajax Framework Page have “quirks” mode.
This property influences the special federation framework page that is used when launching an EP tile from FLP@BTP.
See the Federation Desktop Configuration section in this blog post for information about the special framework page.
Enable Locked Group –If this property is set to “true”, during content exposure, the content is analyzed and all iViews/pages under the locked group will be mapped under the “Locked Group” in the FLP@BTP home page. Note that FLP@BTP does not support such functionality and hence the “Locked Group” is a regular group.
Set this property to “false” if you don’t use the Fiori Framework Page (FFP@EP), if you do use FFP@EP, but do not use the “locked group” functionality, or if you don’t want the locked group to be exposed to FLP@BTP, since this property influences performance
Information about locked group: Setting Up a Locked Group
List of excluded root folders (separated by ,) – PCD roles under this list of root folders don't appear in the content exposure editor.
This list of folders removes unnecessary PCD roles from the “Expose Portal Content to SAP BTP” table, making it leaner, and also prevents unnecessary roles from being exposed by mistake.
List of languages supported by the categories (separated by ,) - List of languages you support in your SAP Fiori launchpad categories. If titles are missing for some languages, the default language will be used.
Remove unnecessary or irrelevant languages from the list to improve performance.
Information about Fiori Launchpad Categories: Managing Categories in the Tile Catalog
Reminder: Don’t forget to save and restart the portal service on all instances for the changes to take effect.
Portal Content Preparation
Before starting to expose the PCD content, you must design it for optimal usage on FLP@BTP.
Fiori Launchpad uses groups and catalogs, business applications and roles, whereas in EP you have PCD objects (iViews, pages, roles, worksets, etc.) and categories.
The following is the mapping between EP content and Fiori Launchpad on BTP content:
FLP role -> PCD role
FLP business application (tile) -> PCD iView/page
FLP catalog -> the “Category Assignment” iView/page property
FLP group -> the “Category Assignment” + “Default App in Homepage” iView/page properties
*The value of the “Category Assignment” property is maintained in the Fiori Launchpad Categories iView. See Managing Categories in the Tile Catalog
If you haven’t configured categories in your portal, it is recommended to first configure categories, and then to relate the iViews/pages to those categories.
iViews/pages that are not related to any category, will be automatically related to the “General” category.
Warning: There is a restriction in FLP@BTP - a single role, group, or catalog cannot have more than 3000 entities.
3. EP Content Exposure and Consumption
Operations on the Enterprise Portal side
After the content is ready for exposure, navigate in EP to System Administration -> Transport -> Content Provider to SAP BTP -> Expose Roles to SAP BTP.
(In SP19, the title is “Expose Roles to Central Launchpad”, and in SP20, the title is “Expose Roles to SAP Cloud Platform”, and the editor has less capabilities)

Expose Roles to SAP BTP editor in EP
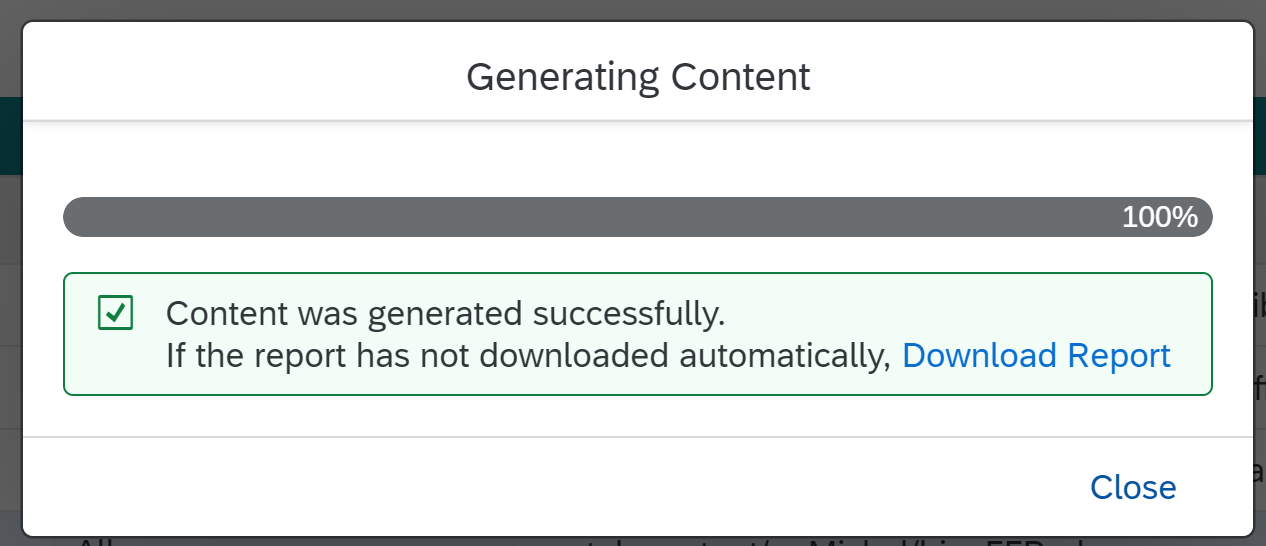
The editor that opens is responsible for generating CDM (Common Data Model) content from the PCD content (CDM format is used by FLP).
After choosing the relevant content in the table and clicking “Generate Content”, the content is generated and saved in the database with the following conversion (taken from the documentation):

Content Conversion from EP to BTP CDM format
Starting from SP21, the editor enables you to choose only part of the content inside of a role.
This ability also provides the option to check what content is visible for exposure before generating the content. This is unlike the functionality available in previous SPs, where you could only see what content is visible for exposure after the content generation operation finished, in the generation report.
Note: If you can’t find some content inside a role, check whether the content is marked as visible and whether it is under an entry point. Properties calculated during runtime such as merge, sort, and filter are not relevant.
After generating the content, a report is generated, listing all the objects and their status.
Exposure Status Popup
In case of a warning status, it is recommended to open the report and check which specific objects had unexpected statuses.
In SP19 and SP20, you could see all the content that was generated by looking at all the reports located under: usr\sap\TST\SYS\global\EP2CDM\EP2CDMAnalysis_*
Starting from SP21, you can see which content was already generated using the “Content Generation Status”:

Content Generation Status Editor starting from SP21
In SP22, this editor allows you to delete already generated content. This deletion is sent to SAP BTP during the content synchronization. Prior to SP22, if you wanted to “delete” content from BTP, you had to change the content to invisible or delete it from the Portal Content, and then generate that content again.
What about the operations on the SAP BTP side?
(**All screenshots taken from SAP BTP might change in later releases)
If you already have a subaccount on SAP BTP, you are subscribed to the portal service in the cloud, and you created the destinations as described in phase #1 (connectivity settings), you need to create a new content provider in your Site Manager (under Provider Manager):

Creating a New Content Provider in the Site Manager
When you click “Save”, all content that is already generated on EP is synchronized.
For more information about the Site Manager, please read the formal documentation: Manage Content Providers (On Premise)
If during provider creation, you chose “Content Addition Mode” = “Manual addition of selected content items”, then you should first manually select what content you would like to use in your sites. This is done using “Content Manager -> Content Explorer” in the Site Manager:

Site Manager - Content Manager
For more information, refer to the documentation: Add Specific Roles to Your Subaccount Manually
After the EP roles are added to “My Content”, a role collection is created on SAP BTP for each EP role with the following format:
~<Provider ID>_<Role PCD Path with converted characters>
Example: ~ep_provider_portal_content:Test:Michal_test_role
Before using these roles in your sites, you need to assign the role collections to your SAP BTP users. For more information, refer to the documentation: Assigning Role Collections
Note: These EP roles should also be assigned to the users on the EP side.
After the users have the relevant authorizations to run the content, you can create the site and add EP content to it:
Creating a new site using the “Site Directory”:

Creating New Site
After the site is created, you can edit the site and assign to it the required roles:
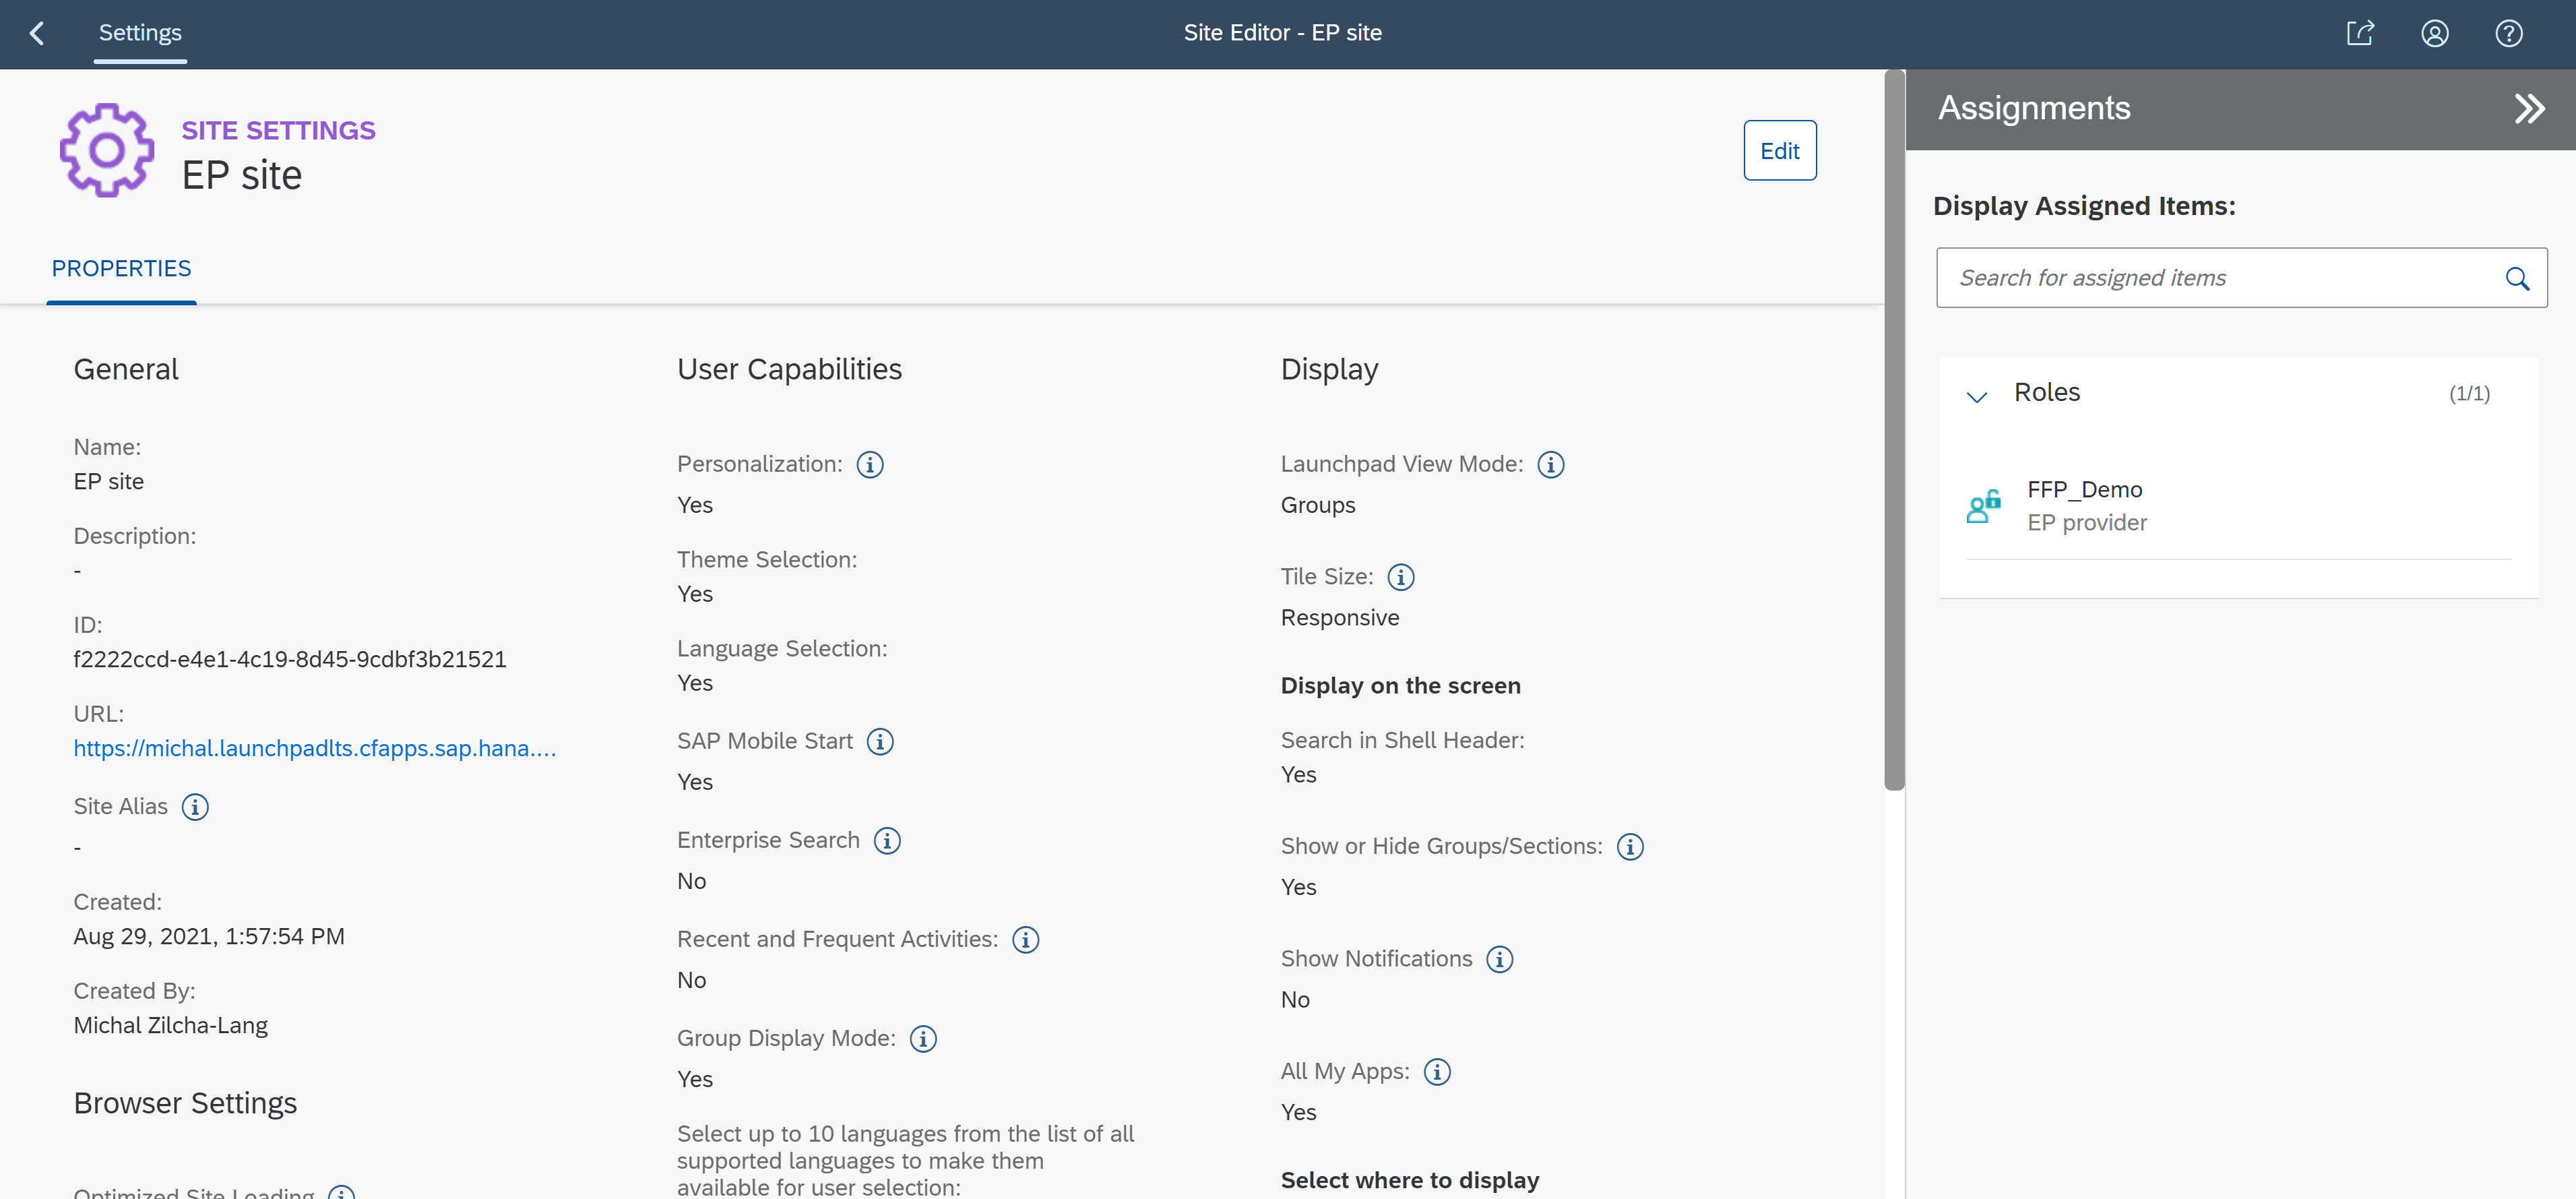
Site Manager - Site Editor
For more information about managing sites: Managing Sites
Result: When launching the EP tile from the created site, a new window or tab is opened with the relevant iView or page that was converted to this tile:

Launching an EP Tile - Opens in a new Window or Tab
Automatic Content Synchronization
Starting from SP22, a new feature has been added for automatic synchronization of EP content on the SAP BTP side.
What does it do?
After every change of content (creation/update/deletion), a callback URL is sent to the SAP Cloud Portal service notifying about the content change.
This notification results in an automatic synchronization operation on the SAP Cloud Portal service, with no need for manual synchronization.
The feature is enabled by default.
If you want to disable it on the EP side, you can configure it via the SAP NetWeaver Administrator. Under Module List Name, enter com.sap.portal.cdm.persistency. Under Portal Service Details, set the property values for the NotificationService Portal Service as follows:
Enable Auto Sync. – If you want to disable the feature, change the property to “false”.
For information about other service properties, refer to section "Portal Services Configuration" part 3 in the following documentation: Enterprise Portal as a Content Provider to SAP BTP
Information about Automatic Updates on SAP BTP - SAP Launchpad Service side: Set Up Automatic Updates for a Content Provider - SAP Enterprise Portal
I hope that I have covered all the required information to make it easier for you to use EP as a content provider.
Labels:
10 Comments
You must be a registered user to add a comment. If you've already registered, sign in. Otherwise, register and sign in.
Labels in this area
-
ABAP CDS Views - CDC (Change Data Capture)
2 -
AI
1 -
Analyze Workload Data
1 -
BTP
1 -
Business and IT Integration
2 -
Business application stu
1 -
Business Technology Platform
1 -
Business Trends
1,661 -
Business Trends
87 -
CAP
1 -
cf
1 -
Cloud Foundry
1 -
Confluent
1 -
Customer COE Basics and Fundamentals
1 -
Customer COE Latest and Greatest
3 -
Customer Data Browser app
1 -
Data Analysis Tool
1 -
data migration
1 -
data transfer
1 -
Datasphere
2 -
Event Information
1,400 -
Event Information
64 -
Expert
1 -
Expert Insights
178 -
Expert Insights
273 -
General
1 -
Google cloud
1 -
Google Next'24
1 -
Kafka
1 -
Life at SAP
784 -
Life at SAP
11 -
Migrate your Data App
1 -
MTA
1 -
Network Performance Analysis
1 -
NodeJS
1 -
PDF
1 -
POC
1 -
Product Updates
4,577 -
Product Updates
325 -
Replication Flow
1 -
RisewithSAP
1 -
SAP BTP
1 -
SAP BTP Cloud Foundry
1 -
SAP Cloud ALM
1 -
SAP Cloud Application Programming Model
1 -
SAP Datasphere
2 -
SAP S4HANA Cloud
1 -
SAP S4HANA Migration Cockpit
1 -
Technology Updates
6,886 -
Technology Updates
403 -
Workload Fluctuations
1
Related Content
- Empowering Retail Business with a Seamless Data Migration to SAP S/4HANA in Technology Blogs by Members
- 10+ ways to reshape your SAP landscape with SAP Business Technology Platform - Blog 7 in Technology Blogs by SAP
- Top Picks: Innovations Highlights from SAP Business Technology Platform (Q1/2024) in Technology Blogs by SAP
- Crystal Reports text clipping issue. PDF created by Business Obj on Red Hat Enterprise Linux (RHEL) in Technology Q&A
- Upload Excel using SAP RAP Only in Technology Blogs by Members
Top kudoed authors
| User | Count |
|---|---|
| 12 | |
| 10 | |
| 9 | |
| 7 | |
| 7 | |
| 7 | |
| 6 | |
| 6 | |
| 5 | |
| 4 |