
- SAP Community
- Products and Technology
- Technology
- Technology Blogs by SAP
- Data to Insight: Journey from modeling in SAP HANA...
Technology Blogs by SAP
Learn how to extend and personalize SAP applications. Follow the SAP technology blog for insights into SAP BTP, ABAP, SAP Analytics Cloud, SAP HANA, and more.
Turn on suggestions
Auto-suggest helps you quickly narrow down your search results by suggesting possible matches as you type.
Showing results for
Product and Topic Expert
Options
- Subscribe to RSS Feed
- Mark as New
- Mark as Read
- Bookmark
- Subscribe
- Printer Friendly Page
- Report Inappropriate Content
08-06-2021
3:04 PM
Have you ever wondered how SAP HANA Modeling is carried out in SAP HANA Cloud which runs on top of SAP Business Technology Platform? or How the different services on SAP Business Technology platform work together? If you are answer is a Yes then this blog post is for you!
This blog post is for everyone, who -
SAP Business Technology Platform:
SAP Business Technology Platform(BTP) brings together intelligent enterprise applications with database and data management, analytics, integration and extension capabilities into one platform for both cloud and hybrid environments, including hundreds of pre-built integrations for SAP and third-party applications.
SAP HANA Cloud:
SAP HANA Cloud is a fully managed in-memory cloud database as a service (DBaaS). As the cloud-based data foundation for SAP Business Technology Platform, it integrates data from across the enterprise, enabling faster decisions based on live data.
SAP Business Application Studio:
SAP Business Application Studio service offers a modern development environment tailored for efficient development of business applications for the SAP’s intelligent enterprise.
SAP Analytics Cloud (SAC):
The SAP Analytics Cloud solution combines BI, augmented and predictive analytics, and planning capabilities into one cloud environment. As the analytics layer of SAP BTP, it supports advanced analytics enterprise-wide.
We have understood the components. Let's get into our demo part now.
Login to your BTP trial subaccount, navigate to subscriptions and select SAP Business Application studio.
This will open the dev spaces that have been created. Click on Create Dev Space.
Select SAP HANA Native Application for the Dev Space type and specify a name. Click on create Dev Space button.
I have provided the name as HANADevSpace.
In a minute, the Dev Space will get created. We need to start the Dev Space which will by default be in stopped state.
After starting, the state of the Dev Space changes to Running.
Click on the Dev Space name to launch Business Application Studio.
After launching Business Application Studio, we need to login to Cloud Foundry. To login, we can click on View menu, select find command and type CF. From the available options we need to select login to CF.
Select the Cloud Foundry endpoint.
Specify your e-mail address.
Select the space from the CF Subaccount. This will set the CF Organization and Space for the application we are building. A confirmation message will be shown at the bottom of the screen.
A confirmation message will be shown at the bottom of the screen.
We will start the creation of the project now. Select File menu, choose the option project from template this will show the list of available templates to create applications using BAS.
For this scenario, we will select SAP HANA Database project and then click start.
Specify a name to the project
Leave the Basic properties as it is ( i.e module name = db).
Leave the Namesapce and Schema Name fields empty. Have the option ‘Yes’ checked for Bind the database module to a Cloud Foundry service instance property.
Leave default values in Bind to HDI Container service and then click Finish.
The SAP HANA DB project generation will start.
Now we will be able to see the project in the Explorer section of Business Application Studio.
We will start creating tables now. Click on View menu, select find command, type HANA and then select the option create SAP HANA Database Artifact.
Select the src folder in the project to create the artificat and choose the artifact type as table (hdbtable) later after that specify a name to the artifact. Here we are calling the table as customers.
Include the below code for the table definition.
COLUMN TABLE "customers" (
custid integer,
custname varchar(40),
custcountry varchar(3),
custregion varchar(4)
)

Similarly, we can create another table called sales by simply right clicking on the src folder and selecting the option new file. Provide a name to this table with the extension .hdbtable
Add the below definition to the sales.hdbtable file.
COLUMN TABLE "sales" (
sid integer,
pid varchar(5),
sdate date,
samt integer,
custid integer )
This will open SAP HANA Database Explorer in a new window where we can see the details of the HDI container.
Select the tables folder in the HDI Container to see the customers and sales tables that we have created.
Click on the customers table. This will show us the table definition.
Click on open data and then click '+' icon to insert a few sample records into the table.
Follow similar steps to insert a few sample records into sales table.
Let’s go back to our project in Business application studio to create a CUBE calculation view.
Select the src folder in the project to create the calculation view and choose the artifact type as calculation view (hdbcalculationview), later after that specify a name to the artifact and then click on create. Here we are calling the CV as customerwisesales.
Open the file customerwisesales.hdbcalculationview. We will observe the below nodes in the CV.
Add a Join node into the canvas.
Click on the '+' icon of the join node to add the tables. Search for customers and sales tables and add them to the join node.
After adding both the tables, the join node looks like the below.
Double click on the join node.
Drag the custid field of customers table onto the CUSTID field of sales table. This will add a join condition between the tables.
Navigate to the mapping tab of the join node and map the fields from both customers and sales into output columns.
Double click on the aggregation node. Move all the columns from the join node to the output columns.
Double click on semantics node in the calculation view. Select CUSTID and SID fields and mark them as attributes.
Maintain all the other semantics as needed.
Click on the deploy button to deploy the CV.
Navigate to the database explorer. Select the HDI container and choose Column views. This will show the customerwisesales CV.
Select the calculation view and click on open data. This will present the data from the CV.
We can go to Analysis tab to view the data in the form of graphs, charts etc.
Here we are seeing country wise sales in a donut chart.
Navigate to SAP BTP trial and select the dev space and then choose the instances. Here we will get to see the application instances.
Select the application that we have deployed in BAS.
Click on the keys, to see the credentials to be used for establishing live connection in SAP Analytics Cloud.
** Using the schema details one can create a generic credentials set (reporting_user) which can later be used in SAP Analytics Cloud.
Go to SAP Analytics Cloud trial, click on connections then click on the + icon to create a live data connection setting.
Select connect to Live data then choose SAP HANA.
Provide a name to HANA Live connection. Select the connection type as SAP HANA Cloud.
Provide the hostname, language key, username, password details (The details are obtained from hana application under deployed instances section of BTP trial) and click OK.
This creates the HANA Live data connection setting.
Next step is to create a Live data model based on the calculation view we have created. For this, navigate to the modeler section in SAP Analytics Cloud. Select Modeler.
Under the modeler, select the option live data model
Select the system type as SAP HANA and the connection that we have created previously.
Type first three letters of the CV in the data sources section. This will show the calculation view that we have created previously in BAS.
Select the calculation view and click OK.
This will show all the measures and attributes that are part of the model.
Click on SAVE button to save the model. Specify a name to the model and then hit save.
From the home screen of SAC, select stories and click canvas type of stories under create new.
This will open the new story. Click add data button.
Select data from a model in the next window, this will navigate us to the list models that are available.
Select the model that we have created in the previous steps.
This will bring us to the data analysis section where we can analyze the data from the model.
Select the Story tab again and add a numeric point chart to display total sales amount, bar graph to show sales amount variation with respect to products and a donut chart to show customer wise sales amount. After adding the charts, navigate to the styling section in SAC to add custom styles and colors to the charts and other objects in the story.
In conclusion, through this very simple demo, we have understood the working of SAP HANA modeling, Live data connection and story creation using SAP Analytics Cloud.
Reference tutorials for further Learning:
More information about SAP HANA Cloud on SAP BTP can found from the HANA Academy tutorials here.
Access set up of live access to SAP HANA Cloud from SAP Analysis for Microsoft Office via the SAP HANA analytics adapter video tutorial here.
Find SAC Configuration with SSO HANA Academy video tutorial here.
This blog post is for everyone, who -
- Would want to understand how Data and Analytics facets of SAP Business Technology Platform work together.
- Want to know how SAP HANA modeling is performed using SAP Business Application Studio
- Want to understand the setup of SAP HANA Cloud Live Data Connection in SAP Analytics Cloud.
- Are looking for help on creation and use of HDI containers.
- Need an overview of Story Creation in SAP Analytics Cloud.
SAP Business Technology Platform:
SAP Business Technology Platform(BTP) brings together intelligent enterprise applications with database and data management, analytics, integration and extension capabilities into one platform for both cloud and hybrid environments, including hundreds of pre-built integrations for SAP and third-party applications.
SAP HANA Cloud:
SAP HANA Cloud is a fully managed in-memory cloud database as a service (DBaaS). As the cloud-based data foundation for SAP Business Technology Platform, it integrates data from across the enterprise, enabling faster decisions based on live data.
SAP Business Application Studio:
SAP Business Application Studio service offers a modern development environment tailored for efficient development of business applications for the SAP’s intelligent enterprise.
SAP Analytics Cloud (SAC):
The SAP Analytics Cloud solution combines BI, augmented and predictive analytics, and planning capabilities into one cloud environment. As the analytics layer of SAP BTP, it supports advanced analytics enterprise-wide.
We have understood the components. Let's get into our demo part now.
Login to your BTP trial subaccount, navigate to subscriptions and select SAP Business Application studio.

This will open the dev spaces that have been created. Click on Create Dev Space.

Select SAP HANA Native Application for the Dev Space type and specify a name. Click on create Dev Space button.
I have provided the name as HANADevSpace.

In a minute, the Dev Space will get created. We need to start the Dev Space which will by default be in stopped state.

After starting, the state of the Dev Space changes to Running.

Click on the Dev Space name to launch Business Application Studio.

After launching Business Application Studio, we need to login to Cloud Foundry. To login, we can click on View menu, select find command and type CF. From the available options we need to select login to CF.

Select the Cloud Foundry endpoint.

Specify your e-mail address.

Select the space from the CF Subaccount. This will set the CF Organization and Space for the application we are building. A confirmation message will be shown at the bottom of the screen.

A confirmation message will be shown at the bottom of the screen.

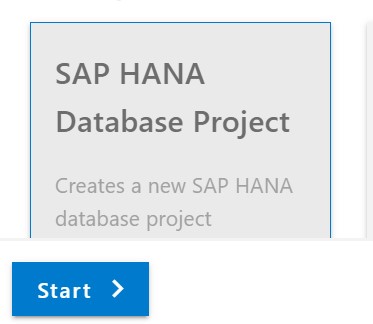
We will start the creation of the project now. Select File menu, choose the option project from template this will show the list of available templates to create applications using BAS.

For this scenario, we will select SAP HANA Database project and then click start.
Specify a name to the project

Leave the Basic properties as it is ( i.e module name = db).

Leave the Namesapce and Schema Name fields empty. Have the option ‘Yes’ checked for Bind the database module to a Cloud Foundry service instance property.

Leave default values in Bind to HDI Container service and then click Finish.

The SAP HANA DB project generation will start.

Now we will be able to see the project in the Explorer section of Business Application Studio.

We will start creating tables now. Click on View menu, select find command, type HANA and then select the option create SAP HANA Database Artifact.

Select the src folder in the project to create the artificat and choose the artifact type as table (hdbtable) later after that specify a name to the artifact. Here we are calling the table as customers.

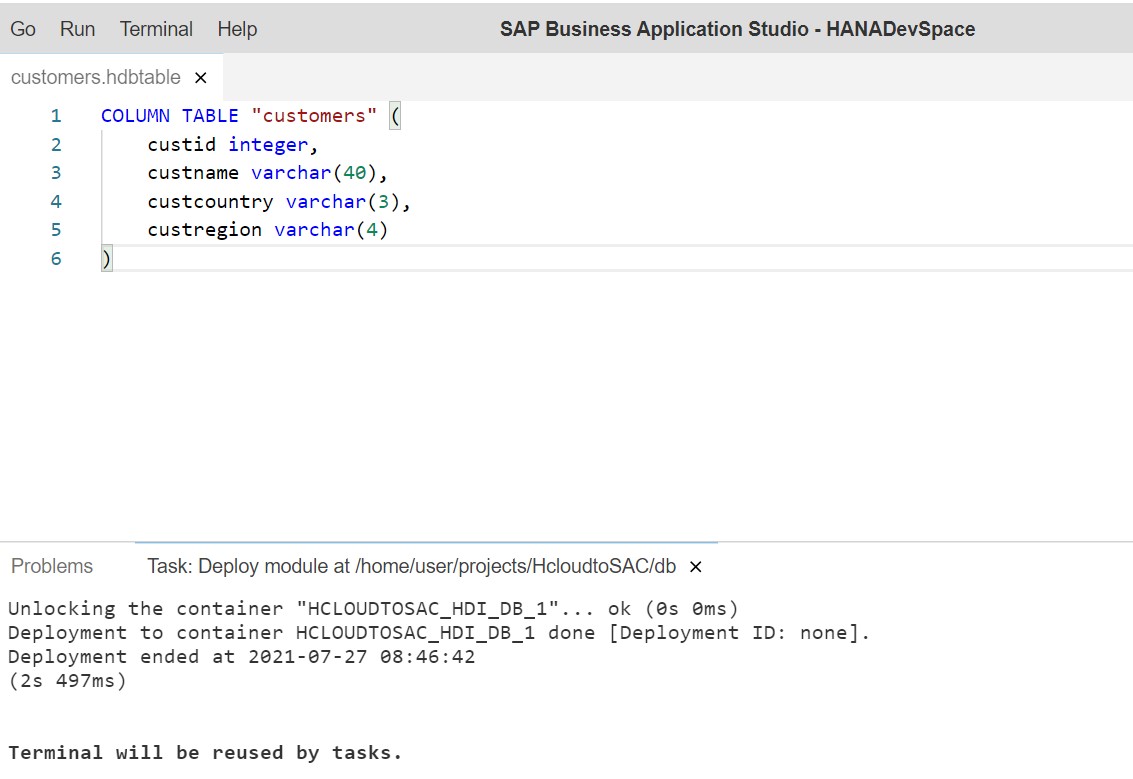
Include the below code for the table definition.
COLUMN TABLE "customers" (
custid integer,
custname varchar(40),
custcountry varchar(3),
custregion varchar(4)
)

Click on the deploy
button on the top right corner to deploy the table.
Similarly, we can create another table called sales by simply right clicking on the src folder and selecting the option new file. Provide a name to this table with the extension .hdbtable

Add the below definition to the sales.hdbtable file.
COLUMN TABLE "sales" (
sid integer,
pid varchar(5),
sdate date,
samt integer,
custid integer )

Click on deploy button on the top right corner to deploy the sales table.

Click on the SAP HANA projects in explorer then click on the database explorer icon as highlighted below

This will open SAP HANA Database Explorer in a new window where we can see the details of the HDI container.

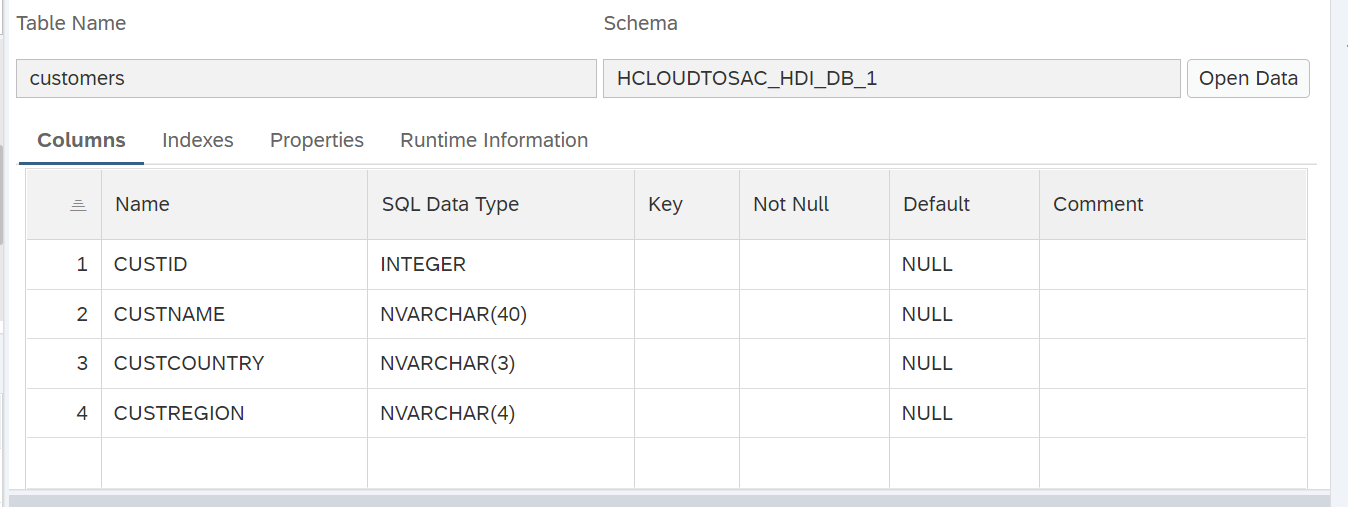
Select the tables folder in the HDI Container to see the customers and sales tables that we have created.

Click on the customers table. This will show us the table definition.
Click on open data and then click '+' icon to insert a few sample records into the table.

Follow similar steps to insert a few sample records into sales table.

Let’s go back to our project in Business application studio to create a CUBE calculation view.
Select the src folder in the project to create the calculation view and choose the artifact type as calculation view (hdbcalculationview), later after that specify a name to the artifact and then click on create. Here we are calling the CV as customerwisesales.

Open the file customerwisesales.hdbcalculationview. We will observe the below nodes in the CV.

Add a Join node into the canvas.

Click on the '+' icon of the join node to add the tables. Search for customers and sales tables and add them to the join node.

After adding both the tables, the join node looks like the below.

Double click on the join node.

Drag the custid field of customers table onto the CUSTID field of sales table. This will add a join condition between the tables.

Navigate to the mapping tab of the join node and map the fields from both customers and sales into output columns.

Link the join node to the aggregation node by using the arrow button on the join node.

Double click on the aggregation node. Move all the columns from the join node to the output columns.

Double click on semantics node in the calculation view. Select CUSTID and SID fields and mark them as attributes.

Maintain all the other semantics as needed.

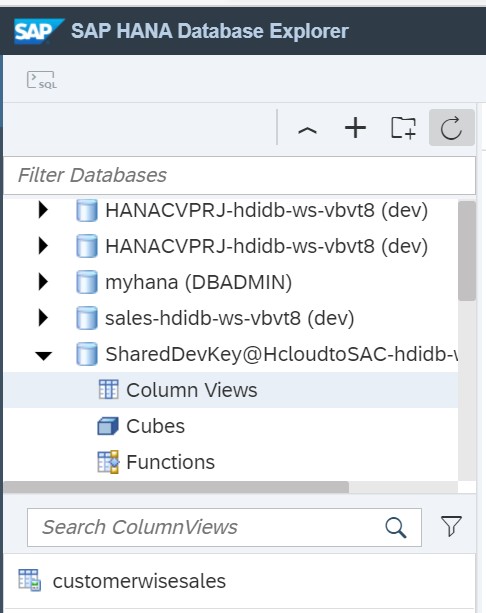
Click on the deploy button to deploy the CV.

Navigate to the database explorer. Select the HDI container and choose Column views. This will show the customerwisesales CV.
Select the calculation view and click on open data. This will present the data from the CV.

We can go to Analysis tab to view the data in the form of graphs, charts etc.
Here we are seeing country wise sales in a donut chart.

Navigate to SAP BTP trial and select the dev space and then choose the instances. Here we will get to see the application instances.

Select the application that we have deployed in BAS.

Click on the keys, to see the credentials to be used for establishing live connection in SAP Analytics Cloud.

** Using the schema details one can create a generic credentials set (reporting_user) which can later be used in SAP Analytics Cloud.
Go to SAP Analytics Cloud trial, click on connections then click on the + icon to create a live data connection setting.
Select connect to Live data then choose SAP HANA.

Provide a name to HANA Live connection. Select the connection type as SAP HANA Cloud.

Provide the hostname, language key, username, password details (The details are obtained from hana application under deployed instances section of BTP trial) and click OK.

This creates the HANA Live data connection setting.

Next step is to create a Live data model based on the calculation view we have created. For this, navigate to the modeler section in SAP Analytics Cloud. Select Modeler.

Under the modeler, select the option live data model

Select the system type as SAP HANA and the connection that we have created previously.
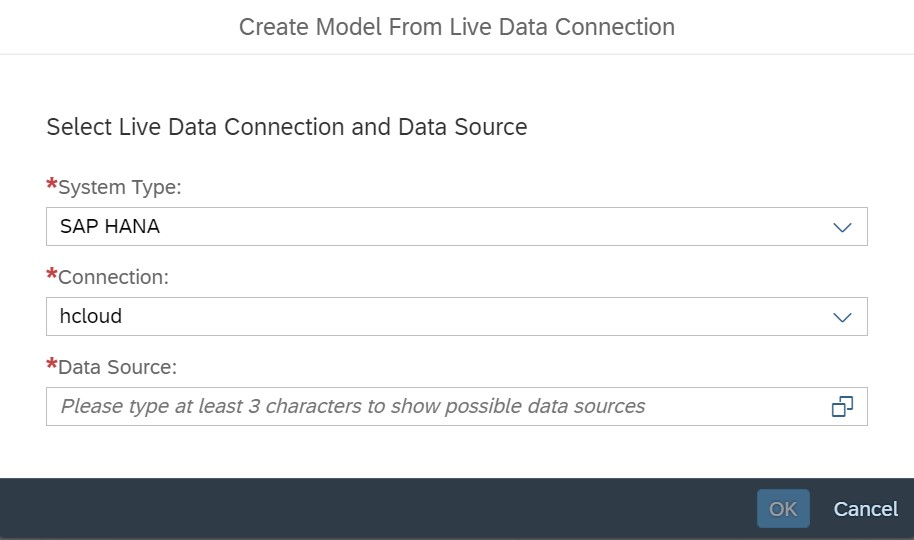
Type first three letters of the CV in the data sources section. This will show the calculation view that we have created previously in BAS.

Select the calculation view and click OK.

This will show all the measures and attributes that are part of the model.

Click on SAVE button to save the model. Specify a name to the model and then hit save.

From the home screen of SAC, select stories and click canvas type of stories under create new.

This will open the new story. Click add data button.

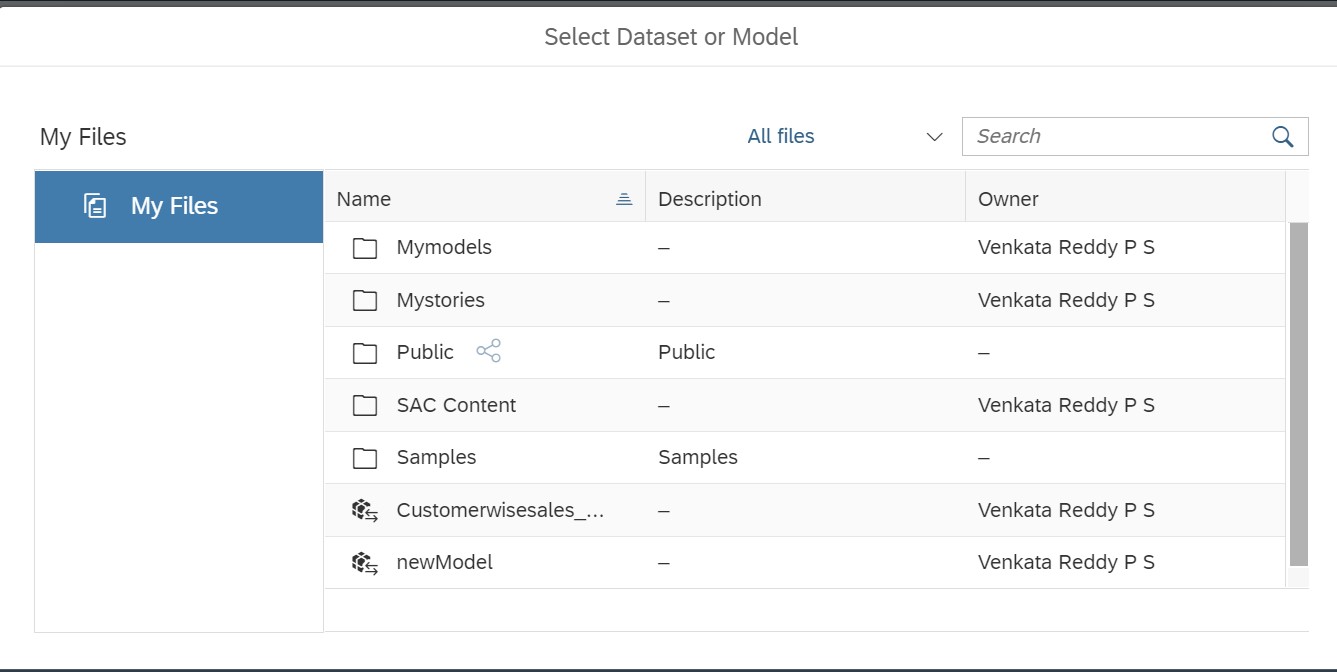
Select data from a model in the next window, this will navigate us to the list models that are available.

Select the model that we have created in the previous steps.
This will bring us to the data analysis section where we can analyze the data from the model.

Select the Story tab again and add a numeric point chart to display total sales amount, bar graph to show sales amount variation with respect to products and a donut chart to show customer wise sales amount. After adding the charts, navigate to the styling section in SAC to add custom styles and colors to the charts and other objects in the story.

In conclusion, through this very simple demo, we have understood the working of SAP HANA modeling, Live data connection and story creation using SAP Analytics Cloud.
Reference tutorials for further Learning:
More information about SAP HANA Cloud on SAP BTP can found from the HANA Academy tutorials here.
Access set up of live access to SAP HANA Cloud from SAP Analysis for Microsoft Office via the SAP HANA analytics adapter video tutorial here.
Find SAC Configuration with SSO HANA Academy video tutorial here.
- SAP Managed Tags:
- SAP Analytics Cloud,
- SAP Data Intelligence,
- SAP HANA Cloud
Labels:
10 Comments
You must be a registered user to add a comment. If you've already registered, sign in. Otherwise, register and sign in.
Labels in this area
-
ABAP CDS Views - CDC (Change Data Capture)
2 -
AI
1 -
Analyze Workload Data
1 -
BTP
1 -
Business and IT Integration
2 -
Business application stu
1 -
Business Technology Platform
1 -
Business Trends
1,661 -
Business Trends
88 -
CAP
1 -
cf
1 -
Cloud Foundry
1 -
Confluent
1 -
Customer COE Basics and Fundamentals
1 -
Customer COE Latest and Greatest
3 -
Customer Data Browser app
1 -
Data Analysis Tool
1 -
data migration
1 -
data transfer
1 -
Datasphere
2 -
Event Information
1,400 -
Event Information
65 -
Expert
1 -
Expert Insights
178 -
Expert Insights
280 -
General
1 -
Google cloud
1 -
Google Next'24
1 -
Kafka
1 -
Life at SAP
784 -
Life at SAP
11 -
Migrate your Data App
1 -
MTA
1 -
Network Performance Analysis
1 -
NodeJS
1 -
PDF
1 -
POC
1 -
Product Updates
4,577 -
Product Updates
330 -
Replication Flow
1 -
RisewithSAP
1 -
SAP BTP
1 -
SAP BTP Cloud Foundry
1 -
SAP Cloud ALM
1 -
SAP Cloud Application Programming Model
1 -
SAP Datasphere
2 -
SAP S4HANA Cloud
1 -
SAP S4HANA Migration Cockpit
1 -
Technology Updates
6,886 -
Technology Updates
408 -
Workload Fluctuations
1
Related Content
- 10+ ways to reshape your SAP landscape with SAP Business Technology Platform – Blog 4 in Technology Blogs by SAP
- Deep dive into Q4 2023, What’s New in SAP Cloud ALM for Implementation Blog Series in Technology Blogs by SAP
- ML- Linear Regression definition , implementation scenarios in HANA in Technology Blogs by Members
- SAP Sustainability Footprint Management: Q1-24 Updates & Highlights in Technology Blogs by SAP
- SAP Datasphere: Using Variable derivation for currency conversion measures within Analytic Model in Technology Blogs by SAP
Top kudoed authors
| User | Count |
|---|---|
| 13 | |
| 10 | |
| 10 | |
| 7 | |
| 6 | |
| 5 | |
| 5 | |
| 5 | |
| 4 | |
| 4 |