
- SAP Community
- Products and Technology
- Technology
- Technology Blogs by SAP
- Using SDI FileAdapter to write to Azure file share
Technology Blogs by SAP
Learn how to extend and personalize SAP applications. Follow the SAP technology blog for insights into SAP BTP, ABAP, SAP Analytics Cloud, SAP HANA, and more.
Turn on suggestions
Auto-suggest helps you quickly narrow down your search results by suggesting possible matches as you type.
Showing results for
Advisor
Options
- Subscribe to RSS Feed
- Mark as New
- Mark as Read
- Bookmark
- Subscribe
- Printer Friendly Page
- Report Inappropriate Content
06-09-2021
9:46 AM
In this blog we will create an Azure file share and use it as a destination for SAP SDI FileAdapter.
Let's start by creating the Azure file share. Login to the Azure portal and create a premium storage account as depicted in the below screenshot
Once the storage account is created, create a file share by clicking on the + sign as shown in the below screenshot
Click on the file share once it is created and then click connect . Thereafter choose Windows and copy the command
Now we will create a symbolic link to the azure mount under DP Agent installation directory (C:\usr\sap\dataprovagent) using the mklink command
Note that the directory azshare shoud not exist before you run the below command from a command prompt as an adminstrator
Once the softlink is created, you will see a folder as shown below
Now we will create a folder data inside the softlink and place a simple csv file (sample.txt) there. Here are the contents of the csv file.
Next we need to create a cfg file for this csv using the createfileformat.bat utility located in C:\usr\sap\dataprovagent\agentutils using the sample command as below
This would result in a cfg file in the same directory as the txt file
Here is the content of the cfg file .
Now we are all set to start configuring the fileadapter in DP Agent. To do that, run the DP agent configuration tool as an administrator. Click connect to HANA and provide the HANA credentials to connect the DP Agent to HANA
Once DP Agent is connected to HANA, scroll down the list of Adapters and find FIleAdapter. click on it and then click Register Adapter.You should see both , Deployed? and Registered with HANA? as Yes.
Once the FileAdapter is setup, we will login to the WebIDE using a url similar to the following
https://myserver.abc.def.corp:4300/sap/hana/ide/
This will log you into the WebIDE with an interface like below screenshot
Click on Catalog and then expand Provisioning folder. Create a new remote source by right clicking Remote Sources. Choose FIleAdpter as the Adapter for this remote source. You will need to specify the Root Directory and the directory of the file format definitions exactly same as the one where you placed the sampledata.txt and sampledata.txt.cfg.
Note that password to be entered is the Token that you provided while configuring the FileAdapter in the DP Agent Configuration.
Once the remote source is created, you can click on Test Connection to test the connection. Now we will create a flowgraph to output the contents of a HANA table as a csv to the Azure mount.
We have a table in HANA named MATERIAL_CDC with the below structure.
Click on the Editor in WebIDE and right click on the package to create a new flowgraph as shown in the below screenshot
Drag a data source from left pane into canvas. A pop up will ask you to choose the source. Navigate to your source table and choose it.
Drag a filter and join the filter to the Data Source.
Use the filter to transform char to nvarchar and nclob to nvarchar. Click back button located on top right once done.
Finally drag a Template file to the flow graph and join the filter to template file.
Then click on the Template file to configure the settings for the template file. Provide the inputs in the General tab as shown in the below screenshot.
Next click on the Parameters tab and configure it as per the below screenshot. Note that you must provide the Force Directory Pattern to be the same location as the one where the cfg file is located. Also if you include a % in the Force Filename Pattern, it will create the files with a timestamp.
Save and execute the flow graph. You will see the data from the MATERIAL_CDC table in a csv file on your local Azure file share
You can login to your Azure portal and check the file there as well. It will be present under the file share as shown in below screenshot.
SAP HANA SDI FileAdapter can be easily configured to write data to Azure file share. The FileAdapter has the capability to write to a shared directory. In this blog ,I have simply mounted the Azure file share on the Windows machine running DP Agent as a shared directory. Do note that the file share has to be located in the same directory or a subdirectory of the DP Agent root directory.
Finally do note that these steps are valid for linux environment as well. You can mount the Azure file share on linux under the DP Agent root directory if your DP Agent is running on the linux platform.
Prerequisites
- Azure Account
- SAP HANA Data Provisioning Agent server enabled
- SAP HANA Data Provisioning Agent installed
Let's start by creating the Azure file share. Login to the Azure portal and create a premium storage account as depicted in the below screenshot

Create Storage Account
Once the storage account is created, create a file share by clicking on the + sign as shown in the below screenshot

Create a File Share in the storage account
Click on the file share once it is created and then click connect . Thereafter choose Windows and copy the command

Get the command to connect to the file share
Run the command from a powershell session on the Windows machine where DP Agent is running. That would mount the file share persistently as shown in the below screenshot.

Mount the Azure file share to DP agent host machine
Now we will create a symbolic link to the azure mount under DP Agent installation directory (C:\usr\sap\dataprovagent) using the mklink command
Note that the directory azshare shoud not exist before you run the below command from a command prompt as an adminstrator
C:\Windows\system32>mklink /d "c:\usr\sap\dataprovagent\azshare" \\p****.file.core.windows.net\myshare\
Create symbolic link using mklink command
Once the softlink is created, you will see a folder as shown below

softlink folder under c:/usr/sap/dataprovagent
Now we will create a folder data inside the softlink and place a simple csv file (sample.txt) there. Here are the contents of the csv file.

Contents of sampledata.txt file
Next we need to create a cfg file for this csv using the createfileformat.bat utility located in C:\usr\sap\dataprovagent\agentutils using the sample command as below
createfileformat.bat -file c:\usr\sap\dataprovagent\azshare\data\sampledata.txt -cfg c:\usr\sap\dataprovagent\azshare\data\This would result in a cfg file in the same directory as the txt file

sample csv and cfg file
Here is the content of the cfg file .

contents of the samples.txt.cfg
Now we are all set to start configuring the fileadapter in DP Agent. To do that, run the DP agent configuration tool as an administrator. Click connect to HANA and provide the HANA credentials to connect the DP Agent to HANA

Connect DP Agent to HANA
Once DP Agent is connected to HANA, scroll down the list of Adapters and find FIleAdapter. click on it and then click Register Adapter.You should see both , Deployed? and Registered with HANA? as Yes.

File Adapter deployed and registered with HANA
Click on top left Configure tab and configure the FileAdapter as shown in the below screenshot. Provide an AccessToken which will be used as a password later on.

FileAdapter configuration
Once the FileAdapter is setup, we will login to the WebIDE using a url similar to the following
https://myserver.abc.def.corp:4300/sap/hana/ide/
This will log you into the WebIDE with an interface like below screenshot

SAP HANA WebIDE
Click on Catalog and then expand Provisioning folder. Create a new remote source by right clicking Remote Sources. Choose FIleAdpter as the Adapter for this remote source. You will need to specify the Root Directory and the directory of the file format definitions exactly same as the one where you placed the sampledata.txt and sampledata.txt.cfg.
Note that password to be entered is the Token that you provided while configuring the FileAdapter in the DP Agent Configuration.

Remote source for FileAdapter
Once the remote source is created, you can click on Test Connection to test the connection. Now we will create a flowgraph to output the contents of a HANA table as a csv to the Azure mount.
We have a table in HANA named MATERIAL_CDC with the below structure.
Create table MATERIAL_CDC(

MEINS CHAR(3),

ATBEZ CHAR(30),

ATNAM CHAR(30),

ATWRT CHAR(70),

ATZHL INT,

ATWTB CHAR(70),

KSCHL CHAR(40),

CLASS CHAR(18),

STATU CHAR(1),

KLART CHAR(3),

CREATEDTIMESTAMP CHAR(50,

ATERF CHAR(1),

CLINT INT,

ATINN INT,

ATZIS INT,

OBJEK CHAR(90),

LONGTEXT NCLOB,

MATKL CHAR(9),

MTART CHAR(4),

MAKTX CHAR(40),

SOURCESYSTEMID CHAR(2),

UPDATEDTIMESTAMP CHAR(50))
Click on the Editor in WebIDE and right click on the package to create a new flowgraph as shown in the below screenshot

Create a flow graph
Drag a data source from left pane into canvas. A pop up will ask you to choose the source. Navigate to your source table and choose it.

Choose data source of the flow graph
Drag a filter and join the filter to the Data Source.

Add a filter to the flow graph
Use the filter to transform char to nvarchar and nclob to nvarchar. Click back button located on top right once done.
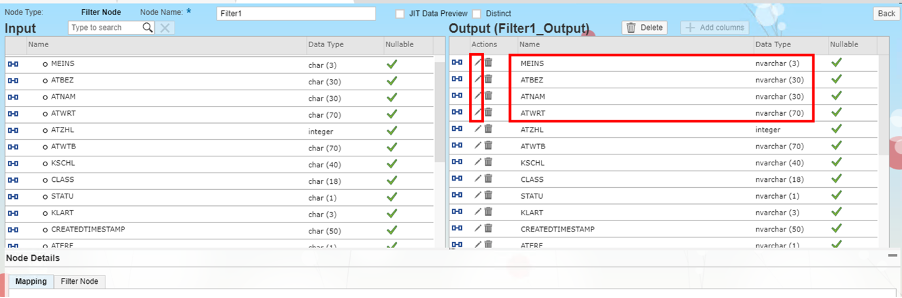
Filter transformation
Finally drag a Template file to the flow graph and join the filter to template file.

Add Template File to flow graph
Then click on the Template file to configure the settings for the template file. Provide the inputs in the General tab as shown in the below screenshot.

General tab configuration
Next click on the Parameters tab and configure it as per the below screenshot. Note that you must provide the Force Directory Pattern to be the same location as the one where the cfg file is located. Also if you include a % in the Force Filename Pattern, it will create the files with a timestamp.

Parameters tab configuration
Save and execute the flow graph. You will see the data from the MATERIAL_CDC table in a csv file on your local Azure file share

csv file is generated at local DP Agent machine
You can login to your Azure portal and check the file there as well. It will be present under the file share as shown in below screenshot.

Generated CSV in Azure file share
Conclusion
SAP HANA SDI FileAdapter can be easily configured to write data to Azure file share. The FileAdapter has the capability to write to a shared directory. In this blog ,I have simply mounted the Azure file share on the Windows machine running DP Agent as a shared directory. Do note that the file share has to be located in the same directory or a subdirectory of the DP Agent root directory.
Finally do note that these steps are valid for linux environment as well. You can mount the Azure file share on linux under the DP Agent root directory if your DP Agent is running on the linux platform.
- SAP Managed Tags:
- SAP HANA,
- SAP HANA smart data integration
Labels:
You must be a registered user to add a comment. If you've already registered, sign in. Otherwise, register and sign in.
Labels in this area
-
ABAP CDS Views - CDC (Change Data Capture)
2 -
AI
1 -
Analyze Workload Data
1 -
BTP
1 -
Business and IT Integration
2 -
Business application stu
1 -
Business Technology Platform
1 -
Business Trends
1,658 -
Business Trends
92 -
CAP
1 -
cf
1 -
Cloud Foundry
1 -
Confluent
1 -
Customer COE Basics and Fundamentals
1 -
Customer COE Latest and Greatest
3 -
Customer Data Browser app
1 -
Data Analysis Tool
1 -
data migration
1 -
data transfer
1 -
Datasphere
2 -
Event Information
1,400 -
Event Information
66 -
Expert
1 -
Expert Insights
177 -
Expert Insights
295 -
General
1 -
Google cloud
1 -
Google Next'24
1 -
Kafka
1 -
Life at SAP
780 -
Life at SAP
13 -
Migrate your Data App
1 -
MTA
1 -
Network Performance Analysis
1 -
NodeJS
1 -
PDF
1 -
POC
1 -
Product Updates
4,577 -
Product Updates
341 -
Replication Flow
1 -
RisewithSAP
1 -
SAP BTP
1 -
SAP BTP Cloud Foundry
1 -
SAP Cloud ALM
1 -
SAP Cloud Application Programming Model
1 -
SAP Datasphere
2 -
SAP S4HANA Cloud
1 -
SAP S4HANA Migration Cockpit
1 -
Technology Updates
6,873 -
Technology Updates
419 -
Workload Fluctuations
1
Related Content
- IoT - Ultimate Data Cyber Security - with Enterprise Blockchain and SAP BTP 🚀 in Technology Blogs by Members
- Activation of IAS in Technology Q&A
- Top Picks: Innovations Highlights from SAP Business Technology Platform (Q1/2024) in Technology Blogs by SAP
- Long Awaited Transformation for Your Credentials in Technology Blogs by Members
- Enhancing S/4HANA with SAP HANA Cloud Vector Store and GenAI in Technology Blogs by SAP
Top kudoed authors
| User | Count |
|---|---|
| 36 | |
| 25 | |
| 17 | |
| 13 | |
| 8 | |
| 7 | |
| 6 | |
| 6 | |
| 6 | |
| 6 |