
- SAP Community
- Products and Technology
- Technology
- Technology Blogs by SAP
- How to integrate SAP Conversational AI web chat cl...
Technology Blogs by SAP
Learn how to extend and personalize SAP applications. Follow the SAP technology blog for insights into SAP BTP, ABAP, SAP Analytics Cloud, SAP HANA, and more.
Turn on suggestions
Auto-suggest helps you quickly narrow down your search results by suggesting possible matches as you type.
Showing results for
Advisor
Options
- Subscribe to RSS Feed
- Mark as New
- Mark as Read
- Bookmark
- Subscribe
- Printer Friendly Page
- Report Inappropriate Content
04-23-2021
11:05 PM
Digital assistants play a crucial role in the UX of every application. They are everywhere! Is not that all applications should have one, just make sure they add its value to the whole. Their massive adoption is a clear sign of their importance in terms of UX. We are quite far from achieving a KITT, like in Knight Rider, but people are adopting them more and more.
Personally, I use Alexa at home quite a lot, Google assistant sometimes, and the voice assistant in my car too, although rarely.
I’m sure you already know SAP Conversational AI, SAP’s offering to develop your own chatbots. It offers many standard channels to choose from, like the webchat, the SAP web client, Amazon Alexa, Facebook Messenger and Telegram, among others. A lot of options that can suite your needs. You can even, of course, implement one of your own. In this blog post I want to show you how you can integrate the web chat client into an MDK app. It’s clear that this functionality wont work offline, as an MDK app can, but is understandable and useful despite of that. Many popular assistants have that limitation too.
In this blog post I’m not going to go over the process of creating a chatbot and the basics of MDK. I intend this to be a short reading with the specific goal to integrate the two parts.
If you want to understand these topics better before you go on, you can go through these resources:
SAP Conversational AI Blogs
SAP Mobile Services, Mobile Development Kit
Specially this tutorial is key as I was based on it to write this post.
https://developers.sap.com/tutorials/cp-mobile-dev-kit-slider-extension.html
The idea is to create a custom control for the MDK app, using the metadata approach. This control will implement an embedded browser that will display a webpage with the web chat client in it. I have only did it for Android, using the WebView control, but it’s similarly achievable in iOS with the WKWebView. Hopefully I can soon update the post and include these devices too.
So, first of all, you need to build a web page and place the script that will include the web chat client. For example, this is the way I did it, just because I was reusing something I did previously. You can let go your imagination and make it the way you like it.
And it looks like this:
Now you need to make your webpage accessible from the MDK app and I found 2 ways to do it. One alternative is to host it publicly and access it with the url. Or else you can include it and ship it as a resource in your app. For this, I couldn’t make it work using the metadata. Apparently, there is a folder in the metadata definitions to store resources, but not html files. If I’m wrong, I appreciate you let me know so I can fix it in here. But there is other way by building your own MDK client and placing your web page inside. So we are going to do that.
I thought it was a nice trick and I hope you enjoy trying it on your own. So easily, you can extend the reach of the web chat client making it available to MDK apps.
Your feedback is highly appreciated!

KITT: “Michael are you sure you want to do that?”
Personally, I use Alexa at home quite a lot, Google assistant sometimes, and the voice assistant in my car too, although rarely.
I’m sure you already know SAP Conversational AI, SAP’s offering to develop your own chatbots. It offers many standard channels to choose from, like the webchat, the SAP web client, Amazon Alexa, Facebook Messenger and Telegram, among others. A lot of options that can suite your needs. You can even, of course, implement one of your own. In this blog post I want to show you how you can integrate the web chat client into an MDK app. It’s clear that this functionality wont work offline, as an MDK app can, but is understandable and useful despite of that. Many popular assistants have that limitation too.
In this blog post I’m not going to go over the process of creating a chatbot and the basics of MDK. I intend this to be a short reading with the specific goal to integrate the two parts.
If you want to understand these topics better before you go on, you can go through these resources:
SAP Conversational AI Blogs
SAP Mobile Services, Mobile Development Kit
Specially this tutorial is key as I was based on it to write this post.
https://developers.sap.com/tutorials/cp-mobile-dev-kit-slider-extension.html
Prerequisites
- You need a chatbot with the web chat channel implemented
- A BTP (trial) account with mobile services and an MDK app created
- The MDK SDK correctly installed
Overview
The idea is to create a custom control for the MDK app, using the metadata approach. This control will implement an embedded browser that will display a webpage with the web chat client in it. I have only did it for Android, using the WebView control, but it’s similarly achievable in iOS with the WKWebView. Hopefully I can soon update the post and include these devices too.
So, first of all, you need to build a web page and place the script that will include the web chat client. For example, this is the way I did it, just because I was reusing something I did previously. You can let go your imagination and make it the way you like it.
<!DOCTYPE html>

<html>


<head>

<style>

body {

    background-image: url(./assets/Athenas.jpeg);

    background-repeat: no-repeat;

    background-size: cover;

}

</style>

</head>


<body background-image="./assets/Athenas.jpeg">

    <!-- // Pericles -->

<script src="https://cdn.cai.tools.sap/webchat/webchat.js" channelId="<channelId>" token="<token>" id="<id>"> </script>

    <meta name="viewport" content="width=device-width">

</body>


</html>
And it looks like this:

Simple webpage
Now you need to make your webpage accessible from the MDK app and I found 2 ways to do it. One alternative is to host it publicly and access it with the url. Or else you can include it and ship it as a resource in your app. For this, I couldn’t make it work using the metadata. Apparently, there is a folder in the metadata definitions to store resources, but not html files. If I’m wrong, I appreciate you let me know so I can fix it in here. But there is other way by building your own MDK client and placing your web page inside. So we are going to do that.
Steps to implement the metadata
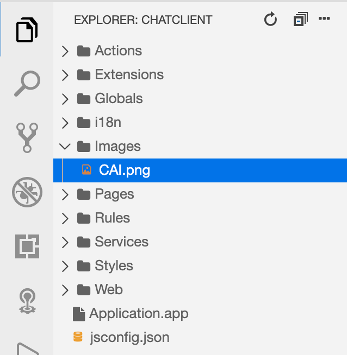
- Open the Business Application Studio, create the Dev Space and a new project using the MDK template.

- Upload the image that will represent your custom control. In my case I’m using this one.

- Now register the extension control

- Select template New and Register Metadata Extension Control

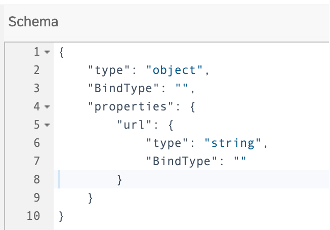
- For the schema use this json
{
"type": "object",
"BindType": "",
"properties": {
"url": {
"type": "string",
"BindType": ""
}
}
}

- Now edit the Main.page to place your new custom control. Drag and drop it in the available area
 Set the Height to something like 580In the extension properties you can set the location of your webpage in the network
url: https://etc. - Fill the code in Extensions/chatClientModule/controls/chatClientExtension.ts
import * as app from 'tns-core-modules/application';
import { IControl } from 'mdk-core/controls/IControl';
import { BaseObservable } from 'mdk-core/observables/BaseObservable';
export class chatClientClass extends IControl {
private _observable: BaseObservable;
private _webView: any;
private _url: string;
public initialize(props: any): any {
super.initialize(props);
if (this.definition().data.ExtensionProperties.url) {
this._url = this.definition().data.ExtensionProperties.url;
} else {
this._url = "file:///android_asset/webchat.html";
}
if (app.android) {
this._webView = new android.webkit.WebView(this.androidContext());
this._webView.getSettings().setJavaScriptEnabled(true);
this._webView.getSettings().setAllowFileAccessFromFileURLs(true);
this._webView.getSettings().setAllowUniversalAccessFromFileURLs(true);
this._webView.getSettings().setAllowFileAccess(true);
this._webView.getSettings().setAllowContentAccess(true);
this._webView.loadUrl(this._url);
app.android.on(app.AndroidApplication.activityPausedEvent, this.onActivityPaused, this);
app.android.on(app.AndroidApplication.activityResumedEvent, this.onActivityResumed, this);
app.android.on(app.AndroidApplication.saveActivityStateEvent, this.onActivitySaveInstanceState, this);
app.android.on(app.AndroidApplication.activityDestroyedEvent, this.onActivityDestroyed, this);
var that = this;
}
}
private onActivityPaused(args) {
console.log("onActivityPaused()");
if (!this._webView || this != args.activity) return;
this._webView.onPause();
}
private onActivityResumed(args) {
console.log("onActivityResumed()");
if (!this._webView || this != args.activity) return;
this._webView.onResume();
}
private onActivitySaveInstanceState(args) {
console.log("onActivitySaveInstanceState()");
if (!this._webView || this != args.activity) return;
this._webView.onSaveInstanceState(args.bundle);
}
private onActivityDestroyed(args) {
console.log("onActivityDestroyed()");
if (!this._webView || this != args.activity) return;
this._webView.onDestroy();
}
public view() {
if (app.android) {
return this._webView;
}
}
public viewIsNative() {
return true;
}
public observable() {
if (!this._observable) {
this._observable = new BaseObservable(this, this.definition(), this.page());
}
return this._observable;
}
public setContainer(container: IControl) {
// do nothing
}
public setValue(value: any, notify: boolean, isTextValue?: boolean): Promise<any> {
// do nothing
return Promise.resolve();
}
}
In your import function, if you see errors related to tns-core-modules or mdk-core, you can ignore them. There is currently no reference of such libraries in the MDK editor.
The way it’s implemented, the web view is going to take the url from the extension properties if it’s set. If not it will use the one bundled with the client. - Finally, deploy it to your app in mobile services.

Steps to build the MDK client
- I assume you already have your SDK installed, so look for the project template and paste your web page files in the respective resources folder.

- Set the respective values in the branding settings and build the client. If everything worked fine you will see your nice web page display in the phone.


Conclusion
I thought it was a nice trick and I hope you enjoy trying it on your own. So easily, you can extend the reach of the web chat client making it available to MDK apps.
Your feedback is highly appreciated!
- SAP Managed Tags:
- SAP Conversational AI,
- SAP Mobile Services,
- mobile development kit client
Labels:
7 Comments
You must be a registered user to add a comment. If you've already registered, sign in. Otherwise, register and sign in.
Labels in this area
-
ABAP CDS Views - CDC (Change Data Capture)
2 -
AI
1 -
Analyze Workload Data
1 -
BTP
1 -
Business and IT Integration
2 -
Business application stu
1 -
Business Technology Platform
1 -
Business Trends
1,658 -
Business Trends
91 -
CAP
1 -
cf
1 -
Cloud Foundry
1 -
Confluent
1 -
Customer COE Basics and Fundamentals
1 -
Customer COE Latest and Greatest
3 -
Customer Data Browser app
1 -
Data Analysis Tool
1 -
data migration
1 -
data transfer
1 -
Datasphere
2 -
Event Information
1,400 -
Event Information
66 -
Expert
1 -
Expert Insights
177 -
Expert Insights
293 -
General
1 -
Google cloud
1 -
Google Next'24
1 -
Kafka
1 -
Life at SAP
780 -
Life at SAP
13 -
Migrate your Data App
1 -
MTA
1 -
Network Performance Analysis
1 -
NodeJS
1 -
PDF
1 -
POC
1 -
Product Updates
4,577 -
Product Updates
340 -
Replication Flow
1 -
RisewithSAP
1 -
SAP BTP
1 -
SAP BTP Cloud Foundry
1 -
SAP Cloud ALM
1 -
SAP Cloud Application Programming Model
1 -
SAP Datasphere
2 -
SAP S4HANA Cloud
1 -
SAP S4HANA Migration Cockpit
1 -
Technology Updates
6,873 -
Technology Updates
417 -
Workload Fluctuations
1
Related Content
- Consuming SAP with SAP Build Apps - Connectivity options for low-code development - part 2 in Technology Blogs by SAP
- SAP Secure Login Service for SAP GUI Now Supports Custom Certificate Authorities on AWS in Technology Blogs by SAP
- New webcast series on “SAP BTP DevOps and Observability in Action” in Technology Blogs by SAP
- SAP Datasphere - Space, Data Integration, and Data Modeling Best Practices in Technology Blogs by SAP
- Exploring SAP Cloud ALM and its functionalities in Technology Blogs by Members
Top kudoed authors
| User | Count |
|---|---|
| 34 | |
| 25 | |
| 13 | |
| 7 | |
| 7 | |
| 6 | |
| 6 | |
| 6 | |
| 5 | |
| 4 |