Adaptive Server Enterprise became a new database offering within SAP HANA Cloud some days ago. This enables you to use ASE, Data Lake and HANA database services side by side in any kind of combinations for your applications - while the databases are fully operated by SAP in the SAP HANA Cloud.
In this blog post I will show step by step how to provision an SAP HANA Cloud, adaptive server enterprise database.

Prerequisite: You need to have access to the SAP BTP Cockpit and a valid Subaccount / Space.
How to start?
We start with our activities in the SAP BTP Cockpit. Go to your Subaccount, then go into your Space. From there you can access the SAP HANA Cloud area.

Click on 'Create' and you will find two new entries in the drop-down menu. This is 'Adaptive Server Enterprise' and 'Adaptive Server Enterprise Replication'. We will review the ASE Replication service in another blog post. Now, let's find out which options we have to provision an ASE database.

The Database Creation Wizard in action
A pop-up will open and you see the Database Creation Wizard. These are the information we need to give:
Step 1: Location & Basics
- Instance name (However you want to call it, but use no spaces in the name)
- Instance description: Not mandatory, but give some description in 40 characters.
- Lisense: Is it a Production system, or for Test/ Development?
- The user 'aseadmin' needs a password. Type it twice for confirmation.
Step 2: Size
Specify the compute, memory type, and total storage of your ASE instance. Memory will be allocated automatically depending on the compute and memory type choices.
Minimum configuration
- 4 vCPUs
- Standard Memory Type
- 16 GB Memory
- 128 GB Total Storage
Maximum configuration
- 60 vCPUs
- Ultra-Premium Memory Type
- 960 GB Memory
- 65536 GB Total Storage
Step 3: Advanced settings
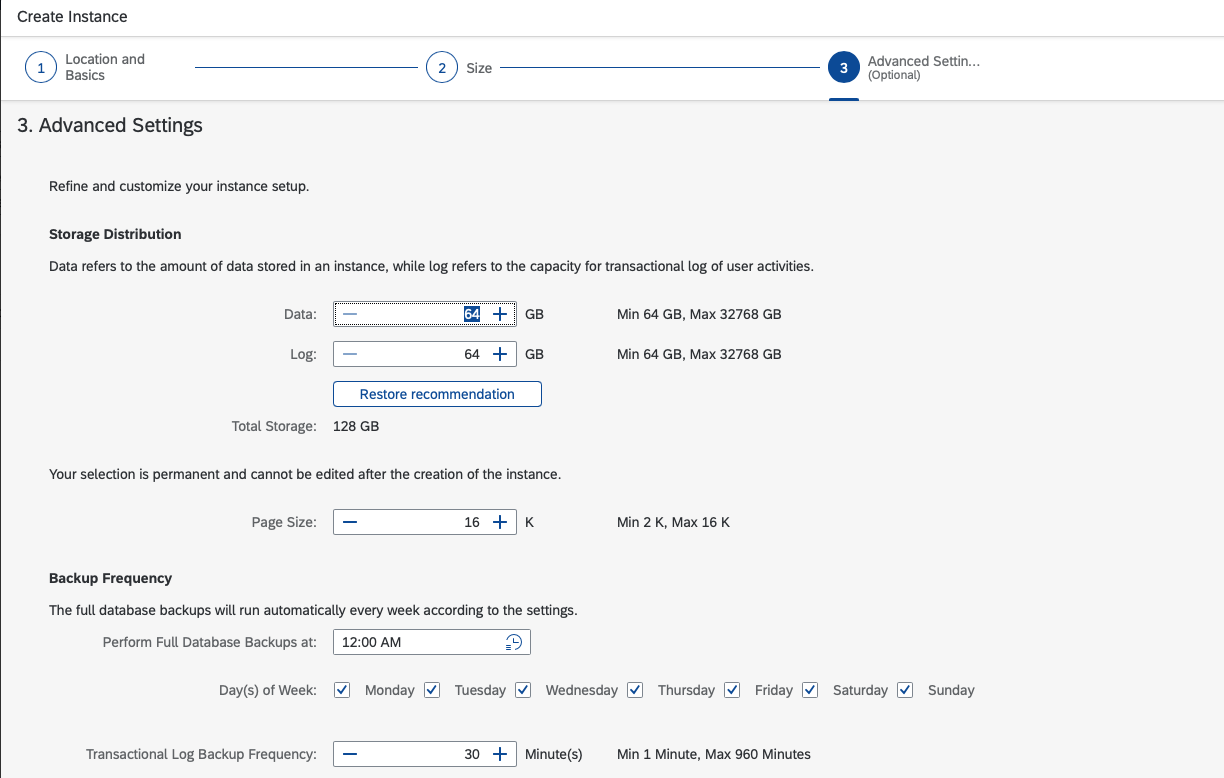

Now for some more advanced settings. We need to specify the storage distribution, page size, the backup frequency and retention, character set settings and connections.
Please be aware: These settings can't be changed after the instance is created:
- Page size
- Character Set
- Sort Order
Now it's time to click 'Create instance'. You instantly will see your system with status 'creating' in the list and once you see the status 'running' you are ready to go!


This is it. We have provisioned our ASE database in SAP HANA Cloud.
Stay safe!
Matthias
