In this blog post you will learn how to implement custom alerts for your automations. As an example, I created an automation that check the status among orders on a webpage. Here the goal is to send an email when an order is late. For this example, I captured the page and define the status and the reference of the orders as elements. The next step now is to create the automation.
You can also see the help portal page on custom alerts :
link to help portal
Create the automation

This is a simple automation, we start the application with the screen captured, for each order we check if the status is equal to “Too late”. If it’s the case, we get the order reference and we raise an alert with the alert status activity. Now we need to create an alert.
Create an alert
After placing the activity on the automation, an alert creation module appears in the Create drop down menu.
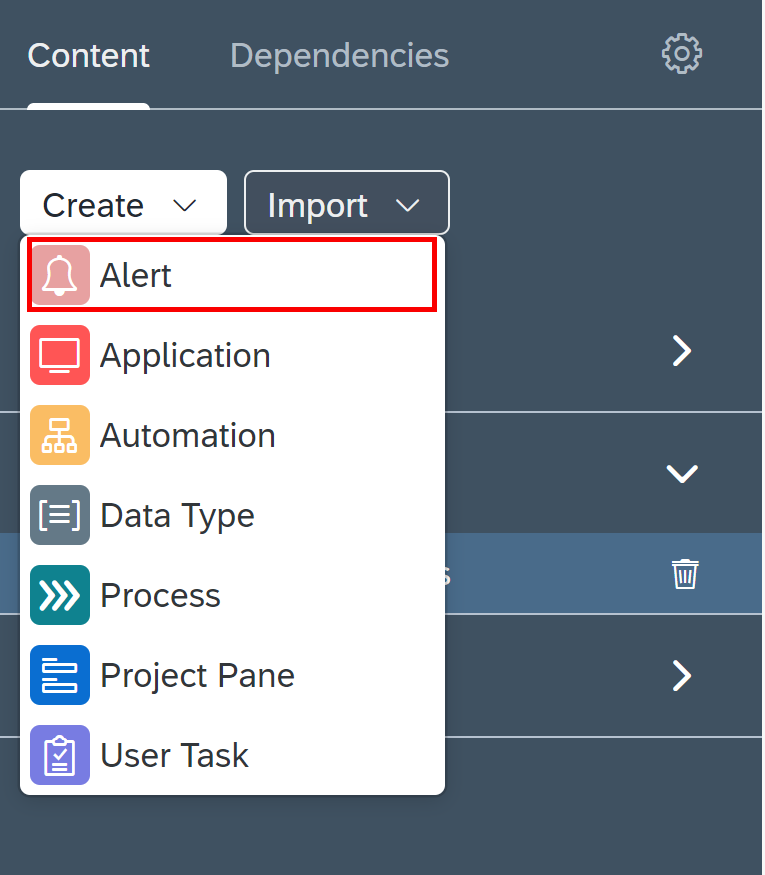
After clicking and giving a name and a description to the alert, you arrive at the alert creation menu. Here you can setup parameters, a message and some meta-data like the name and the severity of the alert. The parameters are some variable that you will be able to give as input to your alert activity. The message is what will be displayed by the alert.

Once the alert is created you can go back to the automation to add the alert in the raise alert activity.
Add the alert

In the alert activity you can now choose the alert that you have just created.

Once the alert is selected, the input parameters that you setup in the creation step of the alert will appear. You can now setup those variables. Here I use the
orderStatus and the
orderRef that I got at steps 4 and 6 of my automation.
Setup the environment
In order to create the alert handler that will be used to send the alert by email, notification or event, go or create an environment and import the package of the project you just created in the package section. Once that is done you need to create the handler that will send the alert.
Create the alert handler

In the alert handler section of your environment, click on add alert handler and choose your alert. Then define a name and an optional description for your handler.

The next step is to setup recipients for the alert, the subject of the alert and the message. For now only alert by email are available, so the subject is the subject of the email sent and same for the message. You have access to two variables ${event} and ${alert}. With these two variables you can access 4 variables that are name, message, severity and timestamp. Here it is really up to you on how do you want to setup the alert, but here is an example of what you can do.

(In the future there will be more means to receive an alert. And other variables will be available for creating the message)
Test the alert
To test the alert you have to create a trigger in the trigger section of your environment and choose the package of the project you just created (that should have the green tag Deployed). The trigger can be created as you wish, here is an example of a scheduled one

Once you created the trigger, you can run it now and go to the monitoring jobs tab. There if you refresh you should see the name of your trigger and if everything went well, you can see the successful tag appear. You should receive an email shortly after. The email is not immediate, it takes 15 to 20 seconds to arrive.
Once you have the email, congratulations you just implemented you first custom alerts.
In order to receive a mail you must have set up the mail server configuration. Here is the documentation :
Link to documentation
Conclusion
This activity allows us to create custom business-oriented alerts that can be raised at any point during your automation in order to give you more immediate information.
Thanks to this functionality, the factory send the email, it’s not the bot, so there is no need to configure outlook.
In the release 2104 there will be dynamic recipients.
