Having spent last couple of days trying to figure out what seems simple, I spanned through a lot of documentation and articles around SAP Business Application Studio(BAS). What I wanted to achieve was to create a simple UI5 application and be able to connect to my SAP MII destination I created on cloud foundry. Though I could connect the dots, but most of the documents were talking about fiori development utilizing odata services and not external systems like SAP Manufacturing Integration and Intelligence(MII), so I thought of sharing my learning through this step by step guide.
End Object: Simple UI5 application connecting and fetching some data from SAP MII destination on cloud foundry
Knowledge prerequisite: SAP UI5 basics
Assumption: Destination and cloud connector configuration is already done.
Here it goes...
Setup project for MII connectivity using cloud connector
- Open SAP BAS and open your workspace.
- Create a Fiori application using template SAP Fiori application. Select Start.
- From application type dropdown, select SAP UI5 freestyle.

- From the tile list which updates after type selection, select SAP UI5 Application. Click Next.

- In Data Source and Service Selection, select None and hit Next.

- Provide a view name for your application and hit Next, provide a project module name and namespace. This combined together would become alias for your resource path.

- Click Finish, your project has been generated.

- When you expand your project folder, the root should look like below.

- Delete all files outside webapp apart from .gitignore, package.json and package-lock.json.
- Under root folder(mii in this case), create new file “xs-app.json”.
- Copy the content from this file to xs-app.json and save it.
{
"welcomeFile": "/index.html",
"authenticationMethod": "none",
"logout": {
"logoutEndpoint": "/do/logout"
},
"routes": [
{
"authenticationType": "none",
"source": "^/XMII/Illuminator(.*)$",
"destination": "XMII"
},
{
"source": "^(.*)$",
"target": "$1",
"service": "html5-apps-repo-rt",
"authenticationType": "xsuaa"
}
]
}
- Add/Edit the env file to have below content. If replace <destinationName> with your destination name like XMII:
destinations=[{"name":"<destinationName>","url":"http:// <destinationName>.dest","proxyHost":"http://127.0.0.1","proxyPort":"8887"}]
- Update index.html, provide resource path as "https://sapui5.hana.ondemand.com/resources/sap-ui-core.js"
- To to Run Configuration and Click on + to add run configuration for your project.
- Select your project, notice Fiori Tools in bracket. Press ESC and go back to project root folder.

- Edit package.json, copy, paste below content and save the file.
{
"name": "mii",
"version": "0.0.1",
"devDependencies": {
"@sapui5/ts-types": "1.71.x",
"@sap/ui5-builder-webide-extension": "1.0.x",
"@sap/approuter": "8.1.x",
"@sap/html5-repo-mock": "1.6.x"
},
"scripts": {
"build": "ui5 build --include-task=generateManifestBundle generateCachebusterInfo",
"start-local": "node node_modules/@sap/html5-repo-mock/index.js"
},
"ui5": {
"dependencies": [
"@sap/ui5-builder-webide-extension"
]
}
}
- Now, again click on + next to run configuration, you should see the list updated as below. Notice FioriTools changed to flat_html5.
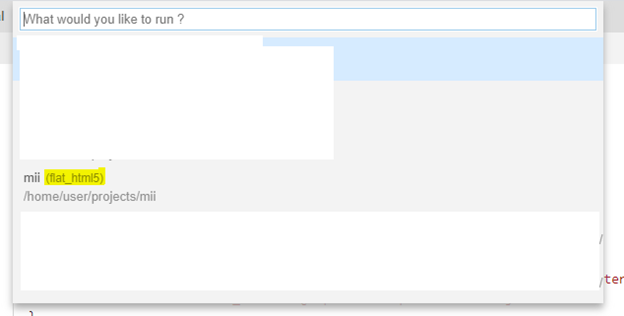
Select your project. Select latest version from the list.
- You would see something like below and on expanding node, you would see Data Source as defined in xs-app.json. Click on bind to connect to data source.
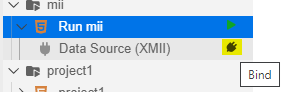
- Select the destination system name from Could Foundry.

- Modify the controller.js file to call MII service, something like below. This is to test if your application is able to communicate to destination.

- Now run the configuration using play button. It would give you a prompt to open in a new tab, click open.
- In the network tab, you should see the request successful and also in console, the document written from above ajax success.


- So your new application is ready and is able to communicate to MII destination system.
Hope this helps ease your development! Open to feedback
🙂
Nice time....!
