
- SAP Community
- Products and Technology
- Technology
- Technology Blogs by SAP
- Enrich Data in SAP Datasphere with Data from RESTf...
Technology Blogs by SAP
Learn how to extend and personalize SAP applications. Follow the SAP technology blog for insights into SAP BTP, ABAP, SAP Analytics Cloud, SAP HANA, and more.
Turn on suggestions
Auto-suggest helps you quickly narrow down your search results by suggesting possible matches as you type.
Showing results for
Community Advocate
Options
- Subscribe to RSS Feed
- Mark as New
- Mark as Read
- Bookmark
- Subscribe
- Printer Friendly Page
- Report Inappropriate Content
12-30-2020
9:03 AM
*** Update (March 2024): This blog post is outdated. Most functionality that I implemented for it, can by now be implemented using built-in functions in SAP Datasphere (e.g., scheduling of data snapshots) in combination with SAP Open Connectors (part of the SAP Integration Suite).
Data Enrichment on the SAP Business Technology Platform
Data is considered to be the "new gold", and everyone talks about data enrichment (i.e., gaining new insights by merging your company's data with external data). More and more data provider companies arise and a common way to access their data is via a RESTful API. How is that done in practice though? In this blog post, I will show you a simple example of how to implement end-to-end data enrichment using products of the SAP Business Technology Platform.
Scenario Overview
On the SAP Data Warehouse Cloud we have master data on different cities in Germany (i.e., the city name, postal code, and country). Now we are interested to continuously collect weather data for these cities (e.g., every 2 hours), persist them in the SAP Data Warehouse Cloud and join them with our master data.
For this purpose, we will create a custom micro service on SAP Cloud Platform which reads the city data from the SAP Data Warehouse Cloud, gets the current weather for every city from an API (openweathermap.com) and writes it back to the SAP Data Warehouse Cloud.
Learning Goals
In a step-by-step tutorial you will learn you how to:
- Create sample master data in the SAP Data Warehouse Cloud
- Deploy a micro service (Node.js CAP application) on SAP Cloud Platform using the SAP Business Application Studio
- Join the collected weather data with your master data on SAP Data Warehouse Cloud
- Use the SAP Cloud Platform Job Scheduler to execute the micro service on a scheduled basis
Prerequisites
- Access to SAP Data Warehouse Cloud (SaaS)
- incl. a Space where you can create a technical database user
- external IPs must be whitelisted
- (30 days Trial Account for free: https://saphanajourney.com/data-warehouse-cloud/trial/)
- Access to SAP Cloud Platform
- SAP Business Application Studio
- SAP Cloud Platform Job Scheduler
- Application Runtime Quota
- (all included in the free 365 days Trial Account: https://www.sap.com/cmp/td/sap-cloud-platform-trial.html)
- An account on openweathermap.com
- Sign up for free under https://home.openweathermap.org/users/sign_up
- Remember the API Key that is sent to you via email
Step-by-step Tutorial
Note: Please make sure to use exactly the same names for the artifacts you create.
Create tables and views in SAP Data Warehouse Cloud
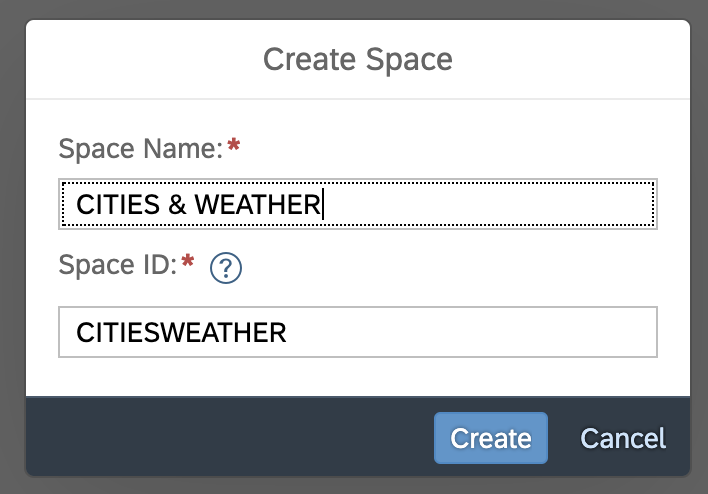
First of all, we navigate to the Space Management in SAP Data Warehouse Cloud and create a new space:
To be able to work in this space later on, we will add our user as member of this space (even as an administrator):

We scroll down to Database Access and create a new Database User by clicking on Create:

Let's make sure to tick the box for Enable Data Ingestion and Enable Data Consumption:

Important: we need to copy and paste Database User Name, Internal Schema Name, Host Name and Password into a notebook or simple text file. We will need them later.

Now we have a Database User called CITIESWEAHTER#TECHUSER for which Data Ingestion and Data Consumption are enabled. Let's select the Database User and click on Open Database Explorer.

The HANA Database Explorer will open in a new tab. In the left upper corner we click on the + symbol to add a database. We need to copy and paste the credentials from our notepad and make sure to use the settings as shown on the screenshot:

Now we do a right-click on the new database connection and open a new SQL console. Let's copy and execute the following code to create the exemplary master data table and insert 5 rows:
CREATE TABLE "CITIES" (

	"Country" NVARCHAR(2),

	"City" NVARCHAR(100),

	"Postalcode" NVARCHAR(5),

	PRIMARY KEY ("Country", "City", "Postalcode")

);


INSERT INTO "CITIES" VALUES ('DE', 'Hamburg', '20148');

INSERT INTO "CITIES" VALUES ('DE', 'Walldorf', '69190');

INSERT INTO "CITIES" VALUES ('DE', 'Berlin', '10178');

INSERT INTO "CITIES" VALUES	('DE', 'Bielefeld', '33617');

INSERT INTO "CITIES" VALUES ('DE', 'Stuttgart', '70173');
As a result, we have a table that contains master data for 5 cities in Germany incl. the postalcode. Next, we will create two target tables for our weather data: one for the weather conditions (API_WEATHERCONDITIONS) and one for the current weather (API_WEATHERBYPOSTALCODE). The columns of the tables are adjusted to the data model of the API of openweathermap.com - this will make more sense later.
CREATE TABLE "API_WEATHERBYPOSTALCODE" (

	"POSTALCODE" NVARCHAR(5),

	"WEATHERCONDITIONSID" Integer,

	"TEMPERATURE" Double,

	"SOURCEUPDATE" Timestamp,

	"INSERTTIME" Timestamp,

	PRIMARY KEY (POSTALCODE, SOURCEUPDATE)

);


CREATE TABLE "API_WEATHERCONDITIONS" (

	"ID" INTEGER,

	"MAIN" NVARCHAR(50),

	"DESCRIPTION" NVARCHAR(50),

PRIMARY KEY (ID));
Let's validate that everything worked. I go back to the SAP Data Warehouse Cloud, open the Data Builder and click on New Graphical View. After switching from Repository to Sources, we should be able to see the 3 tables you have created.

Now, let's drag & drop the table CITIES to the graphical editor to create a new view that we call Relevant_Cities_for_API. Initially, we will have to confirm to import and deploy the table. For this tutorial, there is no further need to model the data at the moment. Just make sure to turn on Expose for Consumption and give the view the correct name. This is important later when we are going to read the master data with our micro service.
We safe the view and then click on deploy. Once the view has been deployed successfully, you can click on the data preview to check whether you have 5 rows of data.

Prepare SAP Cloud Platform Trial Account
In the next step, we will prepare our SAP Cloud Platform Trial Account for the deployment of our micro service. To avoid hardcoding credentials (Database User & API Key) in the micro service, we will create user-provided services on the SAP Cloud Platform to store those credentials in the Cloud Foundry environment variables (i.e., VCAP Services).
Let's go to https://account.hanatrial.ondemand.com/trial/#/home/trial and enter our Trial Account. Navigate to the Subaccount trial (Provider: AWS etc.). Go to the Service Instances of your space dev by clicking on the number of Service Instances (circled in red on the screenshot):

Now we are in the Service Instances overview of your space dev of your Cloud Foundry subaccount trial. Next, we click on the arrow on the right side of the "Create Instance" button and choose "Create User-Provided Service Instance":

We name the first service dwc-weather-data-space and replace the placeholders with the credentials of our SAP Data Warehouse Cloud Database User (copy and paste from notepad) in the following json structure:
{

    "host_and_port": "HOSTNAME:443",

    "user": "DATABASE USERNAME",

    "password": "PASSWORD",

    "schema": "INTERNAL SCHEMA NAME"

}
Next, we create a second service called open-weather-map and paste our openweathermap API Key in the following json structure (leave everything else as it is):
{

    "url": "http://api.openweathermap.org/data/2.5/weather?q=%s,%c&appid=%k&units=metric",

    "keys": {

        "crawler": [

            "PASTE API KEY HERE"

        ]

    },

    "limit": false,

    "timeout": 1000,

    "secret": "",

    "cleanOutdated": true,

    "keepLatest": 7

}
Now we have 2 user-provided services in your service instances:

We go back to the subaccount level by clicking on trial in the top menu.

Next, we navigate to the Subscriptions, search for the SAP Business Application Studio and click on Go to Application.

In the SAP Business Application Studio, we create a new Dev Space of Type SAP Cloud Business Application:

Once our Dev Space is RUNNING, we click on its name to open it.

In our Dev Space Welcome Tab, we click on Clone from Git and enter the following URL: https://github.com/ChristophChristophersen/DWC_Weather_Data.git

Next, we click on Open Workspace, select DWC_Weather_Data and open it.

Code Explanation (Very Brief Overview)
(Skip this paragraph if you just want to follow the tutorial)
Time to take a look at the code. The structure of this application follows the SAP Cloud Programming Model (CAP). Most interesting are the files in the folder srv:
weatherService.cds
- this is CAP specific file
- in our example it defines only one service/function called fetchCurrentWeatherData()
- this service can later be executed via a basic GET call (even possible in the browser)
weatherService.js
- JavaScript file that contains an "on" handler for the cds service
- contains all functions that build the "logic" behind the micro service:
- getVcapService
- reads (user-provided) service variables from the SAP Cloud Platform Cloud
- _fetchCurrentWeatherData
- main function of the handler
- gets all credentials and calls sub functions
- selectCities
- gets cities data from the SAP Data Warehouse Cloud using the SAP HANA client for Node.js
- getWeather
- returns weather data from openweathermap.com for the cities data it is passed
- insertWeather
- uses the SAP HANA client for Node.js to write the weather data to the SAP Data Warehouse Cloud
Another very crucial file is:
mta.yaml
- it contains all information of dependencies of the multitarget application
- further information can be found in the CAP Documentation
Deployment of Micro Service
In the SAP Business Application Studio, we open a new terminal by clicking on Terminal -> New Terminal on the top menu:

On the bottom of our window, we now see a new command line, where our project folder is already opened (in case you only see user: without DWC_Weather_Data, navigate to the project folder by executing cd DWC_Weather_Data).

Next, we want to use the pre-installed multitarget application build tool (MBT) to create an archive file of our micro service project. For this purpose we type following line to the terminal:
mbt build
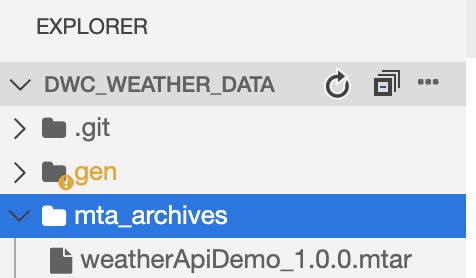
After the build process has finished, we will see a new folder in our project which contains our build file:
Next, we need to select our deployment target using the Cloud Foundry CLI. For this purpose, we type the following line in our Terminal:
cf login
In the following, we are requested to type in some data.
API Endpoint:
https://api.cf.eu10.hana.ondemand.com
Email: The email address which we used to register for your SAP Cloud Platform Trial Account.
Password: The password for our Trial Account
(If you have more than one SAP Cloud Platform Subaccount, you will also have to select the Cloud Foundry Org and Space).
After successfully logging in, the last line of our Terminal looks like this:

We are finally ready to deploy our micro service. Now, we execute the following line in the Terminal:
cf deploy mta_archives/weatherApiDemo_1.0.0.mtar
If the deployment takes a while, we shouldn't worry. Once it is done, we can see a message "process finished" in the Terminal.
Test the Micro Service on SAP Cloud Platform
Congrats! You have successfully deployed the micro service. Let's test it!
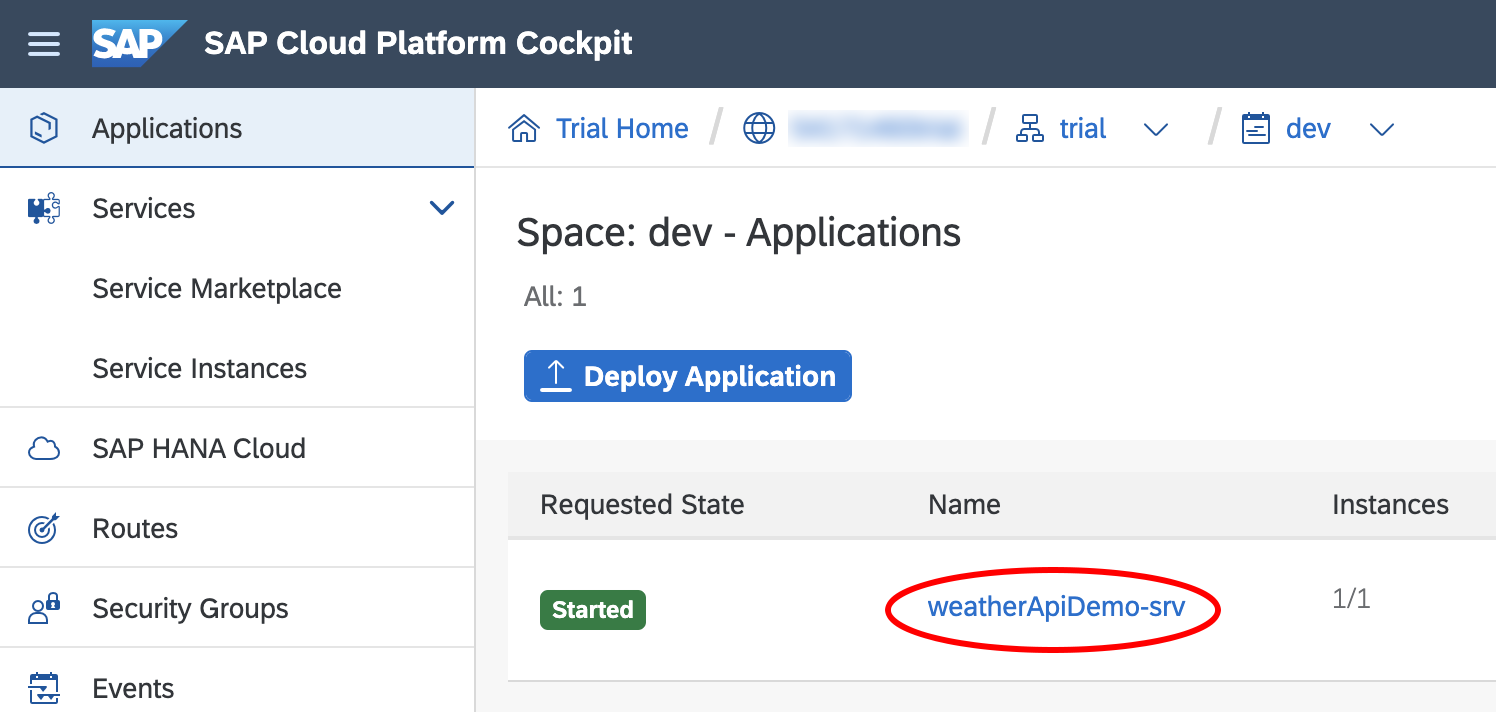
We open the SAP Cloud Platform Trial Account again and navigate to the Overview page of our Subaccount. There, we can already see that our Space dev now has an Application which is the micro service we have just deployed. Let's click on the tiny 1 to be taken to the apps of our Space.

Next, we click on our micro service weatherApiDemo-srv to open the details page:
Let's click on the Application Route to open the landing page of our micro service:

Now we see a simple web page looking like this:

To actually execute the main function of our service, we need to append the following to our Application Route (URL):
/weather/fetchCurrentWeatherData()
In other words, every time we open Application Route + /weather/fetchCurrentWeatherData() in our Browser, the process of enriching the cities data from the SAP Data Warehouse Cloud with the current weather data for these cities is executed. Let's check whether this has actually worked.
We go back to the SAP Data Warehouse Cloud, navigate to the Data Builder, click on New Graphical View, open our Data Sources, expand CITIESWEATHER#TECHUSER and drag & drop API_WEATHERBYPOSTALCODE on the graphical editor (we confirm to import & deploy):

We wait until we get the message that the deployment was successful, then we open the data preview to see whether the execution of our micro service worked:

Now there should be weather data in the table. However, the column WEATHERCONDITIONSID is not very helpful right now. That's why we should now join the table API_WEATHERCONDITIONS to our weather data. When we drag & drop the table API_WEATHERCONDITIONS on API_WEATHERBYPOSTALCODE in graphical editor, the SAP Data Warehouse Cloud will automatically prepare a join of these tables:

To define the columns to perform the join, we go to the details of our join and drag & drop the column WEATHERCONDITIONSID on ID:

As a result, we see the two columns connected by a line:

Per default, the SAP Data Warehouse Cloud will do an Inner Join, which will work for our scenario. (Note: It would be better to perform a left join though, just in case there would be missing data for the weather conditions).
As a final check, we click on the node of the resulting view and open the data preview:

We can see the details behind the WEATHERCONDITIONID, which give us more information on the weather.
Now, there are potential next steps that we can do in the SAP Data Warehouse Cloud to work with that data:
- Save and the deploy the weather data view
- Join the cities data and the weather data view and create an Analytical Dataset
- Create a Dashboard in the Story Builder
For these steps no more guidance should be needed. However, we still need to take care that our weather service is automatically executed based on a schedule.
Automate Execution of Weather Service using the SAP Cloud Platform Job Scheduler
On our SAP Cloud Platform Trial Account, we navigate back to our Cloud Foundry space by clicking on dev on the top menu bar:

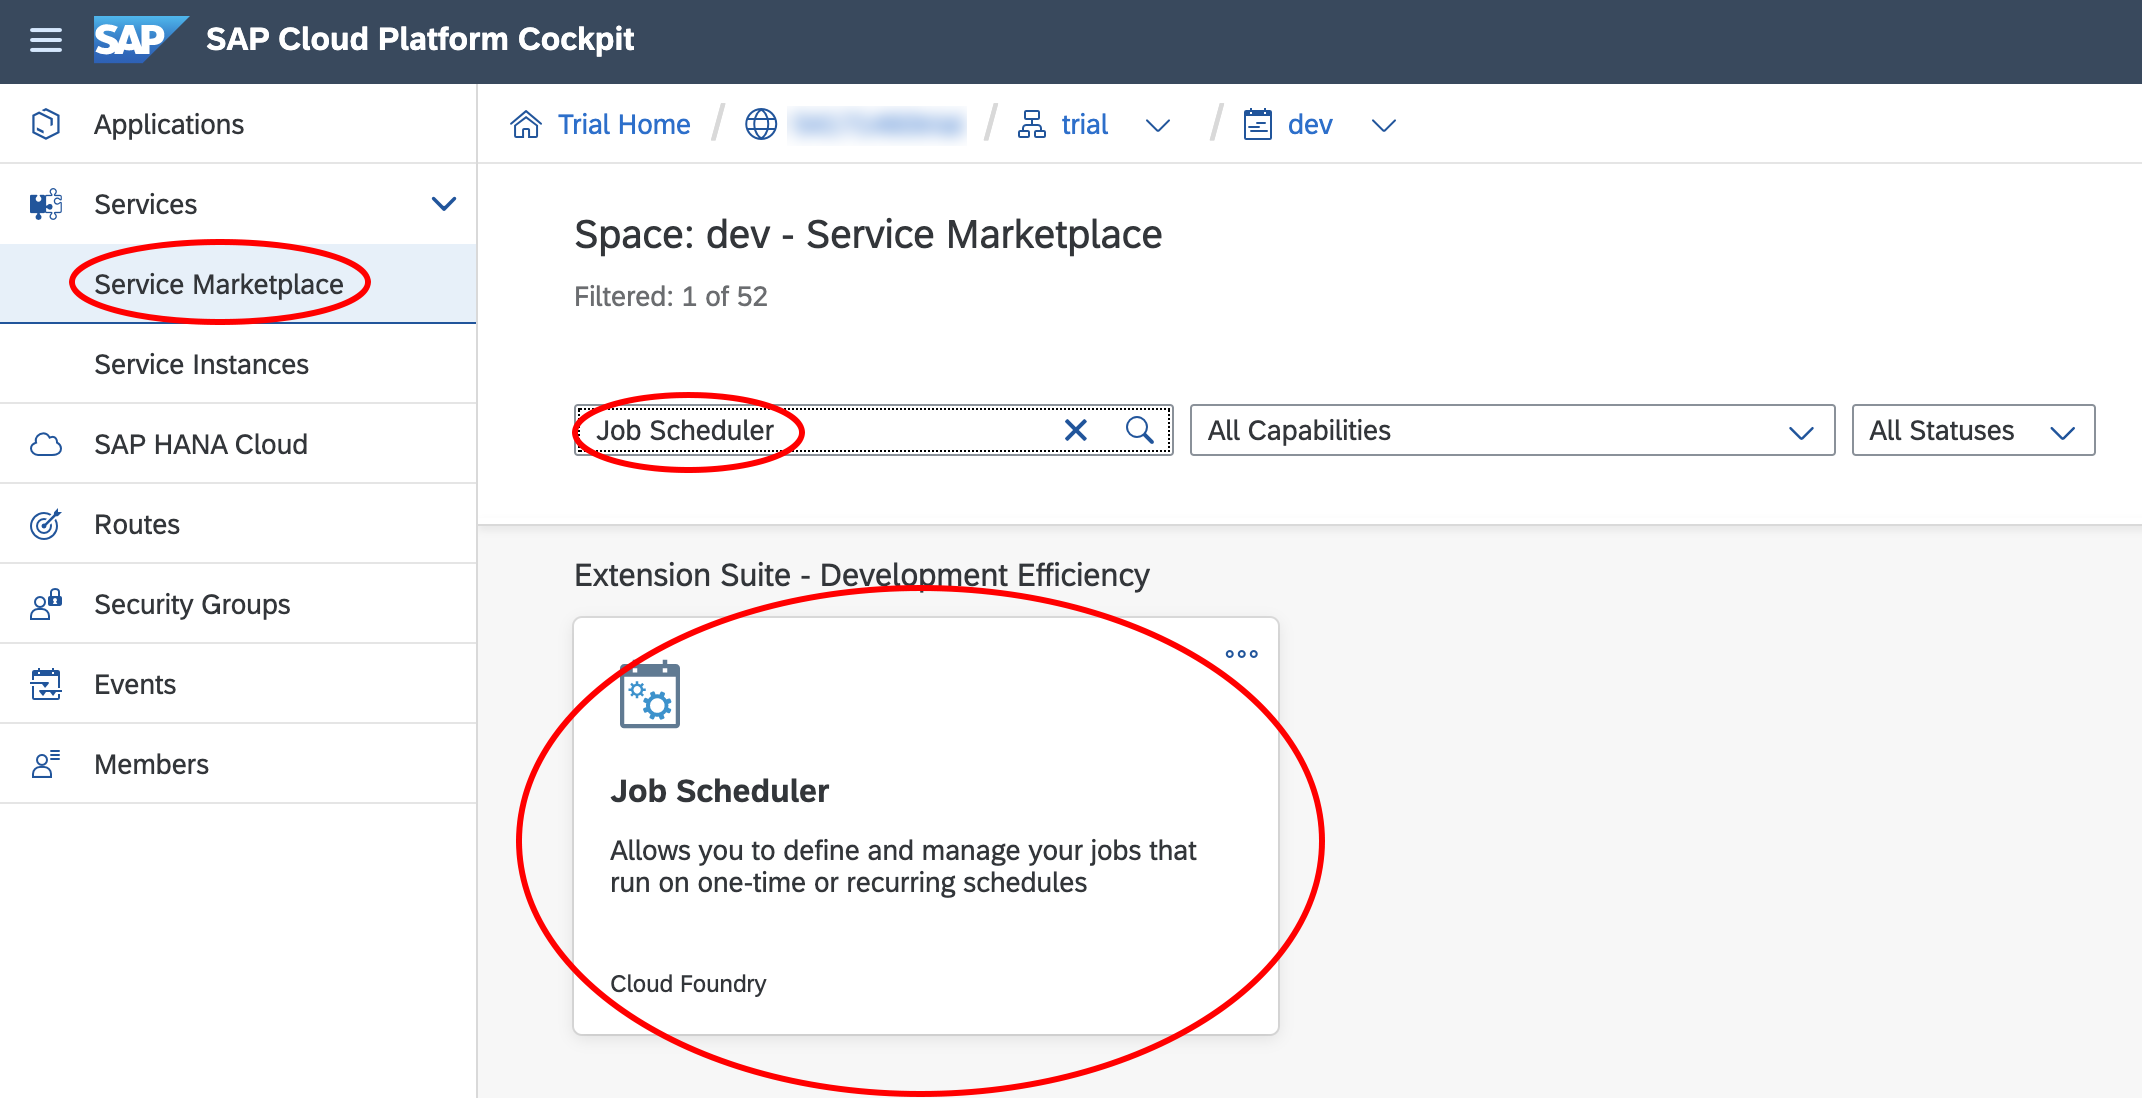
Next we expand Services on the side navigation menu, open the Service Marketplace, search for Job Scheduler and click on the tile:
We click on Create Instance to create a Job Scheduler instance of the Service Plan lite:

We click next to get to specify parameters for our instance. There, we need to post the following specification JSON:
{

    "enable-xsuaa-support": true

}
After we have pasted the specs, we can click on Create Instance.

After our instance has successfully been created, we click on View Instance:

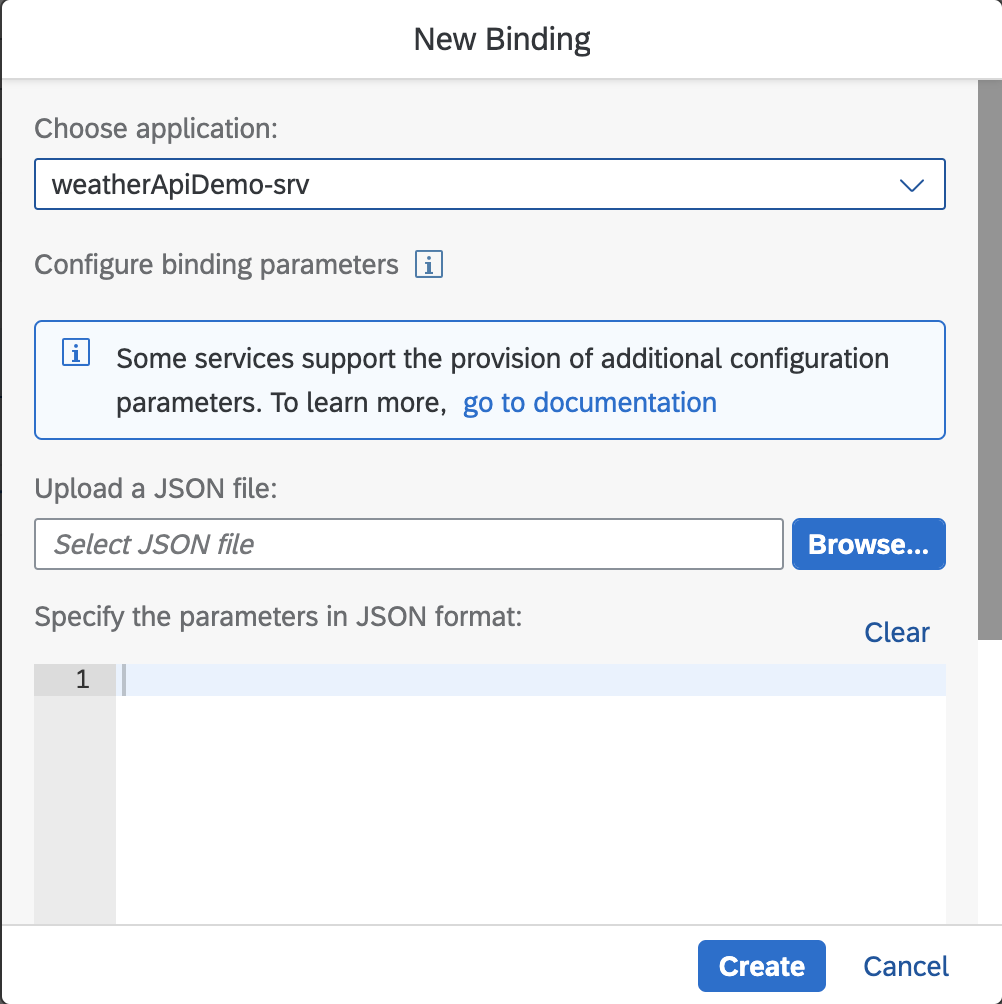
Next, we want to bind our Job Scheduler instance to our service in order to allow the Job Scheduler to execute our main function:

We select weatherApiDemo-srv and click on Create:
After the binding has been created, we want to open Job Scheduler UI by clicking on View Dashboard:

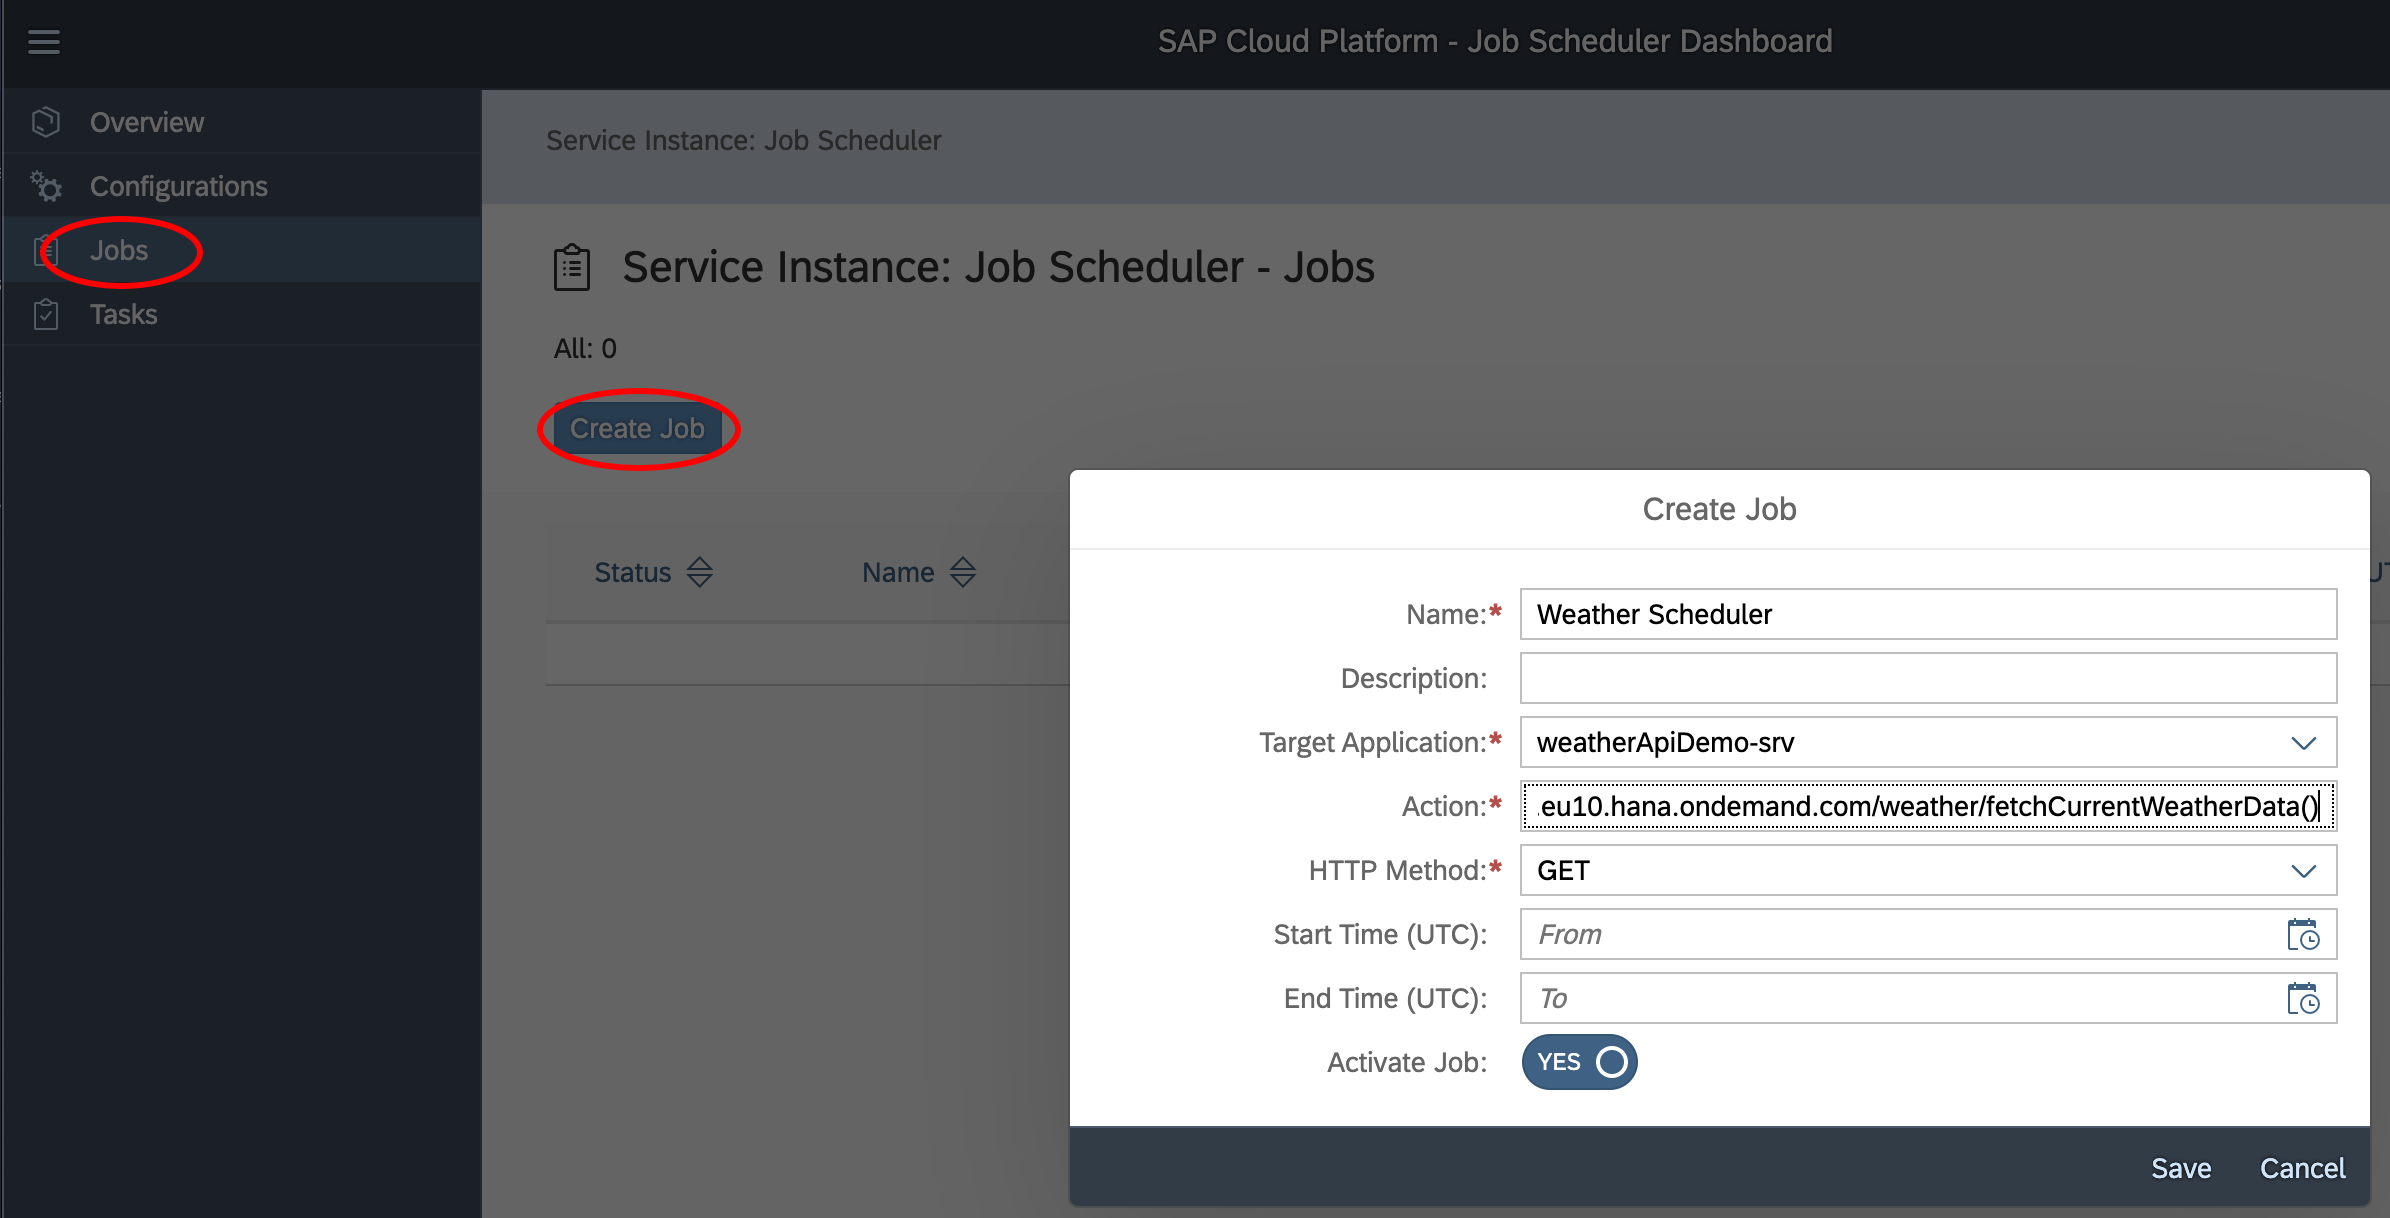
On the Job Scheduler Dashboard, we navigate to Jobs and click on Create Job. As Target Application we choose our service app. As action we paste our service execution URL [Application Route + /weather/getCurrentWeatherData()]:
Next, we click on our newly created Job and navigate to Schedules to create a new schedule. We set the Pattern to Recurring - Repeat Interval and as Value we set 2 hours to get new weather data every other hour:

Aaaand THAT'S IT! We're done! Now we can enjoy watching our SAP Data Warehouse Cloud being filled with fresh weather data every 2 hours.
Outlook
In this tutorial we have implemented an end-to-end example of data enrichment using products of the SAP Business Technology Platform. However, for the future I could picture this functionality being covered by the SAP Data Warehouse Cloud natively. Wouldn't it be nice to conveniently integrate calling RESTful APIs as part of the Data Flows in SAP Data Warehouse Cloud? I would even go further! Let's imagine that Data Enrichment is fully automated, so you can ask for enrichment suggestions in the SAP Data Warehouse Cloud and then merge new data to your company data automatically.
Let's see what the future will bring to us. For the moment, you can take my code, adjust it to your use case and host your own Data Enrichment micro service on the SAP Cloud Platform.
This blog post was not solely created by me, so I want to say thank you to:
- oliver.herms (SAP Data Warehousing Leadership Team). Thank you for the idea to make this standalone micro service and write a blog post about it.
- Quentin Siewe Tchuente (Development Consultant, Customer Success). Thank you for the kick start to create the JavaScript code. Without your code foundation I would have taken me much longer to get this done.
- janik (Development Consultant, Customer Success). Thanks for being the original inspiration for the implementation of this micro service. Also thank you for always being there when I have question about the SAP Cloud Application Programming Model. You are simply the master mind when it comes to creating apps for the SAP Cloud Platform.
- SAP Managed Tags:
- SAP Business Application Studio,
- SAP Datasphere,
- API,
- Node.js,
- SAP Business Technology Platform
Labels:
21 Comments
You must be a registered user to add a comment. If you've already registered, sign in. Otherwise, register and sign in.
Labels in this area
-
ABAP CDS Views - CDC (Change Data Capture)
2 -
AI
1 -
Analyze Workload Data
1 -
BTP
1 -
Business and IT Integration
2 -
Business application stu
1 -
Business Technology Platform
1 -
Business Trends
1,658 -
Business Trends
93 -
CAP
1 -
cf
1 -
Cloud Foundry
1 -
Confluent
1 -
Customer COE Basics and Fundamentals
1 -
Customer COE Latest and Greatest
3 -
Customer Data Browser app
1 -
Data Analysis Tool
1 -
data migration
1 -
data transfer
1 -
Datasphere
2 -
Event Information
1,400 -
Event Information
66 -
Expert
1 -
Expert Insights
177 -
Expert Insights
299 -
General
1 -
Google cloud
1 -
Google Next'24
1 -
Kafka
1 -
Life at SAP
780 -
Life at SAP
13 -
Migrate your Data App
1 -
MTA
1 -
Network Performance Analysis
1 -
NodeJS
1 -
PDF
1 -
POC
1 -
Product Updates
4,577 -
Product Updates
344 -
Replication Flow
1 -
RisewithSAP
1 -
SAP BTP
1 -
SAP BTP Cloud Foundry
1 -
SAP Cloud ALM
1 -
SAP Cloud Application Programming Model
1 -
SAP Datasphere
2 -
SAP S4HANA Cloud
1 -
SAP S4HANA Migration Cockpit
1 -
Technology Updates
6,873 -
Technology Updates
422 -
Workload Fluctuations
1
Related Content
- New Machine Learning features in SAP HANA Cloud in Technology Blogs by SAP
- Top Picks: Innovations Highlights from SAP Business Technology Platform (Q1/2024) in Technology Blogs by SAP
- Enhanced Data Analysis of Fitness Data using HANA Vector Engine, Datasphere and SAP Analytics Cloud in Technology Blogs by SAP
- SAP Datasphere is ready to take over the role of SAP BW in Technology Blogs by SAP
- Possible Use Cases Of ECC & S/4HANA Connection With SAP Datasphere. in Technology Q&A
Top kudoed authors
| User | Count |
|---|---|
| 39 | |
| 25 | |
| 17 | |
| 13 | |
| 7 | |
| 7 | |
| 7 | |
| 7 | |
| 6 | |
| 6 |