This blog post describes the steps to configure the SAP S/4HANA Cloud to meet custom requirements for inserting or updating regions. This extension scenario is implemented using
Business Configuration (SSCUIs).
Prerequisites
You have administrative access to SAP S/4HANA Cloud and have implementation and configuration experience on the system.
Required Authorizations
If it is not yet available, ask your system administrator to assign the following Business Catalog to a given configuration user (that will be used later).
Business Catalog |
Business Catalog ID |
|---|
Business Services Address Management - Configuration |
SAP_CA_BC_IC_LND_ADDR_PC |
Business Need
Before we go into the details of the configuration itself, let’s understand the Business Need context.
The region can be used as part of the address, for tax reporting in FI, or pricing in SD (only for tax). This usage can vary from country to country.
Attention: The regions we are configuring here mean usually the geographic division of a country (state in US, department in FR, province in BE/CA/NL, estado in BR, etc.).
It may seem a small and simple configuration, but it is a very important one since, as stated above, it deals with tax reporting or tax condition access.
Login for configuration
Log in as an user (that has the Business Catalog reported above) in your quality (Q) system. From the
Implementation Cockpit tab, open the app
Manage Your Solution.
Verify whether the local country version is set on the country you wish to configure. If not, you should choose the respective country by clicking on the button
Set Country Version, located in the right bottom corner of your screen. For the examples here we are going use Bahamas (BS). However, we will see later that for this particular setting is not used as any filter in this configuration.
Click on the first option
Configure Your Solution. Please keep in mind that a business change project must be open, in order for you to be able to record the changes.
Custom Configuration
Once you are
logged in for configuration, filter it to (
Application Area)
Application Platform and Infrastructure, (
Sub Application Area)
General Settings, (
Item Name)
Basic Settings. Tip: you can also just type "
500286" on the search field (Configuration Item ID).
For all the SSCUIs, remember that you have access to the
Configuration Help by clicking on the dropdown option of the
Configure button. Read all the documentation to make sure you are following the rules and recommendations (e.g. namespaces).
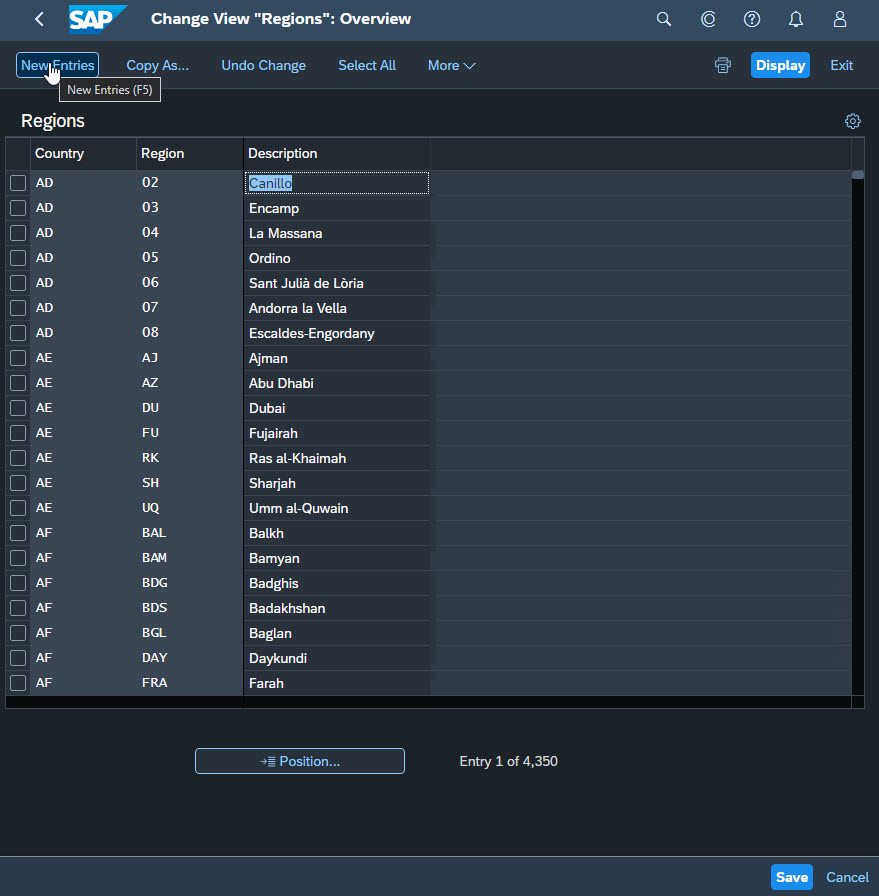
- Go to "Step 4 - Insert Regions" (ID 103826) and click on Configure button.
- Now you can define regions accordingly to your requirements
- Just need to enter a key and description for the regions
- Save your changes
- Your regions will be available for usage in the relevant parts of the system

Configure Your Solution
Regions (overview)
Conclusion
As we have seen above, it is now possible for customers to configure their own regions accordingly to their needs.
Thank you for reading this blog post. Please send your feedback or collaboration below.
