
- SAP Community
- Products and Technology
- Technology
- Technology Blogs by SAP
- Part 4: Manage Integration Flows of Cloud Integrat...
Technology Blogs by SAP
Learn how to extend and personalize SAP applications. Follow the SAP technology blog for insights into SAP BTP, ABAP, SAP Analytics Cloud, SAP HANA, and more.
Turn on suggestions
Auto-suggest helps you quickly narrow down your search results by suggesting possible matches as you type.
Showing results for
divyamary
Contributor
Options
- Subscribe to RSS Feed
- Mark as New
- Mark as Read
- Bookmark
- Subscribe
- Printer Friendly Page
- Report Inappropriate Content
10-01-2020
4:21 PM
SAP Cloud Platform Integration Suite is a versatile, dynamic and enterprise-grade iPaaS (integration platform-as-a-service) from SAP that simplifies and accelerates enterprise integration and helps organizations to quickly transition to becoming intelligent enterprises. More information on SAP Cloud Platform Suite in this blog.
API Management capability of SAP Cloud Platform Integration Suite lets you publish, promote, and oversee APIs in a secure and scalable environment. It enables you to launch your own API domains (api.<customer>.com) and run enterprise API programs. Cloud Integration capability of SAP Cloud Platform Integration Suite supports end-to-end process integration across cloud-based and on-premise applications (cloud-cloud and cloud-on-premise integration) making cloud integration simple and reliable.
In this blog, steps to manage your integration flows from Cloud Integration via API Management has been showcased.
Follow this tutorial to set up SAP Cloud Integration Suite in trial environment and create product details REST API as an integration flow.


Activating the API Management capability from Integration Suite Launchpad only enables the capabilities. To complete your API Management capability, you will need to assign your user APIMangement.SelfService.Administrator and AuthGroup.SelfServcie.admin role. For trial, the setup and configuration of API Management is triggered automatically when you navigate to your API Portal & Developer Portal service of API Management for the first time. After the initial configuration is completed, you will need to logout and login again to access the full service. For productive accounts, follow the steps highlighted in section Initial Configuration & Set up of API Management services of this blog.
Note the endpoint till /http/products is copied instead of /http/products/details. The details will be added later as resource to this API.
You will notice the Example value for your API definition changing based on the schema update for Payload.

With this you have successfully created an API Proxy for your integration flow built in Cloud Integration tenant and generated an API documentation for your REST APIs in OpenAPI format.
SAP Cloud Platform Connectivity policy templates available in SAP API Business Hub facilitates easy and secure inbound communications for SAP Cloud Platform Integration services ( REST/ SOAP or OData). SAP API Business Hub is integrated into API Management and all the APIs and Policy templates available in SAP API Business Hub can be easily discovered and consumed in API Management.
In this section steps to apply SAP Cloud Platform Connectivity policy template and the necessary configuration changes has been captured.


With this you have successfully managed the integration flow from Cloud Integration using API Management.
Stay tuned, more blogs on API Management in Cloud Foundry environment to come:
More blogs on SAP Cloud Platform Integration Suite available in SAP Community.
API Management capability of SAP Cloud Platform Integration Suite lets you publish, promote, and oversee APIs in a secure and scalable environment. It enables you to launch your own API domains (api.<customer>.com) and run enterprise API programs. Cloud Integration capability of SAP Cloud Platform Integration Suite supports end-to-end process integration across cloud-based and on-premise applications (cloud-cloud and cloud-on-premise integration) making cloud integration simple and reliable.
In this blog, steps to manage your integration flows from Cloud Integration via API Management has been showcased.
Prerequisites
- SAP Cloud Platform Integration Suite (Trial Environment)
- Request Product Details with an Integration Scenario Tutorial
Create an API Proxy for Your Integration Flow
Follow this tutorial to set up SAP Cloud Integration Suite in trial environment and create product details REST API as an integration flow.
- To get your integration flow endpoint, navigate to your Integration Suite account. Logon to your SAP Cloud Platform trial. Select Subscription and search and select Integration Suite. Click on Go to Application
- It will launch the Integration Suite launch pad in a new browser tab. Select Design, Develop and Operate Integrate Scenarios.
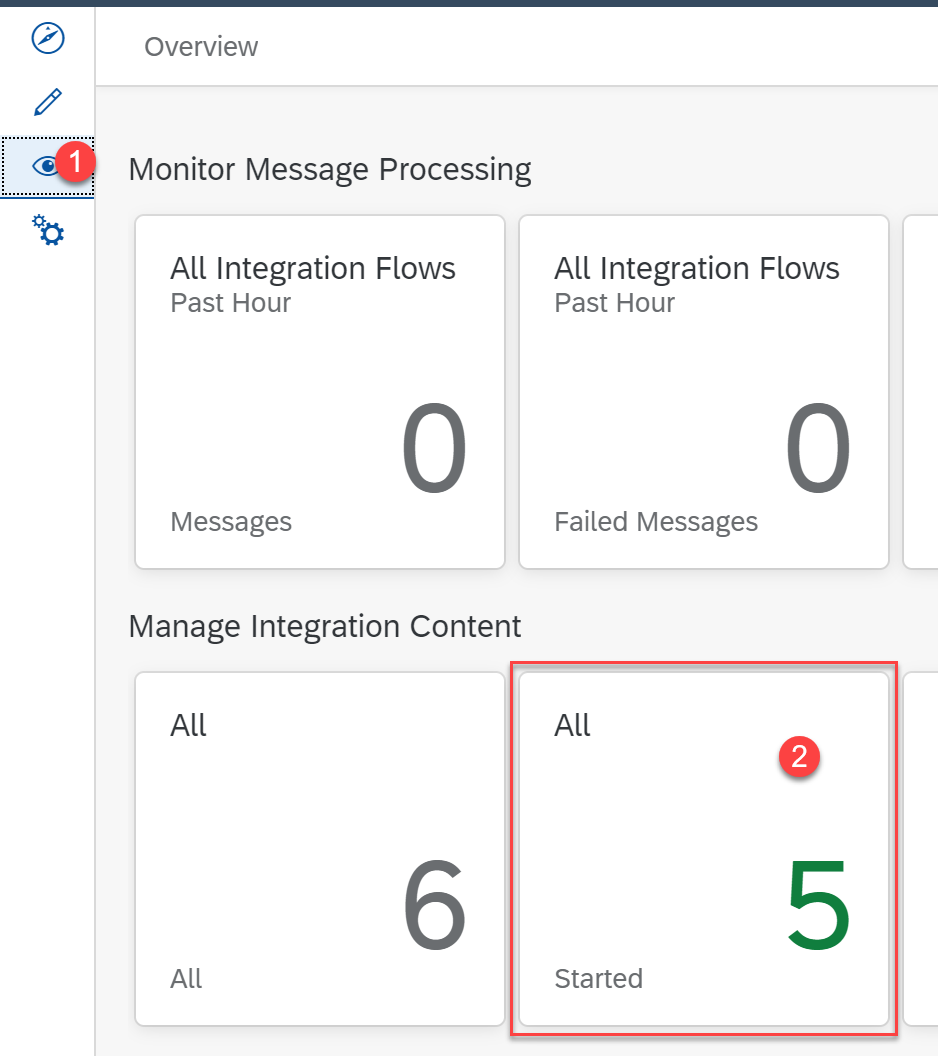
- From the Cloud Integration workspace. Navigate to the Monitor view. In the Monitor view, under the Manage Integration Content section, choose Start to access all the started artifacts that you have deployed. You will also see the integration flow that you have deployed here.
- Select your integration flow and in the Endpoints tab you can notice your REST API URL for your integration flow. Copy the endpoint till /http/products.
- You can access API Management capability of Integration Suite from the launchpad. To navigate to your launch pad, you can click on Integration Suite from the tool bar.

- Select Design, Develop and Manage APIs to navigate to your API Management account. In case this option is not visible for you, you can click on Manage Capabilities and enable API Management capability.
Activating the API Management capability from Integration Suite Launchpad only enables the capabilities. To complete your API Management capability, you will need to assign your user APIMangement.SelfService.Administrator and AuthGroup.SelfServcie.admin role. For trial, the setup and configuration of API Management is triggered automatically when you navigate to your API Portal & Developer Portal service of API Management for the first time. After the initial configuration is completed, you will need to logout and login again to access the full service. For productive accounts, follow the steps highlighted in section Initial Configuration & Set up of API Management services of this blog.

- You will be navigated to the Home tab of API Portal. Select API from the Quick Actions to create an API Proxy for your integration flow.

- In the Create API dialog, enter the details as follows and then select Create :-
- URL - Paste your copied integration flow end.
- Name - RequestProductDetails
- Title - Product Details API
- API Base Path - /products
Note the endpoint till /http/products is copied instead of /http/products/details. The details will be added later as resource to this API.

- To add /details as resource, navigate to Resources tab and then select Add.

- Enter /details in the path prefix. Optionally you can enter a tag Product Details for readability. You can additionally delete any extra HTTP operations like PATCH, GET, OPTIONS, PUT to get enable POST operation for /details resource.

- You can optionally enter details for your resource say Get details about the product by passing your product Identifier and click OK to create this resource.

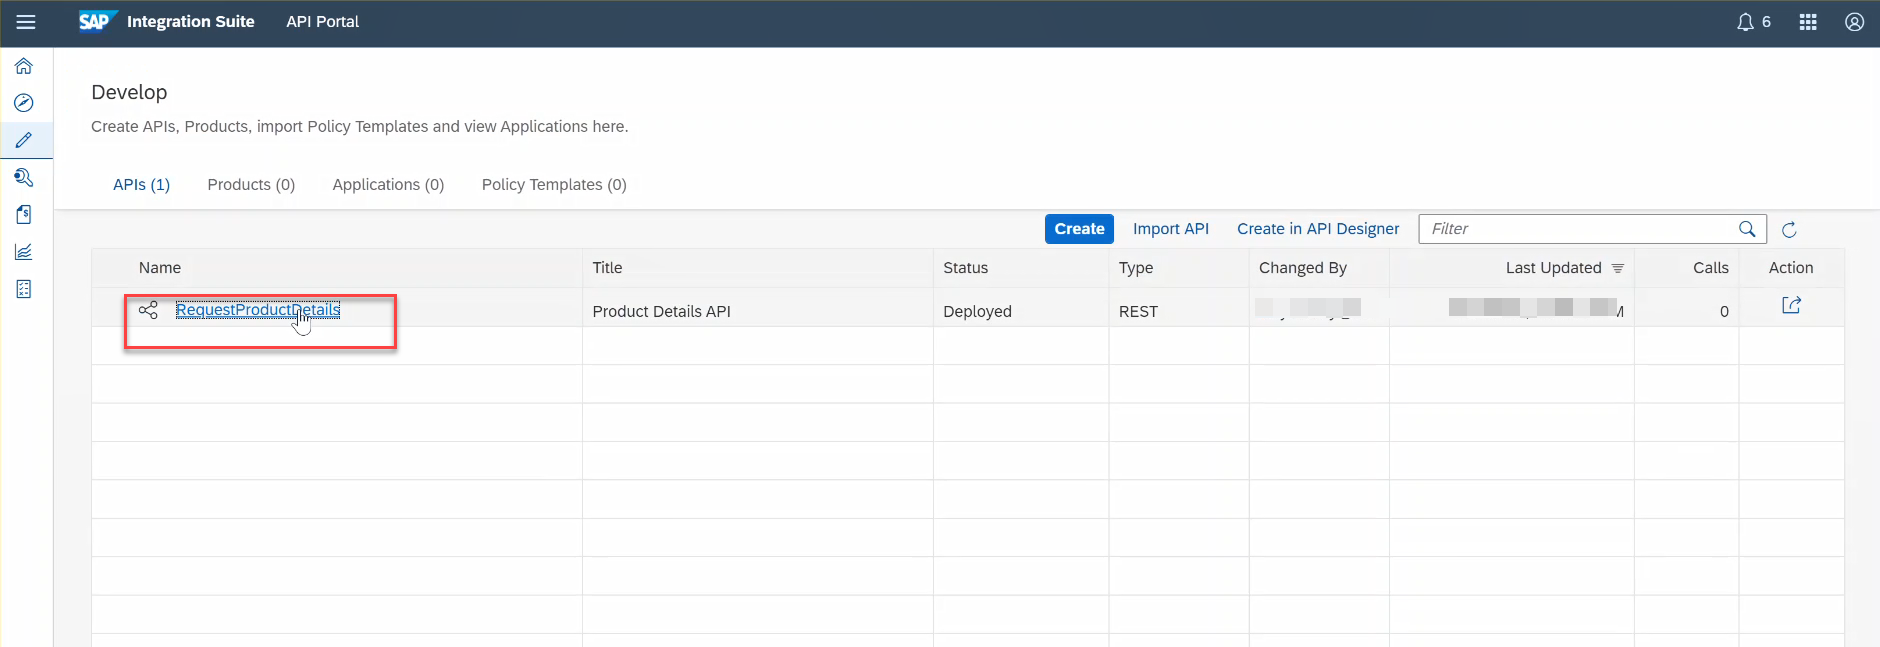
- Select Deploy to create and activate the API Proxy for your integration flow.

- After the API Proxy is activated, under resources you can notice a default API definition in OpenAPI specification format is also generated.

- To update the generated API definition in OpenAPI format, select Edit->Edit in API Designer.

- This will launch the embedded API Designer. You can optionally change Payload schema to productIdentifier and add an example value as follows.
example: "HT-2000"You will notice the Example value for your API definition changing based on the schema update for Payload.

- Select Save to persist the changes.

- You will be navigated to the APIs list view. To view or edit your API Proxy changes, select the API Proxy.
- You can select Try out to view the generated API documentation based on the updated API definition in API Designer.

- You can select Execute to test the APIs. Since no authentication details was provided, you will get an 401 unauthorized error.

- Select on the View API option to navigate to the API Proxy list view.
With this you have successfully created an API Proxy for your integration flow built in Cloud Integration tenant and generated an API documentation for your REST APIs in OpenAPI format.
Discover and Copy SAP Cloud Platform Connectivity policy template
SAP Cloud Platform Connectivity policy templates available in SAP API Business Hub facilitates easy and secure inbound communications for SAP Cloud Platform Integration services ( REST/ SOAP or OData). SAP API Business Hub is integrated into API Management and all the APIs and Policy templates available in SAP API Business Hub can be easily discovered and consumed in API Management.
- From API Management, all the APIs and policy templates available in SAP API Business Hub can be discovered via the Discover tab. Navigate to Discover tab to view and consume all APIs, Policy templates published into SAP API Business Hub.

- Search for Connect to SAP Cloud Platform services and then select the policy template to connect to SAP Cloud Platform services.

- Navigate to Artifacts tab and select Copy.

- To view the copied policy template, select Develop -> Policy Templates.

Apply SAP Cloud Platform Connectivity policy template
In this section steps to apply SAP Cloud Platform Connectivity policy template and the necessary configuration changes has been captured.
- Navigate to APIs tab and select the API Proxy created for your integration flow.

- Select Edit option to edit the API Proxy.

- You can add policies to your API Proxy from the Policy Designer. Select Policies to open the Policy Designer.

- Select Apply from the Policy Template to add the policy templates to this API Proxy.

- Select the newly copied CloudPlatform_Connectivity template from Apply Template dialog.

- Select the newly copied CloudPlatform_Connectivity template from Apply Template dialog and select Apply.
- You can view the applied policies by navigating to the TargetEndpoint -> PreFlow. At a high level this policy template includes the step to first the OAuth access token from the local cache of API Management, if no access token is found or the cache has expired, OAuth access token will be fetched from the provided OAuth token URL, this access token will be cached for subsequent use and also will be set to the outgoing request to the target URL.

- Select the getCredential policy to add in your OAuth client id and OAuth client secret. Detailed steps to get your OAuth client id and secret to connect to the integration flow is covered in this blog.

- Select policy getoauthtoken and in HTTPTargetConnection->URL provide your Cloud Integration OAuth token endpoint. Detailed steps to get your OAuth client id and secret to connect to the integration flow is covered in this blog.
- Select Update to persist the Policy changes.

- Select Save to persist the API Proxy changes.

- Navigate to Resources and Try out to test the newly applied policies.

- Select Execute and this time you will get the response from your Cloud Integration tenant.

With this you have successfully managed the integration flow from Cloud Integration using API Management.
Stay tuned, more blogs on API Management in Cloud Foundry environment to come:
- Enable API Management capability
- Connect to on-premise APIs
- Service Plans of API Management
- Manage integration flow from Cloud Integration (current blog )
More blogs on SAP Cloud Platform Integration Suite available in SAP Community.
- SAP Managed Tags:
- SAP Integration Suite,
- API Management,
- Cloud Integration
Labels:
3 Comments
You must be a registered user to add a comment. If you've already registered, sign in. Otherwise, register and sign in.
Labels in this area
-
ABAP CDS Views - CDC (Change Data Capture)
2 -
AI
1 -
Analyze Workload Data
1 -
BTP
1 -
Business and IT Integration
2 -
Business application stu
1 -
Business Technology Platform
1 -
Business Trends
1,658 -
Business Trends
93 -
CAP
1 -
cf
1 -
Cloud Foundry
1 -
Confluent
1 -
Customer COE Basics and Fundamentals
1 -
Customer COE Latest and Greatest
3 -
Customer Data Browser app
1 -
Data Analysis Tool
1 -
data migration
1 -
data transfer
1 -
Datasphere
2 -
Event Information
1,400 -
Event Information
66 -
Expert
1 -
Expert Insights
177 -
Expert Insights
299 -
General
1 -
Google cloud
1 -
Google Next'24
1 -
Kafka
1 -
Life at SAP
780 -
Life at SAP
13 -
Migrate your Data App
1 -
MTA
1 -
Network Performance Analysis
1 -
NodeJS
1 -
PDF
1 -
POC
1 -
Product Updates
4,577 -
Product Updates
345 -
Replication Flow
1 -
RisewithSAP
1 -
SAP BTP
1 -
SAP BTP Cloud Foundry
1 -
SAP Cloud ALM
1 -
SAP Cloud Application Programming Model
1 -
SAP Datasphere
2 -
SAP S4HANA Cloud
1 -
SAP S4HANA Migration Cockpit
1 -
Technology Updates
6,873 -
Technology Updates
426 -
Workload Fluctuations
1
Related Content
- Supporting Multiple API Gateways with SAP API Management – using Azure API Management as example in Technology Blogs by SAP
- Not able to see run button on dataflow in Technology Q&A
- Configuring SAP CI/CD pipeline for Deploying ReactJS application in Cloud Foundry in Technology Q&A
- Question regarding enabling the Extended Integration Impact Analysis for SAP Readiness Check in Technology Q&A
- SAP Build Process Automation Pre-built content for Finance Use cases in Technology Blogs by SAP
Top kudoed authors
| User | Count |
|---|---|
| 40 | |
| 25 | |
| 17 | |
| 14 | |
| 8 | |
| 7 | |
| 7 | |
| 7 | |
| 6 | |
| 6 |